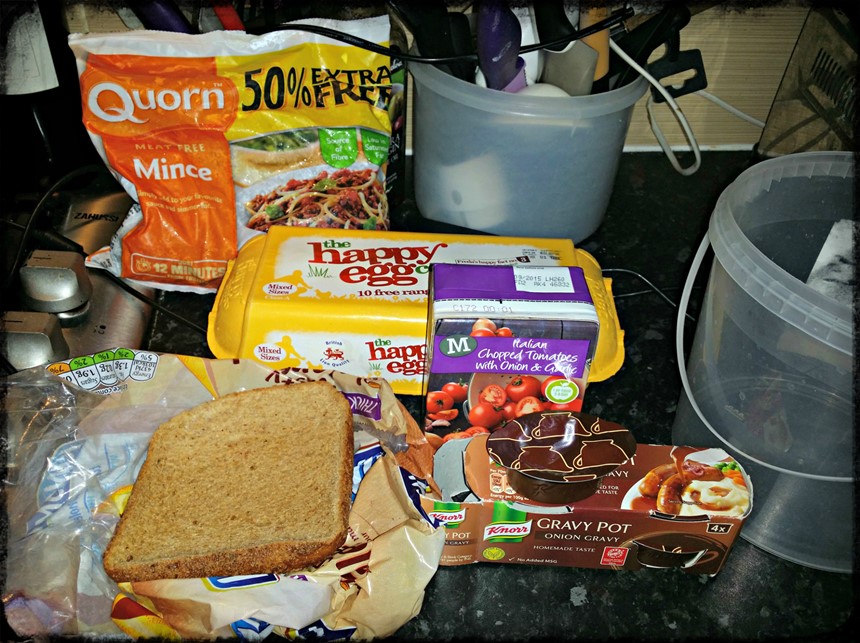
4 tablespoons of Passata or tinned chopped tomatoes
2 eggs, beaten
1 slice of bread, chopped into breadcrumbs
A little olive oil
Baking paper
Baking tray
Pack of spaghetti
Vegetables you have to hand
1 Beef stock
1 herb flavour pot
1 cup of water
2 teaspoons of tomato puree
4 tablespoons of natural yoghurt
Dash of red wine
Method
Preheat the oven to 200C/400F/Gas Mark 6)
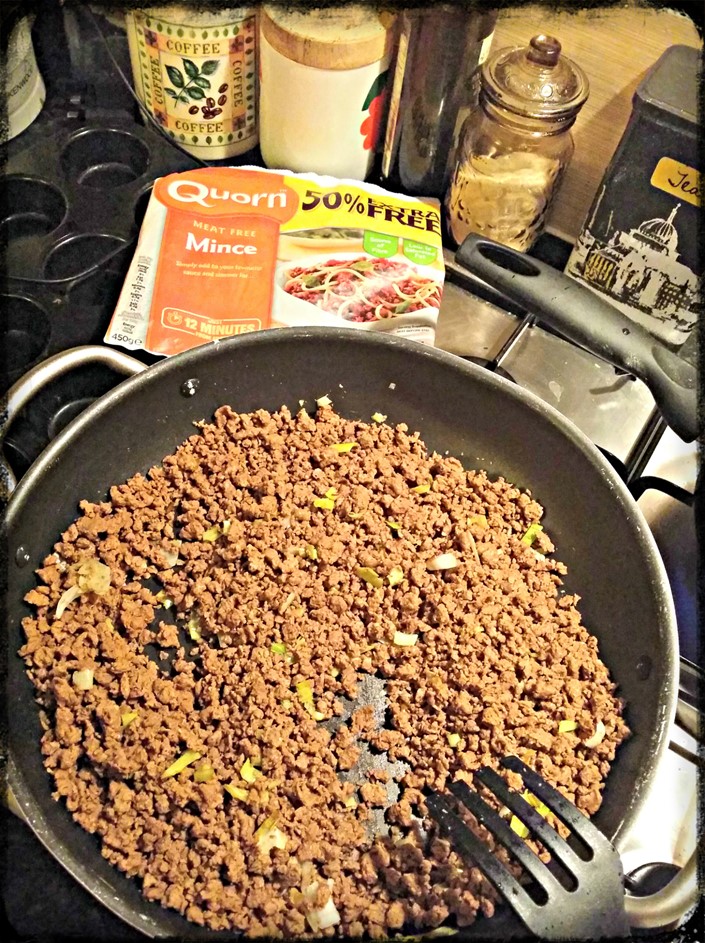
Heat oil, fry leek (and add onion and garlic if used)
Add the Quorn Mince
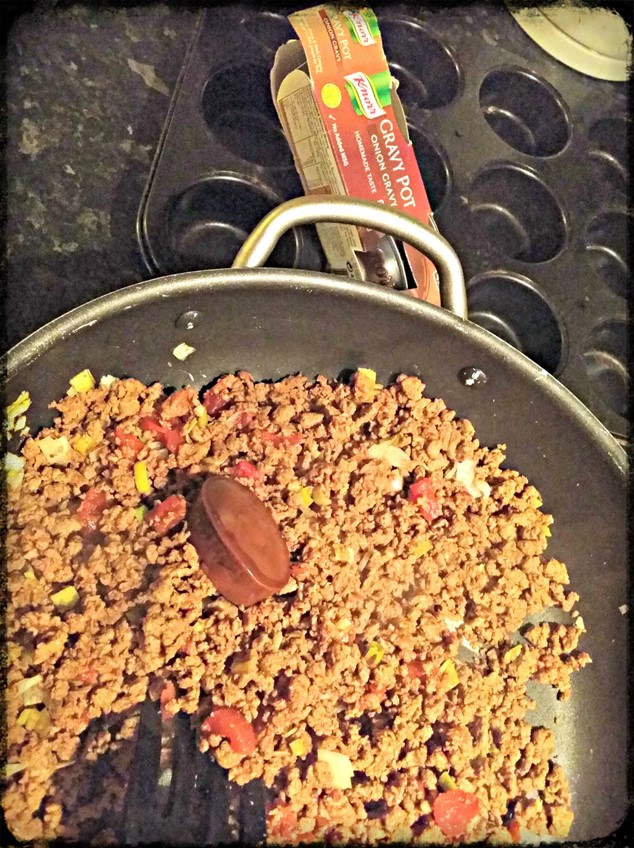
Add the Knorr Onion Gravy Stock and mix well
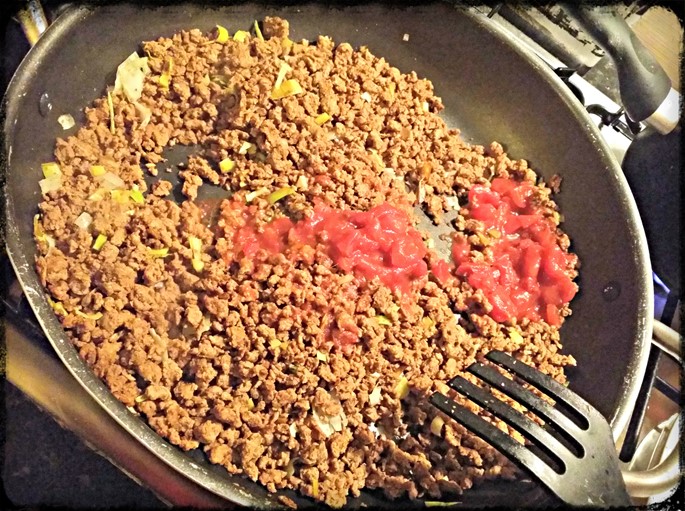
Add the tomato and cook for 5 minutes
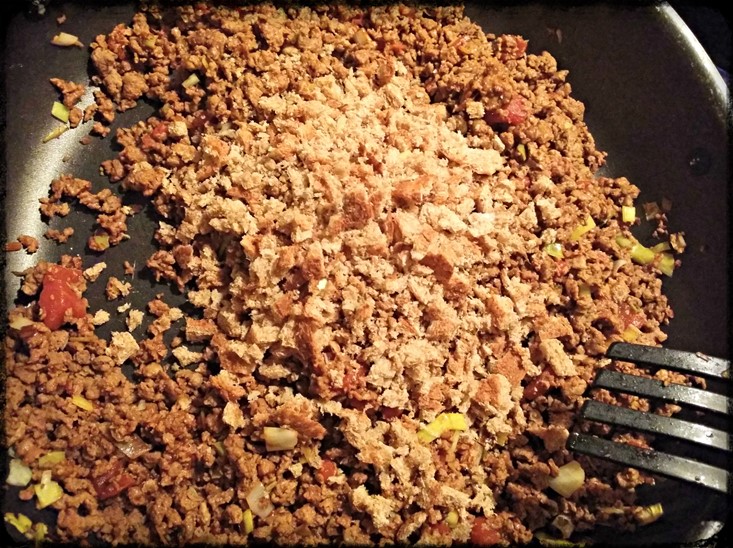
Stir in the breadcrumbs and leave to cool
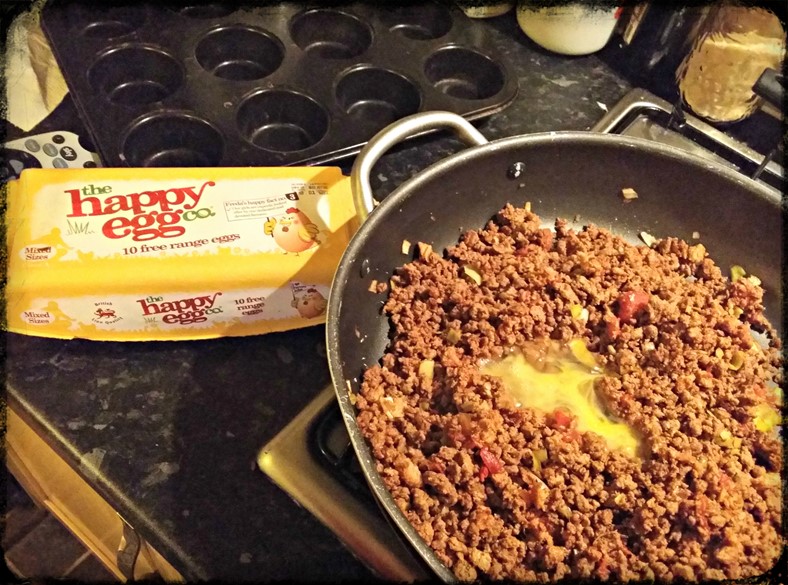
Stir in the eggs a little at a time until mixed well
Shape into balls with your hands (which you can freeze)
Line a tray with baking paper and place the shaped Quorn balls for almost 20 minutes (I didn’t have any baking paper to hand, so I just used cake release spray and sprayed generously on the baking tray).
Whilst the meatballs are in the oven, cook spaghetti as per the pack instructions.
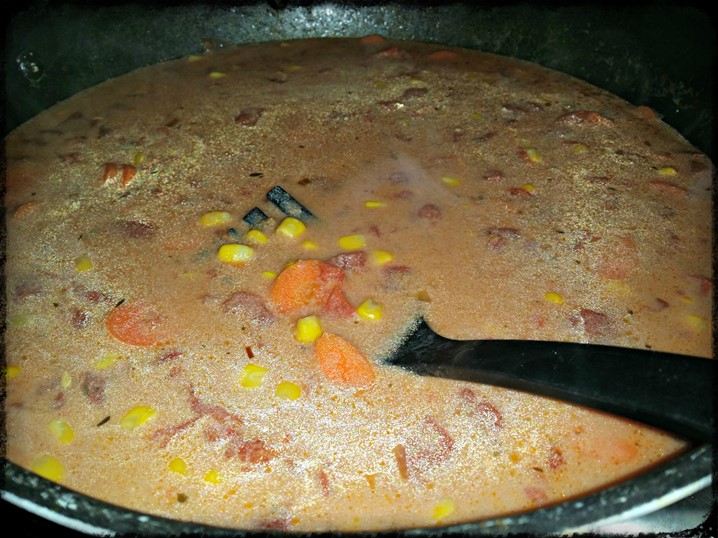
For the sauce and spaghetti
Heat little oil
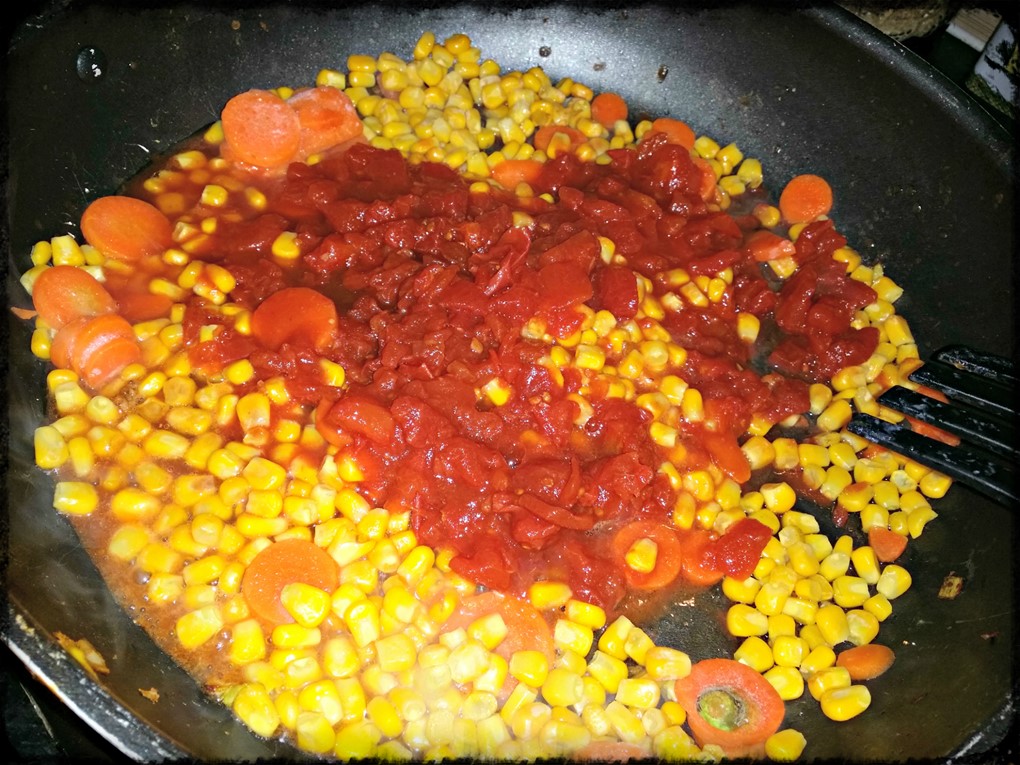
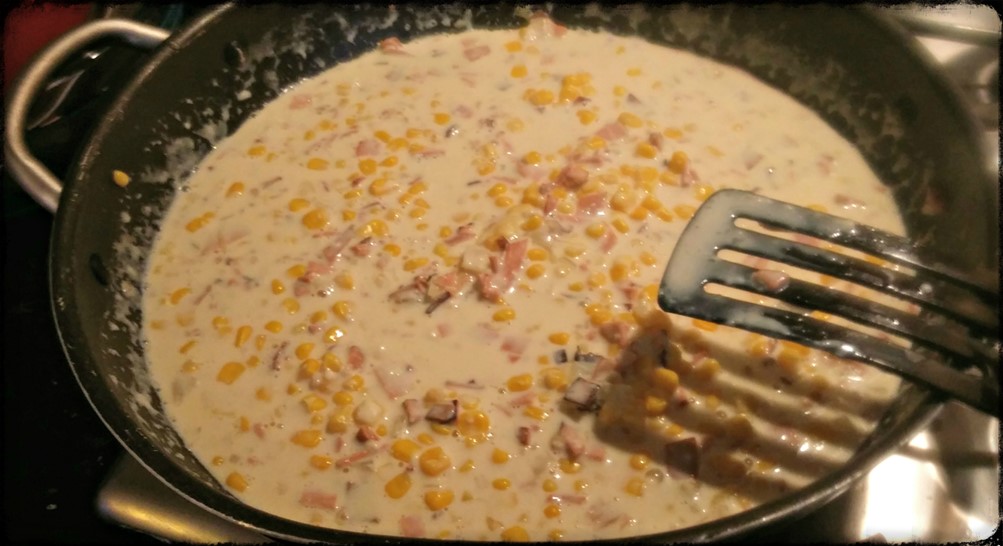
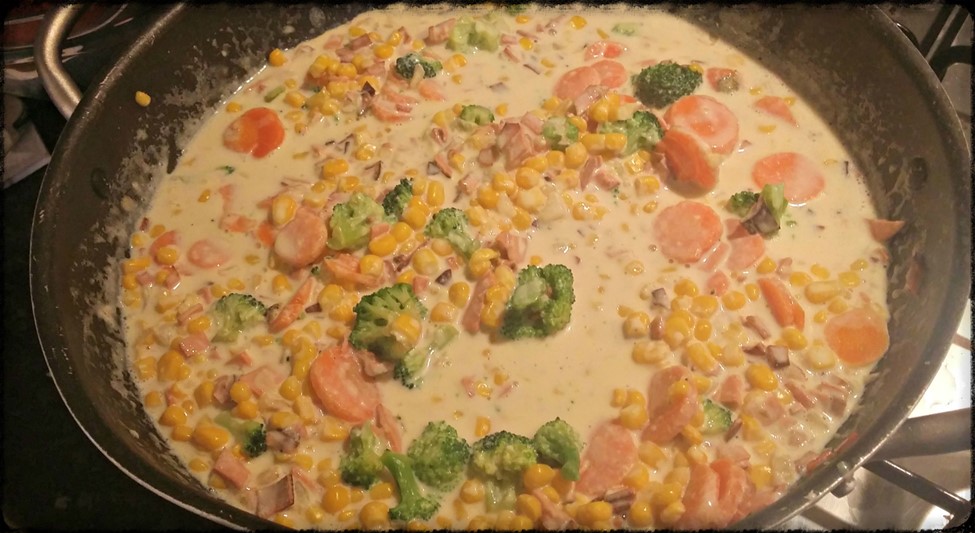
Add vegetables (sweetcorn, carrots, basically whatever you have in your cupboard/fridge)
Add the rest of the Passata or tinned chopped tomatoes
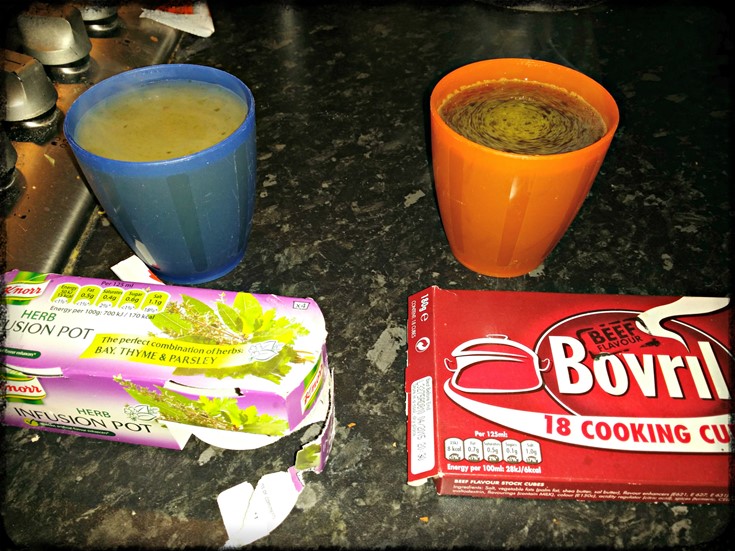
Dissolve 1 beef stock and one herb flavour pot in 1 cup of water each.
Add to the mix with 2 teaspoons of tomato puree
Add 4 tablespoons of natural yoghurt to the mix
Add a dash of red wine and season to taste
Add the cooked meatballs and simmer uncovered
Serve with spaghetti.
Subscribe here to stay on top of new content added to Motherhood Diaries.
These Quorn Meat Free Sausage Rolls have been a hit with the family for years now, especially as a party food side to a mean main dish. I even rock these up at Christmas as appetizers, along with other Quorn recipes, and get creative with the fillings. I do love Quorn mince recipes and often replace the meat ingredient in my one-pot spaghetti. Give these mini sausage rolls a try yourself, they are so easy to make!
What are sausage rolls?
Sausage rolls are simply a small amount of sausage meat covered in pastry and cooked. Sausage rolls are so versatile; you can add pretty much any ingredient you want to your sausage roll and it’ll taste awesome.
Sausage rolls are hugely popular in the UK and around the Commonwealth, including Australia and Canada. Gregs in the UK sells around 2.5 million sausage rolls per week!
250g of ready-to-roll Puff Pastry, room temperature (you will have some left over)
4 eggs, beaten (one for the egg wash and 3 for the sausage mix)
A little plain flour
100g of cheese (goats or feta), grated
30g of parmesan cheese, grated
1 Knorr Herb Infusion pot
Salt and black pepper to season
1 large saucepan
1 large bowl
1 large rolling pin
1 large knife
1 baking tray
Greaseproof paper
Sesame seeds (optional)
Method:
Sausage Mix
Heat oven to 200C/180F/Gas Mark 6
Crush garlic and a little salt to paste using a mortar & pestle, or the flat part of a large knife on a chopping board.
Mix the finely chopped parsley with the garlic/salt paste and stir in the 50ml cold water.
Heat the olive oil in the pan and sauté the leek and onion until soft.
Add the 1 packet of defrosted Quorn Mince and cook until browned.
Transfer the heated mix to a large bowl and add the garlic/salt paste, Knorr Herb Infusion pot and all the grated cheese.
Mix well and stir in 3 of the beaten eggs.
Mix well and place aside.
Puff Pastry
Divide the puff pastry into half and half again, so you have 4 blocks.
Leave 3 aside and start with one quarter of the puff pastry on a clean floured surface.
Using your rolling pin, roll out the pastry to 1.5in/1.3cm thickness.
Cut the dough into long rectangles, leaving the width at least 4in/10cm.
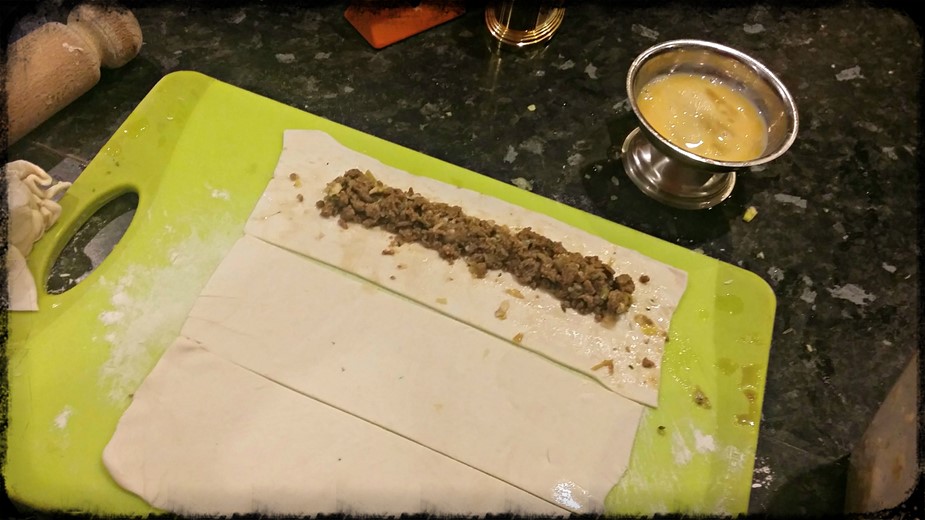
Place the sausage mix in the middle of the long rectangular dough, leaving at least 1in/2.5cm gap around the sides to seal the dough.
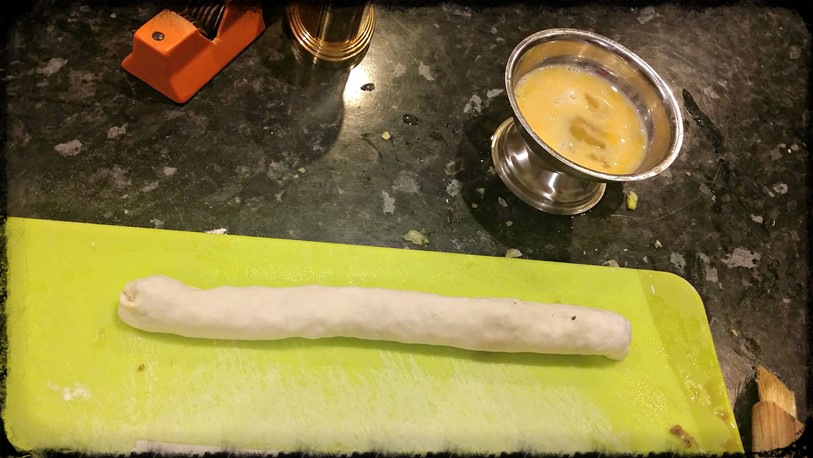
Spread a little egg wash around the sides of the pastry and fold upwards to create long parcels.
Seal the parcels with the egg wash, by rolling over the seal gently. (okchef.org have some great videos on egg washing (and other culinary terms too – worth checking them out!))
Slice the parcels to create small 1.2in/3cm parcels.
Line your baking tray with greaseproof paper and place the small parcels on the tray, making sure there’s space between each parcel (I actually had to use cake release spray on this occasion because I didn’t have any greaseproof paper to hand, but I wouldn’t advise it.)
Eggwash each parcel generously (this will create the lovely golden brown look when cooked).
Pop into the oven for about 30 minutes or until the pastry is golden and the sausage mix is cooked well (cut one parcel open to check inside).
Allow to cool slightly and serve with a nice dip/sauce (yoghurt sauce is nice). You can adapt this recipe slightly to make kids sausage rolls made with sausages from Quorn too.
How can I convert this recipe into vegan sausage rolls?
Instead of using egg for the egg wash, use plant-based milk and instead of feta cheese or animal-based cheese, use a plant-based cheese like Violife which also melts when heated. I’ve tried both and it makes for one mean vegan sausage roll!
The great thing is Quorn is an easy vegan sausage to work with so it still works as a homemade vegan sausage roll recipe for toddlers. You can even make easy vegan sausage rolls with vegetables but just make sure you squeeze all the moisture out first. For more vegan recipes head to Five for a Fiver where all recipes are just five ingredients and cost a fiver or less!
Other meatless sausage rolls recipes you can make from changing just a few ingredients!
Vegetarian sausage rolls using vegetarian sausages – Just use Quorn sausages or any kind of sausage, wrapped around in Jus Roll pastry
Vegetable sausage rolls – You can add pretty much any vegetable you want to make vegetarian sausage rolls. Check out my 5-ingredient vegan sweet potato and chickpea sausage rolls which double as a dairy free sausage rolls recipe as I don’t use any animal milk in them.
Sage and onion sausage rolls – This sausage roll filling recipe just contains the famous pair sage and onion and then you can add anything else you want in your sausage roll filling recipe
Superfood Christmas Tree Salad – The Big Health Recipe Challenge by The Health Bay
Motherhood Diaries massively enjoys creative cooking and coming up with new recipes, especially recipes that transform into super healthy and entertaining dishes that both adults and kids can enjoy. The Health Bay are currently running a competition for all bloggers to submit a recipe that is as healthy, as it is tasty. The prices are pretty awesome too:
1st place: £175 to spend at The Health Bay
2nd place: £50 vouchers to spend at The Health Bay
3rd place: £25 vouchers to spend at The Health Bay
All recipes will be compiled into a free eBook, coming out in the New Year. Full details on the competition (which ends on 11 January 2015) can be found here: http://www.thehealthbay.com/big-recipe-competition.
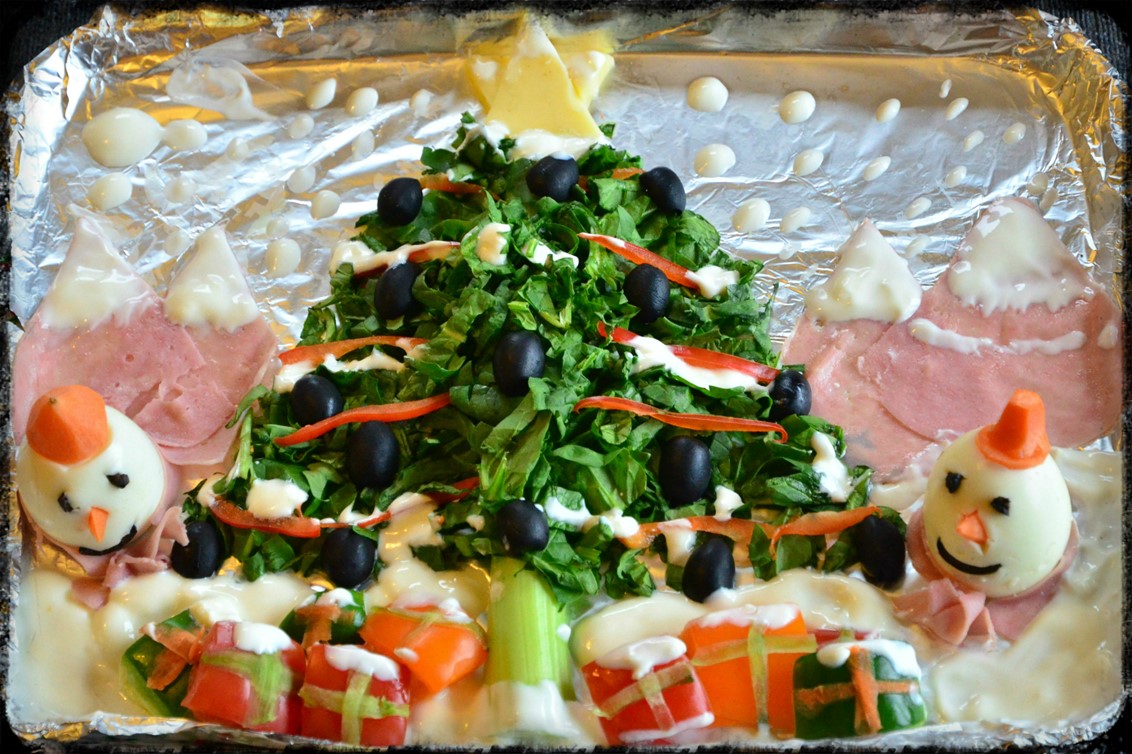
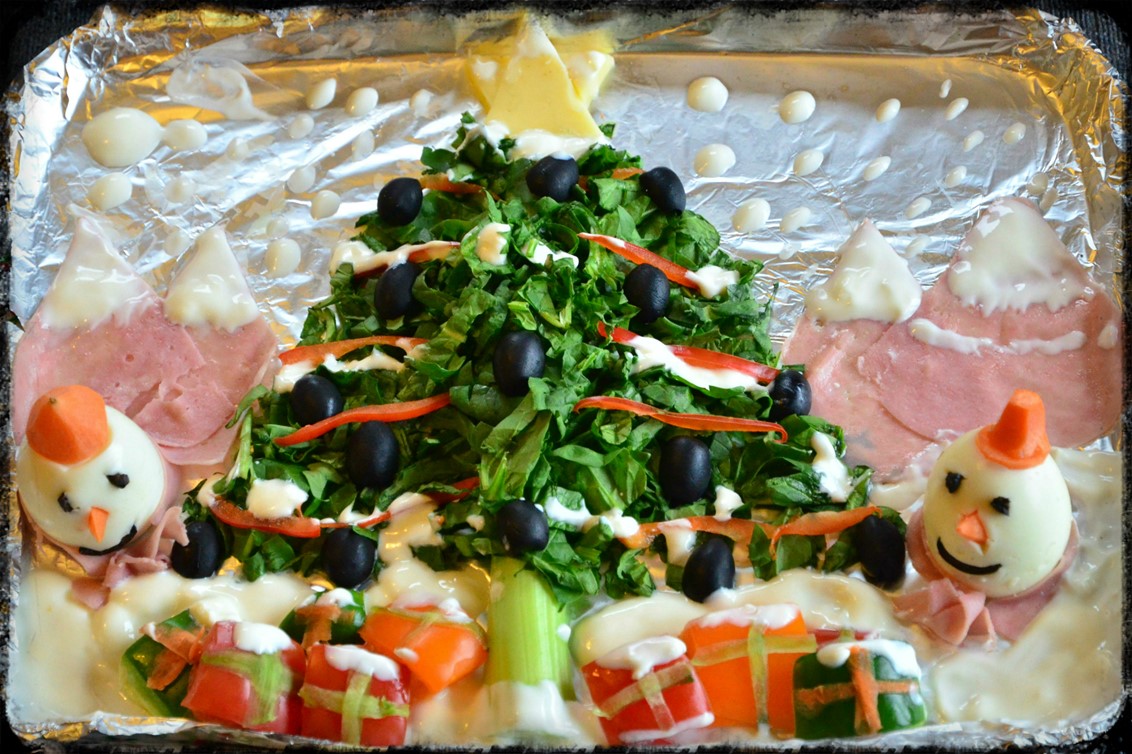
So, without further ado, I present to you my competition entry, The Superfood Christmas Tree Salad!
Superfood Christmas Tree Salad Recipe
Ingredients:
Block of cheddar cheese for the star on top of the Christmas Tree
Natural plain yoghurt for the snow (Lacto free yoghurt is just as good)
Wafer thin ham for the mountains
2 large boiled eggs for the snowmen
1 tomato for the presents
1 carrot for the snowmen’s hats and noses
200g spinach for the Christmas Tree leaves
About 20 black olives for the baubles on the Christmas Tree and the snowmen’s eyes and mouth.
1 orange bell pepper for the presents
1 green bell pepper for the presents
3 inch cucumber for the ribbon on the presents
1 red bell pepper for the tinsel on the Christmas Tree
1 celery stalk for the trunk of the Christmas Tree
Method:
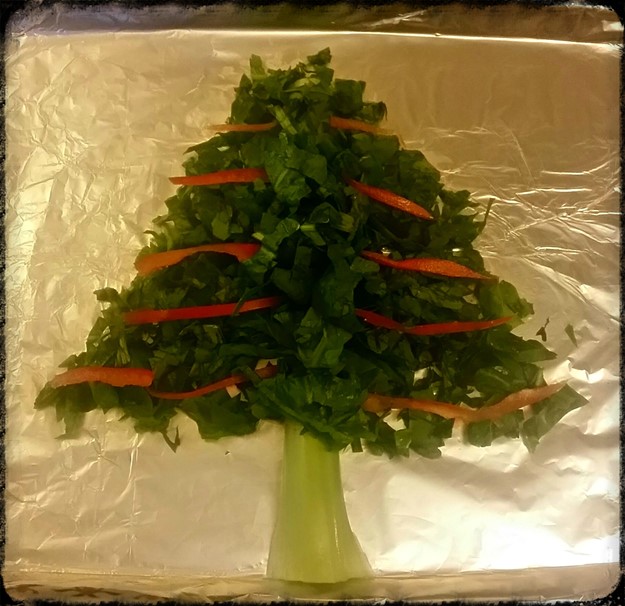
The Christmas Tree
Place the celery stalk in the middle of your tray/plate, with the curved edges face down.
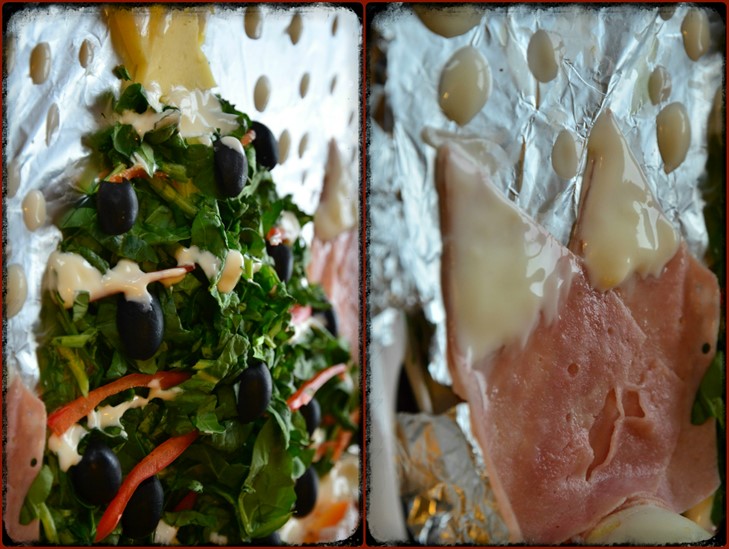
Grab your spinach and place on top of the celery stalk, making sure to shape the spinach into a triangle for the Christmas Tree
Grab your red bell pepper and cut very thin slices. Place the thin slices on each side of the Christmas Tree to resemble tinsel.
Decorate the Christmas Tree with black olive baubles
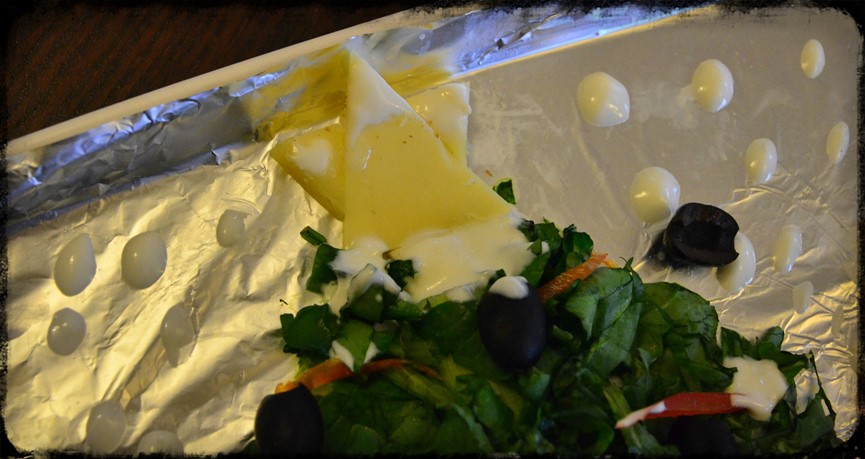
Cut a slice of cheddar cheese about 2 inches wide and 0.5 inches in depth. Fashion a triangle out of that square. Create another triangle and place on top of the other cheese triangle to make a star.
Presents at the bottom of the Christmas Tree
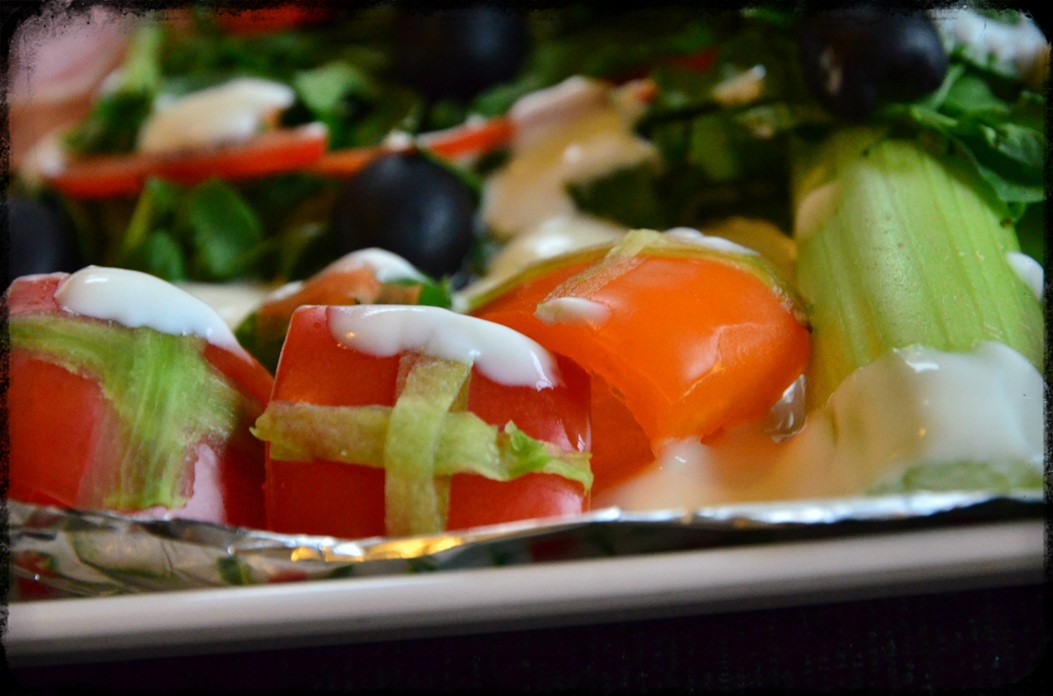
Grab your tomato and cut into 4 pieces. Cut the pieces again, leaving just the outer edge and all the insides removed. Place under the tree
Do the same for the orange and green bell pepper.
Use a peeler or mandolin to shave thin slices of cucumber. Cut to size and place over the presents as ribbon
Do the same with the carrot on the green bell pepper present
Snowmen
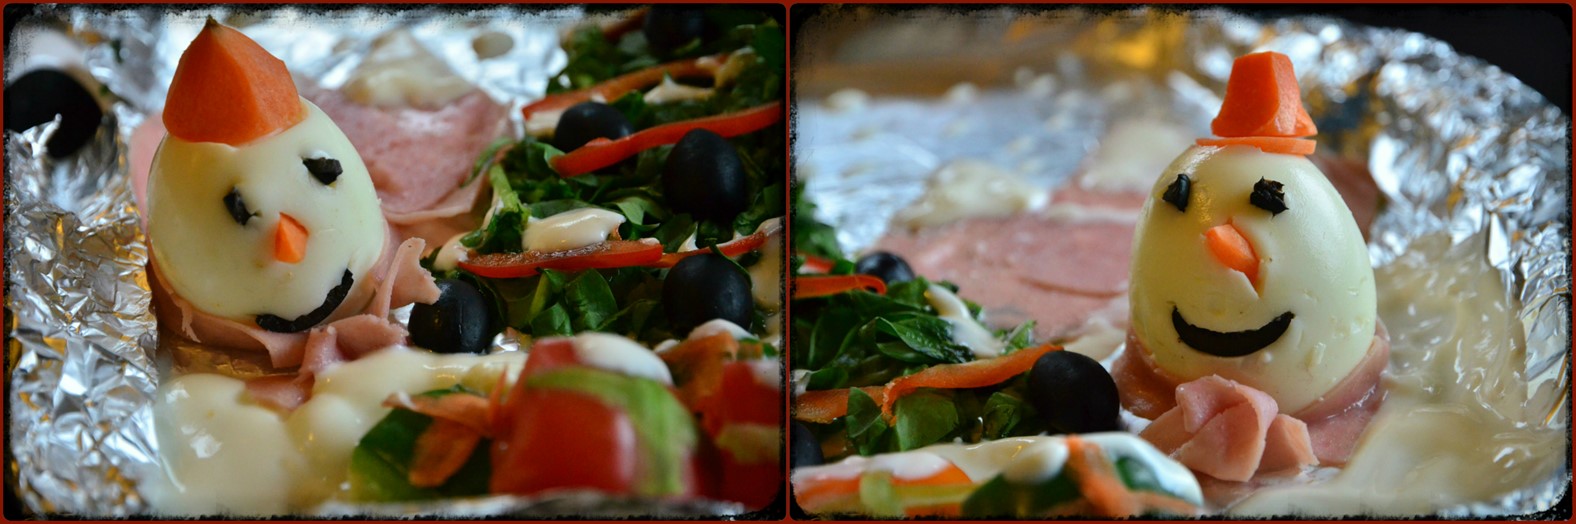
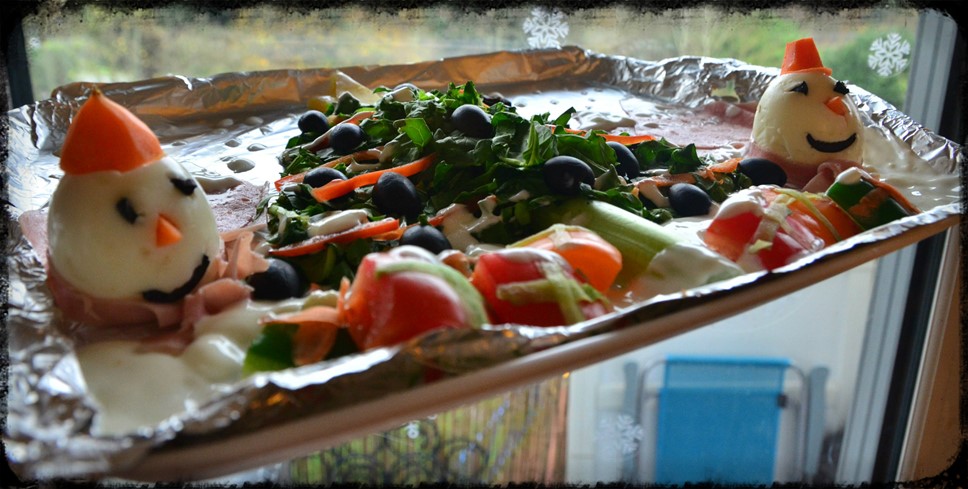
Hard-boil the eggs and immediately place them in cold water to harden them up.
Remove the shell and cut the tip of the bottom of the egg, so that the snowmen can stand on the tray/plate. If you cut at a slant then you can control the direction the egg’s face will be.
Cut a carrot into 2 inch pieces for the hats.
Cut a very small dent at the tip of the egg in order to place the carrot head
Use 1 olive and cut out 4 very small pieces for the eyes and push into each egg to secure them.
Do the same for the mouth, but slice the olive thinly instead to create an upturned smile. Push into the egg to secure in place.
Cut tips of the carrots for the nose and push in until you reach the desired peak nose effect.
Mountains
Cut the wafer thin hams into mountains and overlap them over each other to create a more 3D approach to the decoration.
Snow
Using a small teaspoon, dip into the natural yoghurt and dab over the star and the peaks of the mountains. Dribble some onto the Christmas Tree and over the presents. Also, fill in the gaps around each item with the natural yoghurt to simulate a settled snowy ground. Dot the yoghurt at the top of your tray/plate for falling snow.
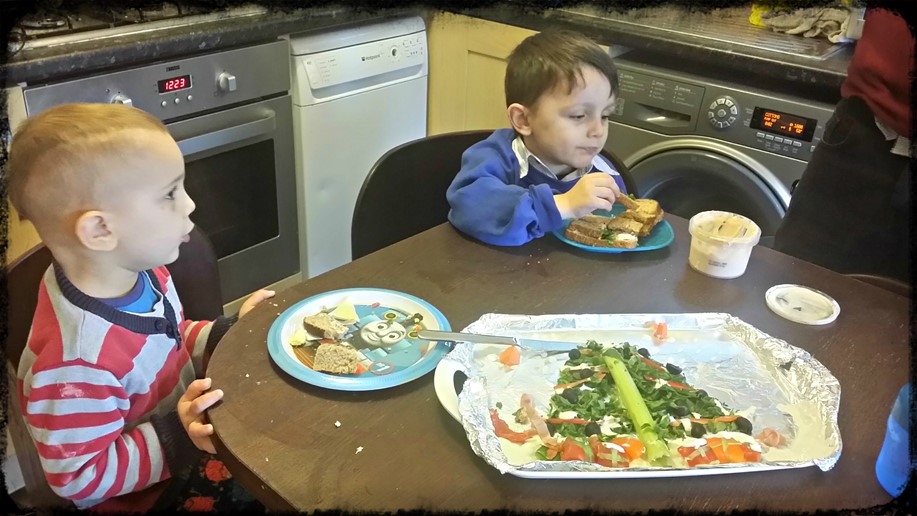
And, there you have it, a very festive and Christmassy, yet super healthy Christmas Tree Salad, which was polished off by the whole family soon afterwards. It’s amazing how kids are more enthusiastic to try new things when their food resembles something they recognise!
Please leave a comment below and tell me what you think of Motherhood Diaries’ Christmas entry. Thank you 🙂
Subscribe here to stay on top of new content added to Motherhood Diaries.
Breville blend active recipes – 5 cold busting smoothies
Motherhood Diaries was gifted an awesome Breville Blend-Active Family Pack* to make some awesome blending recipes using the Breville blend active personal blender. It is a nifty little blender that comes with a Breville Innovative Smoothie Blenders recipe book and a selection of bottles you can blend your ingredients in and drink on the go. There are various different sizes of the Breville blend active personal blender smoothie maker to suit people, large and small, and the travel-sized blender is small enough to take with you anywhere.
Each of the blender bottles is made from Eastman Tritan copolyester which is a durable BPA-free, odour, taste and stain-resistant material used for manufacturing sports bottles. It is able to withstand extreme use and repeated dishwasher cleaning.
It’s super easy to use the Breville smoothie maker and create some awesome Breville juice recipes (you can find these Breville recipes below). Just connect the blade to any one of the supplied bottles, fill it with your smoothie ingredients and click it to blend. There is a ‘blend’ button on the front of the blender that, when pressed quickly, the blades burst through the ingredients, and when held down, the blade spins continuously.
I was very impressed that the blender also crushes ice, which meant I could add ice to my smoothies without the fear of them blunting the blades. I love how travel-sized the blender is and the bottles are literally fresh and ready to take away with you wherever you go.
How much does the Breville blend-active family pack cost and where can you buy it?
Pretty much the whole of my family, including my mum, dad and siblings!
Recipes:
So, armed with lots of fruit and veg and, of course, the Breville Blend-Active*, I set about creating five very healthy smoothies, which are perfect for on-the-go and the cold winter months!
5-a-day smoothie
Ingredients
200ml Milk
2 ice cubes
Handful of baby spinach
Large handful of raspberries
1 Apple
1 Kiwi
2 squirts of honey
1 peach
The result
A rich and full-flavoured smoothie, with a berry punch. It certainly felt like I was drinking a meal!
Citrus Smoothie
Ingredients
Juice of half a lemon
Squirt of honey
½ orange
1 kiwi
2 ice cubes
½ Avocado
The result
My favourite of the bunch. I love how the zingy lemon shines through, complemented beautifully by the sweetness of the kiwi and honey.
Cold Busting Smoothie
Ingredients
1 Kiwi
1 Apple
1 Carrot
1 Celery
½ orange
1 tsp grated ginger
½ lemon juice
Couple squirts of honey
Handful of pineapple
Handful of Cherries
Handful of spinach
Handful of blueberries
The result
It’s a great bug-busting, cold-fighting energy drink, which really spruced me up. Perfect after a gruelling workout or as a breakfast smoothie. Be careful not to overdo it on the ginger.
For a bit of protein, you can either make this a chia seed smoothie and add chia seeds or add a dollop of peanut butter which lowers the GI index of the smoothie too.
Green Smoothie
Ingredients
1 Apple
1 Celery Stick
3 inches of cucumber
8 ice cubes
Handful spinach
½ Avocado
Honey to taste
The result
A nice, light and sweet smoothie that feels healthy and is easy on the stomach.
Fruit Milkshake
Ingredients
1 Banana
200ml Natural Yoghurt
20 Blueberries
10 Blackberries
10 Raspberries
½ Mango
The result
Very fresh and sweet. Bananas are just the perfect sweet little alternative to sugar. Make this a smoothie bowl and add some extra nuts and seeds too for that protein and fibre boost as well.
Free Infographic!
I have created an infographic of the smoothie recipes for you to print out and stick to your fridge or pin to your Pinterest board, so you are filled with nutritious goodness every day of the week. Enjoy!
What’s not to like? Let me list the benefits out for you:
You get one travel-sized and very nifty blender with a blade sharp enough to crush ice.
You can collect and fit tons of food ingredients into the 600ml bottle (just check out my ‘Cold Busting Smoothie’ ingredient list and the other Breville juicer recipes!) and the smoothie comes out (excuse the pun) smooth. Add some water for a more liquid-textured smoothie.
What to watch out for:
My belly was full of fruit and veg after the juicer smoothie recipes creation afternoon and I ended up becoming quite bloated and uncomfortable. Perhaps, one smoothie (or two) a day is enough when you can fit as many ingredients into these bottles as I could. Get into the habit of cooking some of the fruits like apple so it’s easier on the stomach.
Other points to note:
The Blend-Active Family Pack* comes with four bottles and can be used to crush ice too. (I know, I’ve already said that).
Also, the instruction manual lists some awesome smoothie recipes of its own (pages 9 to 10), so it’s worth checking those out, along with the tips on how to create great smoothies generally.
How much nutritional value from fruits and vegetables is lost by juicing?
Other questions asked were:
When you blend all your fruits with a blender and drink it what effect does this have on the glycaemic index and why should we care?
Is it better to blend a smoothie than eat whole fruits and vegetables?
Are smoothies and juices just as good as eating whole fruits and vegetables?
Does it really matter if you blend your vegetables?
Does blending vegetables and fruit destroys the fibre. It seems there is no definite and certain reliable answer to this question online?
Will blending vegetables ruin its nutritional value?
If I steam my vegetables and then blend them and drink it will I be getting more nutrition?
Is eating vegetables in the form of a smoothie the same as eating them whole? Do you get the same nutritional value?
Do smoothie blenders kill the nutrients of fruits and vegetables?
Does blending fruit add calories?
Does blending reduce the nutritional content of fruits and vegetables?
Does the caloric value of food change if the food is liquefied or blended?
Does blending increase sugar content of fruit?
Do we absorb nutrients from fruits and vegetables?
When juicing fruits and vegetables some of the healthy fibre is lost. That’s because juicers separate the juice from the pulp and skins (which contain the fibre). As a result, juices can spike your blood sugar in a more dramatic way than if you ate the actual fruit or vegetable. What’s more, you lose some polyphenols and antioxidants which are found in citrus fruits and skins of fruits and vegetables.
When you choose to juice, don’t delay. Drink it straight away so as not to lose the enzyme and antioxidant activity which depreciates over time.
To minimise fibre loss, just add pulp back into the juice.
Does lettuce contain more nutritional value than most fruits and vegetables per kg?
Lettuce is low in fibre but high in minerals like calcium, phosphorous, magnesium and potassium. Romaine lettuce is also high in vitamins C and K, folate and beta carotene which converts into vitamin A in the body. It’s also low in sodium so it’s very nutritional.
Is it true that modern-day industrially grown fruits and vegetables have almost no vitamins, minerals and antioxidants and are therefore unhealthy?
It depends on where the fruit and veg are grown. A landmark 2004 University of Texas study compared what’s now on store shelves to vegetables from 1950 and they saw a decline of 5% to 40% in certain nutrients among 43 types of produce.
Much of what we eat today has lower nutrient levels than when our parents and grandparents were growing up. This is down to mass industrialisation of fruit and veg and much less time devoted to farmland where farmers nurture the crop and provide it with the best love and care through soil, fertiliser and seeds.
Where you can, try to buy organic and stay away from mass-produced fruit and veg which could contain lots of hidden chemicals. Some fruits and veg are waxed so always opt for the unwaxed variety.
How do you use the Breville active blender?
Other questions asked were:
How does Breville blend active work?
See above for how to work the Breville blend active blender.
Is Breville blend active dishwasher safe?
Other questions asked were:
How to clean Breville blend active?
You can add the Breville blender and juicer’s blades, bottles and food processor bowl to the dishwasher for safe cleaning.
Can Breville blend active blend ice?
Other questions asked were:
Does Breville blend active crush ice?
Your Breville active blender can crush ice, but to protect the blades from possible damage, always add a small amount of liquid to the ice before processing.
What bottles are compatible with the Breville blend active?
The Breville blend active bottle 600ml (spare bottle with green lid) fits any Breville blend active blender. Just use the items in the same way you would use the bottles that the Breville Blend Active provides you with.
How long do Breville blenders last?
A Breville personal blender comes with at least a one-year limited warranty if you need to return damaged items, but with proper care your Breville bottle blender should last for at least a decade.
Rating:
5 out of 5 – The Breville blend active blender and blend active bottle are cheap, high quality and super fun to use. I would definitely recommend the Breville Blend-Active Family Pack* to families who want to live healthier and create fun Breville all in one recipes. The pack also comes with more than enough bottles for the whole family to enjoy, so you can count on this blender to be useful for everyone.
Plus the Breville active blend is a quality small kitchen appliance so it doesn’t take up much space at all, even with the Breville blender bottle. We have been using the Breville blender and juicer to make some delicious Breville Blend Active Milkshake recipes and Breville Blend Active protein recipes too, as well as Breville Blender recipes for weight loss. I also want to invest in a juicer cookbook so watch this space..
To find more Breville Juice recipes download the Breville juicer recipe book which is included within the manual here: Breville Blend Active Recipe Book PDF.
*As an Amazon Associate I earn from qualifying purchases
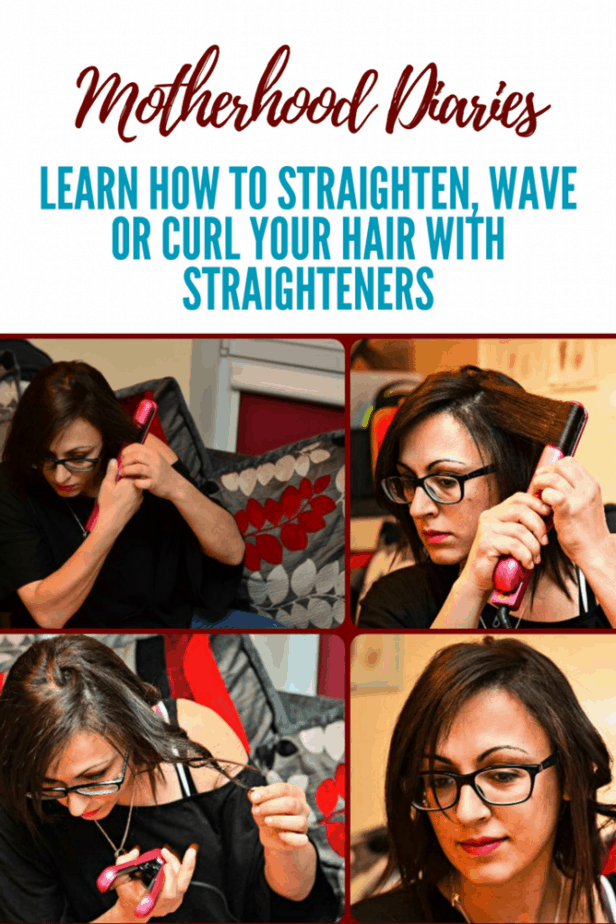
How to straighten, wave and curl your hair in a rush with Straighteners
UPDATE at 29/03/2017 – Nava Hair Straighteners seemed to have disappeared off the face of UK, so where I make references to the Nava Hair Straightener below, please note that you may not be able to purchase this product anymore. My next favourite straighteners are the GHD Platinum Stylers, which you can purchase from Amazon here:
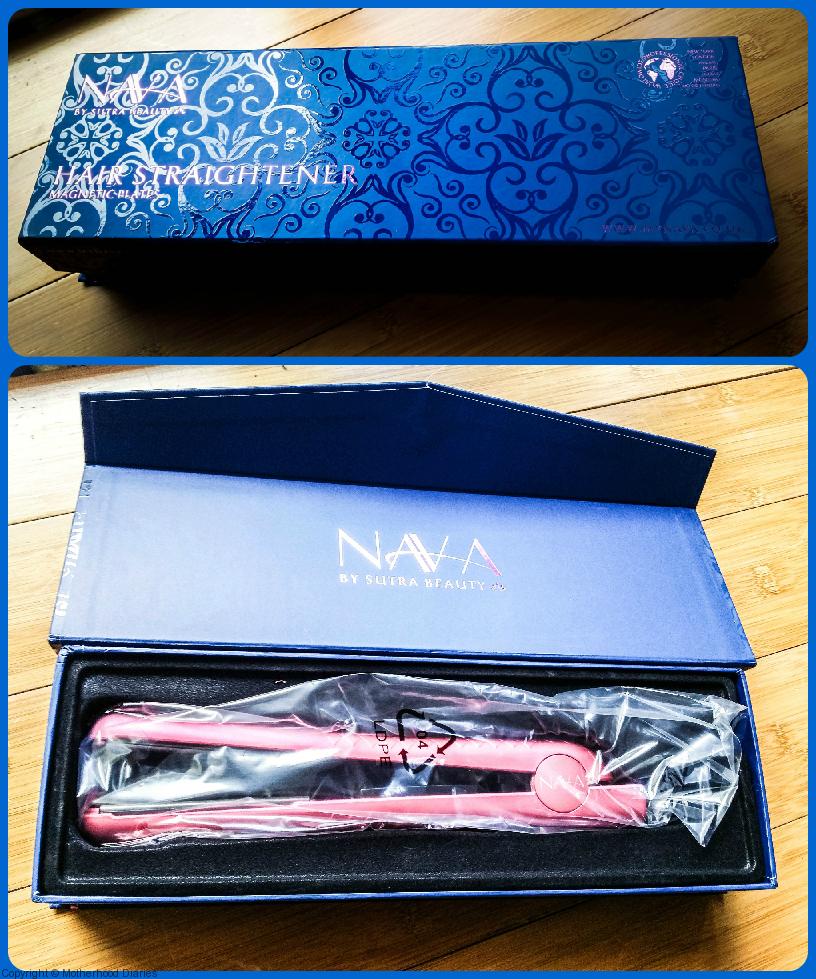
Being a regular ol’ ‘Curly Sue’, I welcomed the chance to review a pair of hair straighteners from a brand I’d never heard of before – Nava. My old straighteners had broken down quite a few months ago and I had a hair transformation just a couple of months after that, going from long curly hair to very short curly hair. So, I was given the chance to trial these new hair straighteners on relatively virgin hair.
I have very curly hair and, to make it worse, I’ve chopped it all off too. Sometimes, as a busy mum of 2 boys, I don’t have time to style my hair, so I just want to put it all up and hide it away. But, there’s no chance of that happening now because it’s so short…
Yep, that’s natural…
My original hair straighteners had broken down almost 6 months ago, so my newly chopped hair has been free from any heating tools for a while. As I’ve always been partial to GHDs because I believed they were the only brand that could straighten my curly hair, I was a bit sceptical of Nava at first. I didn’t know anything about the hair straighteners except that they were a pretty pink.
I was so eager to try them out, but the boys were in bed and it was late in the evening, so I couldn’t wash and blow dry my hair. Therefore, I decided to do something quite controversial – I was going to straighten my curly locks without washing and blow-drying them first (I had washed my hair earlier that day though).
Straightening in a rush
Haven’t got time to wash and dry your hair? No worries, follow my step-by-step instructions below for silky smooth hair in under 15 minutes. Make sure you haven’t got any other chemicals in your hair and you don’t get used to straightening without washing and drying first! These instructions are only for when you have less than 15 minutes to straighten your hair.
1. Spritz your hair with a heat protection spray
(a) This is a very important step because you need to protect the hair follicles from breaking apart.
(b) I used the classic TRESemmé Heat Defense Styling Spray, which I still believe is one of the best sprays for protecting your hair from the heat. And, don’t worry, you can use the spray on dry hair and straighten afterwards, it still protects the hair.
(c) Just spray liberally, about 6 – 8 inches away from the hair and use a brush to evenly coat the spray.
2. Divide hair into even sections
(d) Use your thumbs as a guide.
(e) Start at the top of your head and place your thumbs on your temples. Guide the thumbs up to the top of your head to where they meet in the middle. That’s your fringe section, which you can divide again in half and clip away if desired.
(f) Place your thumbs at the bottom of your ears. Follow behind your ears and up to where your thumbs meet in the middle, at the top. That’s your middle section. Divide that section in half and clip both parts in place.
(g) Place your thumbs at the top of your ears and follow the thumbs back (and parallel to the nape of your neck), to behind your head until they meet in the middle. That’s your lower middle section. Clip away.
(h) Leave the bottom free, as that’s the section you’re going to start with.
3. Brush all the knots out gently with a comb
(i) Use a comb to ensure the protection spray has coated your hair evenly, but also to ensure that all the knots have been brushed out. You don’t want to straighten knots because it’ll make them that much harder to brush out afterwards!
4. Grab your Straighteners – it’s time to get started!
(j) Start with the bottom free section. Take a section of hair 2 to 3 inches wide and brush again with the comb.
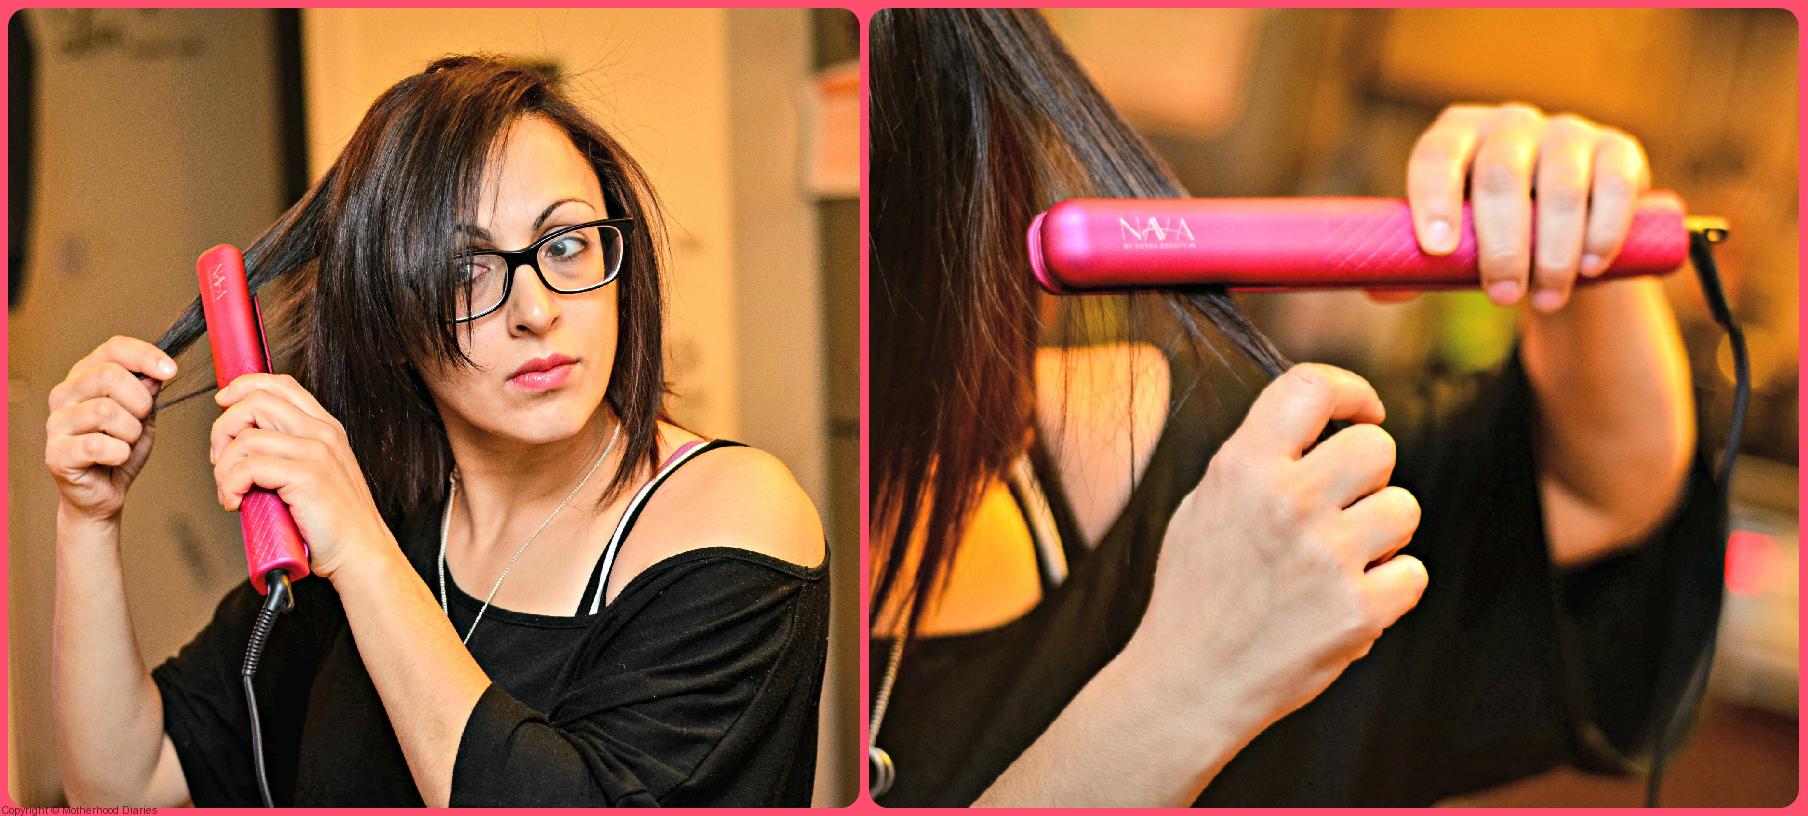
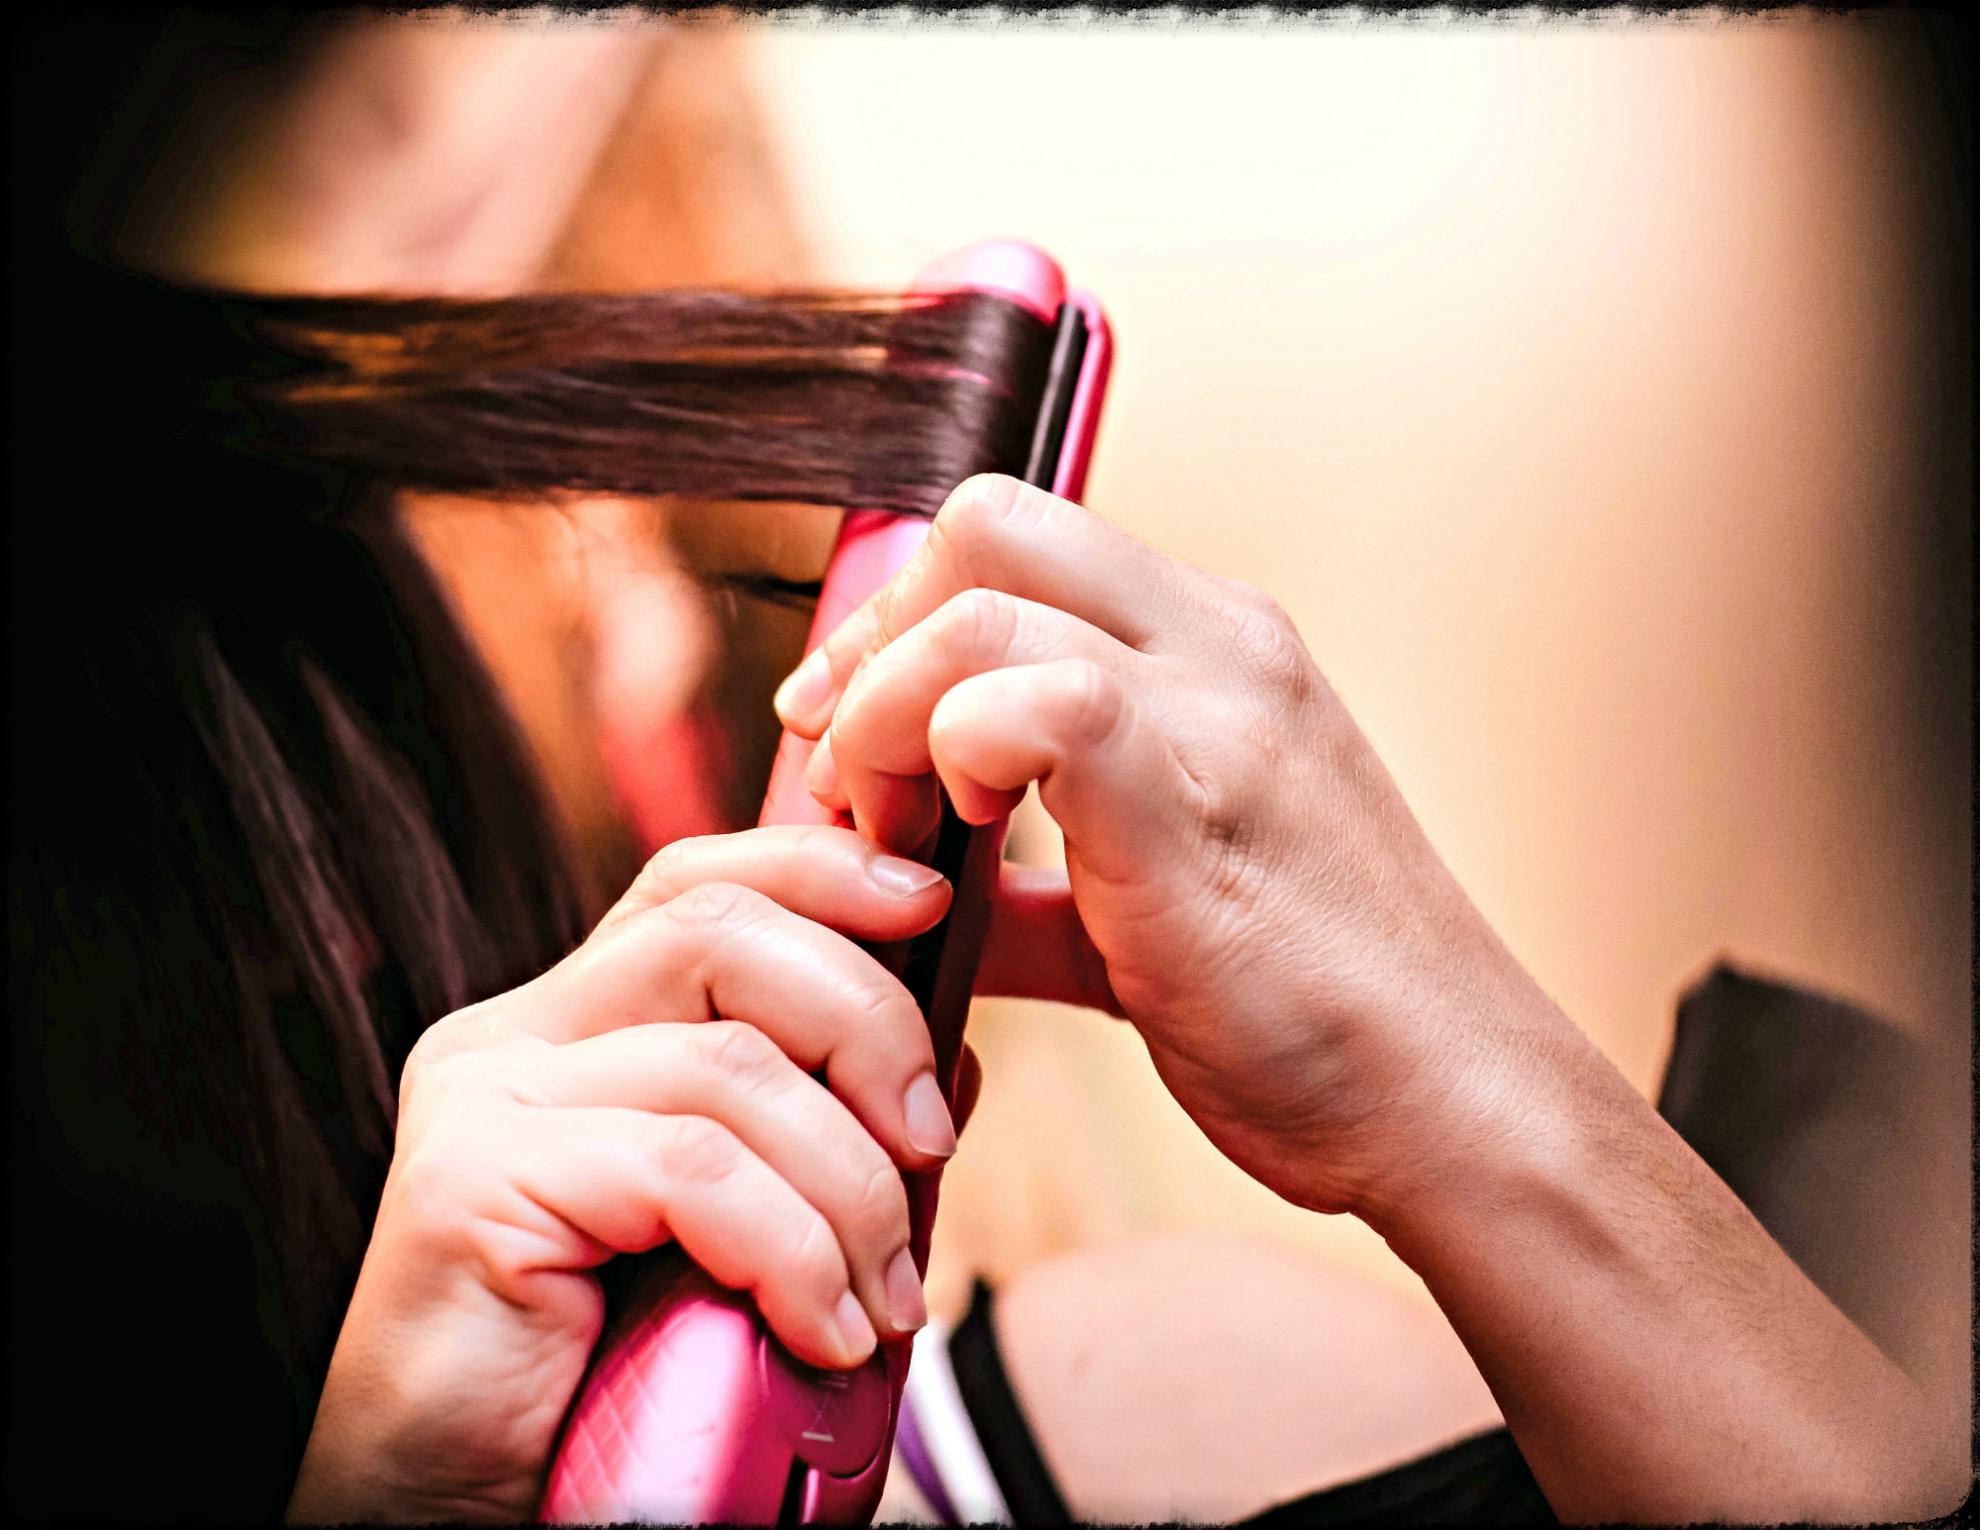
(k) As you comb the section down, hold the hair taut and glide the hair straightener down once at a normal pace. Try not to leave the iron on your hair for too long.
(l) Now, here comes the magical part! Immediately brush the straightened and heated hair with your comb again and hold taut for a few seconds until the hair cools down. Heated hair stays in the shape that it cools down in, so this part is important.
(m) If you have seriously curly hair, like mine, you may benefit from another glide down the section with the hair straightener. But, be sure to follow step (l) of brushing the heated section with the comb immediately afterwards and holding the section taut until your hair cools down.
(n) Repeat through all sections of the hair, keeping the sections at around 2 to 3 inches wide, so that the straightening iron glides through the whole of the hair in that section.
(o) Once you’re done, grab a mirror and check for any kinks, brushing through the hair with a comb at the same time. If you find any, follow the above steps (j) to (l).
(p) If you want a bit of volume, instead of brushing through the heated section with your comb, use a large roller and clip in place whilst you’re straightening another section. Then, you can remove the roller and roll the newly heated section of hair. This creates a lot of volume and bounce, but it’s too poofy for my very short hair. For shorter hair, use smaller rollers. (I only had large rollers to hand.)
(q) Use hairspray to hold the look.
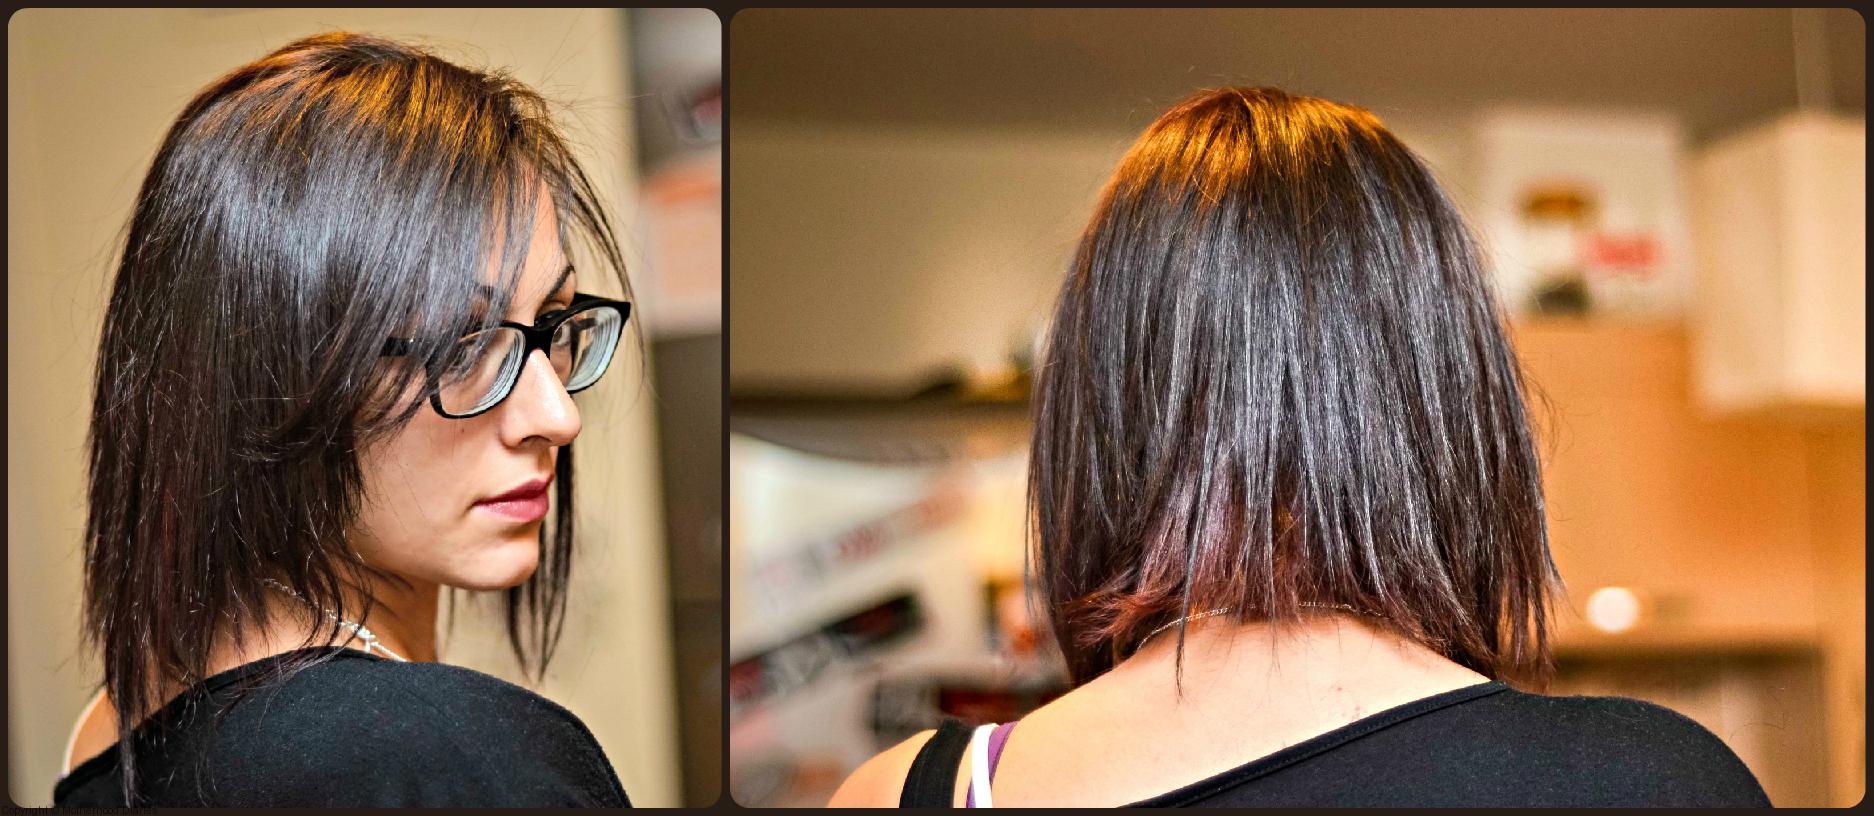
As you can see from the above picture, my hair is very straight and super silky! I’m so impressed with the results and my hair feels a lot healthier and shinier than when I use my regular burning GHDs.
If you don’t have a brush or comb to hand because you’re in a rush, just use your fingers. I did!
Look how straight my hair is!
The Nava Hair Straightener doesn’t just straighten hair – oh no! It waves and curls hair too! But how? I’ll show you:
Nice wavy hair
Ok, so not many people like poker straight hair because they feel like there isn’t much shape to the whole look. So, with a little spin of the Straightener, you can create some loose waves that give the hairstyle a lovely bounce and great texture – and it’s so easy to do!
Create your sections as normal, using steps 2 (d) to 4 (j) (above) and, instead of gliding the hair straightener down, simply turn the straightener towards you in a half turn, so that the unstraightened hair is pointing towards you. Like this:
For great waves, always turn the straighteners away from you and not towards you. So, on the left-hand side of your head, turn the straightener half to the left, and vice versa on the right-hand side of your head.
Trick number 1: start halfway down the section of your hair, so the top is still straight, but the ends have a little bounce and wave to them.
Trick number 2: don’t wave your fringe. For a nice side-swept fringe, straighten the hair on the opposite side of where you want the fringe to be and then flick back to the opposite side.
Once you have created some lovely waves for your hair, go back and twist the waves loosely with your finger.
Spray with hairspray to lock the waves in.
The result is a lovely textured look, which replicates the look of salon hair!
#Looks like you’ve just stepped out of a salon!#
You want great curly hair, but not your normal frizzy curls!
Simple, simple, simple! Really!
You follow all the rules of when you wave your hair but turn the straightener all the way around until the hair is pointing back in the right direction – away from your head. So, you’re turning one whole spin. But, be careful not to hold the straightener too tight, otherwise you won’t be able to glide the iron down through the hair.
As you let go, let the curl fall and immediately twist with your fingers to lock the curl in.
Again, start from just above halfway down the section, so that the top of the hair is straighter – it gives the whole look a more groomed finish.
Finish with some hairspray and then brush the curls out lightly, either with your fingers or a wide-toothed comb. Or, you can just leave as is!
All the above works on longer hair too, of course. You can achieve longer-looking hair by investing in some (heatable) hair extensions and following the above steps for a straight, wavy or curly finished look.
If you want me to create a video on how to straighten, wave and curl your hair with the Straighteners, please leave a comment below this post. If I get enough interest, I’ll create a very extensive step-by-step process for you.
What did I like most about the Nava Hair Straighteners?
The Nava Hair Straightener heats up almost instantly and the temperature gauge allows you to control how hot you want the iron to be. The result is a very silky, smooth and straight hair – a far cry from my frizzy curls!
What to watch out for:
230C is hot, hot, hot! So, keep those fingers away when you’re waving or curling, you might just get burned.
Rating:
5 out of 5 – A sleek styling tool and a worthy contender to the GHDs. The Nava Hair Straightener has everything, from an aesthetically pleasing pink style to precision formula to protect hair from damage through heating.
*Collaborative featured post*
The many versatile uses of Jus Rol Puff Pastry
I love puff pastry, not because it’s so tasty, but you can pretty much use any ingredient to turn the pastry into a delectable dish – or as a perfect snack on its own! Of course, you can always go and make your own puff pastry, which isn’t super difficult (recipe for puff pastry to follow soon), but if you are a busy mum like me, and you have minimal time in the day to make puff pastry from scratch, then Jus Rol is perfect because the pastry dough is readymade and versatile enough for you to mould into any shape you want to make your own little cute pastry dishes. So, thanks to Jus Rol for supplying me with some of their awesome products. Read on for what I managed to make out of the ready-to-roll puff pastry dough.
I used the Jus Roll double pack of pastry in a block, so I had to leave the pastry to defrost under room temperature first. Once defrosted fully, I divided the block in half and wrapped the other half in cling film before putting back in the fridge to use at another time.
I divided the other half in half again and rolled the quarter out to about ½ inch thick. I cut around the edges to make a rectangle and divided the rectangles horizontally into 3 long rectangles. Add some of the Quorn mince in the middle of each long rectangle, making sure to leave at least 1cm around the edges.
Brush some beaten egg around the edges of the long rectangle and, starting from the bottom, roll gently to create a pastry roll. Cut each roll 3 cm long and brush again with egg.
To make little Quorn croissants
Cut the pastry into large, long triangles, with a little triangle cut out at the bottom for flexibility
Add a little mince in the middle of the triangle and brush around the edges with beaten egg
Starting from the wide edge of the triangle, roll over the mince mix gently, but tightly, until you reach the tip
Pinch each side to seal the croissant
Brush everything in beaten egg again
Look at how they all turned out!
Apple/Pie Pastry Pie
Apple Pie is so cheap and easy to make when you already have Jus Rol puff pastry dough to hand. I even changed it up a bit and added pear to the equation and all it cost me was one apple, one pear, some sugar and some nutmeg. I ended up making enough little Apple/Pear Pies to serve at a mini birthday lunch at my friend’s house. It’s so easy to make, here are the steps:
Preheat your oven to 180C Fan
Beat one large egg in a mini bowl and leave aside to use for later.
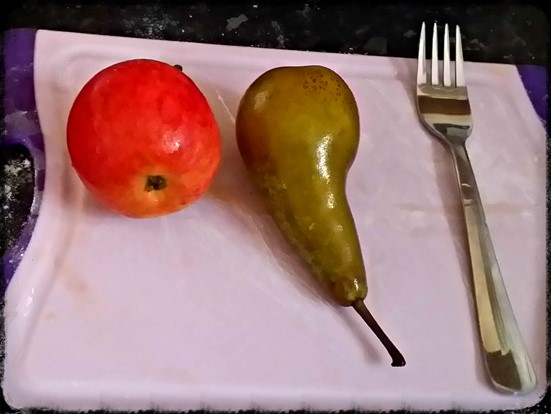
Grab one apple and one pear from your fruit bowl
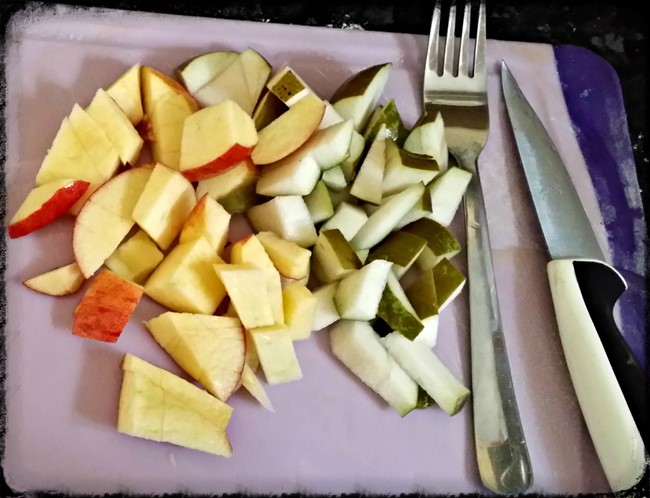
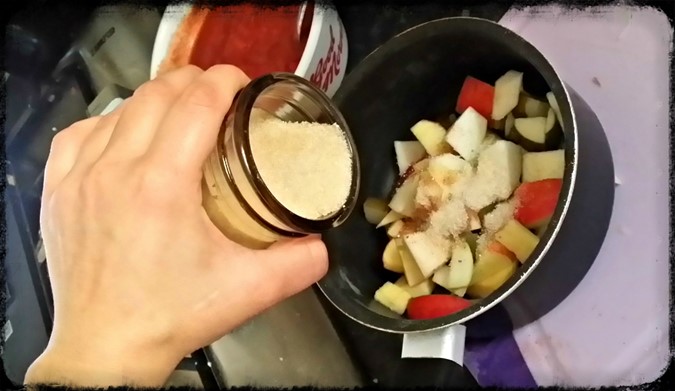
Chop the fruit up into bite sized chunks and add to a pan of about 4 tablespoons of water
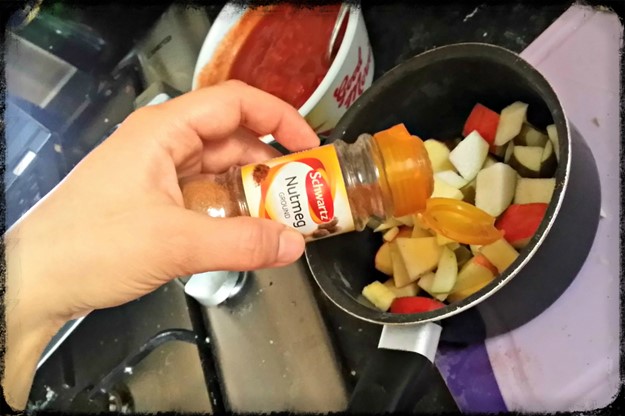
Add 1 teaspoon of nutmeg
Add 1 tablespoon of brown sugar (or 2 tablespoons if you like the pies super sweet)
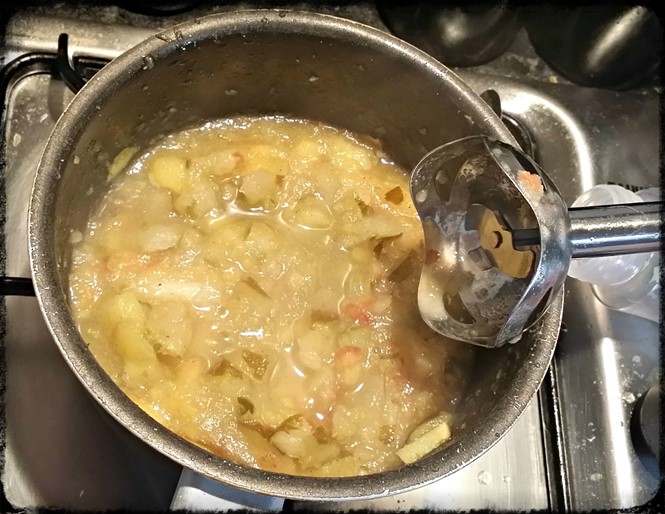
Simmer and stir gently until the fruit are soft and mushy.
Either mash up with a fork or use a hand mixer like I have done. Leave some chunks for a more textured flavour.
Roll out your puff pastry dough to at least ½ inch thickness
This is where you can get creative and cut your puff pastry into any shape you want. I cut my dough into squares.
Add a dollop of apple/pear mix to the middle of half of your squares, making sure to leave enough room along the sides to seal with dough.
Get your beaten egg and, with a brush, brush the sides of your square with egg.
Grab one of your squares (with no apple/pie mix in the middle) and place over the top of the square with your mix. Gently push along the edges to seal the two squares together.
Use a fork to press along the sides and create the pattern shown in the illustration
Place your squares on a greased baking tray or parchment paper.
Using a knife, score a pattern on the top of the square, any pattern at all, I tried to score an apple, but it didn’t work.
Brush egg generously over the top of your squares and place in the centre of the oven.
Bake for 20 – 25 minutes or until golden brown.
Hey presto! You have your awesome apple/pear pies!
Other gorgeous pastries you can make – Chocolate Croissants!
Cheese and Tomato Pastries
As you can see, there are many ways to use the very versatile Jus Rol Puff Pastry and these above recipes are just the beginning!
The different types of ready-to-roll Jus Rol pastry that you can buy in the supermarkets can be found here: http://www.jusrol.co.uk/productRange.aspx
Halloween is near and it’s time to get creative with your food!
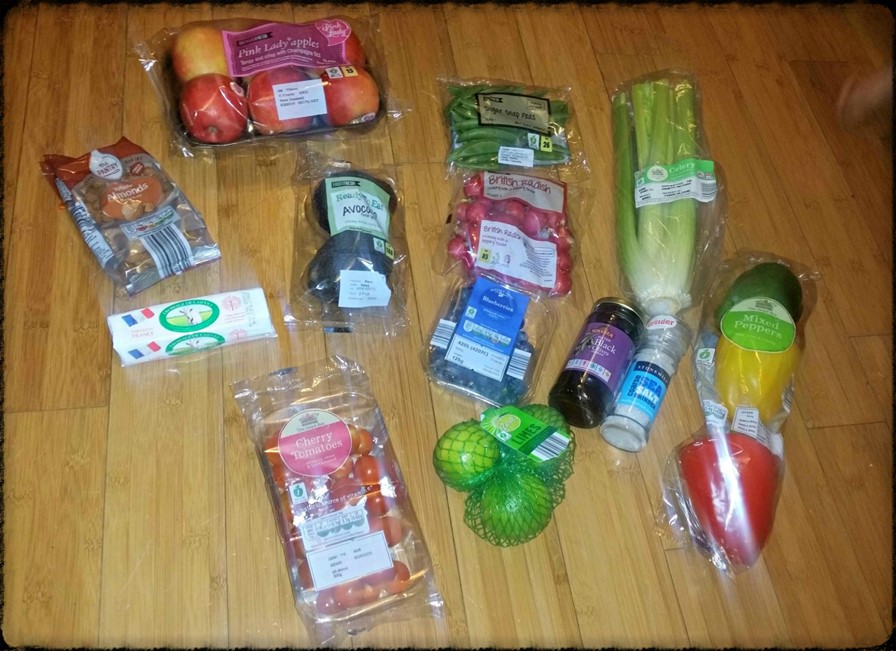
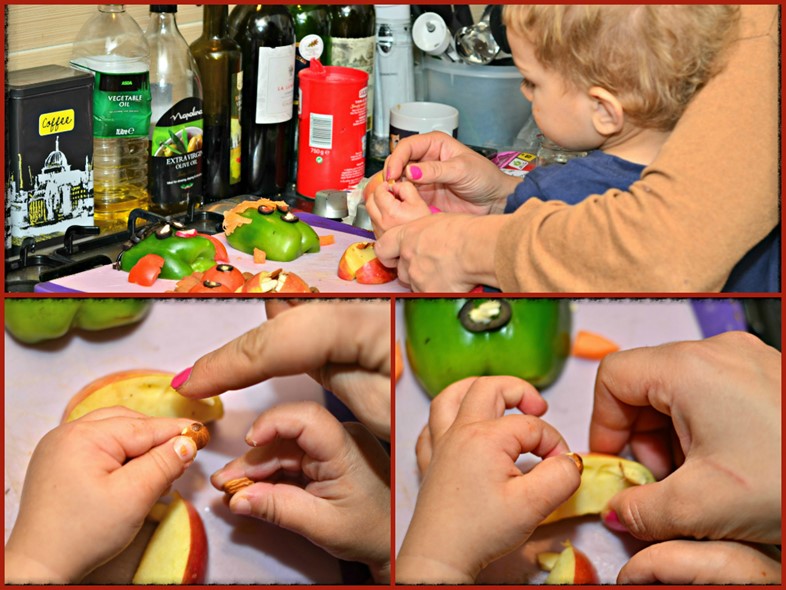
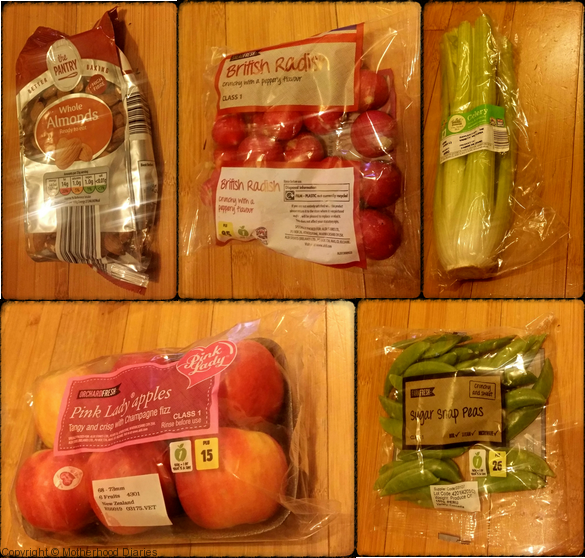
Aldi kindly provided Motherhood Diaries with some of their finest fruit and veg in order to assist us in making some dangerously delicious Halloween creations, for the chance to win a family ticket to Scarefest at Alton Towers – not just for us, BUT FOR ONE OF OUR READERS TOO! AND…. WE WON! So, that means, one lucky winner will get the chance to win a family ticket to Scarefest at Alton Towers too! You can enter the competition at the end of this post.
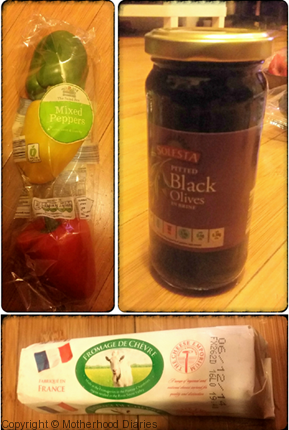
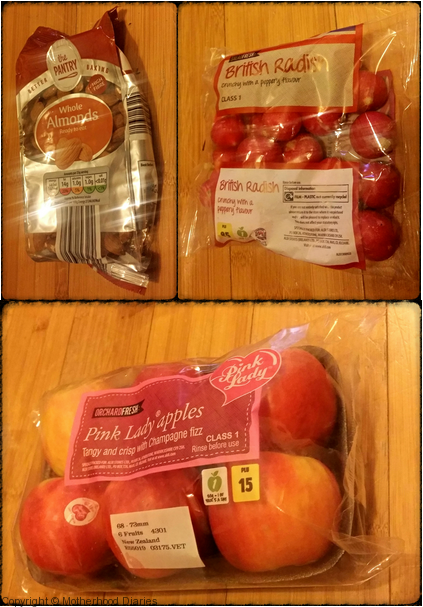
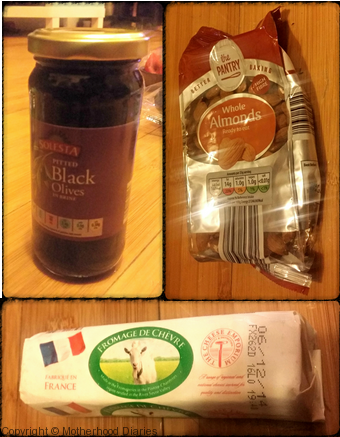
I must admit, I found it quite hard to think up of some inventive ways to transform the above ingredients into spooky, scary Halloween creations. At least, Aldi had given us some recipe ideas to begin with! The ingredients we were given were:
Peppers (Salad Fresh Green peppers, 89p for mixed 3 pack)
Black Olives (Solesta Pitted Black Olive in Brine 45p, 230g)
Soft Cream Cheese (The Cheese Emporium Soft Cream Cheese, 49p for 200g)
Pink Lady Apples (Orchard Fresh Pink Lady Apples, £1.99 for eight)
Whole Almonds (The Pantry Whole Almonds, £1.29 for 185g)
Blueberries (Berry Fresh Blueberries, 75p for 125g)
Radishes (Salad Fresh British Radishes, 55p for 250g)
Sugarsnap Peas (Farm Fresh Sugar Snap Peas, 85p for 150g)
Celery (Salad Fresh British Celery, 39p each)
Cherry Tomatoes (Salad Fresh Cherry Tomatoes, 39p for 300g)
Avocado (Fruit Fresh Ready to Eat Avocado (£1.59 for 2)
Limes (Zest Limes, 69p for 3)
Salt (Stonemill Coarse Sea Salt Grinder, 89p for 90g)
Aldi have also stocked some fabulous Halloween Specialbuys, including creepy costume ideas and party hints and tips, in time for the spooky holiday. You can check these out here:
This is what we came up with, using Aldi’s Halloween recipes.
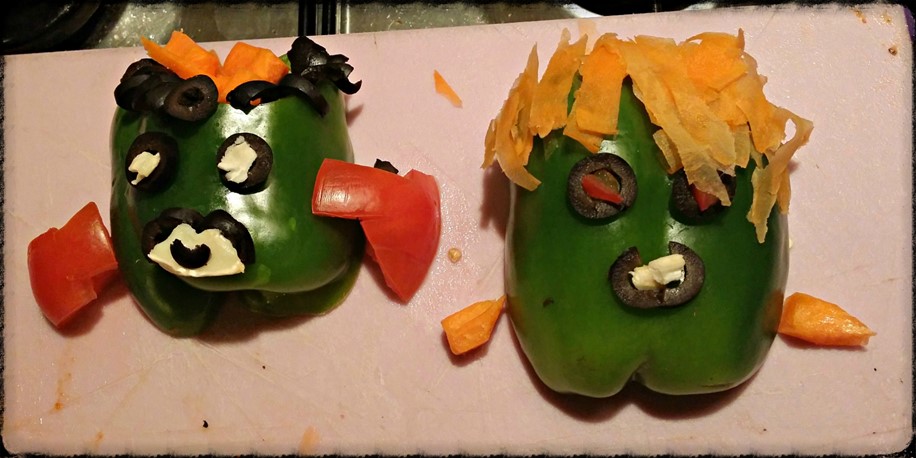
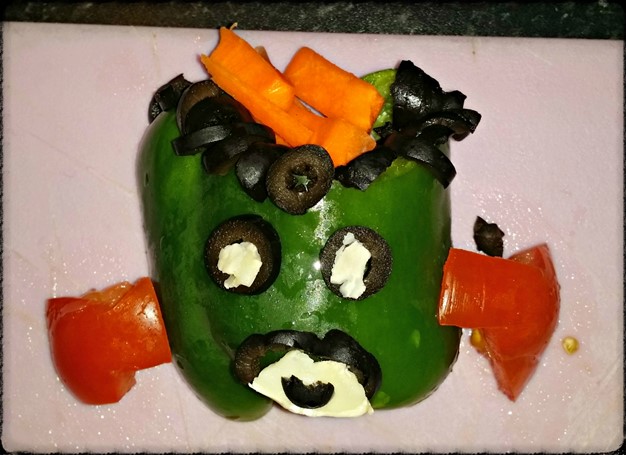
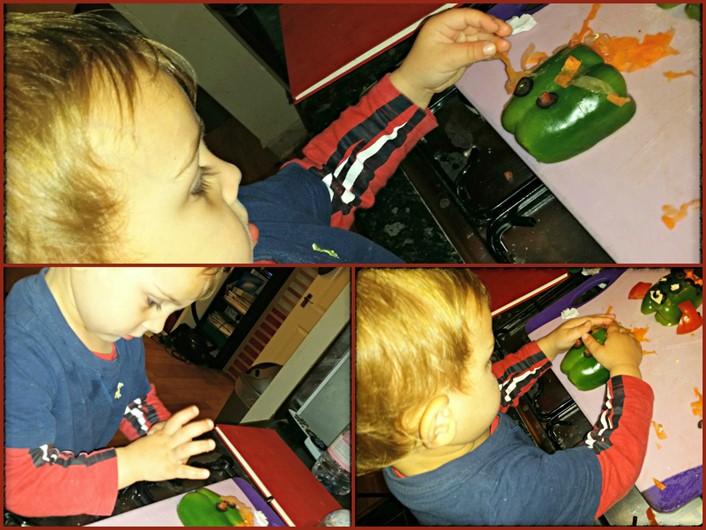
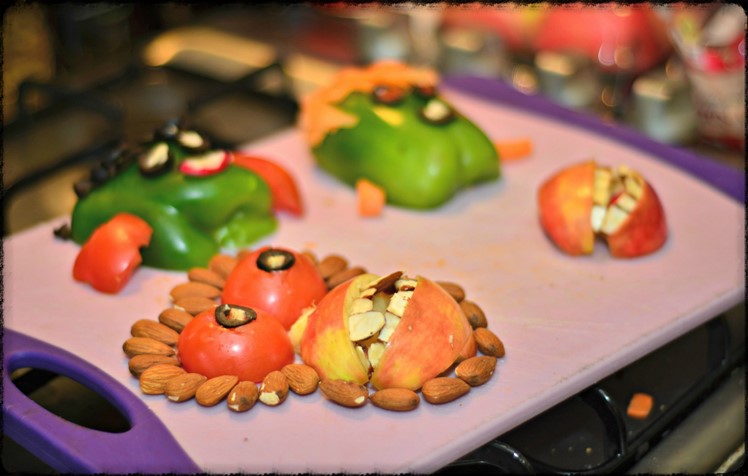
Monsieur Frankenstein and Surfer Frankenstein (Easy)
(Taken from the recipe, ‘Frankenstein’s Monster’, provided by Aldi.)
Monsieur Frankenstein
Ingredients
Green Pepper
Black Olives
1 Tomato
Soft Cream Cheese
1 Carrot (Specially Selected Chantenay Carrots, currently 59p for 500g)
Directions
Cut the green pepper in half, lengthways, and take the seeds out, placing one half on a plate for the head.
Cut the tomato into quarters and use the knife to shape the quarters into bolts, one for each side.
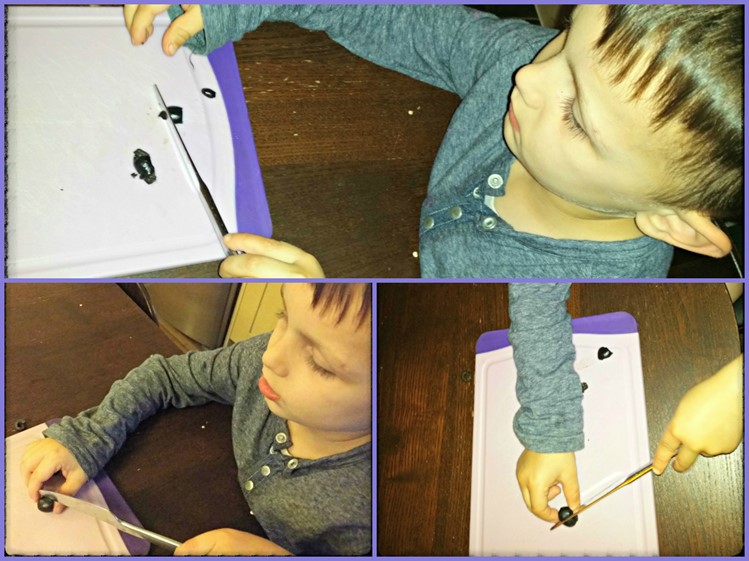
Slice the olives to create the hair and facial features. Include one for the moustache.
Use a dab of the soft cream cheese to create eyelids and the opening of the mouth.
Slice some carrots for the top of the head.
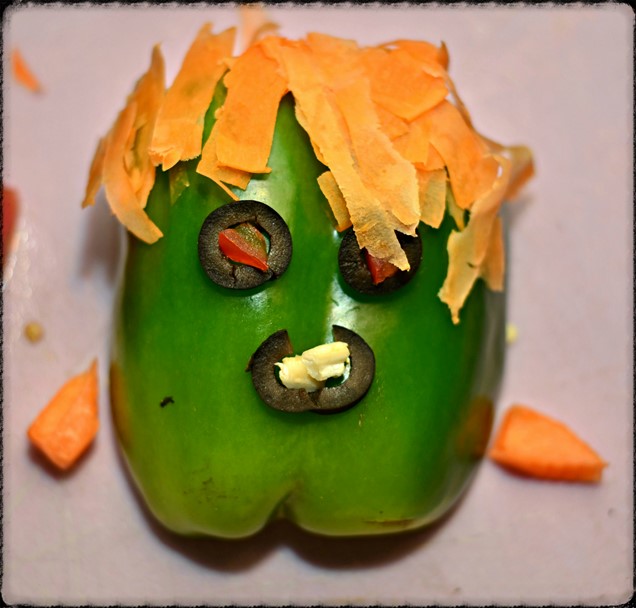
Surfer Frankenstein
Directions
Cut the pepper in the same way as above, but create the bolts and hair with carrots instead.
Slice some black olives to create the facial features.
Add a dab of soft cream cheese for the mouth and tomato for the eyes for that evil look.
To replicate the long floppy hair, use a vegetable peeler to shave thin slices of the carrot and shape them over the top of the head.
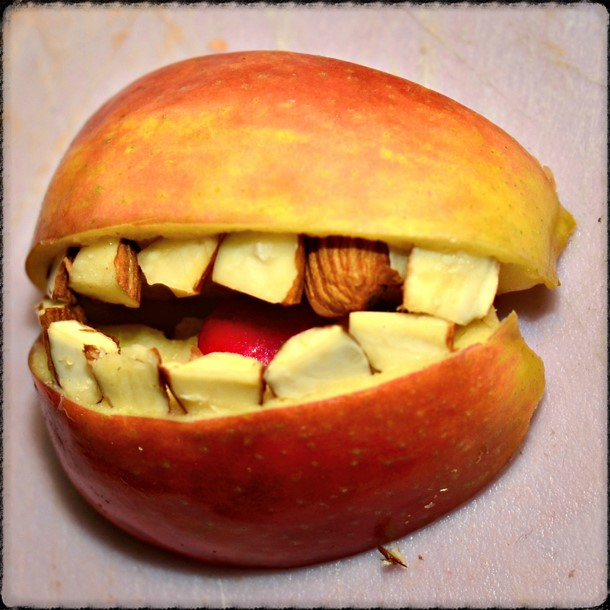
Gold -Tooth Vampire Apple
(Taken from the recipe ‘Vampire Apples’, provided by Aldi)
Ingredients
Pink Lady Apples
Whole Almonds – For the chunky brown stained look to the teeth and the gold tooth, whole almonds are best, but they are quite tricky to cut.
Directions
Cut an apple into quarters and then cut again into eighths. Place one on top of each other, leaving an opening in the middle for the mouth.
If using whole almonds lay one on its side on a chopping board and very carefully split in half with a knife. Repeat for all the teeth.
Push the teeth into the ‘gums’ starting with the front teeth and working back.
Turn one of the teeth over to create the ‘gold tooth’.
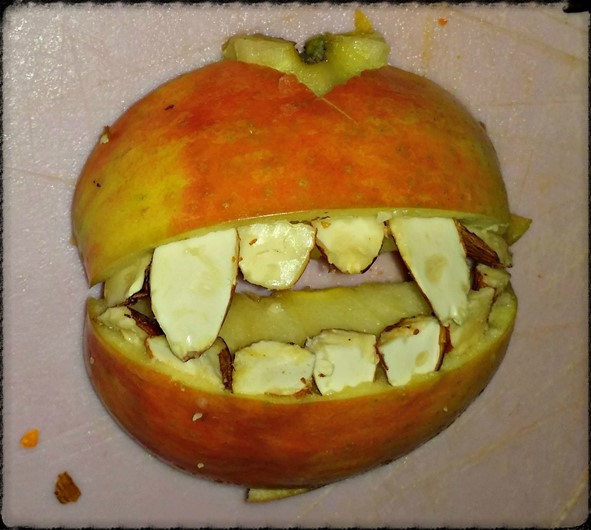
Vampire Apple with Fangs
Directions
Cut the apple in the same way as above.
Cut a V shape into the middle of the top lip for the ‘cupid’s bow’.
Now take the cut or flaked almonds and cut some with knife or scissors to make shorter teeth, leaving two long for the fangs.
Chimpvampee
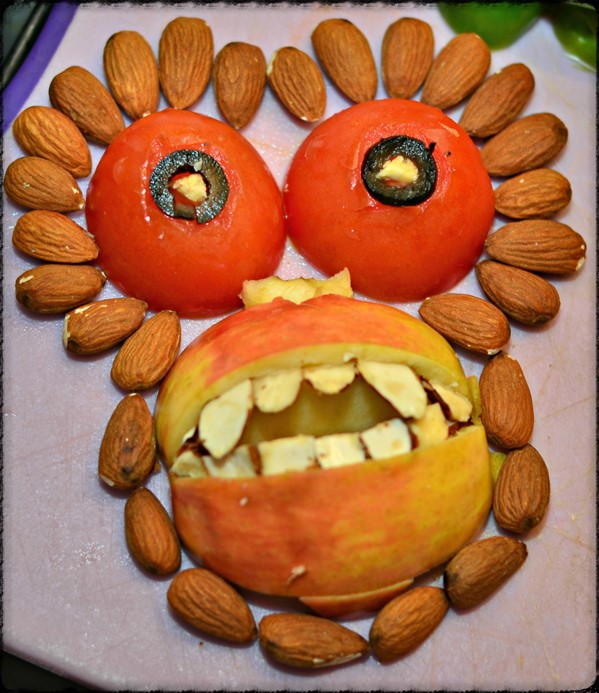
We thought that the Vampire Apple came out so well that it would be perfect for a larger creation, the vampirous chimpanzee – The Chimpvampee!
Additional Ingredients
1 Tomato
Whole Almonds
Black Olives
Soft Cream Cheese
Directions
Use the Vampire Apple creation you made earlier as the mouth.
Cut a tomato in half and place each half above the mouth for each eye.
Slice an olive and add a dab of soft cream cheese for the middle of the eye.
Place whole almonds around the eyes and mouth to create the face.
Almond Night Owl (Harder)
(Taken from the recipe ‘Almond Night Owl’, provided by Aldi)
Ingredients
1 Apple
Whole Almonds
7 Blueberries
Celery
1 Radish
3 Sugarsnap Peas
Directions
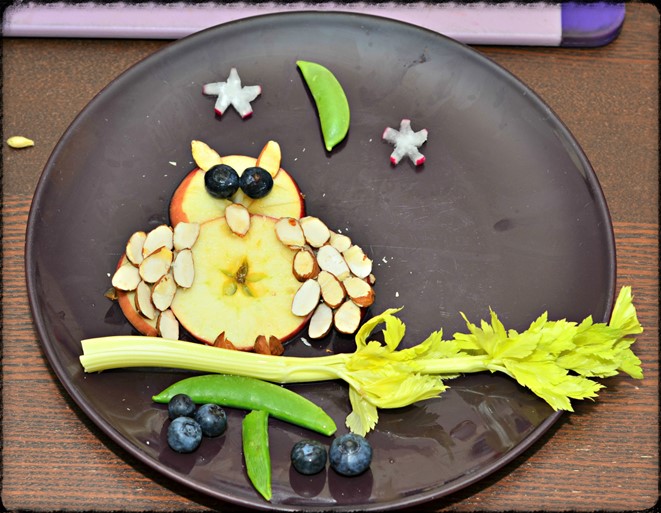
Cut the apple into slices and use one as the belly of the owl.
Use a slightly smaller slice and cut a little indent at the bottom. Place above the belly to create the head.
Cut a small slice into 2 wings and place on either side of the belly.
Cut the whole almonds in half and place two on top for the ears and one for the beak. Cover the two wings with the almonds, white side up, to make the feathers. Finally, cut 2 slices into 4, turn them over so they’re brown side up, and place on the bottom of the belly to create claws.
Add 2 blueberries for the eyes.
To make the stars, slice radishes and snip the slices into triangles using scissors. Overlap two triangles for each star. (I tried to cut the radishes into stars from the offset and it was not an easy thing to do!)
Select a crescent shaped sugarsnap pea as the moon.
Use a particularly leafy stalk of the celery to create the tree branch and then add blueberries and sugarsnap peas as details on the tree.
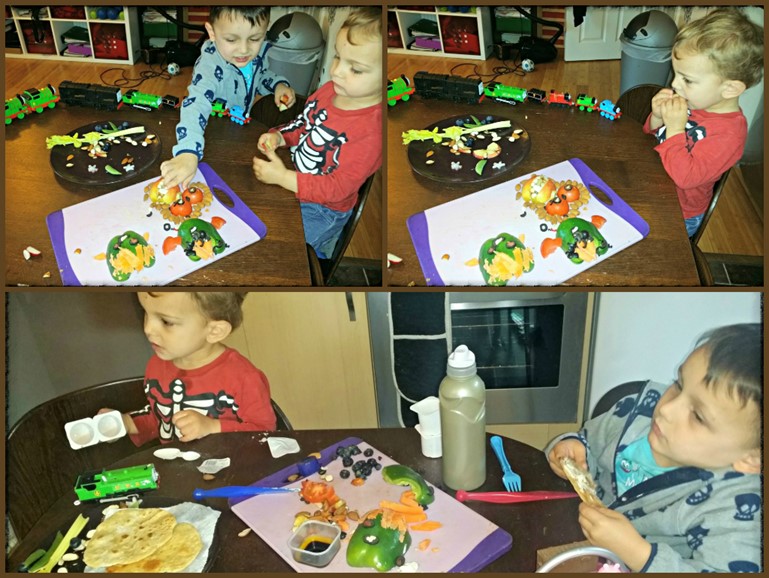
So, there you are! Our Halloween creations using Aldi’s great products!
They certainly passed the taste test with the boys…