NCC Home Learning Nutrition and Health QCF Award Level 2 Overview
Back in the day, when the internet had not been invented yet and being accepted into university was only held for the crème of the crop, it was nigh on impossible for stay-at-home parents or those without wealth to study and build on their CV in their own time. Nowadays, distance learning and home learning courses (recognised and accepted, free or paid), are now readily available for anyone to study in the comfort of their own home, to better their chances of finding work or building on their qualifications. NCC Home Learning provides that flexibility and knowledge in order for Joe or Jane Bloggs to do this.
I was offered the chance to review the NCC Nutrition and Health QCF (NVQ) Level 2 course so I could build on my knowledge of food (my passion) and understand the connection between weight gain and the link to emotional eating. The QCF course, which has now replaced the NVQ qualification, is all about understanding the differences between normal weight, overweight and obesity, and the connection we build between food and our feelings.
Who are NCC Home Learning?
NCC Home Learning is a complete resource for NCC online courses. There are hundreds of NCC resources and home study courses to choose from, whether you are looking to top up your qualifications or embark upon a new career, NCC should have the right course for you. They boast a vast selection of over 350 distance learning courses at home which are accredited by various awarding bodies such as NCFE, 1CB, SAGE, and Ascentis. NCC also offer student support and course tutor phone calls if you require any help or advice during the course. Their homepage provides a link for you to choose your course via industry here.
So, what is the NCC Nutrition and Health QCF Level 2 course about?
“With obesity on the rise and the Foresight Study predicting that by 2050 60% of men, 50% of women and 25% of children will be obese; the time to make a change is NOW and this accredited qualification can help you to achieve that. In one compact course, you can respond to the rising level of obesity across adults and children, and prevent the expected expenditure of £45 billion a year (in 2050) on care, missed working hours and ill-health.
Instead, with only a basic knowledge of this subject, you can almost immediately begin improving the health and well-being of your friends, loved ones and yourself, and most importantly have the chance to add an approved qualification to your CV that will make you stand out from the crowd.” NCC Home Learning
The NCC NCFE Level 2 Nutrition and Health course (QCF) is specific to the UK and tackles problems the NHS has with rectifying the obesity epidemic that is on the rise. (i.e. the proportion of obese adults between 1993 and 2010 had increased from 13.2% to 24.4% among men and 6.4% to 25.1% among women.
The course is split into three concise units and can be completed at your own pace over the course of twelve months. It comes with the full support of a qualified tutor, who will guide you through the entire process, whether you complete it online or by paper.
The course details are:
Qualification Title: NCFE Level 2 Award in Nutrition and Health (QCF) Qualification Number: 501/0038/5 Total Credits: 12
Price: £210.00 (reduced from £280.00)
Course duration: 120 hours
A brief overview of how to navigate the course
You will be provided details of the NCC Home Learning login for your course via email. Once you log in you will be taken to your dashboard and on the left-hand side, you have a folder tree, which allows you to navigate through the course modules.
The course contains 15 modules and an exam at the end to test your knowledge. Each module plunges you straight into a PDF of ‘underpinning knowledge’, which you can download and save to your desktop. Be sure to read the User Guide for all students at the introduction of the course, as it takes you through how to get started, how to access the course with ease, and how to log in and actually go through the course itself. You must read and understand all modules before passing the exam and unlock the course completion certificate.
The NCC Home Learning course website helps those who are unable to attend college or university to build on their CV
With tons of NCC remote classes to choose from, arranged by industry, career, interest, experience and course type, it’s really easy to search for a course from NCC learning you’re really passionate about and build on your knowledge. I would definitely recommend signing up and choosing your course, whether it’s an entry-level teaching assistant or a care diploma level at home course. NCC classes broaden the NCC learning pool and will help you either in your current job, to find a new job or start that business you’ve always been meaning to start. Contact NCC Home Learning directly if you have any questions or require more information on their at-home learning courses.
FAQ
Is NCC Home Learning legitimate?
Another question asked was, ‘Is NCC Home Learning accredited?’
NCC Home Learning is an award-winning education provider with over twenty years experience offering distance learning courses from home. To date, they have delivered training to over half a million learners worldwide.
The NCC certificates offer proof of completion of your NCC courses which you can provide either at the job you’re applying or as proof of expertise in your business or current employment.
How has NCC changed your life?
I’ve applied what I’ve learned in the nutrition at home courses to daily life, making changes to our diet and lifestyle so that we can live our best life as a family.
How do you feel about NCC Home Learning?
NCC Home Learning allows everyone to build on their most important assets – themselves. So I absolutely back NCC Home Learning as a great way for parents to build on their qualifications around their kids so they have a chance against others in vying for that desired hobby/job/role/business.
How does your home study environment and your study habits affect your productivity?
You need to know how and when you like to revise. Everyone is different. For example, I like to get up before anyone else in the morning and write out my task list. If you’re a visual person, you’ll want to stick to bright, colourful text, illustrations and videos/images to help you study. If you prefer to revise audibly then you can use a text to speech software like Word to read out the content in the course. Work out how you want to revise then trial and error until you hit your sweet spot.
*Collaborative feature post*
5-ingredient sweet and zesty roast chicken recipe with all the trimmings in under 2 hours!
We Brits love our traditional Sunday roasts and our golden turkeys at Christmas time. But, I’ve always wanted to provide a full roast dinner for the boys during the week, to send their tummies into a blissful sleep before another busy day at school. So, armed with my new beautiful – and very English style – Doris & Co roasting items (more on those below) and a 1.8kg whole chicken, I set about creating a roast chicken dinner with all the trimmings and with just enough time to chat before the scheduled bedtime routine – all squeezed in just under 2 hours!
Sweet and Zesty Roast Chicken Dinner with all the trimmings
Inspired by the Zesty Roast Chicken recipe from Lewis of Radlett butchers
Here’s how:
Ingredients
1.8kg/4lb Whole Chicken – serves 4
2 large sweet potatoes
2 lemons
4 carrots
2 cloves of garlic
Optional extras
Stuffing – I used Kent’s Kitchen Ready-made Cranberry & Orange Stuffing, to complement the sweet and zesty chicken
Gravy – I used ready-made gravy, but you can make your own using the chicken’s giblets, 1 chopped red onion, 2 OXO beef/chicken cubes and a couple of tablespoons of the chicken’s cooked juices. It only takes a few minutes, so make it when the chicken is resting under the foil.
For seasoning
Sunflower oil
Sprig of rosemary
Salt and Pepper
50g Butter (room temperature)
1 clove garlic or garlic granules
Method
1/ Preheat your oven to 190C/170F/Gas Mark 5
2/ Heat up the oil in your roasting tin whilst you squeeze lemon all over the chicken.
3/ Pop the remains, along with some rosemary and a couple of garlic cloves inside the chicken.
4/ Place the chicken in the middle of the roasting tin, within the hot oil.
5/ Grate 1 clove garlic or use 1 teaspoon of garlic granules and add to the butter, along with a pinch of salt and pepper.
6/ Brush all over the chicken, with a pastry brush, including the legs.
7/ You will be roasting the chicken in the centre of the oven for a total of 1 ½ hours, basting with the butter and juices in the roasting tin every 20 minutes.
8/ Whilst roasting for the first 20 minutes, prepare your vegetables
9/ Add the carrots and onions with the chicken at 40 minutes (2nd baste) and cover with the juices.
10/ Add the sweet potatoes in at 1 hour (3rd baste) and cover with the juices. You can add more oil and season with salt and pepper at this point, if needed.
11/ Time to prepare the stuffing, Follow the packet instructions if you are using ready-made. For Kent’s Kitchen’s version, it was as simple as adding boiling hot water, leaving the granules to stand in the measuring jug for a bit and then forming them into balls.
12/ At 1 hour 20 minutes (4th baste), add the stuffing balls around the chicken and cook for a further 10 minutes. Check the chicken is cooked at 1 hour 30 minutes to see whether its juices are running clear. If not, it’s not cooked yet. Baste for a 5th time and then put it back in for another 10 minutes. You’ve got to make sure that chicken is cooked thoroughly!
13/ Once cooked at around 1 ½ hours, remove from the oven and place on your roasting dish.
14/ Cover with foil and rest the chicken for around 10 minutes to make the chicken meat juicier.
15/ Grab a couple of tablespoons of the chicken juices and add to a measuring jug to make the gravy (if using).
16/ Crank up the oven to 220C/200F/GM 7 and cook the remaining ingredients for around 15 minutes until they are all crisp.
17/ Serve with broccoli, green beans or any mixed vegetables (optional)
Here were my timings for cooking the roast on a school night.
15:50 – Place chicken in the oven
16:10 – Baste at 20 minutes
16:30 – Baste at 40 minutes, add the carrots and onions.
16:50 – Baste at 1 hour, add the sweet potato, salt and pepper and prepare the stuffing balls, if using
17:10 – Baste at 1 hour 20 and add the stuffing balls to the vegetables in the roasting dish. Cook for a further 10 minutes
17:20 – Check the chicken at 1 hour 30 minutes. If not cooked, baste again for the 5th time and cook for a further 10 minutes. Keep cooking and checking every 10 minutes, until the juices run clear and the chicken is cooked through.
17:30 – Remove from the oven and place on a roasting dish. Cover in tin foil and rest for ten minutes. Cook the remaining vegetables at 220C for another 15 minutes.
17:45 – Serve with other mixed vegetables and gravy, if using.
Any ideas on how to make a quick roast dinner for the family? Please leave your tips below.
A great afternoon tea for two at Le Restaurant de PAUL in Covent Garden
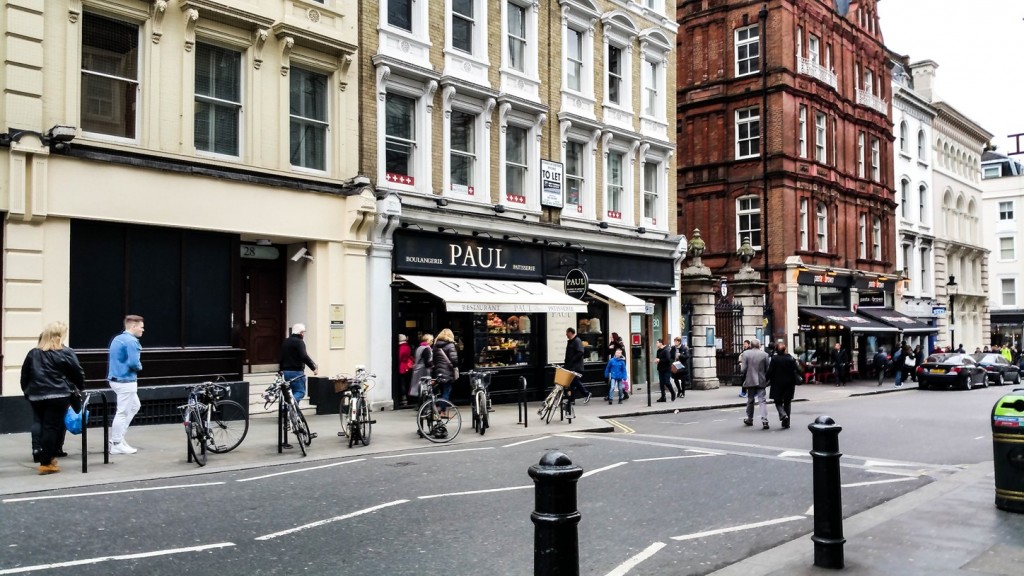
It’s not easy for a busy mum to find three hours out of her hectic schedule to enjoy a great spot of Afternoon Tea with her best friend. But, thankfully, PAUL in Covent Garden throws a fabulous Afternoon Tea for two and Motherhood Diaries was invited to attend and review the selection of artisan bakery that PAUL is so famously well known for.
A little bit about PAUL
PAUL is a French artisan bakery that originates from a family of agricultural workers in the Artois region of Northern France. In 1889, Charlemagne Mayot and his wife opened a small bakery located in rue de la Mackellerie in Croix, near Lille. PAUL branched out of France, towards Barcelona in 1985 and incorporated a tearoom/restaurant alongside the bakery. Today, PAUL continues to be a family owned company, built on the foundations of time-honoured product methods, which have been passed down through five generations. PAUL is shared in more than 25 countries today and in 2012, PAUL opened its first bakeries in Singapore and Moscow.
Afternoon Tea at Le Restaurant de PAUL in Covent Garden
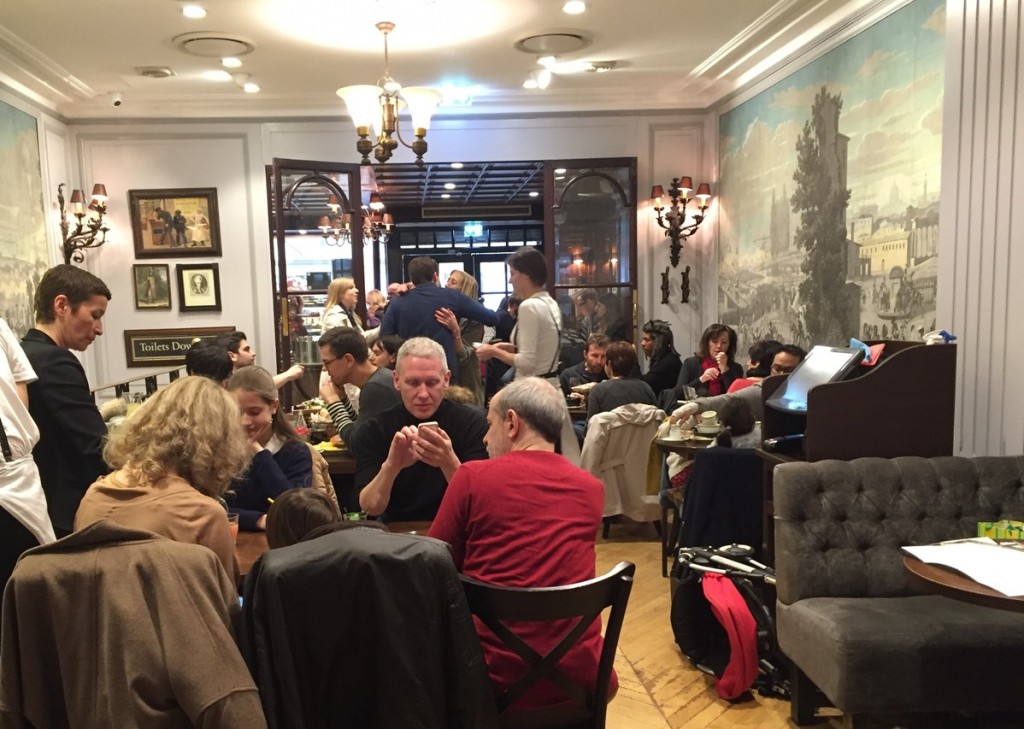
I arrived an hour earlier than the allocated time for Afternoon Tea, at 2.30pm, and entered a hugely bustling and overflowing bakery, draped in different food delights, ranging from Bread and Sandwiches to Viennoiserie and Pâtisserie. Weaving through the relatively small front-end bakery/café, I found a petite French woman dressed in black and assumed her to be the manager, as she stood out from a healthy number of staff dressed in chef white colours. She was very accommodating and, although I was an hour early, she found a seat for me in the tearoom/restaurant at the back of the café, which was only slightly larger in comparison.
As I was studying the beautiful French imagery on the walls, an enthusiastic waiter hovered over to offer me a drink, for which I opted for a Cappuccino and an Americano for when my absent friend arrived.
I had some spare time to sip my chocolate-sweetened Cappuccino before the afternoon tea portion began, so I made full use of the free Wi-Fi and signed up for PAUL’s loyalty card, which works a little bit like a payment card, i.e. 1 point = £1. Also, for every 9th stamp you get, you can enjoy a free food or drink item of your choice.
After about ten minutes, the manager came over and offered to move me to a more private and spacious area, tucked into the corner of the tearoom. The seating area was large enough to hang my coat on the side, allowing me more seating room. I people-watched for a while, whilst pondering whether PAUL was suitable for families, as my two boys would really appreciate the vast array of patisseries on display. As soon as I had the notion, a family of four entered with two young babies and sat beside me. At this point, my friend had also arrived and walked past the waitress, who was securing the two highchairs in an already seemingly tight space. I asked the waitress about what was on offer for kids and she advised that no separate kids’ menus were available and that, generally, they can choose anything from the ‘Aperitifi and Plateaux’ menu or the ‘Pre-Theatre and Plat Principaux’ menu.
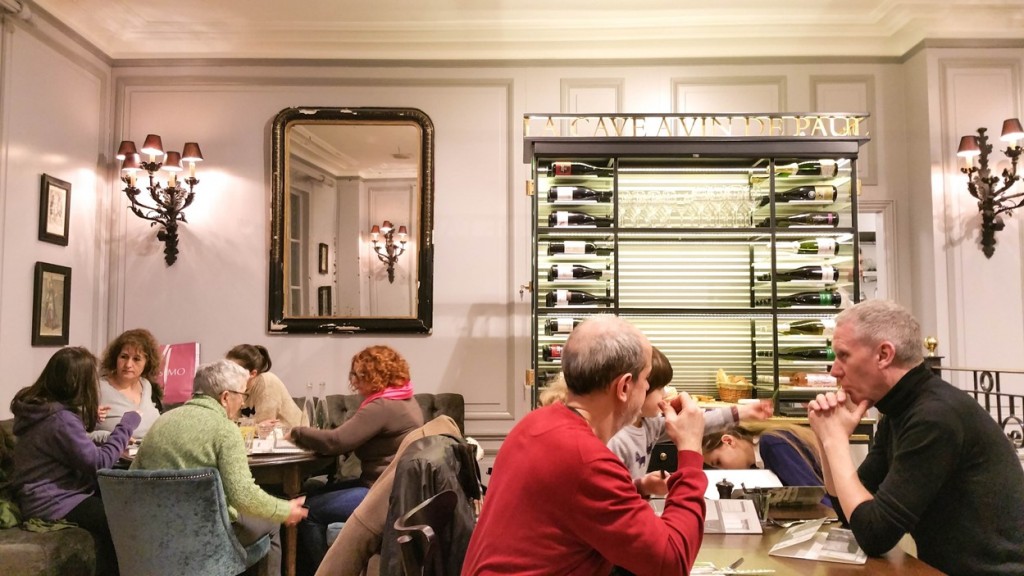
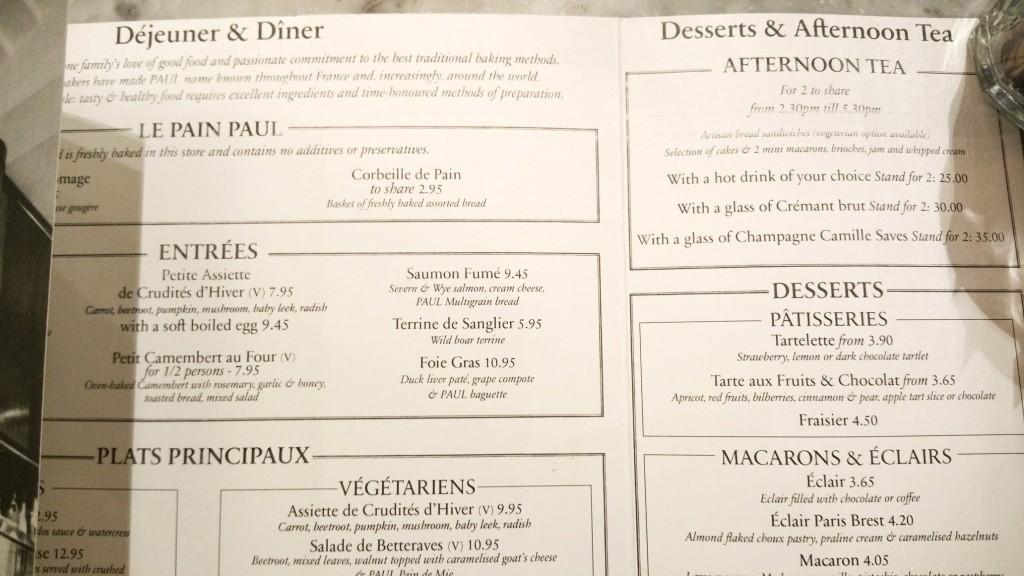
My friend and I chatted briefly about the ‘La cave a vin de PAUL’ wine and artisan bread displayed provocatively in front of us, perhaps, to entice us to a little aperitif with our Afternoon Tea. As both of us were recovering from a cold, we opted to stay on hot beverages and water. However, you can choose a glass of Crémant Brut or Champagne Camille Saves with your Afternoon tea, which will cost £30.00 for two or £35.00 for two, respectively.
To the left of us, past the second partitioned restaurant area, we could see the chef’s kitchen, which was decorated with a display of wooden chopping boards and garlic and herbs, layered to mimic the authenticity of Paul’s French cuisine. Again, champagne and white wine were peeping out of the partitioned windows that separated us from the restaurant area and the kitchen.
Waiters were rushing past us with a beautiful selection of pastries and the smell of what I believed were French salads with the classic Vinaigrette dressing. And, the aroma of meat was also wafting in the air as ‘Burger Boeufs’ were being presented in bright white plates and garnished with some greenery. Adults and children alike were enjoying the sweet dessert menu of glaces, sorbets and cakes.
The menu at a busy central London setting is quite reasonable, with prices ranging from £10.95 for simple ‘végétariens’ salads, to £14.95 for the ‘burger trois fromages’. The extra 150g beef steak to complement the burger boeuf was a small £3.50 on top of the £12.95, which totalled to £16.45. And you’re getting the full shebang in this menu, with a total of 350g beef steak burger, which is 28 days dry and aged from the queen’s butcher, Donald Russell, and garnished with baby gem lettuce, tomato and gherkins. Not bad for a royal burger meal!
On to the Afternoon Tea
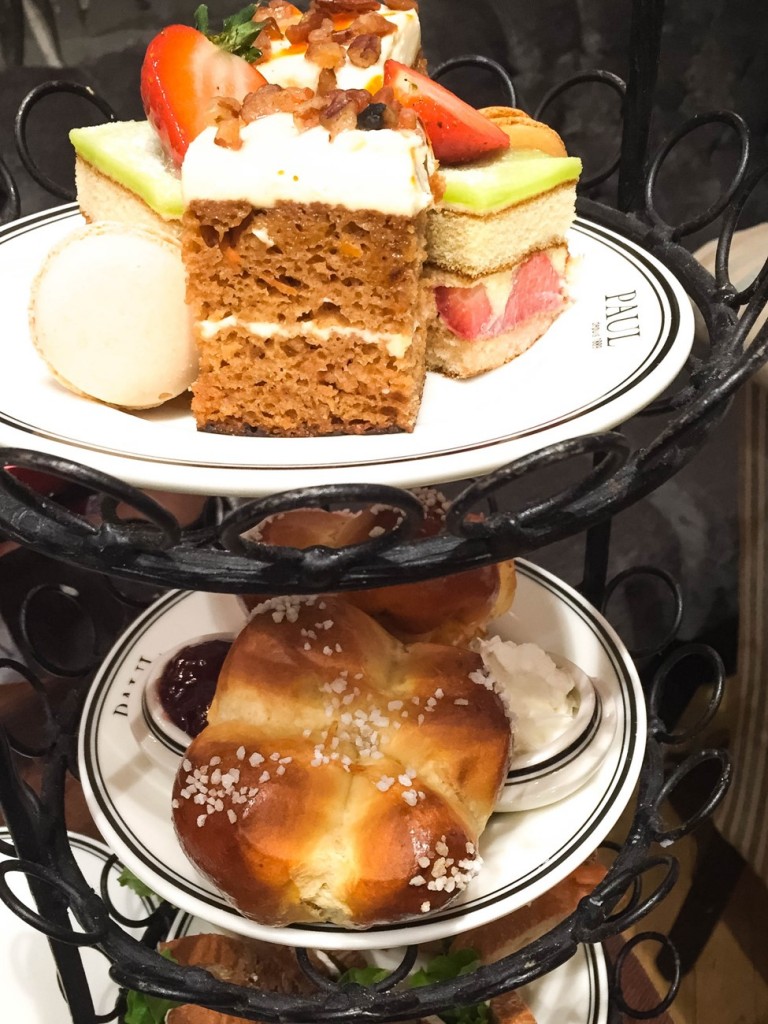
Both my friend and I were pleasantly surprised at the amount of food offered when the Afternoon Tea had arrived. We were served with the following:
2 x Grilled chicken, tomato, mustard mayonnaise and lettuce on white bread
2 x Brie and lettuce with butter on white bread
2 x Smoked salmon and cream cheese with lettuce on white bread
2 x Brioche drizzled with sugar rocks and served with clotted cream and strawberry jam
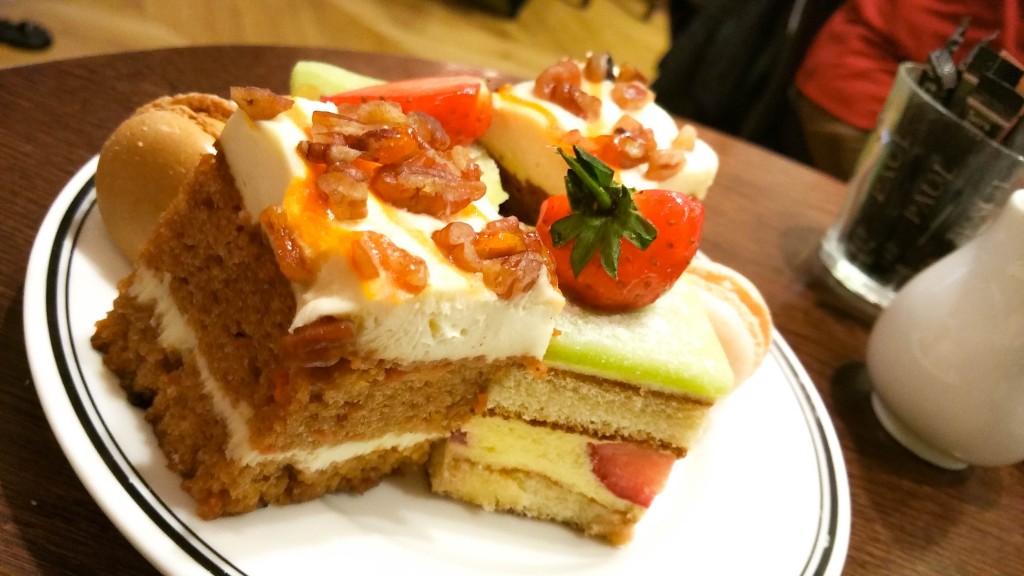
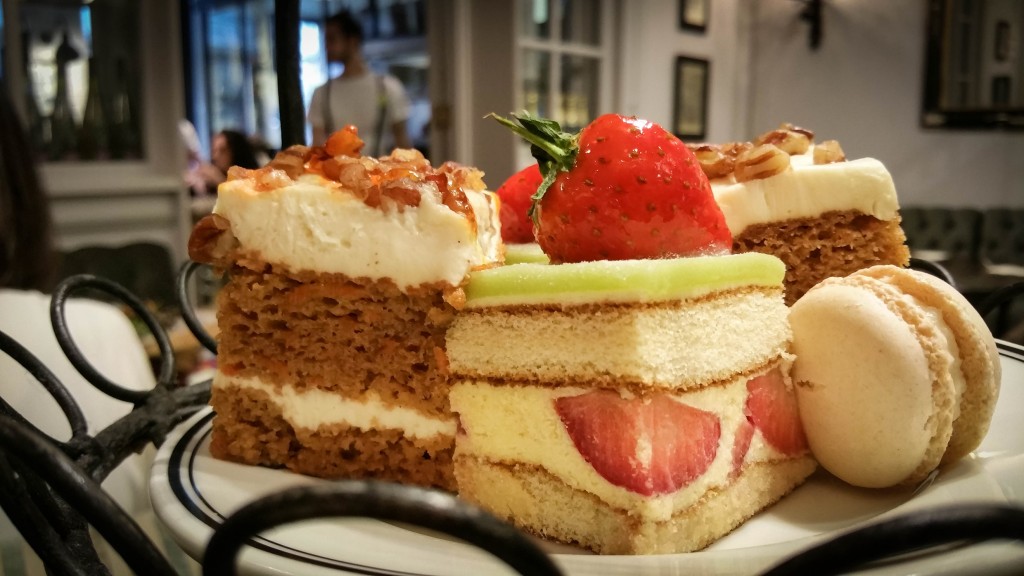
2 x Carrot cakes with walnut and cream cheese filling
2 x Strawberry and custard cream cakes with pistachio marzipan
1 x Coconut macaroon
1 x Caramel macaroon
Alongside our Afternoon Tea, we also ordered a large bottle of Evian water to help wash down the highly sweet treats.
At £25.00 for two, PAUL’s Afternoon Tea was fresh, flavoursome and not too overly sweet as some other Afternoon Teas I have experienced in the past. The sandwiches tasted fresh and light – my favourite was the chicken and mustard mayo, sandwiched in fresh spongy bread. The brioches were just lightly sweetened with sugar rocks on top and the clotted cream was a little on the thin side, but the rich strawberry jam made up for the taste. We finished off our highly decadent Afternoon Tea with a macaroon each. I opted for the caramel flavour and my friend enjoyed the coconut alternative, which she said was very sweet and tasty. The carrot cake zinged with the flavour of carrots but, at that point, we were nicely stuffed and could only stomach extra water to finish.
The staff were helpful, friendly and present, checking sporadically as to whether we needed any top-ups and not rushing us at all when 5.30pm came around. The manager was conversational and communicative, even though the café had been heaving for the entire 3 hours.
Perhaps, the Covent Garden branch could benefit with a larger space for their Afternoon Teas, as it seems to be doing so well with customers, and our waiter, although, understandably rushed off his feet, should pay extra care to how he picks up our drinks. My friend commented twice on the way the waiter handled her jar of hot water. He had picked the jar up, rather un-hygienically, by the spout. Having said that, we had a great time and enjoyed a full afternoon of glorious tea, which, I believe, is massively value for money and the perfect way to get away from the hustle and bustle of daily parenting duties – without breaking the bank!
Where’s your favourite place to go for Afternoon Tea? Leave us a comment with your experiences too.
Spending time on Sunday with the new look Sunday Times Magazine
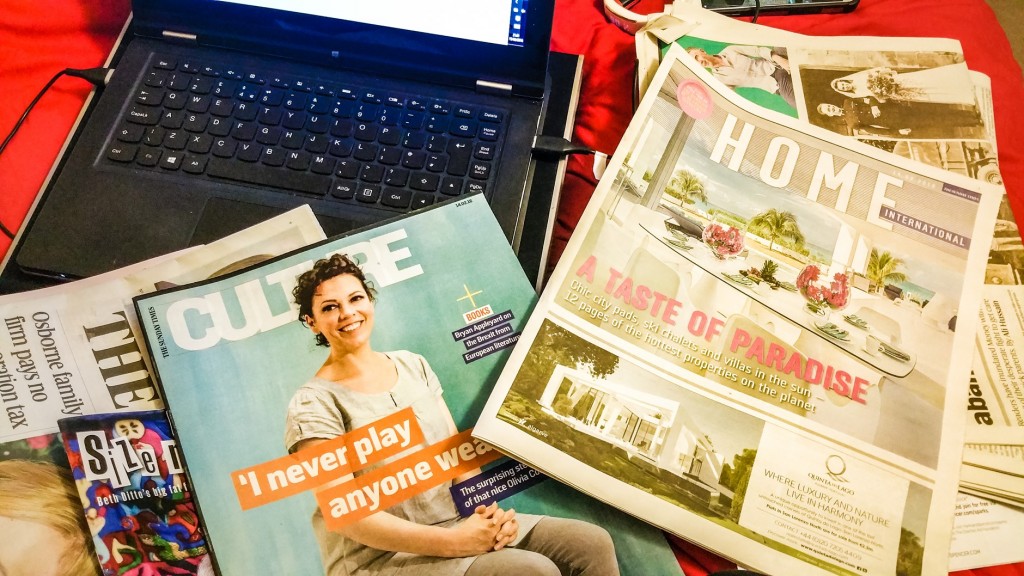
Normally, my Sunday mornings consist of being reluctantly dragged out of bed by the kids to make breakfast post-haste, whilst I skim through my emails and sip my very strong cup of coffee. I rarely get time to do much else. But, on a particularly unusual day, Hubby had risen earlier with the boys and walked into town to buy me the latest Sunday Times. For, I was bestowed upon me the opportunity to read a real life paper version of the infamous broadsheet, something I hadn’t done in simply years! You see, I’m a 30-something ex-City worker with two super active boys and a laptop and smartphone (built like a mini tablet) that travel almost everywhere with me. Digitally, I’m on it. On paper? Not so much…
As I unwrapped and unfolded all the separate sections of The Sunday Times, two familiar thoughts sprang to mind:
(1) How many trees did they cut down to make just one Sunday Times?
(2) Who gets time to read all these sections in one day!?
During my uni and law school days, I remember buying The Times on Tuesday for the law section, but, only ever skim reading it. The rest I used to glance at and then store away, with the promise to myself that I would read them in bed before going to sleep. That time never came…
Magazines, however, I have time for. I see the world in full colour, so, naturally, I flock towards the magazine section of the weekend papers anyway.
Style Magazine
I’ve always enjoyed reading the Style magazine because there’s something in it for everyone. I only really started taking care of my skin in my 30s, so in those four short years, I’ve been actively researching the best products available for an age-defying skincare experience. I can’t even begin to tell you the sheer amount of reviews of organic makeup I have looked at. Of course, it matters what you put in your insides too, so that it’s easier to treat your outside. But, the article about picking the right cleanser for your skin type touched upon the very basics of your skincare routine. I realized I was using the wrong cleanser completely, hence why I was breaking out all the time. I took a picture for my sisters and friends to have a good read.
I was also astounded to hear that the founder of the profoundly famous London designer empire, Browns, is turning 90 this Sunday. I felt a surge of pride as Mrs B shows women everywhere that we can, indeed, own a super successful business and have it all in a man’s world!
I’m still trying to figure out why Beth Ditto’s lesbian sexuality is typified, especially as the article is primarily about her new plus size clothing line. But, I suppose this is why my dad says that The Times can be, well, behind the times…
Culture Magazine
I must admit that I rarely read the Culture magazine and, generally, head to the back for the crossword. I spend so much time reading the Style magazine that I rarely end up getting time to read the Culture, which is double in size. But, of course, I made sure I tackled the crossword first (with a little help from my digital right hand (my mini tablet))
The New Sunday Times Magazine
It has been 54 years since The Times launched Britain’s first full-colour Sunday newspaper magazine. The Sunday Times Magazine has a new, edgy look (assisted by a new line-up of writers for today’s world) and could quite happily sit on the magazine aisle in any supermarket. I, initially, skim through the pages and I am instantly drawn to the article about Taylor Swift, which, I have to admit, is quite negative on the whole.
“Taylor Swift: Nightmare dressed like a daydream?”
Yikes! Eve Barlow gives us quite a detailed insight into pop’s most powerful woman and her new coterie of glamour girls, i.e. the #squad. Eve manages to squeeze into ‘Tay’s’ special circles only to be ousted quite quickly in response to a relatively sour review on one of her public performances. From there Eve rants about how the star’s entourage are fiercely protective over Tay and ensure that the shrewd and business savvy 24 year old keeps up her squeaky clean posterior, no matter the cost. Quite telling and, what I think, is a very honest insight into Taylor Swift’s world, which I thoroughly enjoyed reading. I also glance over the food section and spot a nice recipe on pulled pork burgers. I make a mental note to buy the ingredients to make these for my boys…
There’s a great article showing some beautiful wedding dresses from ASOS for only £200! My best friend is getting married in Tuscany this August, so I took some photos of the wedding dresses to send to her. Knowing her, I’m pretty sure she will spend a little more than £200 on her own wedding dress, but it’s nice to see that The Times caters for those who may not have as hefty budgets.
My thoughts on The Sunday Times and the new Sunday Times Magazine are:
The feel of reading an actual broadsheet paper is second to none, it reminds me of a simpler time. But, to save our flailing environment the digital version is just as readable, providing a niftier and more user friendly experience. I’ve never been good at looking like I know how to handle broadsheets anyway…
Reading the paper version made me realise how much I miss filling out crosswords.
The Sunday Times Magazine is a great addition to The Sunday Times. The content seems more current and on point. I really enjoyed reading the main article on Taylor Swift and Jamie Oliver’s Southend Chowder recipe (he’s a legend!)
It’s nice to see a selection of different recipes for the reader to choose from. They will be ripped out to make up part of my huge recipe scrapbook.
It’s also nice to see a Tech section in the magazine for us digital nerds. Perhaps, expand to more than just one A4 page, though, especially considering that all-things-tech is where the world is heading towards.
There is a rather harrowing article in the Sunday Times about the record amount of stillbirths recorded in various NHS hospitals in the UK. It is a great article because it raises awareness to parents about the general care and wellbeing they should experience during labour and birth. It would be very beneficial to have a parenting section in the The Sunday Times magazine, perhaps an Agony Aunt section or some facts about pregnancy and parenting – I’m available!
And, we could all benefit from more crossword/Sudoku/wordsearch puzzles in a full colour magazine, no? Just me then?
Never miss a new post!
Don’t forget to tailor your preferences, so you just get the posts you want to read!
Last summer, we holidayed in beautiful North Cyprus, and it was searing hot (around 35 – 40 degrees Celsius every day). I am normally in my element in that kind of heat, but finding closed toe shoes/sandals that can withstand circa 40-degree heat, even in the evening (maybe it’ll go down to 33/34), tends to be quite difficult. I’m not a fan of open toe shoes, partly because I don’t like showing my toes, but mainly because I find open toed shoes/sandals really uncomfortable. So, Brantano offered Motherhood Diaries the chance to review the Clarks Ballerina Shoes in a Size 5 over the summer holidays to see whether they were comfortable and easy to wear in extreme heat.
As well as a wide selection of bags and accessories, Brantano specialises in quality shoes for all the family, offering a great range of ladies shoes and men’s shoes. You can also find a wide selection of men’s boots and ladies boots and their kids’ collection includes school shoes, trainers, boots and more. Brantano stock footwear from favourite brands including Clarks shoes, Skechers and Hush Puppies.
“These classic black leather ballerina shoes are perfect for school, college or work and come in a wider fit. With its classic design and simple bow detailing, these shoes look great while CushionSoft cushioning sits underfoot to ensure ultimate comfort.”
Product Information
Wide Fit Carousel Ride
Product Number
2614418411
Gender
Ladies
Brand
Clarks
Upper Material
Leather
Colour
Black
Fit
Wide
My feet are very wide, especially in the summer when they expand due to the heat. So, I always look for a ‘wide fit’ style when purchasing any kind of shoe. These Clarks summer shoes definitely accommodated my swollen feet during and I found them simple to walk in. They’re very soft and durable.
I attended a very fancy outdoor nightclub in Kireniya and my feet were so swollen from the heat that I wasn’t able to wear my heels anymore. I, therefore, opted to wear the Clarks ballerinas and I was so grateful for thinking ahead. We ended up standing the entire night and we didn’t get home until 5 am, so we were all exhausted. My sisters’ feet were bruised and beaten from standing and dancing, yet I had absolutely no trouble with mine because I was wearing one of the most comfortable shoes I’d ever owned in my closet.
However, one day of walking on rubble and stone at the historical North Cypriot Salamis Ruins and the black leather had started to chip off and give way. Totally my fault as these Clarks wide fit shoes is not made for hiking on stone. But, I managed to get some good wear out of them and would definitely look to buy something similar to these again. I felt like I was literally wearing nothing on my feet – super comfortable and so soft.
What did I like most about the Clarks Wide Fit Carousel Ride Ballerina Shoes?
When wearing these Clarks slip on shoes, it feels like you’re walking in bare feet. The wide fit accompanied my swollen feet and I didn’t take these shoes off for almost the entire two weeks in North Cyprus, bar the last day when I battered them during my walk through Salamis Ruins.
What to watch out for:
The price is steep at £35.00, but as long as you don’t go hiking with these Clarks ballerina shoes then you’ll get good long wear out of them.
Rating:
5 out of 5 – No marks off for being destroyed by the hike through Salamis Ruins as that was totally my fault. So, full marks to these super comfortable and awesomely versatile shoes. I wore them on the plane ride to North Cyprus, during the day while I was out and about in the blistering heat, dancing and standing at a fancy nightclub, and hiking through stone and rubble (d’oh). Apart from the hike, they lasted the entire time. I would definitely take them with me to North Cyprus again!
Spanish Paella – Schwartz Flavour Shot Recipe
A blend of herbs, spices and seasonings infused in sunflower oil, for making rustic Spanish-style paella.
Cakes by Robin – Thomas Celebration Cake Product Review
It was great timing that I found myself with an opportunity to review a celebration cake made by Cakes by Robin, as my son’s 4th birthday was coming up and I didn’t have a birthday cake in mind yet. I’d never heard of Cakes by Robin before, but they were very easy going and happy to cater to my birthday cake requirements.
Cakes by Robin’s Website and Social Networking Sites:
After spending her early career in the fast-paced banking world in central London, Robin Green took advantage of the financial downturn to concentrate on her passion for cake design.
Specialising in bespoke wedding cake design, Robin works with you to create the perfect wedding cake for your big day. Robin also makes celebration cakes for any and every type of event, from birthday cakes to christening cakes, anniversary cakes, cupcakes and cookies. Just let Robin know what you want. Robin can also make special gluten free cakes and gluten free wedding cakes for those with food intolerances.
How much do Cakes by Robin birthday cakes generally cost?
The price depends on the design you choose. All elements are made by hand and priced according to complexity. A cake to feed 15 – 20 portions with a sugar model of a character on top will be in the region of £100.
Where can you buy Cakes by Robin’s Cakes?
Check out the website, www.cakesbyrobin.co.uk for details on how to order the bespoke celebration cakes.
With the generous offer from Cakes by Robin of a custom-made cake of Aron’s choice for his birthday party, I put on my detective hat and found out that Aron really wanted a Thomas and Friends cake. So, Cakes by Robin agreed to make a Thomas cake. I was impressed with the email manner, with Robin fully accommodating to my delivery time and place needs. And, as promised, Aron’s Thomas cake arrived the night before the party, packed in a super strong box which protected the cake very well. The box also conveniently stated Cake by Robin’s contact and social media details, so we had the chance to Tweet our cake picture and/or ‘like’ Cakes by Robin on Facebook.
My initial reaction when I opened the box was of complete surprise. I was instantly impressed with the level of care and skill taken to make this cake, as Thomas was very life-like and detailed.
Thomas sat happily on top of a green base cake and green board, in between two hedges. The board was personalised with the text, “Happy 4th Birthday Aron”. The detail was amazing!
Aron squealed with glee the moment he saw the impressive Thomas cake and was eager to cut it open and have a slice.
So, in we go!
And, yes, quite pleasantly surprised by the fact that it’s a chocolate cake! J
What did I like most about Cakes by Robin’s Thomas Cake?
The level of detail which went into the decoration, was commendable. Cakes by Robin seemed to have firmly researched details of Thomas’ body work, from buffer to boiler. I would assume most 4 year olds wouldn’t pay too much attention to the details surrounding the steam engine and settle for confirmation of who it was by colour, train number and facial recognition. Clearly, as demonstrated in the images, my son immediately recognised who his cake represented. As an adult I could not help myself being drawn to the extra details which mirrored the character’s shape and design of Thomas so well. I was also particularly impressed with the embellishments, i.e. the tracks, trees and bushes.
And, let’s not forget how well the cake actually tasted, we expected a chocolate cake and, as ordered, received a rich and flavoursome delight of spongy chocolate sensation.
What to watch out for:
There is not much to mention here. The only slight criticism would be that the symmetry of the face, in particular, the alignment of the eyes, were slightly off. Thomas’ overall face, although recognisable, could perhaps have received a slightly rounder nose, something which distinguishes him facially from the other characters of Thomas and Friends. Perhaps, some of the above could have been caused during transit or as a result of temperature changes.
Other points to note:
We suspected true cake making mastery upon inspection of Cakes by Robin’s impressively stylish website, which showcases many cakes created with high level of detail and imagination. We were very pleased that these skills were put to practice for our son’s birthday and would definitely recommend Cakes by Robin for your next celebration.
Rating:
5 out of 5 – Top cake decorating with a delicious chocolaty taste. Very pleased with the outcome.
Breville blend active recipes – 5 cold busting smoothies
Motherhood Diaries was gifted an awesome Breville Blend-Active Family Pack* to make some awesome blending recipes using the Breville blend active personal blender. It is a nifty little blender that comes with a Breville Innovative Smoothie Blenders recipe book and a selection of bottles you can blend your ingredients in and drink on the go. There are various different sizes of the Breville blend active personal blender smoothie maker to suit people, large and small, and the travel-sized blender is small enough to take with you anywhere.
Each of the blender bottles is made from Eastman Tritan copolyester which is a durable BPA-free, odour, taste and stain-resistant material used for manufacturing sports bottles. It is able to withstand extreme use and repeated dishwasher cleaning.
It’s super easy to use the Breville smoothie maker and create some awesome Breville juice recipes (you can find these Breville recipes below). Just connect the blade to any one of the supplied bottles, fill it with your smoothie ingredients and click it to blend. There is a ‘blend’ button on the front of the blender that, when pressed quickly, the blades burst through the ingredients, and when held down, the blade spins continuously.
I was very impressed that the blender also crushes ice, which meant I could add ice to my smoothies without the fear of them blunting the blades. I love how travel-sized the blender is and the bottles are literally fresh and ready to take away with you wherever you go.
How much does the Breville blend-active family pack cost and where can you buy it?
Pretty much the whole of my family, including my mum, dad and siblings!
Recipes:
So, armed with lots of fruit and veg and, of course, the Breville Blend-Active*, I set about creating five very healthy smoothies, which are perfect for on-the-go and the cold winter months!
5-a-day smoothie
Ingredients
200ml Milk
2 ice cubes
Handful of baby spinach
Large handful of raspberries
1 Apple
1 Kiwi
2 squirts of honey
1 peach
The result
A rich and full-flavoured smoothie, with a berry punch. It certainly felt like I was drinking a meal!
Citrus Smoothie
Ingredients
Juice of half a lemon
Squirt of honey
½ orange
1 kiwi
2 ice cubes
½ Avocado
The result
My favourite of the bunch. I love how the zingy lemon shines through, complemented beautifully by the sweetness of the kiwi and honey.
Cold Busting Smoothie
Ingredients
1 Kiwi
1 Apple
1 Carrot
1 Celery
½ orange
1 tsp grated ginger
½ lemon juice
Couple squirts of honey
Handful of pineapple
Handful of Cherries
Handful of spinach
Handful of blueberries
The result
It’s a great bug-busting, cold-fighting energy drink, which really spruced me up. Perfect after a gruelling workout or as a breakfast smoothie. Be careful not to overdo it on the ginger.
For a bit of protein, you can either make this a chia seed smoothie and add chia seeds or add a dollop of peanut butter which lowers the GI index of the smoothie too.
Green Smoothie
Ingredients
1 Apple
1 Celery Stick
3 inches of cucumber
8 ice cubes
Handful spinach
½ Avocado
Honey to taste
The result
A nice, light and sweet smoothie that feels healthy and is easy on the stomach.
Fruit Milkshake
Ingredients
1 Banana
200ml Natural Yoghurt
20 Blueberries
10 Blackberries
10 Raspberries
½ Mango
The result
Very fresh and sweet. Bananas are just the perfect sweet little alternative to sugar. Make this a smoothie bowl and add some extra nuts and seeds too for that protein and fibre boost as well.
Free Infographic!
I have created an infographic of the smoothie recipes for you to print out and stick to your fridge or pin to your Pinterest board, so you are filled with nutritious goodness every day of the week. Enjoy!
What’s not to like? Let me list the benefits out for you:
You get one travel-sized and very nifty blender with a blade sharp enough to crush ice.
You can collect and fit tons of food ingredients into the 600ml bottle (just check out my ‘Cold Busting Smoothie’ ingredient list and the other Breville juicer recipes!) and the smoothie comes out (excuse the pun) smooth. Add some water for a more liquid-textured smoothie.
What to watch out for:
My belly was full of fruit and veg after the juicer smoothie recipes creation afternoon and I ended up becoming quite bloated and uncomfortable. Perhaps, one smoothie (or two) a day is enough when you can fit as many ingredients into these bottles as I could. Get into the habit of cooking some of the fruits like apple so it’s easier on the stomach.
Other points to note:
The Blend-Active Family Pack* comes with four bottles and can be used to crush ice too. (I know, I’ve already said that).
Also, the instruction manual lists some awesome smoothie recipes of its own (pages 9 to 10), so it’s worth checking those out, along with the tips on how to create great smoothies generally.
How much nutritional value from fruits and vegetables is lost by juicing?
Other questions asked were:
When you blend all your fruits with a blender and drink it what effect does this have on the glycaemic index and why should we care?
Is it better to blend a smoothie than eat whole fruits and vegetables?
Are smoothies and juices just as good as eating whole fruits and vegetables?
Does it really matter if you blend your vegetables?
Does blending vegetables and fruit destroys the fibre. It seems there is no definite and certain reliable answer to this question online?
Will blending vegetables ruin its nutritional value?
If I steam my vegetables and then blend them and drink it will I be getting more nutrition?
Is eating vegetables in the form of a smoothie the same as eating them whole? Do you get the same nutritional value?
Do smoothie blenders kill the nutrients of fruits and vegetables?
Does blending fruit add calories?
Does blending reduce the nutritional content of fruits and vegetables?
Does the caloric value of food change if the food is liquefied or blended?
Does blending increase sugar content of fruit?
Do we absorb nutrients from fruits and vegetables?
When juicing fruits and vegetables some of the healthy fibre is lost. That’s because juicers separate the juice from the pulp and skins (which contain the fibre). As a result, juices can spike your blood sugar in a more dramatic way than if you ate the actual fruit or vegetable. What’s more, you lose some polyphenols and antioxidants which are found in citrus fruits and skins of fruits and vegetables.
When you choose to juice, don’t delay. Drink it straight away so as not to lose the enzyme and antioxidant activity which depreciates over time.
To minimise fibre loss, just add pulp back into the juice.
Does lettuce contain more nutritional value than most fruits and vegetables per kg?
Lettuce is low in fibre but high in minerals like calcium, phosphorous, magnesium and potassium. Romaine lettuce is also high in vitamins C and K, folate and beta carotene which converts into vitamin A in the body. It’s also low in sodium so it’s very nutritional.
Is it true that modern-day industrially grown fruits and vegetables have almost no vitamins, minerals and antioxidants and are therefore unhealthy?
It depends on where the fruit and veg are grown. A landmark 2004 University of Texas study compared what’s now on store shelves to vegetables from 1950 and they saw a decline of 5% to 40% in certain nutrients among 43 types of produce.
Much of what we eat today has lower nutrient levels than when our parents and grandparents were growing up. This is down to mass industrialisation of fruit and veg and much less time devoted to farmland where farmers nurture the crop and provide it with the best love and care through soil, fertiliser and seeds.
Where you can, try to buy organic and stay away from mass-produced fruit and veg which could contain lots of hidden chemicals. Some fruits and veg are waxed so always opt for the unwaxed variety.
How do you use the Breville active blender?
Other questions asked were:
How does Breville blend active work?
See above for how to work the Breville blend active blender.
Is Breville blend active dishwasher safe?
Other questions asked were:
How to clean Breville blend active?
You can add the Breville blender and juicer’s blades, bottles and food processor bowl to the dishwasher for safe cleaning.
Can Breville blend active blend ice?
Other questions asked were:
Does Breville blend active crush ice?
Your Breville active blender can crush ice, but to protect the blades from possible damage, always add a small amount of liquid to the ice before processing.
What bottles are compatible with the Breville blend active?
The Breville blend active bottle 600ml (spare bottle with green lid) fits any Breville blend active blender. Just use the items in the same way you would use the bottles that the Breville Blend Active provides you with.
How long do Breville blenders last?
A Breville personal blender comes with at least a one-year limited warranty if you need to return damaged items, but with proper care your Breville bottle blender should last for at least a decade.
Rating:
5 out of 5 – The Breville blend active blender and blend active bottle are cheap, high quality and super fun to use. I would definitely recommend the Breville Blend-Active Family Pack* to families who want to live healthier and create fun Breville all in one recipes. The pack also comes with more than enough bottles for the whole family to enjoy, so you can count on this blender to be useful for everyone.
Plus the Breville active blend is a quality small kitchen appliance so it doesn’t take up much space at all, even with the Breville blender bottle. We have been using the Breville blender and juicer to make some delicious Breville Blend Active Milkshake recipes and Breville Blend Active protein recipes too, as well as Breville Blender recipes for weight loss. I also want to invest in a juicer cookbook so watch this space..
To find more Breville Juice recipes download the Breville juicer recipe book which is included within the manual here: Breville Blend Active Recipe Book PDF.
*As an Amazon Associate I earn from qualifying purchases
How to straighten, wave and curl your hair in a rush with Straighteners
UPDATE at 29/03/2017 – Nava Hair Straighteners seemed to have disappeared off the face of UK, so where I make references to the Nava Hair Straightener below, please note that you may not be able to purchase this product anymore. My next favourite straighteners are the GHD Platinum Stylers, which you can purchase from Amazon here:
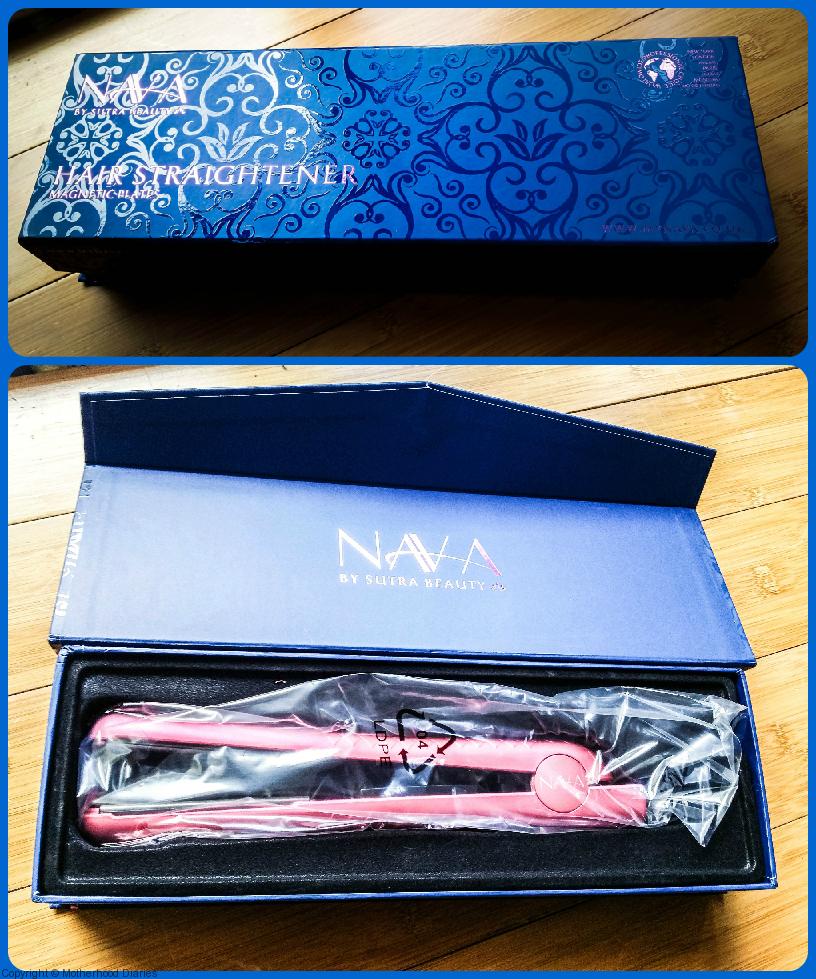
Being a regular ol’ ‘Curly Sue’, I welcomed the chance to review a pair of hair straighteners from a brand I’d never heard of before – Nava. My old straighteners had broken down quite a few months ago and I had a hair transformation just a couple of months after that, going from long curly hair to very short curly hair. So, I was given the chance to trial these new hair straighteners on relatively virgin hair.
I have very curly hair and, to make it worse, I’ve chopped it all off too. Sometimes, as a busy mum of 2 boys, I don’t have time to style my hair, so I just want to put it all up and hide it away. But, there’s no chance of that happening now because it’s so short…
Yep, that’s natural…
My original hair straighteners had broken down almost 6 months ago, so my newly chopped hair has been free from any heating tools for a while. As I’ve always been partial to GHDs because I believed they were the only brand that could straighten my curly hair, I was a bit sceptical of Nava at first. I didn’t know anything about the hair straighteners except that they were a pretty pink.
I was so eager to try them out, but the boys were in bed and it was late in the evening, so I couldn’t wash and blow dry my hair. Therefore, I decided to do something quite controversial – I was going to straighten my curly locks without washing and blow-drying them first (I had washed my hair earlier that day though).
Straightening in a rush
Haven’t got time to wash and dry your hair? No worries, follow my step-by-step instructions below for silky smooth hair in under 15 minutes. Make sure you haven’t got any other chemicals in your hair and you don’t get used to straightening without washing and drying first! These instructions are only for when you have less than 15 minutes to straighten your hair.
1. Spritz your hair with a heat protection spray
(a) This is a very important step because you need to protect the hair follicles from breaking apart.
(b) I used the classic TRESemmé Heat Defense Styling Spray, which I still believe is one of the best sprays for protecting your hair from the heat. And, don’t worry, you can use the spray on dry hair and straighten afterwards, it still protects the hair.
(c) Just spray liberally, about 6 – 8 inches away from the hair and use a brush to evenly coat the spray.
2. Divide hair into even sections
(d) Use your thumbs as a guide.
(e) Start at the top of your head and place your thumbs on your temples. Guide the thumbs up to the top of your head to where they meet in the middle. That’s your fringe section, which you can divide again in half and clip away if desired.
(f) Place your thumbs at the bottom of your ears. Follow behind your ears and up to where your thumbs meet in the middle, at the top. That’s your middle section. Divide that section in half and clip both parts in place.
(g) Place your thumbs at the top of your ears and follow the thumbs back (and parallel to the nape of your neck), to behind your head until they meet in the middle. That’s your lower middle section. Clip away.
(h) Leave the bottom free, as that’s the section you’re going to start with.
3. Brush all the knots out gently with a comb
(i) Use a comb to ensure the protection spray has coated your hair evenly, but also to ensure that all the knots have been brushed out. You don’t want to straighten knots because it’ll make them that much harder to brush out afterwards!
4. Grab your Straighteners – it’s time to get started!
(j) Start with the bottom free section. Take a section of hair 2 to 3 inches wide and brush again with the comb.
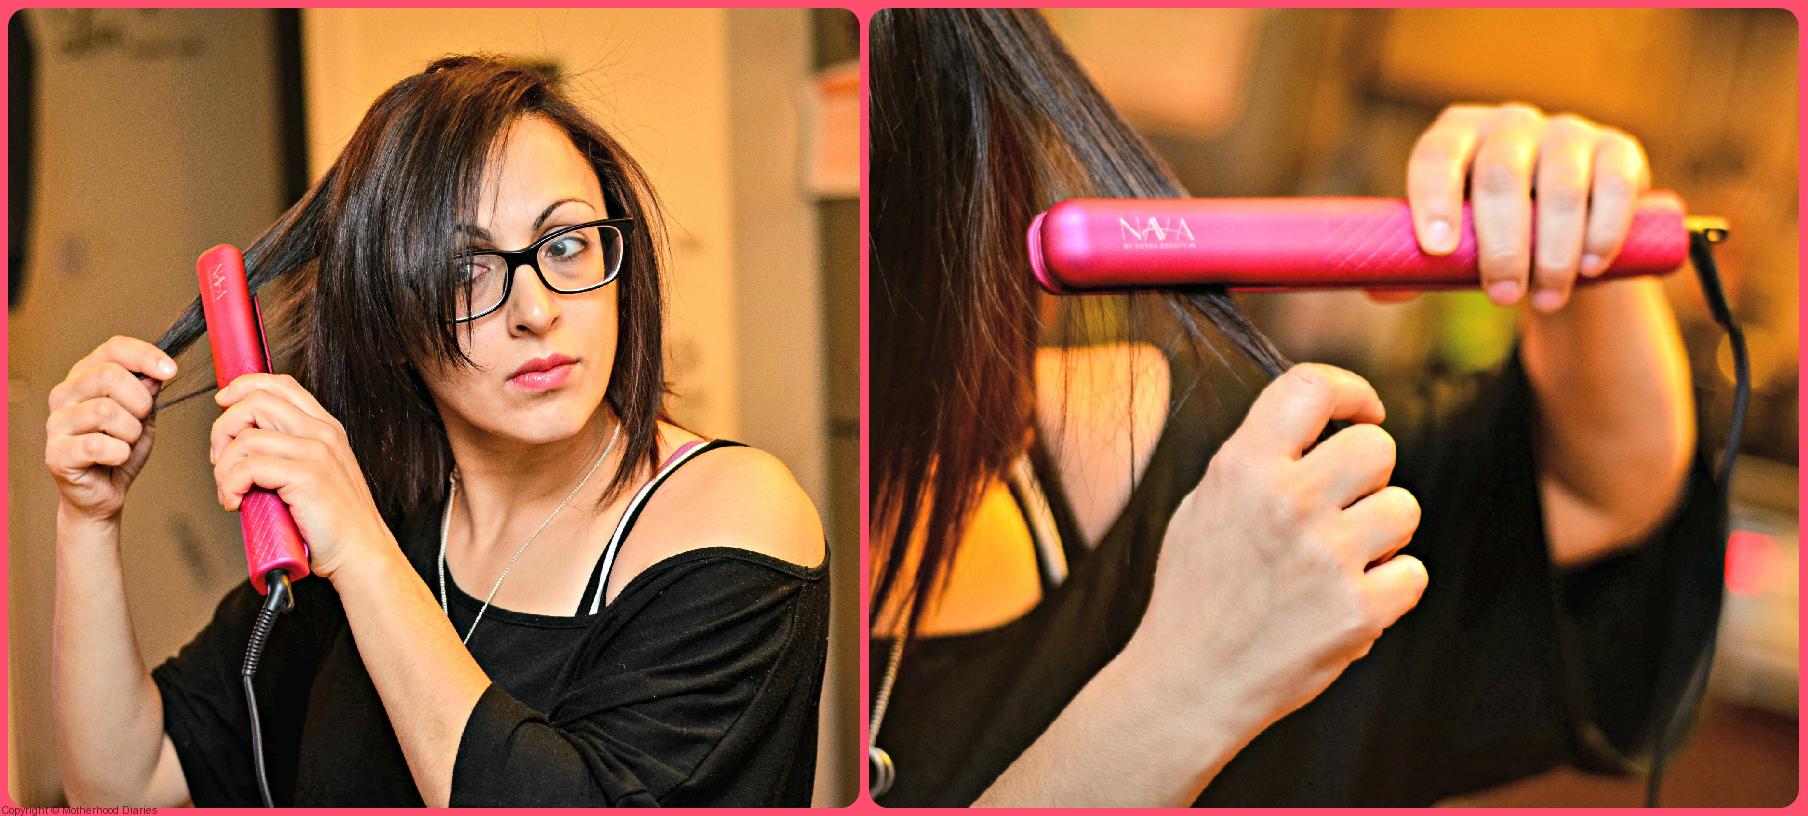
(k) As you comb the section down, hold the hair taut and glide the hair straightener down once at a normal pace. Try not to leave the iron on your hair for too long.
(l) Now, here comes the magical part! Immediately brush the straightened and heated hair with your comb again and hold taut for a few seconds until the hair cools down. Heated hair stays in the shape that it cools down in, so this part is important.
(m) If you have seriously curly hair, like mine, you may benefit from another glide down the section with the hair straightener. But, be sure to follow step (l) of brushing the heated section with the comb immediately afterwards and holding the section taut until your hair cools down.
(n) Repeat through all sections of the hair, keeping the sections at around 2 to 3 inches wide, so that the straightening iron glides through the whole of the hair in that section.
(o) Once you’re done, grab a mirror and check for any kinks, brushing through the hair with a comb at the same time. If you find any, follow the above steps (j) to (l).
(p) If you want a bit of volume, instead of brushing through the heated section with your comb, use a large roller and clip in place whilst you’re straightening another section. Then, you can remove the roller and roll the newly heated section of hair. This creates a lot of volume and bounce, but it’s too poofy for my very short hair. For shorter hair, use smaller rollers. (I only had large rollers to hand.)
(q) Use hairspray to hold the look.
As you can see from the above picture, my hair is very straight and super silky! I’m so impressed with the results and my hair feels a lot healthier and shinier than when I use my regular burning GHDs.
If you don’t have a brush or comb to hand because you’re in a rush, just use your fingers. I did!
Look how straight my hair is!
The Nava Hair Straightener doesn’t just straighten hair – oh no! It waves and curls hair too! But how? I’ll show you:
Nice wavy hair
Ok, so not many people like poker straight hair because they feel like there isn’t much shape to the whole look. So, with a little spin of the Straightener, you can create some loose waves that give the hairstyle a lovely bounce and great texture – and it’s so easy to do!
Create your sections as normal, using steps 2 (d) to 4 (j) (above) and, instead of gliding the hair straightener down, simply turn the straightener towards you in a half turn, so that the unstraightened hair is pointing towards you. Like this:
For great waves, always turn the straighteners away from you and not towards you. So, on the left-hand side of your head, turn the straightener half to the left, and vice versa on the right-hand side of your head.
Trick number 1: start halfway down the section of your hair, so the top is still straight, but the ends have a little bounce and wave to them.
Trick number 2: don’t wave your fringe. For a nice side-swept fringe, straighten the hair on the opposite side of where you want the fringe to be and then flick back to the opposite side.
Once you have created some lovely waves for your hair, go back and twist the waves loosely with your finger.
Spray with hairspray to lock the waves in.
The result is a lovely textured look, which replicates the look of salon hair!
#Looks like you’ve just stepped out of a salon!#
You want great curly hair, but not your normal frizzy curls!
Simple, simple, simple! Really!
You follow all the rules of when you wave your hair but turn the straightener all the way around until the hair is pointing back in the right direction – away from your head. So, you’re turning one whole spin. But, be careful not to hold the straightener too tight, otherwise you won’t be able to glide the iron down through the hair.
As you let go, let the curl fall and immediately twist with your fingers to lock the curl in.
Again, start from just above halfway down the section, so that the top of the hair is straighter – it gives the whole look a more groomed finish.
Finish with some hairspray and then brush the curls out lightly, either with your fingers or a wide-toothed comb. Or, you can just leave as is!
All the above works on longer hair too, of course. You can achieve longer-looking hair by investing in some (heatable) hair extensions and following the above steps for a straight, wavy or curly finished look.
If you want me to create a video on how to straighten, wave and curl your hair with the Straighteners, please leave a comment below this post. If I get enough interest, I’ll create a very extensive step-by-step process for you.
What did I like most about the Nava Hair Straighteners?
The Nava Hair Straightener heats up almost instantly and the temperature gauge allows you to control how hot you want the iron to be. The result is a very silky, smooth and straight hair – a far cry from my frizzy curls!
What to watch out for:
230C is hot, hot, hot! So, keep those fingers away when you’re waving or curling, you might just get burned.
Rating:
5 out of 5 – A sleek styling tool and a worthy contender to the GHDs. The Nava Hair Straightener has everything, from an aesthetically pleasing pink style to precision formula to protect hair from damage through heating.