The best portable laptop monitors for busy parents
As a parent entrepreneur, your work doesn’t stop when the kids come home from school. Between managing your business, helping with homework, and keeping the household running, the right tools can supercharge efficiency and productivity, which means you’ll get more done with the little time you have. I am a mum of four with multiple businesses, and my latest venture is taking up what spare time I have left. So when I’m either working at home, in the office, or in my second home office, I want to limit falling into the trap of buying laptop equipment that promises the world but delivers more frustration instead.
Today, I want to share what really works when it comes to portable laptop monitors for busy parents, and more importantly, what doesn’t, because when you’re juggling client calls during nap time or finishing proposals after bedtime, the last thing you need is unreliable tech that adds stress to your already packed day.
The reality of long work hours as a parent entrepreneur
Many parent entrepreneurs today work longer hours than they ever did in traditional employment. You start the day with coffee and school runs. As the hours pass, the tabs on the screen begin to pile up and you’ve had to respond to emails, get the mail, load the dishwasher, and attend a last-minute meeting. Notes crowd over research, and you’ve resorted to dividing the screen by four to reduce the amount of flipping between programs. You experience mind fog and attention slips away by mid-afternoon. You look at the clock, and it’s time for school pickup.
But what makes it even more challenging for us parents is that we don’t always have the luxury of working in a quiet office either. One minute you’re analysing quarterly reports, the next you’re mediating a sibling argument. Then, back to your laptop, only to find that you’ve lost track of which window had that important document.
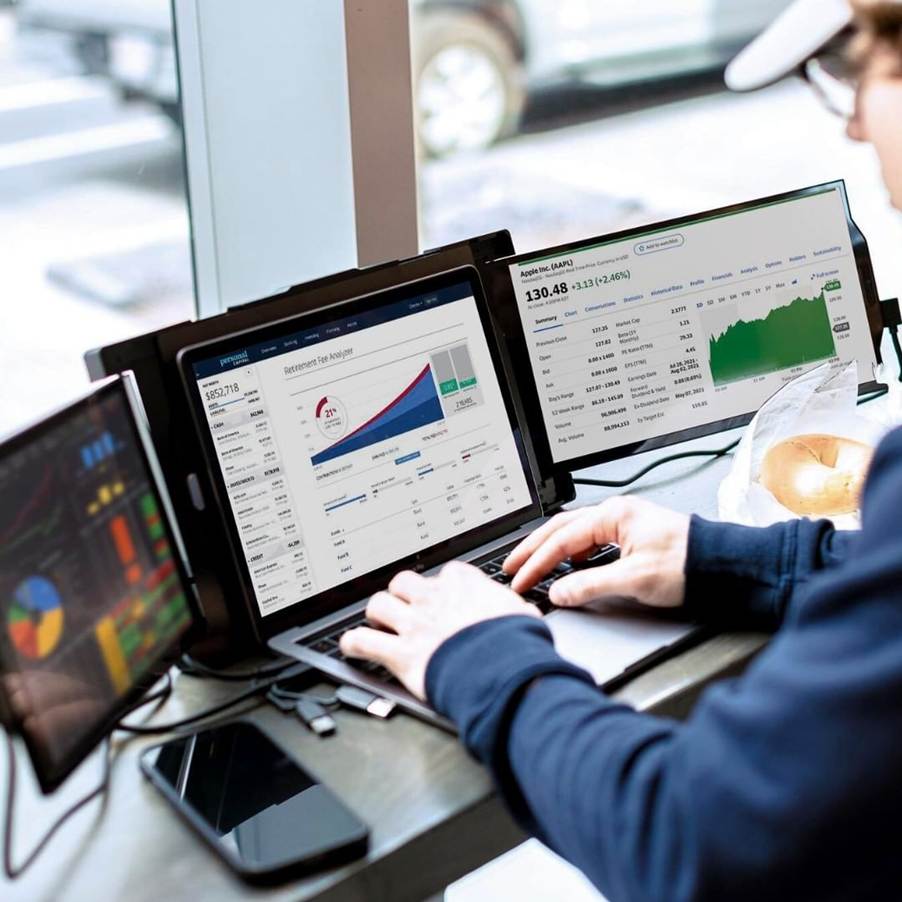
This is where laptop screen extenders come in! They may not do your laundry for you, but they will increase productivity by 42%. And the time you save simply by being efficient is priceless!
Laptop screen extenders can optimise your workspace and help you focus during your long work stretches, especially when those hours are constantly interrupted by family life. In this article, we will explore what to look for in laptop screen extenders, as well as what to avoid when shopping for one.
Time and focus are the currency for parent entrepreneurs
We have so little of it, and when we do have it, we have to use it wisely. So much easier said than done when you are consistently fatigued, both mentally and physically.
For parent entrepreneurs, focus isn’t just about productivity; it’s about making the most of the limited time we have. When you finally get those precious few hours while the kids are at school or asleep, every minute counts. You can’t afford to waste time shuffling between windows or losing track of important information.
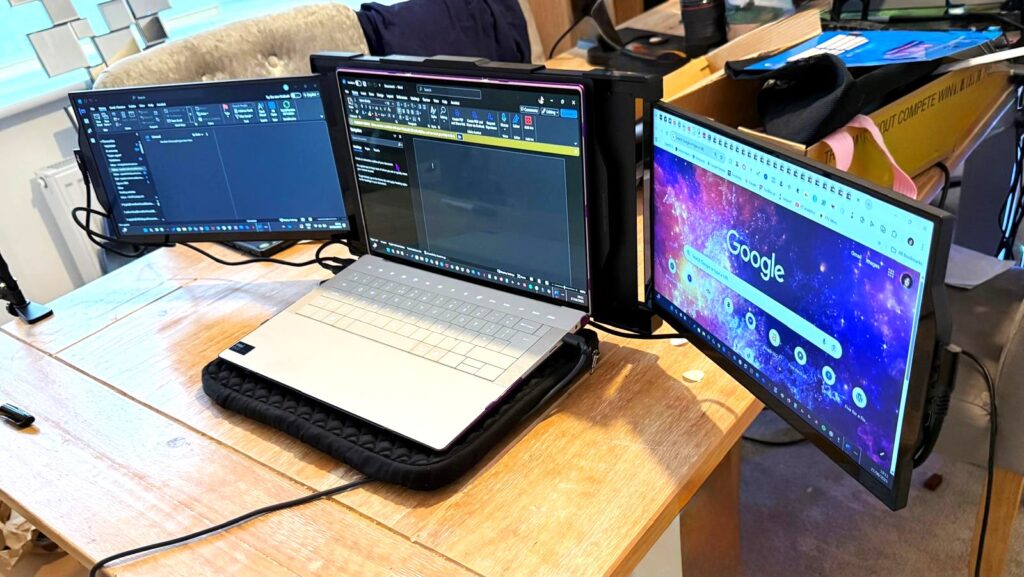
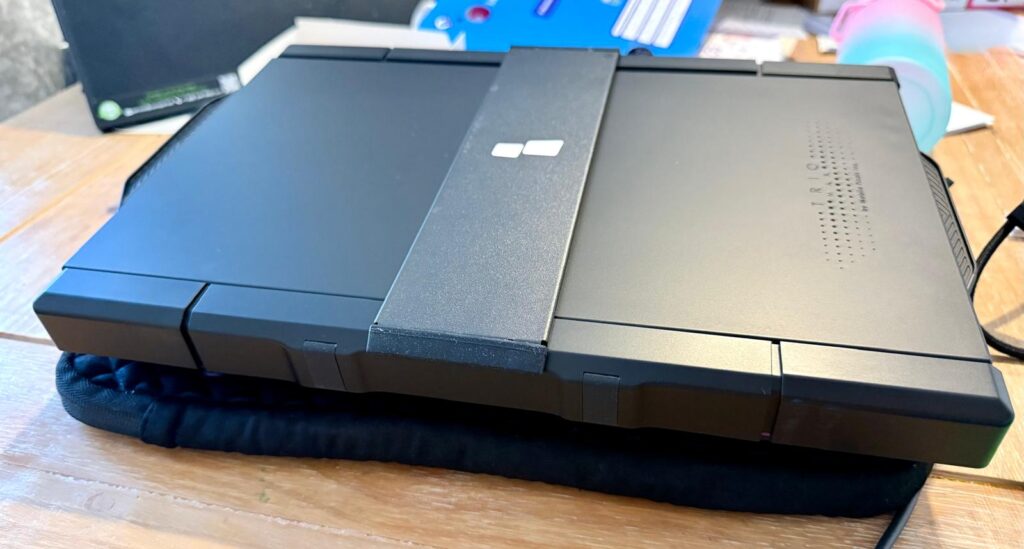
A product like the Mobile Pixels Trio laptop screen extender can save you from this chaos, but only if you choose the right one. Unfortunately, the market is flooded with poorly designed options that promise the world but deliver disappointment.
With a reliable extender, you get space for every task. So, you don’t need to keep shuffling the tabs. Imagine it this way:
One screen can hold the numbers for your quarterly budget
Another can display the client proposal you’re drafting
A third can carry the references and research materials
And with everything in sight, the brain can stay in flow without interruption. Undoubtedly, this flow is priceless for busy parents. It is the difference between “working ten hours and feeling crushed” or “working ten hours and still having clarity at the end”.
What issues to look out for with popular screen extenders
Before we dive into what works, let me share some feedback about a popular (and expensive) dual-screen extender that many parent entrepreneurs have wasted money on. This particular model costs around £400, a significant investment for any parent running a business.
The port placement disaster
One of the most frustrating issues with this expensive model is the poor port placement design. When you connect the cables, you end up blocking the control buttons. This means you literally cannot use the device’s functions without unplugging and reconnecting cables in an awkward, unnatural position.
Imagine you’re in the middle of an important client presentation, and you need to adjust your screen setup. Instead of a quick button press, you’re fumbling with cables while your client waits. As one reviewer noted:
“The ports, if you connect the cable, the HDMI cable, and the Type C cable in a certain way that are more natural to connect, you will block the buttons so people won’t be actually be able to press the buttons without unplugging the HDMI.”
The cable chaos problem
Another major issue that particularly affects parent entrepreneurs who need to work from different locations, like the kitchen table, bedroom, or living room, during kids’ activities is that some extenders require two separate cables: an HDMI cable and a Type-C cable.
This creates multiple problems:
Port shortage: You’re using up two valuable USB-C ports on your laptop, leaving no room for your charger or other essential devices
Portability nightmare: Carrying around two cables increases the chance of forgetting one
Setup complexity: Every time you set up, you need to connect two cables correctly
As the reviewer explained:
“They use up very important real estate space on your laptop because you’re now occupying two Type Cs. And if you’re connecting your charger with a normal work laptop, you run out of plugs.”
The weight and balance crisis
This is perhaps the most concerning issue for parent entrepreneurs, who often work on their laptops in various positions, i.e. on the bed while kids sleep nearby, at the kitchen counter while dinner cooks, or on the couch during family time.
The weight of this particular extender actually broke the laptop stands and put dangerous stress on the laptop hinges. As the reviewer discovered:
“It’s also very heavy that it’s actually broken the stands of my laptop… My dad said that it’s very bad on the hinges of the laptop as well.”
The magnetic attachment system makes the problem worse by lifting the entire laptop base, putting all the weight stress on the hinges rather than distributing it properly.
“The whole load from the base of your laptop is working on your hinges,” the reviewer explained.
The build quality disappointment
For £400, you’d expect premium build quality. Instead, this model uses cheap plastic that scratches easily and feels flimsy.
“The plastic is just going to break very easily. One of the screens has been scratched because of how they engineered the whole construction of it.”
The attachment mechanism is particularly problematic:
“It’s very flimsy to take in and out as well. That’s a big one. I really struggle to.”
More space brings calm and leads to better focus
Today, everyone talks about multitasking. However, the truth is that our brains can’t cope with it daily, especially when you’re already mentally juggling work tasks with family responsibilities. A reliable extender offers that space, as it allows the work to spread easily across the screen in an uninterrupted flow.
And, the point is not only about being faster. It is also about staying calm while working. With a clear space, your shoulders drop, your eyes stop darting back and forth, and the work feels steadier. You can also focus better, even when you are working late into the night after the kids are asleep.
What to look for in a reliable portable laptop monitor
Based on real user experiences and the needs of parent entrepreneurs, here’s what actually matters:
Single cable solution
Avoid any extender that requires multiple cables. Look for models that use a single USB-C cable for both power and video. This simplifies setup, reduces cable management, and preserves your laptop’s precious ports for other devices.
Lightweight design with proper support
The extender should be light enough not to stress your laptop hinges, but if it does add significant weight, it should include a proper stand or support system that doesn’t rely entirely on your laptop’s hinges.
Durable build quality
Skip the cheap plastic options. Look for aluminium construction or high-quality materials that can withstand daily use, travel, and the occasional accidental bump from curious little hands.
Intuitive button placement
Control buttons should be easily accessible regardless of how cables are connected. You shouldn’t need to contort your setup or unplug cables just to adjust brightness or settings.
Magnetic vs. clamp attachment
While magnetic attachment is convenient, it can create balance problems. Some of the most reliable options use adjustable clamps or stands that properly distribute weight.
Great for parents who can’t afford breaks
With a durable extender, you don’t lose momentum when your work time is fragmented. These extenders remain reliable even when used in short bursts throughout the day and far past the point when others would have given up for the day.
The hidden costs of choosing wrong
When you choose a poorly designed laptop screen extender, the real cost goes beyond the initial purchase price. Consider these hidden expenses:
Laptop repair costs
If the extender damages your laptop hinges or screen, you’re looking at expensive repairs. For many parent entrepreneurs, the laptop is the primary business tool – its failure means lost income.
Lost productivity time
Every minute spent wrestling with cables, adjusting awkward positioning, or dealing with technical issues is time stolen from either work or family. For a problematic device, you’re paying premium prices for premium frustration.
Replacement costs
When a poorly built extender breaks or becomes unusable, you’re back to shopping again. The reviewer of our expensive example concluded: “I’m very annoyed. And I would send it back.”
Creating your ideal work setup as a parent entrepreneur
The key to a successful portable monitor setup for parent entrepreneurs is thinking beyond just the screen itself. Consider your entire workflow:
Location flexibility
Your setup needs to work in multiple locations. The kitchen table for early morning work, the living room for evening catch-up, the bedroom for late-night client calls when kids are sleeping nearby.
Quick setup and teardown
When you need to clear the space for dinner or family time quickly, your setup should pack away easily without multiple cables and components.
Child-proofing considerations
Young children are naturally curious about screens and gadgets. Your setup should be stable enough that accidental bumps don’t cause expensive disasters.
Noise considerations
Some extenders have fans or make electrical sounds that can disturb sleeping children or interfere with client calls.
Laptop screen extender is a long-term companion
A reliable extender is an investment for parent entrepreneurs who plan for the long term. The best option lasts through many years of diverse use cases – from client presentations to late-night project work to mobile office setups during family vacations.
You will notice that their hinges don’t loosen, frames don’t crack, and they even carry the weight of daily work without complaint. This is the kind of endurance that matters in more than one way. Yes, it saves you money by avoiding the need for replacements. It also builds a relationship of trust. So, when a parent entrepreneur starts their work session – whether it’s a 6 AM pre-kid work block or an 11 PM catch-up session – they know their extender will perform as expected.
For parent entrepreneurs, this reliability is crucial. When you have limited time to work, equipment failures aren’t just inconvenient – they can derail entire projects and affect client relationships.
Alternative solutions worth considering
While screen extenders can be valuable, they’re not the only solution for parent entrepreneurs struggling with screen space:
External monitor setup
If you primarily work from a home office, a traditional external monitor might offer better value and reliability than a portable extender. Modern monitors are more affordable than ever, and they don’t put stress on your laptop.
When it’s time to upgrade your laptop, consider models with ultra-wide screens instead of adding an extender. This eliminates compatibility issues and cable management.
Virtual desktop solutions
Software solutions that help organise your workspace might address screen real estate issues without requiring additional hardware.
The parent entrepreneur’s decision framework
Before investing in any portable laptop monitor, ask yourself:
Where will I primarily use this? If it’s mainly at a desk, a traditional monitor might be better.
How often will I move it? More frequent movement means weight and setup complexity matter more.
What’s my backup plan? If the extender fails, how will it affect your work and deadlines?
Can my laptop handle it? Consider both the technical requirements and physical stress.
What’s the total cost of ownership? Include potential laptop damage, replacement costs, and productivity losses.
Final thoughts
Ultimately, you can see that a reliable laptop screen extender can change the way long workdays feel for parent entrepreneurs. They add more space for you to protect your focus during those precious, uninterrupted work hours. With the right screens, you get the comfort and organisation you need. Besides, they become your best partners for productivity when time is your most precious resource.
However, the market is filled with expensive options that promise more than they deliver. The example we discussed shows that a higher price doesn’t always mean better design or reliability. As parent entrepreneurs, we can’t afford to make expensive mistakes with our essential work tools.
Before making any purchase, research thoroughly, read real user reviews, and consider whether the solution actually solves your specific challenges.
The key is finding a balance between functionality, reliability, and cost that makes sense for your unique situation as a parent building a business. Sometimes the best solution isn’t the most expensive one – it’s the one that consistently works when you need it most.
You can also make the switch right away, but make it thoughtfully. Your future self, both as an entrepreneur and as a parent, will thank you for choosing tools that enhance rather than complicate your already complex life.
*Collaborative feature post and gifted product*
Top tips on how to be more productive with ADHD
I realised quite late in life that I could have ADHD, even though all the signs were there from as early as I could remember. During my childhood, I was told I’d either distract people or get distracted. The teachers couldn’t handle me. I had bundles of energy and I never slept, so my parents struggled with me, too. It was only when I channelled my energy into music and sport that I realised I needed extra tools to manage daily life.
As a fully-fledged adult, I procrastinate when I should finish a deadline, complete a household chore, or even when I read to the kids before bedtime. Tackling household clutter can feel overwhelming, but starting with practical steps can make a huge difference. For instance, if you’re managing a major decluttering project, you might consider looking into how to rent a home cleanout dumpster that allows you to efficiently clear large amounts of waste and regain control of your space. Procrastination has become the biggest bane of my life, so staying productive can be challenging, especially when I have several distractions around me.
It’s safe to say we all experience procrastination in varying degrees when trying to manage everything. The Internet and social media have made it that much easier to waste time rather than get things done. Now I am a busy mum of four with (undiagnosed) ADHD and, at the best of times, it can feel like juggling plates while walking on a tightrope.
Whether it’s managing the house, the kids, or even your own business, staying productive while ADHD symptoms demand your attention is tough. So, this article is mostly geared towards those, like me, who work from home and juggle parenting and work duties, often at the same time, but with the added nuance of ADHD. From breaking down tasks to using accountability partners, here are 60 top tips on how to be more productive with ADHD. Let’s get stuck in!
What is productivity?
To be productive, we need to know what productivity means. Businessdictionary.com defines productivity as:
“The measure of the efficiency of a person… in converting inputs into useful outputs. Productivity is computed by dividing the average output per period by the total costs incurred or resources (capital, energy, material, personnel) consumed in that period. Productive is a critical determinant of cost efficiency.”
So, in essence, productivity basically means how efficient you are at what you are producing and what you receive economically as a result, i.e.output per unit of input. So, the more productive you are, the more chances you have of increasing your value.
What about productivity at home? Being busy vs productive
In simpler terms, productivity means using your time and energy effectively to achieve your goals. So, if the tasks you are working on are low-value or at the expense of high-value tasks, then doing something doesn’t always mean you are productive. The primary aim of being productive is to know exactly what you should spend your time, energy and attention on to improve yourself and your family around you.
Why does being productive matter?
Consider what it would be like if you could achieve all the high-value tasks you needed to complete in a shorter period, so you have more time to spend with your family. Perhaps productivity will allow you to use your energy on the things that make you happier or even work on tasks that will help you improve your work and home life.
Having something productive to do at home means that you can manage your daily tasks effectively and still increase your health and wellbeing. And at work, being productive means that you can improve your way of living and earn more income to spend on the things that make you happier.
So let’s dig into the tips on how to be more productive. Even if you don’t have ADHD, these tips will work for you too:
Tip 1: Break down big tasks into small goals
We’ve all been there – staring at a massive to-do list and feeling completely overwhelmed. For me, that feeling of being paralysed by the size of a task used to be my biggest barrier to getting things done. What I’ve learned is that breaking down big tasks into smaller, manageable goals is a game-changer. If you’re staring at a mountain of laundry or an overwhelming work project, don’t think about the whole thing. Just tackle the first small step. Before you know it, those little steps will add up, and you’ll be making progress without feeling buried under the weight of it all.
Tip 2: Use a timer (Pomodoro Method)
Let me tell you, the Pomodoro technique is like a secret weapon for ADHD productivity. The idea is simple, but so effective. Set a timer for 25 minutes and focus on one task during that time. Once the timer goes off, take a 5-minute break to reset. I use that little break to grab a coffee, stretch, or just give my brain a breather. After the break, I jump back in for another 25-minute sprint. It’s amazing how much you can get done with this method. Plus, those little breaks are perfect for recharging without losing momentum.
Tip 3: Find your peak productivity hours
Are you more productive in the morning or late at night? For me, it depends on the day, but I’ve learned that knowing my peak hours makes all the difference. If I didn’t have to do the school runs, I could work into the early hours of the morning. But, now I have to be up at 6am, so I find the period just after drop is off my most productive time to check off the most challenging tasks.
The idea is to work with your natural energy levels instead of fighting against them. If you know you’re sharper in the morning, use that time to tackle your most important tasks. If you’re a night owl, save the big stuff for the evening. Understanding when you’re at your best can help you make the most of those bursts of energy.
Tip 4: Keep a task list
I live by my task list. Without it, I’d probably forget half of the things I need to do. Whether you use a simple to-do list or something more structured like a Productivity Planner, having your tasks written down is a lifesaver. Not only does it help you stay on top of things, but there’s also something incredibly satisfying about crossing off completed tasks. It reduces stress and keeps everything manageable.
Tip 5: Use a brain dump
Sometimes, my brain feels like it’s running a million miles a minute, especially when I have a lot on my plate. That’s where a brain dump comes in handy. I just grab a piece of paper or open a productivity app and jot down everything that’s swirling in my mind. Getting it all out helps me focus on what’s most important without constantly being distracted by random thoughts or worries. It’s one of the best ways to clear mental clutter and stay productive.
Tip 6: Use an accountability partner
If you struggle to stay on track, an accountability partner can work wonders. It could be a friend, a family member, or even a colleague. The idea is that someone checks in on your progress, keeping you accountable. Knowing that someone will ask how you’re doing can give you that extra push to stay motivated. I’ve found it especially helpful when I’m working on long-term projects or tasks that feel overwhelming.
Tip 7: Limit distractions
Let’s face it: distractions are everywhere, especially when you have kids at home. For me, the key is creating a work zone where I can limit distractions as much as possible. Whether it’s using noise-cancelling headphones or setting up a quiet workspace, reducing external interruptions helps me stay focused. It doesn’t eliminate the chaos completely, but it certainly makes things a bit easier.
Tip 8: Use ADHD-friendly tools
There are so many tools out there designed to help with productivity, and some of them are particularly helpful for ADHD brains. Apps like Trello and Todoist, as well as my trustee Microsoft Outlook and To-Do help me stay organised, while a Productivity Planner keeps me on track with habits and goals, as I like to write things down. You can also use a LiveChat conversational platform with ChatGPT at its core for almost human-like interaction. I can’t live without it now!
The important thing is to find tools that suit your style and stick with them. These tools are like scaffolding for your productivity—they provide the structure you need to stay on task.
Tip 9: Create routines but stay flexible
Routine is essential for productivity, especially with ADHD. But life happens, and sometimes sticking rigidly to a schedule just isn’t possible. That’s why it’s important to stay flexible. I try to keep a basic routine, but if something throws off my day, I don’t beat myself up about it. The key is to stick to the most important tasks and give yourself a little grace when things don’t go as planned.
Tip 10: Start with one task
When there’s too much to do, it’s easy to get stuck in indecision. My advice? Just pick one task and start. It doesn’t have to be the biggest or most important thing—just start with something small. The act of getting started builds momentum, and before you know it, you’re ticking things off your list. Action leads to motivation, so don’t wait for that burst of energy. Just begin.
Tip 11: Take short breaks
We’ve talked about the Pomodoro Technique, but short breaks can make all the difference, especially when your brain feels overloaded. I try to work in 25 to 30-minute bursts and then take a 5-minute break to move around, grab a snack, or just relax. But, the important takeaway here is breaks are needed as they’re a great way to recharge without losing focus. And those little breaks prevent burnout, helping you stay productive for longer stretches of time.
Tip 12: Keep things fun and interesting
Let’s be honest—boring tasks are the worst. But I’ve found that adding a bit of fun can make even the most mundane chores more bearable. I’ll often put on a playlist or listen to an audiobook while I’m cleaning or working. Music can really shift your mood and make repetitive tasks feel less like a chore.
Tip 13: Celebrate small wins
One of the best ways to keep yourself motivated is to celebrate the little victories along the way. Finished a task? Take a moment to acknowledge it! Whether it’s treating yourself to a cup of tea or taking a quick break, these small rewards help build momentum and keep you moving forward.
Tip 14: Try body doubling
Body doubling is a brilliant productivity hack for people with ADHD. Simply having someone else around, even if they’re working on something completely different, can help you stay focused. I’ve even found virtual body doubling helpful—just having someone on a video call while we both work keeps me on task.
Tip 15: Don’t wait for motivation
If you’re waiting for motivation to strike, you might be waiting a long time! The truth is, ADHD brains often struggle with finding motivation. But here’s the secret: action creates motivation, as we mentioned before. Don’t wait for the spark—just start. Once you’re in motion, the motivation will usually follow.
Tip 16: Avoid multitasking
Multitasking is tempting, especially when you have a lot on your plate. But I’ve found that it rarely works, especially with ADHD. It’s better to focus on one task at a time and see it through to completion. You’ll be more efficient and less stressed when you’re not trying to juggle multiple things at once.
Tip 17: Use visual cues
I’m a huge fan of sticky notes and other visual reminders. If you’re the type of person who forgets what you were doing just two minutes ago, like me, having visible cues can be a lifesaver. Whether it’s a note on your desk or a reminder on your phone, keeping important tasks front and centre can help you stay focused.
Tip 18: Find an ADHD coach or expert
Sometimes, you need a little extra help. An ADHD coach or expert can provide personalised strategies that fit your unique challenges. They can help you find what works for your specific situation and even help you develop a plan for your business or guide you through any rough patches. It’s worth considering if you’re struggling to manage on your own.
Tip 19: Be kind to yourself
Productivity will vary day by day, especially when you’re managing ADHD. Some days, everything flows smoothly, and you feel like a superhero. Other days, it’s a struggle just to get out of bed. And that’s okay. Be kind to yourself and recognise that not every day will be perfect. Give yourself the same grace you’d offer a friend.
Tip 20: Plan your day the night before
One of the best habits I’ve developed is planning my day the night before. Before I go to bed, I write out my top tasks for the next day. This way, I wake up knowing exactly what I need to focus on. It takes the guesswork out of the morning and helps me hit the ground running.
Tip 21: Get some sleep
Sleep is key to being productive at home during the day and being at your very best work performance. Set a bedtime and wake time every day, even during the weekends, and stick to them so your body clock automatically shifts to these times.
To have an effective good night’s sleep, try to sleep in complete darkness. I use an eye mask which helps me sleep in pitch black because the slightest bit of light will wake me up. If you can, invest in blackout blinds, as they help to block out any light coming from the window. Avoid drinking alcohol and caffeine before bed, as they will keep you up and decrease your productivity the next day.
Tip 22: Fit in regular exercise
Exercise is literally my number one therapy! It helps to keep the heart pumping and will keep your mind and body happy and relaxed. I work out from home 30 minutes a day, and this works for me as I also work from home. But if you need extra motivation, perhaps classes are a good way to keep you motivated.
Exercising outside when the weather is nice is a great way to take your mind off your daily tasks and get in some much-needed fresh air, which will help to clear the cobwebs in your head. Studies have shown that if you step outside at the very start of your day, your productivity increases by up to 70%! When and where I can, I will take myself for a walk.
Diet is also just as important as exercise. Make sure you’re eating well and getting your 7-a-day. Try to avoid sugary food and drinks as they spike your sugar levels and will cause an energy crash, which is not good for productivity.
Tip 23: Practice mindfulness and meditation
Mindfulness and meditation are all about keeping your mind in the present moment, and not wandering off when you need it to focus on your work. It’s a great way to train your brain muscles and help you be more productive in your daily tasks.
This is a slow process, so take your time and keep going – you will reap the rewards later. Headspace is a great way to practice meditation, and I have written more about mindfulness and meditation to reduce anxiety, which you can find here.
Tip 24: Set up a home command centre
Set up a home office that limits distraction and makes your office space the hub of productivity. For more information on how to set up your home office, check out Forbes’ article here.
Tip 25: Embrace procrastination and use it as a tool
As I’ve mentioned before, I am a huge procrastinator and spend a lot of my time wasting time! So, as mentioned above, I incorporated a technique which works for me, and that is to work on my tasks in 30-minute bursts and then allow myself 5 – 10 minutes to procrastinate.
You will not beat procrastination, the temptation will always be there. So use your time effectively to get all your procrastinating done and then focus your time and energy on getting your projects done in periods which you can manage. Try the 30-minute burst and see if that works for you.
I wear a fitness tracker, so I set 30 minutes on my timer, and my wrist will buzz when I have finished those 30 minutes. Then I get off my seat, and I take a walk around, scroll on my phone, eat some food or schedule in my exercise.
Take your mind off work for those short few minutes, so you are ready to set another 30-minute timer and tackle your tasks.
Also, if you have deadlines and you set them a few weeks in advance, but you sit on that deadline until the last minute, then change your deadline to a shorter period in advance. If I have a deadline coming in a few days, then I make sure I get it sorted in those few days. If I had 3 weeks, I wouldn’t do anything until the last minute!
Tip 26: Use a productivity journal to reach your goals
Start recording your habits and tasks so you know what you’re working on every day. You can set goals, manage your time, and plan your tasks, so you can see what you need to do every day.
At the start of each month, specify what you will work on each month. Then within each week, set goals that will contribute to that monthly goal, and each day work on the goals that will contribute to your weekly goals.
I found since using a productivity planner that I am so much more productive with my work and house duties because I know what my good and bad habits are and I know what I need to do every day, week and month.
Tip 27: Work out what your goals are and create habits to achieve those goals
What is it you would like to achieve? Are you trying to lose weight? Do you want to clean less and spend more time working on your business? Do you want to spend more time with your family? Be clear with what you want to achieve and note the point at which you want to get to, so you can create habits to achieve your goal.
For example, if you want to lose weight, set times to get to the gym or fit in your workout. If you want to spend more time with your family, then schedule a few hours in the day to purely spend time with the family – make sure you do nothing else in that time.
If you want to clean less and spend more time working on your business, then use my ‘short work-burst’ method and work on your business for 30 minutes and spend 10 minutes cleaning up a certain area of the house. You can use The Organised Mum’s Method where she talks about cleaning an area in your house for just 30 minutes a day, and this works just as well. I use a method similar to this, otherwise I would just end up cleaning all day and spending little time on work.
Use a habit tracker to track the habits you have identified. Each time you have fulfilled a habit, tick it off. Include your bad habits too like I did and cross-check them off when you have successfully not fallen into those bad habits that day.
If you’re stuck for ideas on how to be productive, here are some productive things to do when you are bored at home:
Tip 28: Improve yourself
As mentioned above, knowing your bad habits are just as important as creating good ones. Know where you need to work on and spend time improving yourself.
Tip 29: Try something new
Stepping outside your comfort zone is the only way you’ll grow. I try to do that regularly by learning a new skill or trying my hand at something new. I took a leap of faith and started publishing on Amazon and I’m so glad I did! I’ve learned a new skill and I feel like I’ve accomplished something huge.
Tip 30: Invest in your future
The best investment you can make is on yourself. So carve out some time to learn a new skill. Take some home learning courses and work towards building your portfolio, which will eventually help you to build on your income too.
Tip 31: Have fun
We’ve touched on this before, but give yourself a break now and again to wind down and forget about tasks and to-dos. Having fun is actually a very productive past-time because it clears the stress and it helps you step away from a task and have a birdseye view of the problem if you’re not thinking about it all the time. Plus, it’s healthy. Balance is key to being productive so have some downtime too. Go out with friends, go to the cinema or go shopping. Whatever it takes to get in those feel good hormones.
Tip 32: Better your health
I’ve noticed that when I eat junk, I am less productive because I feel lazy and I don’t have the energy to get up and get things done. Exercise has given my brain a natural energy boost, but so has fuelling my body with good food. Improving your health improves your productivity, so put health at the very top of your to-do list.
Tip 33: Get organised
I run a tight ship – I have to because I have four kids, triple school runs and a business from which I work at home. So household tasks, work day tasks and work time itself all have their own pockets in which they can’t overlap or be allowed to fall by the wayside. Project management and organisation is the only way I survive the multitude of tasks but it also keeps me ticking. So make sure you get organised, but be prepared to wing it if certain things prop up you haven’t accounted for. It’s also important to think on your feet too.
Tip 34: Hone your talent
Do you have a particular skill that you could potentially monetise? Then work on honing that talent and becoming an authority in that field. Knowledge is power, especially if it’s your ADHD superpower and you can teach your potential customers something that will help better their own lives.
Tip 35: Visit the library
If I get writer’s block or lose my mojo because I’ve had a particularly challenging day, then I put my work down and I head to the library. While I’m there I browse the shelves until I find a particular book that reaches out to me. I sit down for a few minutes and I read for a bit. The act of sitting down and tucking into a good book makes me forget about my day and once I’ve put the book down, I’m ready to tackle my tasks again.
Tip 36: Make a playlist
On Spotify I have a number of playlists that help me get into the mood for whatever I’m doing. I have a playlist all about bettering yourself and a playlist for winning in business. I also have a playlist of workout music to get me into the groove for working out. Playlists are effective at picking you up when you need an extra boost to get started.
Tip 37: Learn from mistakes
Mistakes aren’t failures, they’re perfect opportunities to learn and do better at succeeding. But if you repeat your mistakes, you learn nothing. Always take your mistakes as experiences and learn from them so you don’t repeat. Remember, without mistakes you won’t know the path to success, so keep trying, even if you fail.
Tip 38: Create an evening routine
We have touched on this before, but one thing I do to make sure I’m prepared for the next day is to set out clothes for the kids’ school, pack any lunches and basically do anything that doesn’t impinge on the morning routine. Then I get ready for bed by washing my face, applying my skincare and finishing any tasks that can’t spill onto the next day. Only then do I go to bed knowing I’ve done what I need to do.
Tip 39: Create a morning routine too
First thing I do when I wake up is review my 5 main productive tasks of the day in priority order. My to-do list also has other home tasks like making sure to fit exercise in and other child-related activities that are important. I consult my to-do list every hour on the hour because it keeps me on task and I make sure I’m not deviating from what I need to do that day. Then I forget the rest for the next day. As long as I’ve completed my five tasks for the day (and even if I don’t) that’s all i’m focussing on, and nothing more.
Tip 40: Go camping
There is nothing like leaving the materialistic stuff behind and getting back to nature to make you feel you can accomplish anything. Making a fire out of wood or frying an egg on a makeshift tinfoil pan can provide you with the animalistic tools to go out and get what you want. It also helps you shift your focus on what really matters, something we often forget to do when we’re knee deep in our to-dos.
Tip 41: Watch tutorials
Learn new skills in webinars if you want productive downtime because tutorials can help you become better in the business of what you’re doing. Perhaps you want to learn to become a better chef so you watch tutorials on how to hold a knife. Or you want to write a book so you watch a step by step process on how to write and publish a book. These are all skills you’re learning so make sure your downtime is filled with lots of productive watching.
Tip 42: Start a bullet journal
A bullet journal is much like a productivity planner in that it helps you set out the goals you want to achieve in the year ahead. First you lay out your index of plans you want to achieve and then you dissect them into monthly, weekly and daily goals. Define your purpose, review your goals and keep it simple and achievable.
Tip 43: Again set some goals
If you have some free time, set some goals, this time on things you’d like to achieve as a person. It could be a bucket list of things you want to do that’s not related to work.
Tip 44: Test out new time management strategies
Sometimes what you’re doing isn’t working, so it’s important to keep testing until you hit the magic formula. Keep testing new time management strategies to see what works for you. This also includes the time in the day you’re at your most productive and whether you prefer to work in longer stints than 30 minutes a day. Whatever works for you will be different to the next person, so try to focus on what you’re doing rather than what other people are doing.
Tip 45: Create a list of travel destinations
You may wonder why creating a travel list is a productive thing to do, but it helps you set goals for where you’d like to travel and allows you to work for them. Plus it’s something fun to look forward to!
Tip 46: Start planning your days
It’s really important to know what your daily schedule looks like in advance. So plan what you’re going to do in advance so you can focus on the tasks that offer the biggest reward and leave the less urgent, less important things for later.
Tip 47: Share your knowledge
It’s always nice to pay it forward and the act of sharing your knowledge with people will make you an authority in your field, which is great for business!
Tip 48: Build a blanket fort
You may think that building a blanket fort sounds like a waste of time but it’s actually a pretty effective way to shut the outside world out and focus on you in the here and now. Either build a blanket fort on your own and use it as a form of me time or build with friends and family and use it as a bonding exercise. It is a great way to forget about the mountain of tasks you have waiting for you and just enjoy yourself.
Tip 49: Make a new dish
I’ve mentioned before that change is good for the soul and making a new dish is a great way to build confidence in your culinary skills. Make a new dish, add it to your recipe arsenal and use the accomplishment to boost your productivity at work
Tip 50: Become a better decision maker
The famous saying, ‘indecision is the number one reason for failure’ could never ring more true because it halts productivity and stops you from getting things done. Become a better decision maker and the best way to start doing this is by making a decision and sticking to it. Go with your gut and decide – your decision is final.
Tip 51: Go for a swim
Swimming is such a fantastic sport to melt your troubles away. I find that a vigorous front crawl that gets the heart pumping makes me feel alive and strong, so much so that I want to run back to my desk and bash work out. Use the swim to feel strong mentally and physically and then bring that force back to your productivity.
Tip 52: Go airplane mode
Sometimes going offline means you can focus on the tasks ahead of you because you’re not messing about on the internet or scrolling through social media. It has taken me a long time to force myself to work on my tasks for the dedicated 30 minutes without caving and clicking on a notification that comes up. So I disabled notifications and went airplane mode. Now I don’t get distractions anymore to entice me to stop working.
Tip 53: Go for a hike
Another productive sport is hiking because it’s get you out into the fresh air which boosts productivity and it gets your heart pumping which boosts your mental health. Hiking helps you forget about your insular world for a moment and enjoy nature and the bigger picture. A good hike should leave you feeling refreshed and ready to tackle your tasks when you get home.
Tip 54: Envision your ideal body
One of my biggest goals is to get back to my pre-pregnancy athletic fit weight, but I have been lazy and often resorted to junk food because I haven’t got a goal or I haven’t envisioned how I want to look. I started looking through old photos of me and now I can envision my ideal body which helps me to push through the workout when I haven’t got the mental energy to start. Envisioning your goal helps you map out the steps to success, so that’s what I always do when I’m feeling like i don’t want to exercise. It helps so much.
Tip 55: Clear out your clutter
If you’re constantly asking yourself, ‘How can I be more productive in life?’ Perhaps your mental and visual load is a bit overwhelming and you need to declutter and compartmentalise your to-dos. Start by organising your space around you or venting to someone if you have anxiety. And don’t take on other people’s worries, you have enough to deal with!
Tip 56: Clean out your junk drawer
If you have junk everywhere, then you will not be very productive at home. Cleaning junk from your space is one of the most vital tips on how to be more productive.
Tip 57: Organise the spices
Another strange one to add to the productivity to do list but the act of organising your spices helps you organise your mind and it boosts you to organise other parts of your life too. If you do’t have spices, then organise your clothes or your books. Try it and see for yourself.
Tip 58: Prep your meals for the week
One of my favourite tips to be productive is to prep your tasks in advance, and one of them is definitely meal prepping. It helps me not to waste time on figuring out what to cook every day. I now subscribe to Hellofresh which means I don’t need to waste time figuring out what to cook or go to the shops and waste time figuring out what to buy. I just pick out the recipe card and the exact ingredients and I cook!
Tip 59: Make backups of everything
I now back all my work to a cloud which means no more hard drives and no more figuring out where everything is. Backups help you access your work easier and if something goes wrong, it doesn’t matter, because you have a copy in the cloud.
Tip 60: Know your why!
The infamous Simon Sinek penned this, but knowing your why means knowing why you do what you do. What is your biggest reason for what you are doing right now? Maybe you want a forever home or you want a bigger family. Figure out what it is and work backwards. It’s easier to forge a path ahead of you than fumble in the dark and get nowhere.
Best productivity tips for working from home from parents
I asked multitasking parents what their top tips are on productive things to do moving forward:
I feel more productive if I put my phone down… I get so easily sucked into irrelevant things on social media that I lose track of what I’m doing and feel like I have to start again. That goes for both work and at home. Once I sit down and just have 5 minutes, I don’t want to get up again.
I have been an early bird for as long as I can remember. Before Ted arrived, it wasn’t unusual for me to set my alarm at an ungodly hour – 5 am, sometimes earlier – when I had a specific task to turn around. I don’t have that luxury now… I sometimes have no choice but to work at night, but I always give myself time the next day to review what I’ve produced – because I can’t trust my morning person brain to make anything of quality after 5pm. You might be completely the opposite, so work with your strengths.
I am definitely more productive if I stop working for regular breaks. I either do some housework, walk the dog, go for a run or swim or simply play the piano or read a book for 5 minutes. I’m much more able to properly focus on what I should be doing afterwards.
I am more productive if I chunk similar activities together so I’ll set time aside specifically for social media, schedule writing for a different time etc.
I’m more productive when I actually get dressed and out of my pyjamas. I ‘pretend’ I’m actually leaving the house and prepare in the mornings that way. Well, most days anyway!
I think a really great way to be productive is to have your to -do list written out and on your clear and clean desk the night before. It means you start the day with absolute clarity of purpose.
I recommend a to-do list. Either online using something like Trello or just on paper. It helps to write down everything you need to do and then tick off as you go.
Working from home can be distracting when you have a mountain of washing or other household tasks. I often take myself off to a nice cafe with free WiFi so I’m then totally focused on work. A good coffee and slice of cake is a good reward.
I make a list the night before my day off so I don’t procrastinate/waste time in the morning deciding what to do. I feel that way I get up knowing exactly what I’ve got to get done!
Don’t go for the false economy of not buying some of the productivity tools out there. The money you save not doing so is far outweighed by the increase in time you have if you use them. Tools like Tailwind, Buffer, Missing Letter are a godsend for me. And – have a set time to check your emails. Absolutely DON’T have it open all day distracting you.
Try and set certain tasks up the night before, such as the washing machine or dishwasher! By the time you then come downstairs in the morning, some of your tasks will already be done – resulting in more time for other tasks or a 5 minute sit down.
Starting something is probably the hardest thing to do, so the only way to start is, well, to start! Use the above tips to be productive at home, grab yourself a productivity pack like I did and start recording your habits.
Plan your goals and write out your monthly, weekly, and daily goals. Set yourself a target of 30 days to complete your habit and focus on tracking that habit every single day. After a few weeks, you will form your habit naturally as you have focussed on fulfilling that habit. I always feel amazing when I’ve had a particularly productive day.
You just need to find the motivation to start and what better time than to start implementing the ways to be productive now!
FAQs on how to be more productive with ADHD
How to be productive at home with ADHD?
Staying productive with ADHD at home requires creating routines, breaking down big tasks into small goals, and using productivity planners to stay on track.
How can ADHD people be more productive?
By using techniques like the Pomodoro method, prioritising important tasks, and limiting distractions, you can improve your productivity.
Can ADHD contribute to increased productivity and creativity in individuals who do not take medication for the condition?
Yes, many people with ADHD find they have bursts of creativity and productivity, especially during periods of hyperfocus. Medication isn’t always necessary for everyone.
How do I create a routine that sticks for someone with ADHD?
Start by setting small, achievable goals and using tools like task lists, timers, and accountability partners to build habits over time.
What strategies can a person with ADHD use to stay organised and remember tasks in their daily life?
Using visual cues like sticky notes, brain dumps, and productivity apps like Trello or Todoist can help you stay organised and on top of tasks.
How can people with ADHD use digital tools to create a more productive daily routine?
Apps like Trello and Notion offer visual task management, while timers like the Pomodoro technique help break the day into manageable chunks, making it easier to stay focused.
Are adults with ADHD more intelligent or creative?
Some research suggests that people with ADHD can be more creative and thrive in environments that reward innovative thinking. Hyperfocus can lead to impressive productivity in certain areas.
What are some ADHD productivity hacks for staying on task?
Using the Pomodoro method, limiting distractions, and working during peak productivity hours are all excellent ADHD productivity hacks.
*Collaborative feature post*
How to help your child build their foundational maths skills
In a world increasingly driven by data, the ability to navigate numbers is not just an academic requirement, but a vital life skill. Yet, for many parents, helping children build their foundational maths skills can seem like a daunting mountain rather than an accessible journey.
As parents, our involvement in our child’s early education is pivotal, particularly in laying the groundwork for success in maths because foundational math skills are not just about counting or solving simple arithmetic problems; they are the building blocks for critical thinking, problem-solving, and logical reasoning.
From integrating math into daily activities to leveraging technology wisely, this article will equip you with the tools and resources for developing basic math skills and the insights necessary to guide your child through their mathematical journey.
So, let’s begin!
Understanding foundational math skills and assessing your current math skills
To help your child understand foundation mathematics, assess where your math foundations lie first. You should be able to explain what foundation maths skills entail, such as counting, basic arithmetic (addition, subtraction, multiplication, division), understanding shapes, and grasping simple measurements. Then you can build on your foundation in mathematics and use it as a stepping stone in developing math skills for more complex concepts and problem-solving abilities.
Remember, your attitude towards maths is what your child’s perception will be when learning the subject. So aim to stay positive and encourage a math learning environment at home.
What are the basic math skills that everyone should know?
You should have a profound understanding of fundamental mathematics before you help your child in maths. But what are basic math skills? Here is a foundational math skills checklist to consider building on before you help your child with their foundational maths skills too:
Number Sense: Understanding and working with numbers, including recognising numbers, counting, and basic number patterns.
Basic Arithmetic: Proficiency in the four fundamental operations – addition, subtraction, multiplication, and division.
Fractions and Decimals: Basic understanding and manipulation of fractions and decimals, including simple calculations and conversions between them.
Measurement: Knowledge of basic units of measurement (length, weight, volume, time) and the ability to measure and estimate using these units.
Time: Ability to read clocks, understand calendars, and calculate time intervals.
Basic Geometry: Understanding basic shapes, their properties, and spatial relationships.
Money Management: Basic skills in handling money, including understanding currency, making change, and basic budgeting.
Data Interpretation: Ability to understand and interpret simple graphs and charts.
Problem Solving: Application of math skills to solve practical problems, involving logical thinking and reasoning.
Percentage: Understanding percentages and their calculation, which is useful in various contexts like sales, statistics, and finance.
Why is it important to develop mathematics skills?
Developing mathematics skills is important for several reasons, both in academic contexts and in everyday life. Here are some reasons why it’s important to develop your child’s foundational maths skills:
It promotes critical thinking and problem-solving
Math teaches kids how to approach complex problems, break them down into smaller parts, and solve them logically. This skill applies to various life situations and professions.
It provides a foundation for advanced learning:
Proficiency in basic math is essential for understanding more advanced concepts in mathematics, sciences, engineering, and technology. A strong mathematical foundation opens doors to many educational and career opportunities.
Helps with practical tasks daily
Math skills are used daily, from managing money and budgeting to cooking, shopping, and planning. These skills help kids make informed decisions, like comparing prices, calculating interest, or measuring ingredients.
Helps with technological and scientific advancement
Mathematics is the language of science and technology. Advances in these fields rely heavily on mathematical principles, making math skills crucial for innovation and progress.
Enhances analytical skills
Math enhances analytical and logical reasoning skills. It teaches kids how to analyse data, recognise patterns, and draw conclusions, which are valuable skills in any field.
It builds confidence and independence
Proficiency in math boosts confidence in your child’s ability to handle various tasks independently, from everyday chores to complex professional assignments later in life.
It provides global competitiveness
In an increasingly universal world, strong math skills are important for keeping up with technological and economic developments, ensuring kids can remain competitive amongst their peers.
Enhances financial literacy
Understanding math is key to financial literacy, which includes managing personal finances, understanding loans, investments, taxes, and saving for the future.
Maths support other subjects
Math skills support learning in other areas, such as physics, chemistry, biology, economics, and even arts, as they often involve mathematical concepts.
Prepares kids for the future workforce
Many of the fastest-growing careers require strong math skills. Whether in IT, healthcare, finance, or engineering, math is a foundational skill that enhances employability and adaptability in a rapidly changing job market.
How do you get your child interested in math?
So it’s clear mathematics is not just about numbers and equations; it’s a critical tool for navigating and understanding the world, fostering logical reasoning, and enabling personal and professional growth. But how do you encourage your child to be interested in maths?
Getting your child interested in learning maths involves a blend of creativity, practicality and a whole heap of enthusiasm. There are tons of ways you can encourage your child to delve deeper into their maths learning. Here are some actionable ideas you can try now:
Relate maths to their interests and incorporate maths into daily activities
Connect maths concepts to things your child already enjoys. For example, if they like cooking, you can encourage them to measure ingredients. If they’re into sports, you can discuss the statistics from their favourite game.
You can also play board games or card games that involve counting, strategy and problem-solving like Monopoly, Uno, or chess. You can also take them grocery shopping and get them to help with budgeting, comparing prices and calculating discounts. Play a fun game and guess the total cost of the items in the cart to see who was the closest in the end!
Find out what their frustrations/challenges are when learning foundational maths skills
Some young learners find maths particularly hard, with weaknesses in this area leading to problems in school, future jobs and overall emotional wellbeing. Some children suffer from specific challenges, like developmental dyscalculia (DD), a condition characterised by difficulties in learning and understanding arithmetic.
It’s important to find out where the reluctance is coming from, as it could be something small which is holding them back. If it is a condition like DD, there are ways to help with basic math, which we will go through later in the article.
Create a positive math environment at home
Your attitude towards maths can influence your child’s attitude. Show excitement and interest in math yourself, and they are more likely to mirror it.
Another way to show positivity is to create a math-friendly space in your home. You can do this by setting up a dedicated study area with accessible maths tools like a calculator, geometric shape sets, a protractor and graph paper. Decorate the area with maths-specific posters, for example, charts like the multiplication table or motivational quotes and even audio devices which can help in strengthening mental math. All these help promote a positive environment to learn maths!
Use interactive games and apps
There are many educational games and apps designed to make math fun. These tools use engaging activities and challenges to teach math concepts and integrate math into other fun activities. Here are some fun ways you can utilise educational toys and tools to enhance learning.
Interactive Maths Activity Book, which includes home math games and activities for preschoolers
I have created a Maths Activity Book Canva template* for parents to print out and personalise for their preschooler. It contains over 50 pages of all kinds of maths problems, but it is set out in a very fun and engaging way, so your child doesn’t even know they’re learning maths! You can find out more about the Maths Activity Book and what it includes here.
Calcularis 2.0 is a computer program designed to help children who have trouble with math, especially those with developmental dyscalculia (DD). The program uses games to teach different math skills, like adding and understanding numbers, and it changes based on each child’s way of learning.
Researchers studied how well Calcularis 2.0 works by testing it with children who have DD. These children used the program for 20 minutes a day, 4-5 times a week, for 12 weeks. Their math skills were tested before, right after, and three months after using the program.
The results were positive. The children who used Calcularis 2.0 got better at math tests*, understanding where numbers are in space, and comparing the sizes of numbers. These improvements were only in math; their reading and spelling didn’t change, showing that the program specifically helps with foundational maths skills. Even three months after finishing the program, the children still showed these math improvements.
The study also found that children who didn’t have problems with reading or spelling, and those who were less anxious about math, improved the most. This suggests that being nervous about math might make it harder to get better at it, even with training.
In conclusion, Calcularis 2.0 was a helpful tool for children with DD and it’s recommended for both individual and group use as an addition to regular math lessons. However, it’s important to remember that this program is not a replacement for learning directly from teachers. This is especially true for children who get very anxious about math, as they might do better with personal teaching.
Overall, Calcularis 2.0 offers a supportive way for children with dyscalculia to improve their math skills through interactive and tailored learning.
How to teach maths at home – encourage questioning and explorations
Encouraging questioning and exploration is key in fostering a child’s curiosity and interest in math, especially when building foundational skills.
Create an open environment when creating homeschool activities for kids. Make the environment a safe space for your child to ask questions and make mistakes. They must express their thoughts and questions without fear of criticism.
Ask open-ended questions that don’t have a single right answer. For example, “How many ways can you think of to solve this problem?” Encourage ‘Why’ and ‘How’ questions and take the time to explore the answer together. If you don’t know the answer, research it together or turn it into a discovery project.
How to be great at math – go on math-related outings
Visit science centres, museums, or other places where they can engage in math-related activities and ask questions about what they see and experience.
How to become good at math – watch educational TV shows and videos
There are many educational programs and online videos that teach math in an entertaining and visually appealing way.
How to develop math skills – set challenges and rewards
Create fun math challenges or competitions with small rewards. This can motivate children and make learning math more exciting.
How to increase math skills – nvolve them in financial decisions
Basic budgeting or planning for a family outing can be great ways to teach older children about numbers and finance.
How to increase your math skills – encourage maths through art and creativity
Incorporate math into art projects, such as using geometric shapes for collages or understanding proportions in drawings.
How to make mathematics easy – involve school and join maths groups/clubs
Helping your child improve their math skills involves working together with their school. Regularly talk to your child’s teacher about how they are doing in math, what they find hard, and how you can help them at home. Get to know what your child is learning in math at school. This helps you support them with similar activities at home, for example, using the same foundational math skills worksheets that the school uses.
Attend meetings and events at school like parent-teacher conferences. These are good chances to learn more about how math is taught at the school. If your child is struggling with math, ask the school if they offer extra help like tutoring or after-school math clubs. If your child needs more help, work with their teacher to make a plan that sets goals and outlines how to achieve them.
Keep asking the teacher how your child is doing in math, not just in grades but also in their interest and confidence in the subject. Motivate your child to join math-related activities at school, like math clubs or competitions. These can make math more enjoyable.
Build a good relationship with the school. Appreciate their efforts and stay open to advice from teachers. Working together can create a better learning environment for your child.
As parents and educators, our role transcends beyond teaching numbers and equations; it involves instilling confidence, curiosity, and a problem-solving mindset in our children. By making math relatable and engaging through real-life applications, interactive tools, and personalised learning strategies, we can help demystify this subject and reveal its inherent beauty and logic.
But, remember, every child’s math journey is unique, and patience and understanding are key. Celebrating small victories, providing consistent support, and staying actively involved in their learning process are essential in maintaining their interest and motivation. As we guide them through the early stages of this journey, we are not just teaching them math; we are equipping them with tools to navigate the world, fostering independent thinkers, and perhaps, inspiring the mathematicians, scientists, and innovators of tomorrow!
FAQ
What is foundational knowledge of mathematics?
Other questions asked were:
What is fundamental skills math?
What are the mathematical skills in the foundation phase?
What are foundational math skills?
What is foundational mathematics?
What is functional math skills?
What skills does math develop?
Why are basic math skills important?
What is basic math skills?
Why are foundational skills important?
Why are mathematical skills important?
How to build a strong mathematics foundation?
What is early learning foundational skills mathematics?
How do you go about defining foundational math skills?
What is the importance of foundational math skills?
Foundational knowledge in mathematics refers to the essential concepts and skills that form the basis for understanding more advanced mathematical ideas. You can find out more information about these foundational maths skills in my article above.
What basic math skills are required by most jobs
You must have basic math skills to effectively perform various tasks in most jobs. These foundational math skills examples include:
Basic arithmetic
Understanding fractions and percentages
Measurement and estimation
Budgeting and financial management
Data analysis
Time management
Problem-solving
Using technology for math
Inventory management
Basic geometry
*This post is sponsored by Constructor, the creators of Calcularis. Links marked with a ‘*’ are affiliate links, which means I may earn a small commission if you click through to buy at no extra cost to you – thank you for your support!
Nextbase 622GW dash cam: The secret weapon for school runs
Picture this.
It’s snowing/raining/sleeting and the roads are unsalted. Hoards of cars weave in and out of few unoccupied parking spaces and traffic is building up on both sides. One narrowly misses the other as both cars compete to push through the open bays. Horns are glaring in unison.
This is a regular morning school run for me, no matter the weather.
Every morning we leave the house at 7.30am to beat the inevitable traffic and we’re on the road until I take my fourth to playgroup around 9.30am.
One particular day felt crazier than normal. It had been snowing yet there were more cars on the road. As we turned a corner, a 4×4 hurled towards us and veered onto our lane. The driver quickly swerved back at a particularly angled part of the road but not before we almost hit the curb on our side. As we ventured further, we had to emergency brake at a car which stopped abruptly in front of us, almost causing the car behind to crash into us – all in the space of five minutes!
When we arrived at the second school run pit stop, a rather rude man with a Tesla blocked us in, then proceeded to eff and blind at me in front of the kids because I told him he was parked on a single yellow line and we couldn’t get out to get to our third stop. He moved his car eventually, but that didn’t stop us from being late.
When we arrived at the third stop, a car behind us reversed onto the road behind and almost got hit by a truck. The noise was enough to wake the other side of the equator. To say I had nervous shock when I got home was an understatement.
Of course it’s not always like this, but the school run can be tiring and chaotic at the best of times. If I had a pound for every time I shouted, ‘Learn to drive!’, or, ‘Indicate!’ at an oncoming car, I wouldn’t need to drive my kids to school anymore, I’d be retiring on an island and I’d have my own school rules! I’ve also uttered, ‘If only I had recorded the license plate,’ many a time.
Well now I can!
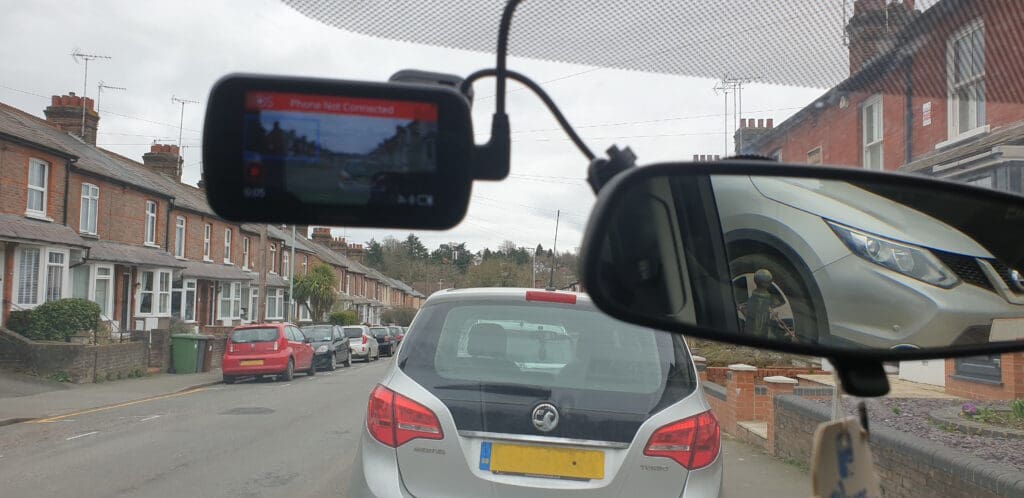
Are you tired of the school run turning into a chaotic, stressful mess every morning? Fear not, because I have the solution to all your road rage problems. Introducing the Nextbase 622GW dash cam which has become my new best friend on the road.
The Nextbase 622GW dash cam can provide added safety and peace of mind for parents while driving on the road, by recording footage, providing emergency assistance, and alerting drivers to potential hazards. It can even spot and record those pesky hit and runners while you’re parked and away from your car. #nowheretohide
Read on for the full Nextbase 622GW dash cam review and how it can help you on the school run too.
The Nextbase 622GW dash cam is a high-end dashboard front view camera designed for cars. It is a premium model in the Nextbase range and is equipped with advanced features and technology, including:
4K dash cam video recording: The camera can provide excellent image quality using ultra-high-definition video footage at a resolution of 3840 x 2160 pixels.
Touch screen interface: The camera features a 3-inch touch screen display that allows for easy menu navigation and playback of recorded footage.
Built-in Wi-Fi connectivity: The camera can connect to Wi-Fi networks, enabling users to transfer footage to a smartphone or tablet for sharing or editing.
Emergency SOS feature: In the event of an accident, the camera can automatically alert emergency services and provide precise location sharing.
Intelligent Parking Mode: The dashcam can monitor your vehicle while it is parked, using motion detection to trigger recording if someone approaches or collides with your car.
Alexa built-in: The Nextbase 622GW dash cam has Alexa built-in so you can get directions, play music, make calls, and more, all hands-free.
Image stabilisation: The camera has advanced image stabilisation technology to help reduce camera shake and ensure smooth footage.
Multiple safety features: The Nextbase 622GW dash cam also comes equipped with several safety features, such as lane departure warnings, collision avoidance systems, and driver fatigue alerts.
What do you get in the Nextbase 622GW bundle? Unboxing the Nextbase GW K Dash Cam
The contents of the Nextbase 622GW bundle may vary depending on the retailer or seller. However, typically, the bundle should include:
The Nextbase 622GW Dash Cam which is the main component of the package.
A power cable to connect the dash cam to the car’s power source.
A Click&Go PRO mount for easy installation and removal of the dash cam from the car’s windscreen.
Some bundles may include a rear camera module that can be connected to the dash cam for recording footage of the rear view. Ours was included in this particular bundle.
A MicroSD Card for storing the footage recorded by the dash cam. We received a 256gb U3 microSD card.
A quick start guide that provides basic instructions for setting up and using the dash cam.
Other accessories such as a carry case, screen protector, or cleaning cloth. We also received a sticker to place on the car’s rear or side window to warn other drivers that we are recording around us.
The Nextbase 622GW is a highly advanced dash cam with features that include 4K Ultra HD recording, built-in GPS, Wi-Fi, Bluetooth, and emergency SOS response. It also includes Intelligent Parking Mode for added security and peace of mind. Below are the full specs of the Nextbase 622GW dash cam:
4K Ultra HD (3840 x 2160) resolution at 30fps, 1080p Full HD at 120fps, 720p HD at 240fps
140-degree wide-angle lens with six-layer glass and f/1.3 aperture
3-inch HD IPS touch screen display
Built-in GPS module for location tracking and speed monitoring
Built-in Wi-Fi for easy transfer of footage to a smartphone or tablet
Built-in Bluetooth for hands-free calling and voice control
Emergency SOS response system that can automatically call for emergency services in the event of an accident
Motion detection and impact sensing to automatically record footage when the car is parked
MP4 video format
H.265 (HEVC) video codec
Supports up to 128GB microSD cards (not included)
500mAh Lithium-ion battery
12-24V DC power supply via included car power cable
98mm x 45mm x 37mm height dimensions
Weighs 128g
How to use Nextbase 622GW dash cam
There are a lot of components so make sure you familiarise yourself with the user manual and manufacturer’s instructions so you use the Nextbase 622GW dash cam properly. Below are the steps on how to install Nextbase 622GW dash cam, including the rear camera too.
First, mount the dash cam on your car’s windshield using the Click&Go PRO mount included. Make sure the dash cam is securely attached by pressing the mount firmly against the glass and twisting the base to lock it in place. The ideal location should provide an unobstructed view of the road ahead and not interfere with your driving.
Connect the dash cam to your car’s power source using the included power cable. Route the cable along the edge of the windshield, tucking it behind the car’s headliner and down the side of the dashboard. Connect the other end of the cable to your car’s power outlet, such as the cigarette lighter socket. Attach the dash cam to the mount by sliding it down onto the mount until it clicks into place. The dash cam should turn on automatically when your car starts up.
Use the dash cam’s touch screen interface to adjust the camera settings to your preferences. You can choose options such as video resolution, frame rate, and exposure. Adjust the camera angle to ensure that it is aimed in the right direction and provides a clear view of the road ahead.
The dash cam will start recording automatically when you start driving. You can also manually start and stop recording using the touch screen interface or voice commands.
You can review the footage recorded by the dash cam on its touch screen or transfer it to your smartphone or computer using the built-in Wi-Fi connectivity or Micro SD card.
The Nextbase 622GW dash cam comes with additional features such as Emergency SOS, Intelligent Parking Mode, and Alexa built-in. You can use these features to enhance your driving experience and ensure your safety on the road.
Always make sure to comply with local laws and regulations regarding the use of dashboard cameras while driving.
How to remove Nextbase 622GW dash cam from mount
Here are the general steps to remove the Nextbase 622GW dash cam from its mount:
Before removing the dash cam from its mount, turn it off by pressing and holding the power button until the screen turns off.
Locate the locking mechanism on the Click&Go PRO mount and release it by pulling the locking lever or pressing the release button, depending on the specific model.
Once the locking mechanism is released, gently lift the dash cam off the mount by pulling it upwards and away from the windshield. Be careful not to tug too hard or apply excessive force to avoid damaging the mount or dash cam.
Once the dash cam is removed from the mount, disconnect the power cable from the dash cam’s power socket.
Store the dash cam in a safe place, such as the carrying case provided or protective cover, to prevent damage or scratches.
Other Nextbase 622GW safety features – Extreme Weather Mode
The Nextbase 622GW Extreme Weather Mode is a feature that is designed to improve the image quality of the dash cam when driving in extreme weather conditions such as heavy rain, snow, or fog.
When Extreme Weather Mode is activated, the camera adjusts its exposure and contrast settings to compensate for the reduced visibility and lighting conditions. This helps to enhance the details and clarity of the video footage, making it easier to see and interpret what is happening on the road.
The Extreme Weather Mode also adjusts the camera’s image stabilisation and anti-glare settings to minimise the effects of weather-related issues such as windshield glare, snow or rain accumulation on the lens, or the vibration of the vehicle caused by strong winds or rough roads.
Nextbase 622GW does include a slow-motion feature.
This feature allows you to playback video footage in slow motion, which can be useful for reviewing details of an incident or for analysing driving behavior.
The slow-motion feature on the 622GW can be accessed through the camera’s playback menu, and can slow down footage by up to 10 times the original speed. This allows you to view the footage in detail and identify important information, such as the speed of the vehicles involved or the actions of pedestrians or other road users.
Nextbase 622GW problems
Like any electronic device, the Nextbase 622GW dash cam may experience problems or issues during use. Here are some common problems that users may encounter with the Nextbase 622GW dash cam:
You may experience connectivity issues when trying to transfer footage from the dash cam to a smartphone or computer. This can be resolved by ensuring the Wi-Fi connection is stable and the correct settings are selected.
You may experience errors with the Micro SD card, such as a “card error” message or difficulty reading the card. This can be resolved by checking the card is compatible and properly inserted into the dash cam.
There may be issues with the dash cam’s power supply or battery life. This can be resolved by ensuring the power cable is securely connected and the battery is fully charged.
The Click&Go PRO mount may not stick properly to the windshield or it isn’t securing the dash cam properly. This can be resolved by ensuring the windshield is clean and free from obstructions and that the mount is installed correctly.
The dash cam can overheat in hot conditions or direct sunlight. This can be resolved by parking in shaded areas or investing in a sunshade for the windshield.
There may be issue with the app’s settings in that it hibernates when not in use. We are still trying to resolve this issue with my Android phone.
If you experience any issues with your Nextbase 622GW dash cam, it is recommended to refer to the user manual or contact Nextbase customer product support for assistance.
Nextbase 622GW dash cam best price
The Nextbase 622GW price can vary depending on the retailer, availability, and any ongoing promotions or discounts. It is always recommended to shop around and compare prices from various retailers to find the best deal.
You can check the prices of the Nextbase 622GW dash cam on popular online retailers such as Amazon, as well as the official Nextbase website. You may also want to check for any special deals or promotions during holiday periods such as Black Friday or Cyber Monday.
The Nextbase 622GW dash cam can help parents stay safe on the road in several ways. Here are some ways that the dash cam can benefit parents:
The Nextbase 622GW dash cam records evidence in the event of an accident
The Nextbase 622GW dash cam can record high-quality footage of any incidents that occur while driving, such as accidents or near-misses. This footage can be used as evidence in the event of an insurance claim or legal dispute, helping parents prove their innocence and avoid potential penalties or legal consequences.
The Nextbase 622GW dash cam provides emergency assistance
The Nextbase 622GW dash cam’s Emergency SOS feature can automatically contact emergency services and provide the driver’s location in the event of a severe impact, such as a serious accident or medical emergency.
The Nextbase 622GW dash cam prevents accidents
The Nextbase 622GW dash cam is equipped with several safety features, such as lane departure warnings and collision avoidance systems that can alert drivers to potential hazards on the road and help them avoid accidents.
The Nextbase 622GW dash cam has built-in Alexa
The Nextbase 622GW has Alexa built-in so parents can get directions, play music, make calls, and more, all hands-free without taking their eyes off the road.
Added bonus – The Nextbase 622GW dash cam can monitor inexperienced drivers
If parents are supervising a newly licensed teenage driver, the dash cam can be used to monitor their driving behaviour and provide feedback on areas for improvement.
Are dash cams worth the expense and hassle of installing and what is the best way to setup a dash cam in a car?
Dash cams can be a worthwhile investment for several reasons. They can provide valuable evidence in the event of an accident or other incident on the road, help deter theft or vandalism, and even capture interesting or scenic moments during your travels.
Dash cams are typically easy to install and require minimal hassle. They can be mounted on the windshield or dashboard with a suction cup or adhesive pad and plugged into the car’s cigarette lighter or USB port. Some models may also require hardwiring for more advanced features such as parking mode or continuous recording.
Overall, the benefits of having a dash cam in your car can outweigh the expense and hassle of installation. Just make sure to follow the manufacturer’s instructions and local laws regarding the use of dash cams while driving.
What other dash cams should you consider?
Nextbase is a popular brand of dash cams that offers a range of models with various features and price points. Here are some Nextbase dash cams you may want to consider:
Nextbase 522GW – This is a high-end dash cam with features such as 1440p HD video recording, built-in Wi-Fi, GPS, and Alexa integration.
Nextbase 422GW – This is a mid-range dash cam with similar features to the 522GW but with a slightly lower resolution of 1080p HD video recording.
Nextbase 222 – This is a budget-friendly option with 1080p HD video recording, a compact design, and easy installation.
Nextbase 312GW – This is a popular mid-range dash cam with 1080p HD video recording, built-in Wi-Fi, and GPS.
Ultimately, the best dash cam for you will depend on your needs and budget.
Why choose the Nextbase 622GW dash cam over other dash cams?
The Nextbase 622GW is a highly rated dash cam that is considered by many to be one of the best on the market.
This bad boy is packed with features that will make your daily commute smoother than a baby’s bottom. With its crystal-clear 4K resolution and advanced night vision, you can capture every detail of your journey, no matter how dark or gloomy it may be outside.
But that’s not all – the Nextbase 622GW also comes equipped with intelligent parking mode, which means you can park up and leave your car knowing that it will record any potential incidents while you’re away. So if someone decides to reverse into your vehicle or attempt a break-in, you’ll have evidence at hand to show the authorities.
And let’s not forget about the safety aspect of this nifty device. With its Emergency SOS feature built in, you can rest assured that help is just a button press away should anything go wrong during your travels. Plus, its automatic emergency response notifications mean that should an incident occur while driving alone or with passengers, emergency services will be alerted immediately for rapid response.
The Nextbase 622GW dash cam can also prevent arguments between siblings fighting over who touched who first during the car ride!
So there you have it folks – the Nextbase 622GW dash cam is more than just a camera; it’s a lifesaver for busy families constantly on-the-go during school runs. Protect yourself from reckless drivers and keep calm throughout those hectic mornings with this indispensable gadget by your side.
For a full list of features and specs on the Nextbase 622GW dash cam, visit Nextbase’s website here.
Why will the dashcam screen go black after recording for some time?
There could be a few reasons why a dash cam’s screen may go black after recording for some time:
Many dash cams have a power-saving feature that automatically turns off the screen after a certain amount of time to save battery power. This is a normal function of the dash cam and is designed to prolong the life of the device’s battery.
If the dash cam becomes too hot due to prolonged use or exposure to direct sunlight, it may shut off the screen to prevent damage to the device. In this case, it is recommended to move the dash cam to a cooler location or turn it off for a while to allow it to cool down.
If the dash cam’s memory card becomes full, it may stop recording and turn off the screen. This is a safety feature to prevent the device from overwriting important footage. In this case, you will need to transfer the recorded files to a computer or other storage device to free up space on the memory card.
If the dash cam’s screen goes black after recording for some time and none of the above reasons apply, there may be an issue with the device itself. In this case, contact the manufacturer for assistance or have the device checked by a professional.
How to fit Nextbase 622GW dash cam?
Follow the instructions above to correctly install the Nextbase 622GW dash cam.
Once the dash cam is installed, it should begin recording automatically when you start your vehicle. Make sure to regularly check the dash cam to ensure it is recording properly and that the memory card has enough space to store your recordings.
How long does a 256GB SD card last in a dash cam?
The lifespan of a 256GB SD card in a dash cam will depend on several factors, such as the quality of the card, the type of dash cam, and the frequency of use.
Generally speaking, SD cards have a limited number of write cycles before they start to fail. This means the more frequently the card is written to, the shorter its lifespan will be. Dash cams tend to write data to the SD card continuously, which can put a strain on the card and reduce its lifespan.
Assuming a high-quality SD card and a typical dash cam usage pattern, a 256GB SD card in a dash cam could last anywhere from several months to a few years. However, it’s worth noting that SD cards can fail unexpectedly, so it’s always a good idea to back up important footage regularly and replace the card periodically to minimise the risk of data loss.
How many hours can you record on a 64GB dash cam?
The amount of recording time you can get on a 64GB dash cam will depend on several factors, including the video resolution and bitrate settings of the dash cam. Here are some estimates based on common video settings:
1080p resolution at 30 frames per second and a bitrate of 15Mbps: Approximately 8 hours of recording time on a 64GB card.
1080p resolution at 60 frames per second and a bitrate of 20Mbps: Approximately 5.5 hours of recording time on a 64GB card.
1440p resolution at 30 frames per second and a bitrate of 25Mbps: Approximately 4.5 hours of recording time on a 64GB card.
4K resolution at 30 frames per second and a bitrate of 60Mbps: Approximately 1.5 hours of recording time on a 64GB card.
It’s important to note that these estimates are just rough guidelines, and actual recording time may vary depending on a number of factors such as the specific dash cam model, the temperature and humidity of the environment, and how frequently the dash cam is recording over existing footage (loop recording). Additionally, it’s always a good idea to periodically review and offload footage from your dash cam to a computer or other storage device to ensure that you have enough space for new recordings.
Is 32GB enough for a dash cam?
Whether 32GB is enough for a dash cam will depend on several factors, such as the resolution and bitrate settings of the camera, the frequency of use, and how often you transfer files off the card. Here are some general guidelines:
For a dash cam recording at 1080p resolution at 30 frames per second and a bitrate of 15Mbps, a 32GB card could provide approximately 4 hours of recording time before it becomes full.
If your dash cam records at a higher resolution or frame rate, or if you prefer to set a higher bitrate, then the amount of recording time you can get on a 32GB card will be reduced accordingly.
If you don’t use your dash cam frequently, or if you transfer files off the card regularly, then a 32GB card may be sufficient for your needs.
However, it’s important to note that dash cams record continuously and overwrite old footage once the card becomes full (in a loop recording mode), so you may not have access to all of the footage you’ve recorded if you don’t transfer files off the card regularly. It’s generally recommended to use a card with at least 64GB of storage capacity if possible, to ensure that you have enough space for your recordings and to minimise the need for frequent file transfers.
What is used for Wi Fi on a dashcam and how does it work? Which dashcam models are equipped with Wi Fi?
Dash cams equipped with Wi-Fi use the Wi-Fi module to create a wireless network that can be used to transfer files, adjust settings, and view recordings on a smartphone or tablet.
When you connect your smartphone or tablet to the Wi-Fi network created by the dash cam, you can use a companion app to access the dash cam’s features and settings. Depending on the dash cam model and the features supported by the app, you may be able to:
View live video from the dash cam
Download and view recorded footage
Adjust video settings
Format the SD card
Update the firmware
There are many dash cam models that are equipped with Wi-Fi, including popular brands such as BlackVue, Thinkware, and Viofo.
It’s worth noting that not all dash cams with Wi-Fi have the same features or capabilities, so it’s important to research different models and read reviews to find one that fits your needs.
How do I install a dash cam without a cigarette lighter?
If your vehicle doesn’t have a cigarette lighter or accessory socket, you can still install a dash cam by using a hardwire kit. Here’s how to do it:
Purchase a hardwiring kit for your dash cam. This kit should include a cable that connects to the dash cam, a fuse tap, and a ground wire.
Locate your vehicle’s fuse box. This is usually located in the driver’s side footwell or under the hood.
Find a fuse that is only powered when the ignition is turned on. This is important to prevent the dash cam from draining your vehicle’s battery when the engine is turned off.
Insert the fuse tap into the selected fuse location. The fuse tap should have two slots: one for the original fuse and one for a new fuse. Insert the original fuse into the top slot, and the new fuse (which should be included in your hardwiring kit) into the bottom slot.
Connect the red wire from the hardwiring kit to the new fuse in the fuse tap.
Connect the black wire from the hardwiring kit to a metal ground point in the vehicle. This could be a metal bolt or screw in the vehicle’s frame.
Connect the cable from the dash cam to the hardwiring kit.
Test the installation by turning on the ignition and ensuring that the dash cam powers on.
It’s important to note that hardwiring your dash cam may require some knowledge of your vehicle’s electrical system, so if you’re not comfortable with this type of installation, it’s best to consult a professional or seek help from a knowledgeable friend. Additionally, be sure to check your local laws and regulations regarding the use of dash cams and their installation before attempting this installation.
Can I use a dashcam as a webcam?
In general, most dash cams are not designed to be used as webcams, and their functionality is limited to recording and saving video files to an SD card. However, some dash cam models do have a webcam function that allows them to be used as a live streaming camera.
To use a dash cam as a webcam, you will typically need to connect it to a computer via USB cable and install any necessary drivers or software. The specific steps will depend on the make and model of your dash cam and the software you plan to use for streaming.
It’s worth noting that using a dash cam as a webcam may not result in optimal video quality, as most dash cams are optimised for recording video in a moving vehicle rather than streaming video in real-time. Additionally, dash cams may not have the same features or settings as dedicated webcams, such as autofocus or manual focus, which could impact the quality of the video stream.
If you’re looking for a camera to use as a webcam, it’s recommended to purchase a dedicated webcam that is designed for this purpose, as they typically offer better video quality and more robust features and settings.
Do I have to use WiFi to use a dash cam?
No, you do not have to use Wi-Fi to use a dash cam. Dash cams can typically function without Wi-Fi, and will still be able to record footage to an SD card.
However, Wi-Fi can be a useful feature for accessing and managing dash cam footage. With Wi-Fi, you can transfer files from the dash cam to your smartphone or tablet, adjust settings, and view live or recorded video from the dash cam. This can be especially useful if you need to quickly share footage with others or if you want to check on your vehicle remotely.
If your dash cam doesn’t have Wi-Fi, you can still access the footage by removing the SD card from the camera and transferring the files to a computer or other device. Some dash cams also include a built-in screen that allows you to view footage directly on the device, without the need for Wi-Fi or an external device.
Ultimately, whether or not you need Wi-Fi in a dash cam will depend on your specific needs and preferences. If you value the convenience and flexibility of being able to access footage remotely or transfer files wirelessly, then a dash cam with Wi-Fi may be worth considering. However, if these features aren’t important to you, then a dash cam without Wi-Fi may be a more affordable and practical option.
Why don’t newer cars have dash cams by default?
Other questions asked were:
Why don’t car manufacturers offer built in dash cams as an option?
There are several reasons why newer cars do not typically come equipped with dash cams by default:
Adding a dash cam to a vehicle can increase the cost of the vehicle, and manufacturers are always looking for ways to keep costs down to remain competitive.
Some manufacturers may be hesitant to include a dash cam as standard equipment because they may be held liable for any footage captured by the camera that could potentially incriminate the driver or vehicle owner.
Dash cams can capture footage of people, vehicles, and other objects in the vicinity of the vehicle. Some people may have concerns about privacy and may not want a camera recording their actions or whereabouts.
Different countries and regions have different laws and regulations regarding the use of dash cams. Some countries, such as Russia and South Korea, have laws that encourage or even mandate the use of dash cams, while other countries, such as Austria and Luxembourg, have laws that prohibit the use of dash cams in certain situations.
Despite these factors, the popularity of dash cams has been increasing, and many drivers are now choosing to install them in their vehicles as an aftermarket accessory. As the technology advances and becomes more affordable, it’s possible that we may see more vehicles equipped with dash cams in the future.
Can the camera system on a car be converted into a dashcam type of recording?
In some cases, the camera system on a car can be converted into a dashcam-style recording system, but it would depend on the specific make and model of the vehicle and the type of camera system it uses.
Some newer cars have cameras built into the vehicle that are designed to provide a 360-degree view of the car’s surroundings, or to assist with parking and reversing. These cameras can be repurposed to provide a dashcam-style recording system, but it may require additional hardware and software to capture and store the footage.
Other vehicles may have cameras built into the rearview mirror or windshield that are designed for driver assistance features, such as lane departure warning or forward collision warning. While these cameras may be able to capture footage of the road ahead, they may not be optimised for recording video for extended periods of time, and may not be able to capture a wide-angle view of the vehicle’s surroundings.
It’s worth noting that converting a car’s camera system into a dashcam-style recording system would likely require some technical knowledge and expertise, and could potentially void the vehicle’s warranty or cause other issues if not done properly. If you’re interested in using your car’s camera system for recording purposes, consult a professional or seek guidance from the manufacturer to ensure that the modification is done safely and effectively.
On dash cams, how long can they record before overwriting and how easy is it to delete the recordings?
The amount of time a dash cam can record before overwriting old footage depends on the size of the SD card used, the video resolution and bitrate settings of the camera, and the length of time the camera is in use each day. Dash cams typically have a loop recording feature that automatically overwrites the oldest footage on the SD card once it becomes full.
For example, a 64GB SD card recording at 1080p resolution at 30 frames per second and a bitrate of 15Mbps may be able to record for approximately 8 hours before the oldest footage is overwritten. This time will decrease if the resolution and bitrate are increased or if the camera is used for longer periods of time each day.
To delete recordings from a dash cam, most cameras have a delete function built into the menu system. This function may allow you to delete individual recordings or to format the entire SD card to clear all recordings at once. The exact process for deleting recordings will depend on the make and model of the dash cam, but it should be a straightforward process that can be done using the camera’s built-in controls or a companion app on your smartphone.
Some dash cams also have a “lock” or “protect” feature that allows you to prevent specific recordings from being overwritten during the loop recording process. This can be useful if you want to preserve important footage, such as in the event of an accident. These locked recordings can be deleted manually using the camera’s delete function or by formatting the SD card.
Do dash cameras work when the car is off?
Other questions asked were:
Can I leave a dashcam thats plugged into a 12V power outlet on when I shut my car off and leave it for a few hours?
Most dash cameras are designed to continue recording even when the car is turned off, as long as the camera is connected to a power source that remains active when the ignition is turned off. However, some dash cameras may have a battery or capacitor that provides power for a short period of time after the car is turned off, after which the camera will shut down to conserve power.
The exact behaviour of the dash camera when the car is turned off will depend on the make and model of the camera, as well as how it is connected to the car’s power supply. If the camera is hardwired to the car’s battery or fuse box, it will typically continue to operate even after the ignition is turned off, unless the power supply is turned off manually or the battery is drained.
If the camera is powered by a cigarette lighter or accessory socket, it will stop recording when the ignition is turned off, unless the socket remains active even when the car is turned off.
It’s important to note that if a dash camera continues to operate when the car is turned off, it can drain the vehicle’s battery if left connected for an extended period of time. To prevent this, some dash cameras have a built-in low-voltage cutoff feature that will automatically shut down the camera if the battery voltage drops below a certain level, preventing the camera from draining the battery excessively. The Nextbase 622GW dash cam includes Intelligence Parking Mode which means it continues to record even when the vehicle is parked and turned off. For more information, see above.
Why do we need dash cameras with a GPS function?
Dash cameras with GPS functionality can provide several benefits:
Dash cameras with GPS can record the exact location of the vehicle at the time of recording, which can be useful in the event of an accident or other incident. This information can help to corroborate your account of what happened and may be useful in legal proceedings.
Dash cameras with GPS can also track the speed of the vehicle at the time of recording. This information can be useful in providing evidence of excessive speed or other driving behavior that may have contributed to an accident.
If you frequently drive in unfamiliar areas, a dash camera with GPS can be useful in tracking your route and helping you find your way back if you get lost.
Dash cameras with GPS can also be used as a security feature, as they can alert you if your vehicle is moved without your knowledge or if it is stolen.
Overall, the GPS function in dash cameras can provide additional context and information that can be useful in a variety of situations, including in the event of an accident, during legal proceedings, or for general navigation and security purposes.
Can my car dashcam recordings be used against me?
In some cases, dashcam recordings could be used against you in legal proceedings, depending on the circumstances of the incident being recorded.
For example, if you are involved in a car accident and the other party claims that you were at fault, the footage from your dashcam could be used as evidence to support or refute their claim. Similarly, if you are pulled over by law enforcement and the officer suspects you have committed a traffic violation or crime, footage from your dashcam could be used as evidence in court.
It’s important to note that while dashcam footage can be useful in providing evidence and supporting your account of what happened, it can also potentially incriminate you if you are shown to have committed a violation or crime. As such, it’s important to use your dashcam responsibly and to follow all traffic laws and regulations.
Additionally, there are laws and regulations in place that govern the use of dashcams and the recording of video and audio in public spaces. It’s important to be aware of these laws and to ensure that you are using your dashcam in a legal and responsible manner.
If I record someone on my dashcam running a red light or driving extremely dangerously can they be prosecuted?
If you record someone on your dashcam running a red light or driving dangerously, the footage could potentially be used as evidence to prosecute the driver for traffic violations or criminal offenses.
For the footage to be admissible in court, it would need to be clear and unambiguous, and would need to be properly time-stamped and geotagged to establish the location and time of the incident. Additionally, it’s important to follow all applicable laws and regulations regarding the use of dashcams and the recording of video and audio in public spaces.
If you do capture footage of someone committing a traffic violation or criminal offense, it’s recommended to report the incident to the appropriate authorities, such as the police or local law enforcement agency. They can use the footage to investigate the incident and potentially pursue charges against the driver.
It’s worth noting that dashcam footage is not always definitive evidence of an offense, and that other factors may need to be considered in determining whether an offense occurred. However, in many cases, dashcam footage can be a valuable tool for law enforcement and can help to promote safer driving behaviors on the road.
Do dashcams record sound?
Many dashcams do have the capability to record sound, but not all models have this feature. Dashcams that include a built-in microphone or have a port for an external microphone can record audio along with video. The Nextbase 622GW dash cam can record audio. The camera includes a built-in microphone that can record audio along with the video footage.
The ability to record audio can be useful in certain situations, such as in the event of an accident where there may be disputes about what was said or heard by the drivers involved. It can also be useful for recording conversations or other sounds that may be relevant to an incident.
However, it’s important to be aware of privacy laws and regulations regarding the recording of audio in public spaces. Depending on your jurisdiction, it may be illegal to record audio without the consent of the parties involved. Some dashcams may include a mute or privacy feature that allows you to turn off the microphone to avoid recording audio in certain situations.
If you’re unsure about the legality of recording audio with your dashcam, it’s recommended to consult local laws and regulations or to seek guidance from a legal professional.
*Motherhood Diaries was gifted the Nextbase 622GW dash cam in return for an honest review
Help toddlers play, learn and grow with the HOMER Learning app
Did you know 85% of the brain develops before 5 years old but 98% of education spending focuses on after the age of 5?
This means children are not achieving their full potential because we are under-investing in a time when it really matters.
During the pandemic, parents were thrown into the role of educator and this period led to a heavy reliance on technology, specifically through apps. But even now, parents need more help than ever to keep their children on level pegging with their peers, with competition ramping up through SAT scores, the dreaded 11+ and ultimately finding a job after university.
But kids, especially before the age of 5, love to learn. Combine this love of learning and empowering parents to help enhance kids’ learning at home with the HOMER Learning play, learn and grow app* and you get kids who will continue to love learning through to adulthood!
The HOMER Learning program was created by cofounder and president Stephanie Dua, who didn’t know where and how to teach her then 5-year-old child, Anya, to read. Stephanie felt helpless when her child felt she was the only one in her class who hadn’t grasped reading yet.
Stephanie reached out to experts across the US and found there was an enormous gap in the market for expert research-backed enhanced tools to help kids with their learning. She figured, if she had this problem, maybe others did too. Thus, the HOMER Learn and Grow app was born.
What is the HOMER Learning method?
The HOMER web app is on a mission to build confident kids and lifelong learners from ages 2 to 8 years old and understands that early learning isn’t just about readiness, but to prepare kids for their unique journey in school and in life too. So the app focuses on the HOMER Method, and achieving progress rather than perfection, which encourages individuality and motivation through each stage.
HOMER Learning’s expert-designed, four-step approach teaches children essential skills so they can transfer that knowledge in a different context. It’s a research-based framework for kids that goes beyond rote memorisation (dabbling at a skill) to deep understanding and building confidence, promoting problem-solving and enhancing the love of learning.
This beginning step introduces a skill or topic to the child to get them excited to learn and facilitate learning, articulate the relevant vocabulary, and support the child’s emerging schema development.
Practicing the skill/topic
The practice stage helps the child reinforce and review the skill or topic with fun practice. Practice helps to boost confidence and create background knowledge on the skill.
Applying the skill/topic
It’s really important the child can apply what they know in context. The application stage shows the child is ready to move on or transfer to a new skill and provides opportunities to show understanding in a familiar environment.
Transferring that skill in real life – ‘I did it!’ moment
The transfer stage is the gold standard of education. If a child can take what they know and transfer it to another context, then they’ve cracked that skill. For example, once they’ve finished playing a game with shapes, if they can point to a plate at the dinner table and say that’s a circle without the aid of the app, then that’s an example of transferring what they learned from the learn and grow app to the real world – which is what HOMER calls an ‘I did it!’ moment.
How do kids aged 2 to 8 learn with the HOMER Learn & Grow app?
HOMER’s signature app, HOMER Learn & Grow, builds across subjects with thousands of activities personalised to kids’ age learning levels, including reading, math, social and emotional learning, thinking skills and many more 21st century skills that children need.
The HOMER web app grows with your child’s learning and starts the journey with a questionnaire to gauge which stage your child is at, so HOMER places that child at the right learning level.
The HOMER Learning app is ad-free so kids can learn with HOMER and enjoy safe screen time too!
HOMER Learning has proven results
Reports and feedback have shown that Homer Learning has increased early reading scores by 74% with at least 6 weeks of usage just 15 minutes per day[1].
What does HOMER Learning teach?
The categories HOMER teaches are:
Knowledge
Knowledge includes maths, literacy, science and more.
Thinking skills
This includes executive functions, problem-solving and more.
Social and emotional development
This includes awareness of self, self-management skills, relationship skills, and more
Physical development
Movement, sensory skills, healthy development and more
After you’ve downloaded the HOMER reading web app, you need to create a HOMER Learn and Grow login.
What does the HOMER Learn and Grow app include?
Included in your trial you get:
Unlimited access to all content in the Learn & Grow App
Up to 4 child profiles
Offline activities and printables
Resources and tips from learning experts
Once you’ve set up your child’s profile and completed the questionnaire, you will be taken to a screen which has eight categories and a special circled category. We will go through each category briefly.
What is HOMER Reading and how does HOMER Reading work?
Reading is one of the most unnatural experiences for a child because it isn’t innate. Reading requires a systemic approach, from learning the alphabet, to sounding out phonics, to blended reading. This process takes time and practice.
When reading with HOMER, you have a learning path which takes you through reading. The pathway is personalised, so your child can read with HOMER and learn the right skill at the right time in the right format.
Your child will explore:
Recognising letters as special symbols
Exposure to the alphabet
Identifying uppercase letters
When singing the alphabet becomes second nature, the child is then ready to learn the foundations of reading. They will explore:
Identifying letters
Practicing letter formation
Auditory and visual memory
Developing language skills
Start learning phonics
Your child will connect the letters and sounds and begin the process of reading and spelling. They will explore:
Reading short words and sentences
Spelling short words
Learning essential sight words
Beginning fluency
Your child will build on these reading skills and then use the tools to discover the world through reading. They will explore:
Developing more advanced fluency
Sounding out complex words
Reading books from their interests
Making connections with other subjects
Math
Counting
Numbers
Shapes
Stories that add up
Create with Sumville friends
How does HOMER Learning Math work?
Kids are born knowing how to do math! So HOMER for kids helps to build on your child’s math confidence and extend their innate skills. Developing early math skills now will help your child achieve much higher grades in maths later.
HOMER education allows your child to play with numbers and apply abstract concepts to real life. They will explore:
Developing a love of numbers
Building math confidence through positive experiences
They will then make connections and understanding math concepts beyond rote memory. They will explore:
Applying mathematical thinking to other subjects
Developing number senses through stories
Practicing counting in songs
Your child will build critical skills and explore:
Numbers and counting
Shapes and their properties
Developing spatial awareness
Applying math to life through play
Stories
Vehicles
Animals
Classics
Nursery rhymes
Dinosaurs
Read and play
Princesses
Space
Robots
Monsters
Holidays
Superkids
Thomas the Tank Engine
Angelina Ballerina
Bugs
Arts and crafts
Ocean
Sid the Science Kid
Sports
Practice
Vocabulary development
Meet the letter
Exploring letters
Letter puzzles
Letter dress up
Power words
Make the uppercase letter
What did we think of the HOMER learning app for kids
The HOMER web app is educational and fun at the same time. I struggle with the guilt of my toddler having excessive screen time, but research suggests educational screen time can still benefit toddlers at this age. I’ve noticed that she is more expressive when she talks and the app teaches life skills and lessons that perhaps I can’t articulate as well. For example, there is a section on entrepreneurialism, mindfulness, and movement. I’m often trying to figure out how to build on her life stills and the HOMER program for kids has a video to help!
We had an ‘I did it!’ moment when she tried out phonetically sounding words and her counting skills shot up from 1 to 10 to 1 to 20!
The topics are fun and based on life skills, like sorting the washing according to colours, so it’s not boring and it applies to everyday life so my toddler can understand the concept behind it.
What’s more, you get to see your child’s progress. So it’s not absent-minded playing but your child is actually working towards goals and milestones.
The HOMER software is very easy to use, so there’s no maze you have to get through or hundreds of passwords to crack before you get to the good stuff. It provides the perfect amount of child care because it keeps my toddler very busy and she gets to learn preschool skills from the curriculum before she starts nursery. Also the app is built so that the parent can engage with the child and you can play, learn and grow together.
You get a 30-day risk-free trial with unlimited access as soon as you create a HOMER login. My toddler focused on a few play and grow videos in the app like the dinosaur section (she loves dinosaurs!) but when she wants to enjoy other sections in the app, she can whenever she’s ready. The whole family can enjoy some videos like the stretching video, which I often got involved in because moving about is a nice way to spend time with the kids.
Cons of using HOMER Learn & Grow app
The app uses American English as it’s based in the US. So if you’re in the UK, your child will learn American English, which may confuse them at school. For example, the word ‘MOM’, is spelled using American English, but in the UK we spell the word differently, i.e. ‘MUM’. I’ve also noticed a slight American twang in my child’s accent. This isn’t a problem per se, but it just means that she will have to re-learn certain words and colours, which may confuse a child of her age.
It would be great to have an option to switch to UK English and have a UK native person speaking the parts where they teach certain words and skills, especially with reading and the alphabet (‘Zed’ rather than ‘Zee’ for the letter ‘Z’). Other skills don’t require the UK accent and can stay the same.
So, why try HOMER?
There are literally thousands of brain-boosting, playful learning activities to make screen time educational and fun.
The app has a kid-friendly design that builds confidence through independent play.
The games are research-based to build skills in reading, math, creativity, social-emotional learning, and more!
I’ve seen the results in my toddler – her phonetics, spelling and maths are really coming on and she hasn’t even turned three yet – it works!
If you want to learn more, Common Sense Media published a Homer app review which you can find here.
Yes, the reading section of the app is tailormade to your child and only progresses when your child is ready to move on.
How much does HOMER reading cost?
Questions also asked are: ‘How many does HOMER reading app cost?’ ‘How much is HOMER reading?’ and ‘Is HOMER reading app free?’ The reading section comes as part of the HOMER play, learn and grow app and you can access a risk-free 30 day trial here* with a special discount for readers.
How do I cancel HOMER reading?
If you want to know how to cancel HOMER reading app, follow the instructions below:
Visit the website and sign in.
Tap or click your email address in the top right corner.
Select ‘Settings’ from the dropdown menu.
Click on ‘Manage Membership’.
Select ‘To turn off, begin cancellation process’.
Click ‘Continue’ at the bottom of the page.
[1] A double-blind study by Dr Susan Neumann, former undersecretary of education and professor of early childhood education at New York University.
*This post is sponsored by HOMER learning, but all thoughts are 100% our own. Links marked with a ‘*’ are affiliate links which means I may earn a small commission if you click through to buy.
Edifier NBQ TWS Wireless Stereo Earbuds Review
Since Apple AirPods came out, earbud brands have followed suit with Bluetooth earbud technology as a solution to the nuisance wires that hang around our neck and get in the way of musical enjoyment. An influx of true wireless earbuds came onto the market and today I will be reviewing the Edifier NBQ TWS Wireless Stereo Earbuds Review wireless stereo earbuds which boast active noise cancelling technology and an ‘Ambient Sound’ mode for easy listening.
Read on for an extensive review.
Review
Overall rating
Ease of use
Fits the purpose
Style and comfort
Controls and functionality
Value for money
Audio and call quality
Battery life and charging capability
What am I reviewing?
I am reviewing the Edifier TWS NBQ earbuds.
A little about Edifier
Edifier specialises in the design and manufacture of premium audio solutions that showcase technological innovation and design excellence. Founded in 1996 and headquartered in Beijing, China, Edifier delivers an outstanding stereo sound experience through a wide range of audio systems for personal entertainment and professional use. Renowned for its award-winning design philosophy, expertise and innovation in acoustic wireless stereo technology, and superior manufacturing standards, Edifier is one of today’s leading innovators of audio electronics.
More information about Edifier is available online at www.edifier.com
What are Edifier TWS NWQ earbuds?
Edifier TWS NBQ earphones are surround sound earbuds without wires which introduces active noise cancellation and ambient sound mode, as well as IPX4 rating in a stylish design and range of colours.
Edifier® International brought out TWS NBQ earbuds that focus on fashion while still delivering excellent sound audio quality. The new TWS NBQ earbuds’ Active Noice Cancelling Technology blocks low to medium external environmental noise frequencies for optimal listening experience.
You can also activate Quick Ambient Mode by tapping the earbud, enabling you to hear external noise when appropriate, i.e. during flight announcements, traffic noise or checking in with your baby.
The Edifier TWS NBQ earbuds allow you to make crystal clear calls with the dual microphone noise cancellation, enhancing the user’s voice. You can answer phone calls by using the on-ear controls (you can find these functional operations in the image below).
The TWS true wireless stereo speaker NBQ earbuds also features single address pairing and role-swapping, where the earbuds can be used together or separately, and the left and/or right earbud can be used for mono or stereo connection.
On-ear tap controls allow you to play/pause music and answer phone calls easily.
Each earbud has touch controls that allow you to switch between gaming, music audio profiles and ambient mode to further enhance your listening experience. You can also play, pause, accept or suspend a phone call and skip music tracks by tapping the earbud.
What are TWS wireless earphones?
What are true wireless earbuds, though, I hear you ask? True Wireless or TWS headphones are the latest in audio true wireless technology so when you wear them you have complete freedom to move about as there are no wires attached. Truly wireless earbuds are currently the best-selling headphones in the market.
What’s the difference between wireless and true wireless earbuds?
Wireless headphones still have Bluetooth connectivity and wires but these wires connect your earbuds together around your neck and not to your phone. This is great for working out as the magnetised earbuds can connect together to form a ‘necklace’.
True wireless stereo Bluetooth speakers in earbuds are not restricted to connecting wires around your neck and between the earbuds. You don’t have to keep the earbuds close together either. As long as you have Bluetooth, you can have complete freedom to move around these stereo Bluetooth wireless earbuds with truly wireless technology.
How much is the Edifier TWS earbuds and where can you buy it?
How long will it take for the Edifier NBQ TWS earbuds to be delivered?
Shipping times vary depending on availability, but you should receive your Edifier TWS NBQ earbuds between one to three business days after confirmation of payment.
Edifier size and specs
Edifier TWS NBQ earphones come in a range of colours; Hazy blue, Sakura pink and Snowy White, and its sound quality is achieved through the 10mm composite diaphragm driver unit, which delivers a balanced, high-resolution sound and punchy bass. The Bluetooth v5.0 provides a reliable and clear connection and offers an easy switch between music, gaming and speaking.
The TWS NBQ earbuds also carry a IP54 rating housing for dust and water resistance.
The TWS NBQ features up to 32 hours of playback time; seven hours with Active Noise Cancellation Technology (ANC) switched on, and nine hours when ANC is switched off. The compact wireless charging case offers up to 23 hours of charging before it needs to be connected to a mains point.
Main Features
Active Noise Cancelling ANC True Wireless Stereo connected Earphones
You get a case with the Edifier earbuds x 2, a storage bag with a USB-C connection charging cable and different size earbuds (3 pairs) in a box, along with a manual.
First impressions of Edifier?
My first impressions were that this was a snazzy piece of kit. I love the clamshell type case that fits snugly into the foamed box and how the rest of the accessories are tucked away neatly in the box above the case. The box is small enough to fit into your handbag but if you don’t want to carry everything around, the case is tiny and won’t take up any space at all.
When opening up the case I liked the look of the earbuds. Not quite as slick as AirPods but a suitable affordable alternative with a neat Edifier design. If you are worried people will think you’re cheap, you don’t notice the logo design from afar.
Was the Edifier earbuds easy to put together?
You really don’t need to do anything. You press and hold the ‘R’ button on the case and wait for your device to discover the Edifier TWS NBQ earbuds and you’re good to go!
How the Edifier TWS true wireless stereo earphones control buttons work
The earbuds power on when the case is opened (the green light is steady lit once) and then power off when the case is closed.
How do you pair the earbuds to your phone or any other devices?
To pair, place the earbuds in the case and press and hold the ‘R’ button for around three seconds to enter true wireless stereo pairing and Bluetooth pairing.
Search for and connect to ‘EDIFIER TWS NBQ’. The white and green light flashes rapidly. After pairing is successful the green light will flash slowly.
The L button is only there for decorative purposes so you should only use the R button for functional operations.
To interconnect or clear pairing you place the earbuds in the case and double click the ‘R’ button. The white light will flash rapidly to clear pairing records and enter TWS pairing mode of the left and right earbuds. When successful white and green lights will flash rapidly.
Functional operations
See the image below for how to operate the earbuds
Are the Edifier TWS NBQ earbuds comfortable?
When I first put them on they felt quite snug in my ears. I did have to reposition them around a bit and found they work best when angled towards you rather than down (which is what I was trying to replicate like the AirPods). Then they pretty much stay in place and you don’t have to move them around again.
What is the sound like?
I was pleasantly surprised with the crystal clear sound coming from these earbuds. I wasn’t expecting it at £59.99 but you get a healthy balance of bass and treble and you could hear each instrument in a song clearly. I love that the bass comes through so you can really bop your head to the music as if you’re the only one in the room. I couldn’t hear any background noise which worried me slightly as I always have an ear on my kids. But, if you’re at the gym or running and need to drown out the noise, you will not be disappointed by how well these earbuds do that.
What are the pros of using Edifier wireless stereo earbuds?
They are cheap at £59.99 and the sound quality is excellent. The functions are very easy to use and I love that you only need to tap the earbuds to change functions rather than having to press actual buttons or play around on your phone. These earbuds would work perfectly when your attention is on working out, running or doing other chores in the house. Stick them on, leave the phone in your pocket or bag and get on with it.
What are the cons of using Edifier wireless stereo headphones?
I had some issues with triple tapping the earbuds to change the song as I wasn’t fast enough and would often pause the music (which you need to double-tap). That does take some getting used to, but once you’ve got the hang of it, you’ll know where and how to tap.
You don’t get much distance when you’re moving around the house. I often play an Audible book on my Alexa Show (which is in the kitchen) while I’m cleaning the house but if you step outside the kitchen and into another room the sound becomes patchy. You would be better off playing the book on your phone and keeping it on you while you’re moving around the house.
I also found these earbuds would slip off when I was lying down or moving around at speed. This worries me because I don’t want to drop and lose one of my earbuds when I’m running. I haven’t tried the other earpieces yet so I will see if the size makes a difference.
What would Edifier be useful for?
Edifier TWS NBQ earbuds are great for putting on some background music, taking calls and listening to stories when you’ve got your hands full with kids or completing tasks with your hands. They help you get through mundane tasks with some background entertainment and it’s easy to answer calls so you can free your hands for kids or workout equipment, like buggy running (watch this space for a great postnatal fitness series coming soon!)
Is Edifier worth the money?
At £59.99 these earbuds are a steal! You get fantastic sound quality, easy-to-use functions and a stylish design with a range of colours. Well worth the price.
Why can’t TWS earbuds come with a longer battery life?
The earbud batteries are small because they fit inside the wireless units. So they can only take a certain amount of wattage to produce enough sound for the earphones to function well. But having said that, you get 7+18 hours of playback time with noise-cancellation mode and 9+23 hours of continuous playback time on Bluetooth mode, which is pretty great in my opinion. And don’t forget you can place the earbuds in the case and they’ll charge automatically in the case too!
What is my overall opinion of Edifier? Overall rating
At £59.99 the Edifier TWS NBQ gives you everything you need when listening to music and drowning out external distractions. You get a decent amount of playtime before you charge and they look stylish enough to enjoy outside of the house. I really like the design, and the pink colour is pleasant. I love the functions which are easy to use once you get the hang of them. So much easier to tap your earbuds than play with buttons or functions on your phone. So that’s a big plus for me.
The app isn’t great. You don’t get much regarding functionality – it basically tells you how much battery is left and that your device is on. You can’t customise sound or use voice assistance which would be a handy add-on in the next update.
Overall, the level of performance and battery time far outweigh the cons and if you’re looking for a sub-£100 TWS earbud product, I wouldn’t look any further than the Edifier TWS NBQ earbuds. They give you better sound and battery life than the AirPods Pro!
5 out of 5
Ease of use
These earbuds are very easy to use. You just open the case and the earbuds will automatically connect to the last bluetooth device pair. I love that the earbuds charge back up when popped back into the case, so you don’t have to always plug into the mains.
You do need to angle the earbuds towards you for a good fit and you will need to get the hang of triple tapping and double tapping, but other than that you’re good to go!
4 out of 5
Fits the purpose
These are great for wearing around the house while completing other chores or out exercising. The only issue is the fear you’ll drop one of the earbuds, but you’re given other earpiece size options, so make sure you pick the right one for you.
4 out of 5
Style and comfort
I really liked the pink earbuds – I thought they were rather cute. However, like AirPods the wireless part doesn’t hang down but rather faces out, so not sure they looked all that great when they were on me.
Comfort-wise I found them comfortable to wear, but I would be worried about running or exercising for fear they would fall off.
The Edifier TWS NBQ claims to be scratch resistant and the casing comes with IP54 rating for dust and water protection. So this means it can henalde sweat and minor splashing which is great when you’re really hitting it hard at the gym.
The case is like a clamshell casing which I found to be very handy as it’s small enough to fit inside the tiniest of bags. I have kept mine in the handy box which houses the casing perfectly – plus it offers extra protection from little hands (my daughter likes to destroy everything she touches). The buds fall into their pockets quite easily in the magnetic casing but you can hear them rattling around which makes me wonder whether the magnets are as strong as I initially thought.
The LED light inside the case makes it really easy to know when the earbuds are pairing or trying to pair. It also turns green when the buds are on, which I really liked. No real guessing required when you don’t have time to work out what’s going on with them.
The logo on the front will giveaway that these earbuds are not AirPods though, but who cares! If they get the job done, right?
4 out of 5
Controls and functionality
I was very impressed with the snazzy controls; you just need to tap the earbuds to change function. Some of the taps are tricky but you’ll get used to it. I still prefer doing it this way than to press actual buttons or use other devices to control the earbuds.
4 out of 5
Value for money
At £59.99 you’re getting high quality audio and great functions, with great battery time. It’s a steal!
5 out of 5
Audio and call quality
You can hear the bass, the treble, the instruments in the song and you can drown out external noise which means you feel like you’re the only one in the room. The call quality is excellent; the speaker on the other end is crystal clear with no static of patchiness. I found the audio and call quality to be excellent.