Affordable snowboard gear for growing kids: What’s worth buying vs. renting
If your child has recently fallen in love with snowboarding, you already know how quickly the costs can add up. Growing feet, sudden size jumps, new interests every season, and gear that feels more complicated than school supply lists. It is completely normal to wonder what you should actually buy and what you can safely rent.
The good news is that with a smart approach, you can build a snowboard setup that keeps your child warm, safe and comfortable without overspending. We are bonafide experts at stretching budgets, and snow gear is no different. Below is a clear, mum-friendly guide to knowing when to rent, when to buy, and how to save along the way.
1. Snowboards: Start by renting
For beginners or younger kids, renting a snowboard usually makes the most sense. Children grow quickly and their ability level can change dramatically between seasons, so renting lets your child try the sport without committing to a board that may be the wrong size in a few months.
When sizing a children’s snowboard, it should reach somewhere between their chest and chin when stood upright beside them. For smaller or newer riders, slightly shorter is fine. Shorter boards are easier to manoeuvre and help build confidence.
Resorts and local shops often offer multi-day or season-long rental packages that cost far less than purchasing a new board. The boards are typically well maintained and chosen to suit beginners, which helps your child learn safely. Some packages even include a mid-season size swap if your child has a growth spurt. It’s worth asking about when you book.
When your child becomes more skilled or starts showing long-term interest, buying can become worthwhile. At that point, you can look for lighter boards sized specifically for kids. Buying secondhand is another smart option as long as the board is still in good condition.
2. Boots: One of the best things to buy
If you are going to invest in one major piece of gear, make it the boots. They affect comfort and control more than anything else your child wears on the mountain. Rental boots are convenient but are often stretched, worn down, or simply not very warm.
A pair of properly fitting boots helps your child stay balanced, reduces fatigue, and prevents those mid-mountain meltdowns caused by uncomfortable feet. Look for boots with supportive cuffs, reliable lacing systems, and a warm liner. Boots should fit snugly but not pinch. Your child’s toes should just brush the end when standing straight, then pull back slightly when they bend their knees into a riding position.
Choose boots with simple closure systems like BOA dials or Velcro straps that children can manage on their own. This makes a real difference when you’re not having to do up laces repeatedly in the cold.
Buying boots also gives you flexibility with fit. Many models have removable liners or adjustable panels that help extend their lifespan as your child grows. Some brands, like Burton’s Grom range, feature “Room-to-Grow” technology that extends the boot by a full size, giving you an extra season’s wear.
3. Bindings: Rent early, buy later
Bindings can easily be rented in the early days. Most rental shops include them with boards and they tend to work perfectly well for beginners.
Once your child starts riding steeper terrain or wants more control, buying becomes more worthwhile. When that time comes, choose bindings that are lightweight and easy for kids to operate on their own. Focus on comfort and simplicity rather than advanced features.
4. Jackets and trousers: Buy these
Snowboarding requires clothing that keeps kids warm, dry and able to move freely. Jackets and trousers designed specifically for winter sports are worth purchasing because they provide the right balance of insulation and waterproofing.
Choose pieces that have room for layers without feeling bulky. Many kids-specific jackets come with extendable sleeves or trouser hems that add an extra season of life as your child grows. These features help stretch your budget and reduce yearly replacements.
Look for a waterproof rating of at least 5,000mm (10,000mm is even better for frequent riders) and reinforced knees and seat. Snowboard-specific trousers usually have extra protection in these areas since snowboarding involves a lot of sitting in snow.
Renting clothing can work in a pinch, but kids usually prefer the comfort and cleanliness of wearing their own. For outerwear like jackets and salopettes, secondhand is a great option. Vinted, Facebook Marketplace, and local secondhand ski groups are brilliant for picking up barely-worn gear at half the price.
5. Base layers and mid layers: Budget-friendly must-haves
Base layers make the biggest difference in warmth. A moisture-wicking top and leggings keep kids comfortable even on long days outside. Cotton is not a good choice because it traps moisture, so look for synthetic or wool blends instead.
A lightweight fleece or thin insulated sweater works well as a mid layer. These pieces are affordable and get used all winter long, not just during snow trips.
Base layers don’t need to be expensive. Shops like Decathlon and even supermarket ranges do perfectly good children’s thermals for around £15-25 a set.
6. Helmets and goggles: Always buy
A helmet is one of the most important pieces of gear your child will wear. Renting might seem easy, but buying provides a far better fit. A properly fitted helmet is safer, warmer and more comfortable, especially for kids who might wear one several days in a row.
Look for helmets with an adjustable fit system. Most have a dial at the back that tightens or loosens the inner harness, allowing for growth. The helmet should sit level on your child’s head, covering the forehead without tilting back. When they shake their head, it shouldn’t wobble.
Goggles are also worth owning. They protect eyes from wind, cold and sun glare. Choose a pair that sits comfortably on your child’s face and fits well with their helmet. Many brands sell helmet-and-goggle sets designed to work together, eliminating the exposed forehead gap that gets painfully cold.
7. Gloves, socks and neck warmers: Small items that matter
These items seem simple but make a big difference in how long your child lasts on the mountain. Waterproof gloves, warm wool socks and a soft neck warmer help keep your child protected against cold weather.
For gloves, make sure they are fully waterproof (not just water-resistant) and well insulated. Snowboarders spend a lot of time with hands in snow. Socks should be merino wool or synthetic blend, calf-length, and not too thick. One proper pair is better than two thin pairs.
They are inexpensive, easy to pack and worth buying new so your child has a reliable set that stays warm and dry.
8. Wrist guards: Worth considering for beginners
Wrist injuries are one of the most common snowboarding accidents. When we fall, our instinct is to put our hands out, and on hard snow, that can mean sprains or fractures.
Wrist guards worn under gloves provide support and protection while your child is learning. Some snowboard gloves come with built-in wrist protection, or you can buy guards separately. They are not essential for everyone, but for beginners or children who tend to fall hard, they are worth considering.
9. What you can skip
Not everything sold in the snowboarding section is necessary. Kids do not need high-end backpacks, avalanche equipment, advanced tuning kits, or racing-specific accessories. Many of these items are designed for advanced riders or backcountry terrain.
Focus on the basics. Warm clothing, a good helmet, comfortable boots and a functional board setup are all most kids need.
10. Saving money through smart shopping
Online shopping can be one of the easiest ways to save money on snow gear. Many retailers mark down last season’s equipment and clothing significantly, especially in late winter and early spring. Past season colours and styles work just as well as current ones for a fraction of the price.
Look for online clearance sections, bundle deals, or end-of-season promotions. Buying jackets or trousers in slightly roomier fits or extendable models can also help them last longer.
The summer months are particularly good for bargains. Snowboard gear is ridiculously cheap off-season as shops want it gone to make room for warm-weather stock.
Secondhand groups, local gear swaps and parent community boards are other great places to find lightly used items for growing kids. Ski swaps, which are events where families buy and sell used equipment, are brilliant for picking up quality gear cheaply.
Some retailers also offer junior trade-in programmes where you return outgrown gear and receive credit towards the next size. Ask at your local shops what’s available.
11. Build a gear strategy, not a collection
The best approach to affordable snowboarding is balance. Renting the high-cost items at first and buying the pieces that affect warmth and comfort helps keep the sport accessible. Once your child commits to snowboarding, you can gradually transition into owning more of the gear.
Kids grow quickly, but smart choices help you stay one step ahead of the next size change. With the right mix of rentals, budget-friendly purchases and a bit of online deal hunting, your child can enjoy every snowy adventure without stretching the family budget.
Quick gear checklist
Rent (at first):
Snowboard
Bindings
Possibly boots (if only going once or twice)
Buy:
Boots (if snowboarding regularly)
Helmet
Goggles
Jacket and snow trousers
Base layers (thermal top and leggings)
Mid layer (fleece)
Waterproof gloves or mittens
Snowboard socks
Neck warmer
Consider:
Wrist guards (especially for beginners)
Frequently asked questions
What age can children start snowboarding?
Most ski schools accept children from around age 4-5 for snowboarding lessons, though some will take younger children if they are physically ready and enthusiastic. The key factors are balance, coordination and willingness to try.
How much does it cost to kit out a child for snowboarding?
With strategic shopping, you can kit out a beginner child for around £150-250, including secondhand outerwear, new boots, helmet and goggles, plus rental board and bindings.
Should I buy snowboard gear a size bigger so it lasts longer?
This is tempting but generally not recommended for key items. Oversized boots affect control and can cause injury. Boards that are too long are harder to manoeuvre and frustrating for learners. Clothing can be slightly roomier, especially with extendable features, but avoid going too big.
Is it worth buying gear if we only snowboard once a year?
For once-a-year holidays, renting the board, boots and bindings usually makes more sense. However, buying outerwear, helmet, goggles and base layers is still worthwhile as these items ensure your child stays comfortable and can be used for other winter activities.
How do I know if rental boots fit properly?
Your child’s toes should just brush the end of the boot when standing straight, then pull back slightly when they bend their knees. There should be no painful pressure points, but the boot should not feel loose. If your child complains about boots within the first hour, take them back and ask to try a different size.
Have questions about getting your family started with snowboarding? Drop them in the comments below. We’d love to help.
*Collaborative feature post*
Which length of Halo Extensions looks best with naturally wavy hair?
As I stood in front of the mirror this morning, running my fingers through what used to be my thick, curly locks, I couldn’t help but feel a pang of sadness. If you’re reading this, chances are you know exactly what I’m talking about. That moment when you realise your postpartum hair loss has left you with thin, lifeless strands that barely resemble your pre-baby mane.
After my fourth baby, the hair loss was worse than ever. Clumps came out in the shower, my ponytail was embarrassingly thin, and my natural curls seemed to have lost their bounce entirely. That’s when I started researching halo hair extensions – and let me tell you, finding the right length for wavy hair while dealing with postpartum changes felt like solving a complex puzzle.
The good news? After months of research, consultations with hair professionals, and trying different options myself, I’ve discovered that for most people with naturally wavy hair, 18 to 22 inches of clip-in hair extensions is the ideal range to achieve a seamless blend and a balanced, voluminous look. In some cases, you can explore clip-free 22-inch halo hair extensions when looking to match longer wave lengths. The final choice often comes down to how your natural texture falls and how much length you’re aiming to add. But there’s so much more to consider, especially when you’re a new mum dealing with hormonal hair changes.
Understanding postpartum hair loss and texture changes
Before we dive into extension lengths, let’s talk about what’s actually happening to your hair after baby arrives. Studies show that between 40–90% of women experience some degree of postpartum hair loss, typically starting around 2–4 months after delivery.
But here’s something many don’t realise – it’s not just about losing hair. Your texture can change dramatically too.
During pregnancy, those lovely hormones gave us thick, glossy hair that seemed to defy gravity. Post-baby? It’s a different story. My naturally curly hair became stringier, lost its pattern, and felt completely foreign. If you’re experiencing similar changes, you’re not alone – and that’s why choosing the right halo extension length becomes even more crucial.
It uses clinically proven red light wavelengths to stimulate regrowth at the follicle level — and it’s totally non-invasive, so it fits perfectly into the chaotic new-mum routine (I literally wear it while replying to emails or folding laundry).
As I discovered in my journey with home remedies for hair fall after pregnancy, sometimes natural solutions aren’t quite enough to restore our confidence quickly. That’s where halo extensions come in as a brilliant temporary solution while we wait for our hair to recover.
If you’re new to the world of hair extensions (like I was!), halo extensions might sound a bit space-age. But they’re actually incredibly simple and, dare I say, genius. Unlike clip-ins that can tug on already fragile postpartum hair, or tape-ins that require professional application, halo extensions sit on your head like an invisible crown.
The extension is attached to a thin, clear wire that sits comfortably around your head, hidden under your natural hair. You simply place it on, pull your own hair over the wire, and voilà – instant volume and length without any damage to your recovering hair follicles. Halo extensions come in a range of common lengths, including 12-inch, 14-inch, 16-inch, 18-inch, 20-inch, and 22-inch options. For naturally wavy hair, the final look differs from straight hair because the wave pattern slightly shortens the perceived length. Shorter options like 14-inch or 16-inch halo extensions suit shoulder-length hair or bobs, offering subtle volume and blending well. Medium (18-inch) is versatile for most wavy hair types and provides a natural enhancement in both length and fullness. Longer lengths (20-inch or 22-inch) create a more dramatic effect, but may require more blending for consistency with natural waves.
What makes them particularly brilliant for us new mums is that they’re:
Damage-free: No clips, glue, or tape pulling on fragile postpartum hair
Quick to apply: Takes literally 30 seconds (perfect for those rushed mornings)
Removable: Take them off for baby snuggles or bedtime
Reusable: One investment lasts months or even years with proper care
Why Halo Extensions are perfect for new mums
When you’re dealing with a newborn, the last thing you need is a complicated hair routine. I remember trying to style my thinning hair while my baby cried in the bouncer, feeling increasingly frustrated and self-conscious. Hair extension specialists and experienced users frequently point to halo extensions as one of the safest and most practical options for those navigating postpartum hair changes. They don’t tug, they don’t require glue, and they don’t demand professional installation.
Here’s why they’re a game-changer for new mothers:
Time-saving: Application takes less than a minute
Breastfeeding-friendly: No adhesives or chemicals
Comfortable: Lightweight and headache-free
Confidence-boosting: Instant transformation when you need it most
Photo-ready: Perfect for those precious family photos
Choosing the best Halo Extensions length for naturally wavy hair
For most people with naturally wavy hair, 18 to 22 inches is the sweet spot – it gives you enough length for that dreamy, voluminous finish without looking artificial or hard to manage.
Here’s a quick guide to standard halo lengths and how they work with wavy hair:
12–14 inch: Subtle volume, good for short bobs or postpartum regrowth
16 inch: Natural-looking, perfect for shoulder-length cuts
18 inch: My personal favourite – blends beautifully, manageable daily
20–22 inch: Glamorous length, but needs more blending and styling
Wave pattern considerations:
Loose waves (2A–2B): Can carry longer extensions (20–22″) easily
Medium waves (2C–3A): Look best with 18–20″
Tight waves: May need shorter lengths for seamless blend
Pro tip: Measure from the top of your head down to where you want the extensions to fall. Remember that wavy textures shorten the visual length by 1–2 inches.
Matching extension length to natural hair and face shape
Cost per wear example: £150 halo worn 3x/week for a year = £0.96 per use. Cheaper than a salon visit!
Professional insights and hair care alignment
While no dermatologist will endorse a specific brand, experts like Dr. Michele Green emphasise gentle hair care postpartum. That means avoiding tension, weight, or harsh chemicals – all of which halo extensions respect.
Hair extension professionals and postpartum users agree: halos are safe, non-damaging, and boost confidence while your natural hair recovers.
When to introduce Halo Extensions postpartum
0–3 months: Prioritise nutrition and scalp care
3–6 months: Consider Halo if confidence is affected
6–12 months: Best time to experiment
12+ months: Reassess – your hair may be bouncing back!
Final thoughts and recommendations
Choosing the right halo extension length for wavy hair postpartum is part science, part trial and error. Aim for 18–22 inches for the best blend of manageability, volume, and confidence. For added longevity, avoid sleeping or swimming with the extensions in. If using other methods like clip-in or tape-in extensions, a similar care routine applies, but always follows the manufacturer’s guidelines. Maintaining the quality of both the natural hair and the halo extension ensures the final style looks fresh and cohesive.
Above all – be kind to yourself. This is a temporary season. If a Halo extension gives you that little spark of “you” back, it’s absolutely worth it.
Want to go one step further?
If you’re still feeling stuck and want to explore a non-invasive solution for hair regrowth, I’ve been trialling the CurrentBody Skin LED Hair Growth Helmet* and it’s become part of my weekly self-care ritual.
Have you tried halo extensions for postpartum hair loss? I’d love to hear about your experience in the comments below!
Disclosure: Collaborative feature post. Some links in this post are affiliate links, which means I may earn a small commission if you purchase at no extra cost to you. All opinions remain my own.
Budgeting as a single mom: staying calm when money plans shift
Being a single mom means navigating constant change, juggling dinner plans one moment and unexpected emergencies the next. In today’s fast-paced world, even well-thought-out budgets can unravel without warning. For single moms managing households and finances, it’s easy to feel overwhelmed. This article explores simple, effective strategies to help you stay calm, keep your budget on track, and support your family through whatever life throws your way.
Budgeting tips for single moms
Master the art of flexible budgeting
Single moms know that plans rarely go perfectly—unexpected changes are part of the daily routine. A trip to the store turns into an adventure. A small bill can quickly become a significant expense. That’s why budgeting as a single mom needs flexibility. Instead of sticking to rigid numbers, think of your budget as a living, breathing entity. It grows and shifts in response to your family’s changing needs.
Start with the basics: cover essentials first. Housing, food, and childcare take priority over everything else. Then add a small buffer for unexpected costs, such as a last-minute school project or a sudden doctor’s visit. Keep it simple and track where your money goes.
It’s these small steps that keep your budget flowing smoothly, even in a busy single mom’s world.
Budgeting tips for single parents
Turn chaos into calm with smart spending strategies
Being a single mom means handling the unexpected with grace and poise. But surprise expenses can quickly test that grace. That’s where innovative spending strategies come in. They turn stressful surprises into manageable moments.
Start by practising mindful spending. Ask yourself if each expense is necessary or if there’s a more effective way to meet that need. Small changes, like swapping brand names for store brands or shopping second-hand, can add up over time.
Tracking your spending weekly helps too. It doesn’t need to be complicated. A notebook, a budgeting app, or even a quick note on your phone can help you spot leaks before they drain your wallet.
Another key tip: be aware of those holds on your debit card that can freeze up funds. Learning to remove hold on debit card gives you more breathing room. You’ll be ready for those surprise birthday party invitations or the sudden need for a new backpack.
How to budget as a single mom
Find strength in small wins
Let’s face it—being a single mom is about celebrating the small wins. When you’re balancing work, kids, and your budget, those wins matter. Every time you cook at home instead of eating out, that’s a win. Every time you find a creative solution to save a few dollars, that’s another win.
Write them down. Keep them somewhere visible to remind yourself that you’re making progress—even if it doesn’t always feel like it. Those small wins build confidence. They turn panic into calm and show you that you’re stronger than you think.
Effective budgeting tips for single moms
Embrace support without guilt
It’s okay to ask for help. No single mom should feel like she has to go it alone. When finances are stretched, lean on friends, family, or community resources for support. Hand-me-downs, swaps, and shared meals can be lifesavers when you’re managing a budget.
Talking about money with people you trust can also help. Sometimes, just saying the worry out loud can bring relief. Other times, a fresh perspective can spark a new idea for managing expenses. Don’t let pride keep you from getting the help you deserve.
Why is budgeting important as a single parent
Keep your eyes on the bigger picture
When life gets busy, it’s easy to forget your long-term goals. But those goals—like creating a safe, happy home—are why you budget. Remind yourself that perfection isn’t the goal. Progress is. Small steps add up. And every choice you make today helps your family feel more secure tomorrow.
So keep your eyes on the bigger picture. Adjust your plans when life changes. Stay flexible and keep your family’s needs at the forefront.
Tips for budgeting as a single mom
Teaching kids about money: making budgeting a family affair
One of the best ways to stay calm when money plans shift is to involve your kids in the process. Teaching them about budgeting doesn’t just help you—it sets them up for a lifetime of wise money choices.
Start with the basics. Show them how to track spending on everyday items, such as snacks or small treats. Make it a game—give them a small “budget” for the week and let them practice making choices. They’ll learn quickly how fast money can go, and how to prioritise what matters.
Use real-life examples to help them understand. Explain how you choose between needs and wants, or how a sudden expense can change what you buy. Let them see how flexible budgeting keeps your family steady, even when things don’t go as planned.
Including kids in these talks also builds trust. They’ll see that it’s normal for money plans to shift—and that there are always ways to stay calm and find solutions. Plus, it takes some pressure off you when everyone in the family knows how money flows and where it’s going. Budgeting becomes a shared effort, not just another chore.
Here’s my monthly single mom budget explained
When money plans shift, it’s easy to feel like everything is out of control. But as a single mom, you’ve learned how to adapt, even when life gets messy. By being flexible and adjusting your budget, you can stay focused on what your family needs.
It’s helpful to remember that small steps can make a big difference. Tracking your spending, finding creative ways to save, and leaning on your support system all add up. These actions help you stay calm, even when your budget faces unexpected bumps.
It’s not about getting everything perfect. It’s about making smart choices and finding balance, so you can keep your family moving forward.
Seek out single mom resources
Don’t hesitate to utilise available resources tailored to single parents. Organisations and online communities offer support, advice, and tools to help you manage your finances effectively.
Budgeting with a low income? Yes, it’s possible!
Budgeting on a low income requires creativity and determination. Focus on essential expenses, seek out discounts, and explore community assistance programs to reduce your financial burden. Remember, every small saving contributes to your financial stability.
FAQs
How to budget as a single mom?
Start by listing all sources of income and expenses. Prioritise essential needs like housing, food, and childcare—Utilise budgeting tools or apps to track your spending and identify areas where you can cut costs.
What is a single budget?
A single budget refers to a financial plan managed by one individual, often encompassing all household expenses and income, especially pertinent to single parents.
Is being a single mom worth it?
While challenging, many single moms find the experience rewarding. With effective budgeting and support, it’s possible to provide a stable and fulfilling life for your children.
Why do single parents struggle financially?
Single parents often rely on a single income, making it harder to cover all expenses. Limited access to affordable childcare and housing can also contribute to financial strain.
What are some tips for managing finances as a single mom if you struggle with finance and math?
Use budgeting apps that simplify tracking expenses. Seek out community workshops or online courses focused on financial literacy for single parents.
What’s a good budget for a single mom of two making $15 an hour?
Focus on essential expenses, allocate funds for savings, and seek out assistance programs. Tools like a Family Budget Calculator can help tailor a budget to your specific situation.
How do you manage your finances as a single parent?
Regularly review your budget, prioritise spending, and seek support when needed. Involving your children in financial discussions can also foster a collaborative approach to budgeting.
What are some ways for a single mother with two children to have a decent life while earning $11 an hour?
Utilise community resources, seek out affordable housing options, and consider additional income streams like part-time work or side gigs. Budgeting effectively is key.
What’s the ideal monthly budget for a single mom?
There is no universal number, but a basic framework is helpful. Focus on covering the essentials—housing, utilities, food, childcare, and transportation. From there, aim to allocate a small amount toward savings, debt repayment, and an emergency fund. Use tools like the Single Mom Budget Calculator to estimate costs tailored to your situation.
What are some financial survival tips for single moms raising children, especially if they had no savings before becoming pregnant?
Start small. Prioritise needs over wants. Seek out community programs, food pantries, and housing assistance. Look for creative ways to save: meal planning, buying second-hand, or bartering with other parents. Build an emergency fund slowly, even if it’s just $5 a week. Every bit counts.
How much would you need to spend monthly raising a child as a single mother in the place you currently live in?
This varies based on location, but everyday expenses include housing, childcare, food, clothing, school supplies, transportation, and healthcare. The Economic Policy Institute Family Budget Calculator offers detailed breakdowns by city and state.
Final thoughts
Budgeting as a single mom is a journey—sometimes challenging, often messy, but always worth it. You’re doing the best you can for your family, and every step forward counts. Whether it’s saving a little, spending smarter, or simply staying calm when the budget gets tight, you’ve got the resilience and creativity to make it work. Keep your goals in sight, your support system close, and your head held high. You’re stronger than you think.
*Collaborative feature post*
How to transfer your e-wallet to your account: Philippines edition
Over the years, an increasing number of parents in the Philippines have used e-wallets for their daily transactions. The Bangko Sentral ng Pilipinas (BSP) noted that the number of accounts for e-wallets in the Philippines reached 393.6 million in 2023, making digital wallets an essential tool for managing family finances and daily expenses. However, one common question busy parents often ask is how to transfer your e-wallet to your account successfully and keep it too!
Below is a practical guide designed specifically for parents, covering everything you need to know about transferring your e-wallet funds and keeping it too!
Everyday transactions and convenience
Are you the type who uses your e-wallet for routine daily transactions, such as paying for a Grab ride or dining out? If so, then you can calculate the total routine transactions demand for the week to determine how much balance you should have in your e-wallet.
Keeping your balance in your Maya wallet to cover just enough for the week, plus a little extra, ensures that you can pay for your daily expenses while also deterring you from making unnecessary large purchases. This can also be a wise way to stay within budget, as spending outside of your routine transactions may leave you short on funds for the rest of the week.
Transaction fees and cash-in options
Depending on your e-wallet, you may be charged a small transaction fee each time you cash out funds from your bank or other accounts to your e-wallet. If you expect to make multiple top-ups over the week or month, consider those fees as well when deciding how much to keep in your e-wallet. However, a more cost-effective approach would be to make a single cash-in transaction every few weeks instead of daily.
Knowing your cash-in options can help you determine how much money to keep in your e-wallet as well. For instance, if you have easy access to reload points such as convenience stores or if your payroll account is linked to your e-wallet, then you may not need to keep such a large balance. Otherwise, if there aren’t any reloading outlets near you, then having a larger wallet balance may be less of a hassle.
Rewards, cashback, and seasonal discounts
Many e-wallets offer various rewards and cashback when you use their services to pay for bills or other transactions. To take advantage of such offers, consider topping up your e-wallet with the amount needed for your bills, in addition to your usual budget, so that you can pay for them digitally instead. Just make sure that you make the payment as soon as possible so that you won’t accidentally spend what should be for your bills on your daily expenses.
If you’re anticipating seasonal discounts such as double-digit or holiday sales, you can also top up your digital wallet in advance for faster transactions. To make sure you don’t spend recklessly, however, set a specific budget to be used for purchases for that particular sales period.
Emergency funds
It’s also important to keep a modest amount in your e-wallet to cover for small emergencies, such as unplanned transport needs or medical costs. This could range from PHP 1,000 to PHP 3,000, or more, depending on your financial means. In addition, having an emergency fund in your own e-wallet can also be beneficial in cases where you need to quickly transfer money to family members, such as when they’re facing an emergency themselves.
Opportunity cost and interest-bearing accounts
Having a large amount just sitting in an e-wallet that doesn’t earn interest can actually be losing you money that you could’ve earned instead. Hence, consider limiting the amount in your e-wallet to your daily expenses and your emergency fund only. Here’s a pro tip: you can put any excess funds in a savings account that earns a higher interest so that it grows over time.
Fortunately, some e-wallets offer their own savings counterparts, allowing you to seamlessly transfer your e-wallet funds to your digital savings account with just a few taps. Maya wallet users, for instance, can maintain their own Maya Savings accounts, which offer higher rates than traditional banks and allow users to reduce transfer fees. With this approach, you can maximise your e-wallet use for daily expenses while growing the rest of your funds in the process.
Security and fraud prevention
While most e-wallets employ top-notch security measures to ensure their users’ funds are safe, it would still be wise to avoid keeping a large balance in your e-wallet to minimise potential losses from hacking or fraudulent transactions.
To better protect your funds, ensure that you activate your e-wallet’s security features, such as two-factor authentication, biometric verification, and spending limits, for an additional layer of protection.
Ultimately, the amount to keep in your e-wallet can depend on multiple factors and varies from individual to individual. The points above should help you determine a good baseline amount to keep in your wallet that covers your expenses while not wasting your money’s potential.
Transfer funds instantly from your e-wallet to your bank account
Transferring funds from your e-wallet to your bank account is a convenient option, especially when managing a family budget or dealing with unexpected expenses. Follow these simple steps to move your funds securely and quickly:
Log in to your e-wallet app.
Find the “transfer” option.
Select your linked bank account or add one if you haven’t already.
Enter the amount of money you wish to transfer.
Confirm the details, then click “transfer funds.”
Most transfers occur instantly or within minutes, depending on your e-wallet provider.
How to transfer e-wallet to account using the FNB App
If you’re using FNB eWallet specifically, transferring funds is just as straightforward:
Open your FNB eWallet app.
Select “Link eWallet to account via the app.”
Choose your account and enter your FNB eWallet PIN.
Enter the amount you wish to transfer.
Confirm and complete the transaction.
This process is especially handy when balancing family finances or sending money quickly to relatives.
Important security tips for parents
When transferring funds, always:
Keep your eWallet PIN safe.
Regularly perform e-wallet balance checks.
Enable security features like biometric verification or transaction alerts to ensure your funds stay secure.
Frequently Asked Questions (FAQS)
Can you transfer an eWallet to your bank account?
Yes, most ewallet providers allow direct transfer from your ewallet to your bank account.
How to cash out an eWallet?
You can cash out by transferring your ewallet balance to your linked bank account and then withdrawing funds via ATM or bank branch.
Can I transfer TNG eWallet to bank account?
Yes, Touch n Go eWallet supports bank transfers, enabling you to easily transfer funds from your eWallet to your bank.
Is it possible to transfer money from an IRCTC e-wallet to a bank account?
Yes, IRCTC ewallet allows transferring money back to your bank account through their online portal.
How do I withdraw from an eWallet? Withdraw by transferring your ewallet funds to your linked bank account, then accessing your funds via ATM or bank withdrawal.
Additional quick tips for parents:
Regularly check your e-wallet balance using your app or the e-wallet balance check number.
If you’ve forgotten your eWallet card PIN, use the “Forgot eWallet Card PIN” option in your app to reset securely.
Use QR codes for instant transfers—scan the QR code to make an instant fund transfer now.
Wrapping up
Transferring your ewallet funds to your account shouldn’t be complicated—especially for busy mums managing household budgets and family financial responsibilities. Follow these straightforward tips and frequently asked questions to ensure your ewallet transfers are seamless, secure, and stress-free.
*Collaborative feature post*
Safety features to consider when choosing a safe sleeper bed
Choosing a safe sleeper bed for your child can be an exciting opportunity to enhance comfort, maximise space, and create a fun sleeping environment. In this article, we will focus on the mid-sleeper bed when choosing a safe sleeper bed for your child, as these versatile beds sit at a medium height and offer storage or safe play areas underneath.
Why choose a mid-sleeper bed?
A mid-sleeper bed is more than just a place to sleep—it’s a versatile and practical solution for any child’s room. These beds offer comfort and they’re an ingenious way to save space and create a multifunctional environment tailored to your child’s needs.
For families working with smaller spaces, mid-sleeper beds are a game-changer. By elevating the sleeping area to a medium height, they free up valuable floor space underneath, transforming it into a usable area for storage, play, or study. Whether you’re dealing with a tiny bedroom or simply want to maximise the room’s functionality, a mid-sleeper bed is a smart choice.
Creative and functional designs
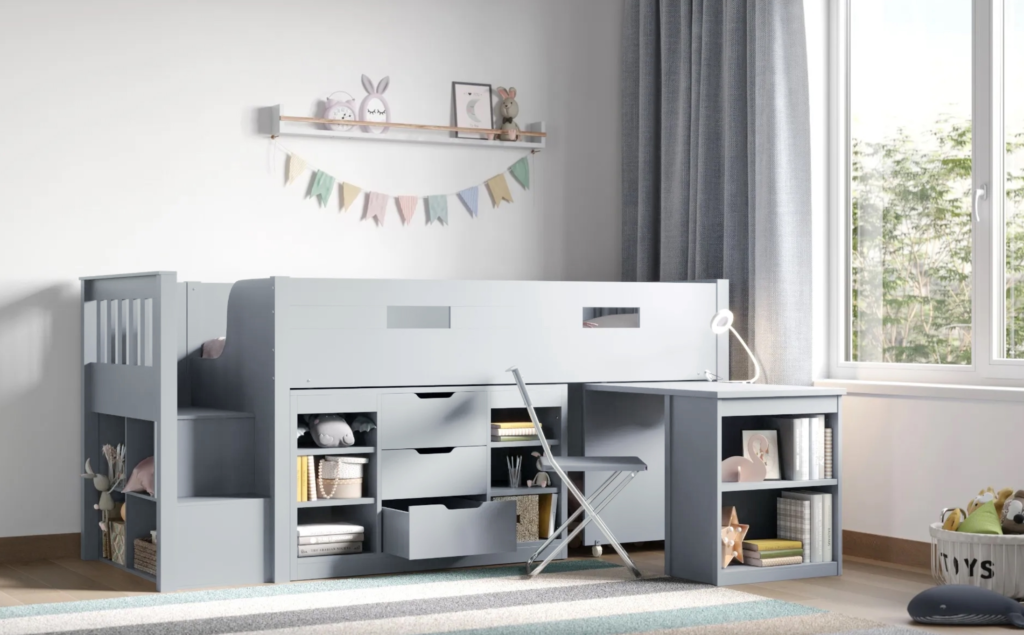
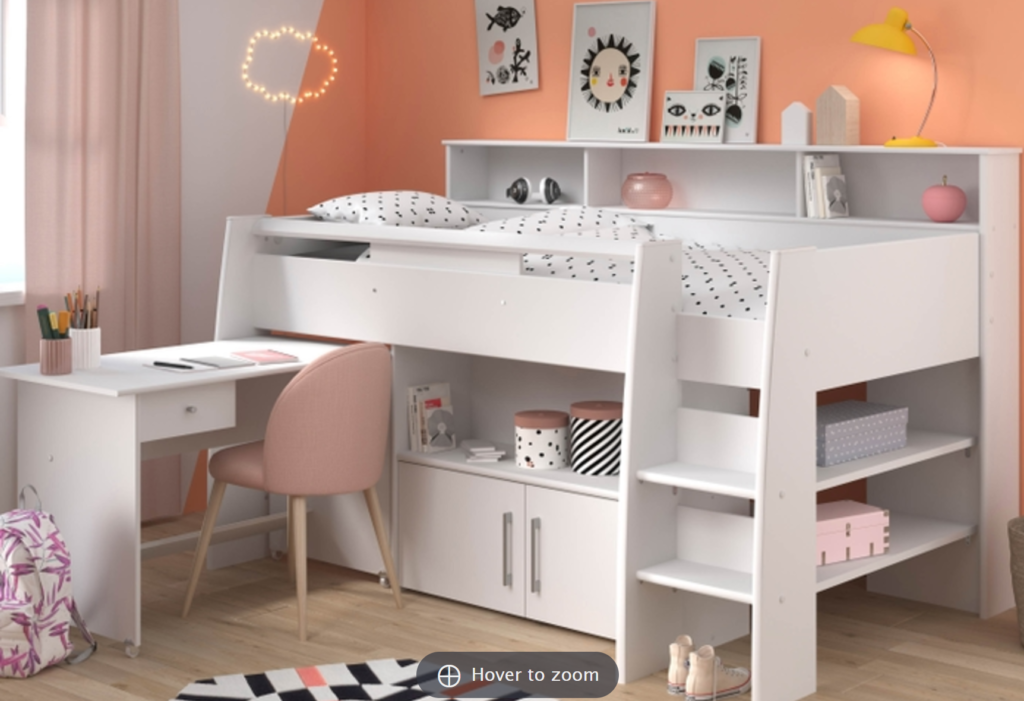
Mid-sleeper beds come in a variety of designs to suit your child’s personality and your family’s needs. Some models include built-in desks for homework, shelving units for books and toys, or even cosy play tents that turn the bed into a private little hideaway. This versatility makes mid-sleeper beds perfect for children of all ages, adapting as they grow and their interests change.
Encouraging growth and independence
When choosing a safe sleeper bed, think beyond the immediate need for a secure sleeping space. Consider your child’s age, interests, and room size when browsing a mid sleeper bed collection to find the perfect fit. Mid-sleeper beds encourage independence by allowing kids to organise their own play or study areas underneath. For younger children, the bed can be a creative space for imaginative play, while older kids can use it as a private nook for reading or studying.
A safe and comfortable choice
Safety is always a priority, and mid-sleeper beds are designed with this in mind. With secure guardrails, non-slip ladders, and robust materials, these beds offer a comfortable sleeping environment that parents can trust. They strike the perfect balance between fun and functionality, giving children a sense of adventure while keeping them safe during sleep.
Safety features to look for in a safe sleeper bed
Safety is non-negotiable when choosing a bed for your child. A mid-sleeper bed, while offering fun and functionality, must meet certain safety standards to ensure your little one is secure during sleep and play. Here’s a closer look at the key safety features you should prioritise:
1. Mattress fit and height
The mattress is a critical part of a safe sleeper bed. An improper fit or incorrect height can compromise the safety of the entire bed. UK and EU mattress sizes differ slightly:
EU single: 90 x 200 cm
UK single: 90 x 190 cm
Snug Fit: The mattress must fit tightly within the bed frame. Gaps larger than 30mm (1.2 inches) between the mattress and the bed’s edges are a hazard, as they can trap small limbs or objects.
Height Matters: The mattress should not exceed the recommended height for the bed’s safety rails. Most manufacturers recommend a mattress no thicker than 16cm (6.3 inches) to ensure the rails effectively prevent falls.
Follow Guidelines: Always check the bed manufacturer’s specifications to select a mattress that complements the frame design and maintains safety.
2. Sturdy construction
A bed is only as safe as its construction. The materials and craftsmanship must be able to withstand everyday use by energetic children.
Durable Materials: Look for mid-sleeper beds made from solid wood or robust metal. These materials ensure the frame can support your child’s weight and activity without bending or breaking.
Rounded Edges: Sharp corners and edges are a recipe for bumps and bruises. Opt for beds with smooth, rounded edges to minimise the risk of injuries during play or climbing.
Non-Toxic Finishes: Children are naturally curious and may touch or even chew on parts of their bed. Make sure the paint or finish is non-toxic, certified child-safe, and free from harmful chemicals.
Regular Maintenance: Even a well-built bed needs regular checks. Inspect the bed periodically for loose screws, worn joints, or other signs of wear and tear, and address any issues immediately.
3. Secure guardrails and ladders
Guardrails and ladders are essential components of a mid-sleeper bed’s safety features. Without them, the elevated design could pose unnecessary risks.
Age-Appropriate Design: Ladders and guardrails should match your child’s developmental stage. For younger children, make sure they can climb the ladder easily and that the guardrails are high enough to provide extra security.
Guardrails: The rails should surround the sleeping area and rise at least 16cm (6.3 inches) above the mattress surface. This height is sufficient to prevent rolling off the bed while still allowing easy access for older children. Ensure the rails are securely fastened to the frame and have no gaps large enough for a child’s head or limbs to get stuck.
Ladders: A sturdy, well-designed ladder is crucial for safe access to the bed. Look for ladders with wide, non-slip steps and strong attachments to the frame. Ensure the ladder’s placement suits the room’s layout, allowing your child to climb comfortably without obstruction.
To help you make the best choice, here are answers to common questions:
What is a safety sleeper bed?
A safety sleeper bed is a secure, enclosed bed designed to provide a safe sleeping environment for children, adults, or individuals with special needs. These beds often feature enclosed sides, durable materials, and protective rails to minimise risks.
What is an autistic safety bed?
An autistic safety bed is specifically designed for individuals with autism to ensure a secure sleeping space. Features often include enclosed sides, soft materials, and customisable options to meet sensory or safety needs.
Are mid-sleeper beds safe?
Yes! Mid-sleeper beds are safe when designed with sturdy frames, guardrails, and snug-fitting mattresses. They are ideal for children who can safely climb a ladder and enjoy the extra space underneath for storage or play.
Can adults use a safe sleeper bed?
Absolutely. Safe sleeper beds for adults are available, particularly for those with special needs or mobility concerns. These beds often include enclosed sides and adjustable features for added safety.
What is the cost of a safety sleeper bed?
The safety sleeper cost depends on the bed’s features, size, and customisation. Prices start from a few hundred pounds, and beds purchased for medical necessity may be covered by insurance.
Are bed side sleepers safe?
Bedside sleepers can be safe if they meet current safety guidelines. Ensure the sleeper attaches securely to the main bed, has a sturdy frame, and includes breathable materials to reduce risks.
What is a letter of medical necessity for a safety sleeper?
A letter of medical necessity is a document written by a healthcare provider explaining why a safe sleeper bed is required for an individual’s medical needs. This letter is often used to secure insurance coverage for the bed.
What is the safest mattress to sleep on?
The safest mattress is one that fits snugly within the bed frame and meets safety standards. For a mid-sleeper bed, ensure the mattress height does not exceed the guardrail’s height.
Is The Safety Sleeper covered by insurance?
Many insurance plans cover The Safety Sleeper, provided it’s deemed a medical necessity. Check with your provider to confirm eligibility.
How safe are bunk beds or high sleepers for children?
Bunk beds and high sleepers can be safe if they have sturdy guardrails, a secure ladder, and are used by children old enough to climb safely. Mid-sleeper beds, with their lower height, are often a safer alternative for younger kids.
Benefits of mid-sleeper beds as safe sleeper beds
Mid-sleeper beds are much more than just a sleeping solution—they’re a versatile, practical, and stylish addition to your child’s bedroom. Let’s dive into what makes these beds so fantastic:
Space-saving designs
For families working with limited space, mid-sleeper beds are a dream come true. By elevating the sleeping platform, they free up valuable floor space for other uses, ensuring every inch of the room is utilised effectively.
Storage Solutions: Many mid-sleeper beds are designed with built-in storage, such as drawers, shelves, or cubbies beneath the bed. These features help keep your child’s room tidy and organised, reducing the need for additional furniture like dressers or toy boxes.
Play Areas: Some models go beyond storage and transform the space underneath into a fun play area. Features like play tents, tunnels, or slides turn the bed into an exciting adventure zone, encouraging imaginative play. For younger children, this makes bedtime something to look forward to rather than a chore.
Multifunctionality
Mid-sleeper beds are designed to adapt to your child’s evolving needs, offering features that grow with them.
Study Stations: Built-in desks tucked beneath the bed create a compact and practical workspace. These desks are perfect for homework, arts and crafts, or reading. They save space and provide a dedicated area for focus and creativity, especially as your child enters school-age years.
Adaptable Features: Many mid-sleeper beds can be reconfigured over time to suit your child’s changing needs. For example, a play area beneath the bed can later be converted into additional storage or a more mature study zone. This adaptability ensures the bed remains a functional piece of furniture for years to come, saving you money in the long run.
Practical for smaller rooms
Not every home has the luxury of large bedrooms, and that’s where mid-sleeper beds shine. They’re specifically designed to maximise functionality in compact spaces.
Maximising Space: By utilising vertical space, mid-sleeper beds leave the floor open for other activities. This is especially valuable in smaller rooms where every bit of space counts. The design encourages a more open and airy feel, preventing the room from feeling cramped.
Easy Access: Unlike high-sleeper beds or bunk beds, mid-sleeper beds have a moderate height that’s perfect for children. They’re easy to climb into, and the reduced height makes parents feel more at ease about safety. This is particularly useful for younger children who might struggle with higher beds but are ready to transition from a standard low bed.
Why choose a mid-sleeper bed?
In addition to their safety and practicality, mid-sleeper beds offer a touch of creativity and fun that transforms a child’s bedroom into their own little world. They combine three critical benefits:
Functionality: Whether it’s storage, play, or study, these beds are designed to fit into busy family lives seamlessly.
Safety: With guardrails, sturdy ladders, and durable materials, mid-sleeper beds prioritise your child’s well-being.
Longevity: These beds grow with your child, adapting to their needs and providing value over time.
For parents looking to create a space that balances fun, safety, and practicality, a mid-sleeper bed is the perfect choice. It’s not just a bed—it’s an investment in your child’s comfort and happiness.
Final thoughts
Choosing a safe sleeper bed, particularly a mid-sleeper bed, offers a wonderful way to create a safe, practical, and fun sleeping environment for your child. With features like secure guardrails, sturdy construction, and multifunctional designs, these beds are perfect for maximising space while ensuring your child’s safety. Don’t forget to check for compliance with safety standards and choose a bed that suits your family’s unique needs.
*Collaborative feature post – images taken from Bedkingdom.co.uk
How to sleep with pillows when pregnant
Pregnancy is an exhilarating yet challenging journey, and one of the most common challenges is getting a good night’s sleep. Pregnancy also brings on new discomforts, such as back pain, leg cramps, frequent urination, and acid reflux, which can disrupt your rest, leaving you feeling more exhausted than ever.
Thankfully, pregnancy pillows can make a huge difference. Specially designed to support your growing bump, back, and legs, these pillows can help you sleep more comfortably and reduce strain on your body. If you’re not sure about what pregnancy pillows to get, then not to worry, Motherhood Diaries and My Dvija will not only show you how to sleep with pillows when pregnant, but what type of pillows are available, the best sleeping positions to try and relaxation techniques on how to improve your sleep quality during pregnancy.
Let’s dive in!
What is a pregnancy pillow and when should you start using one?
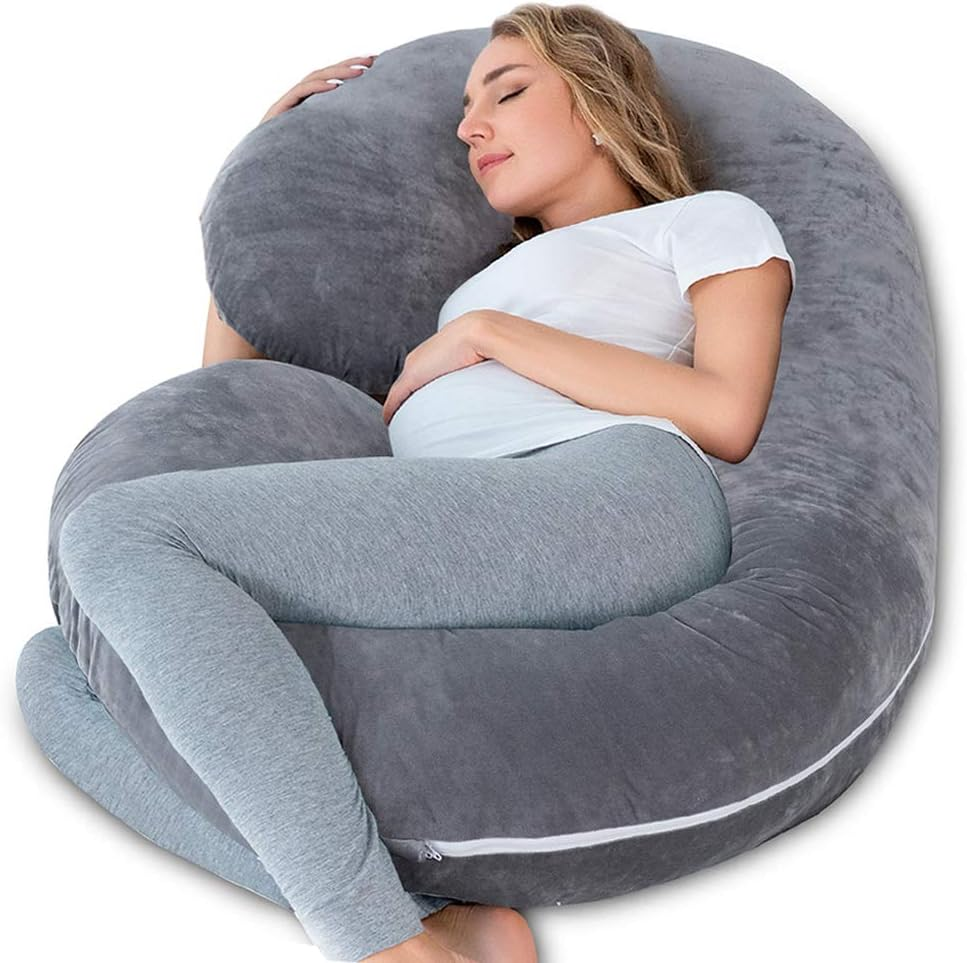
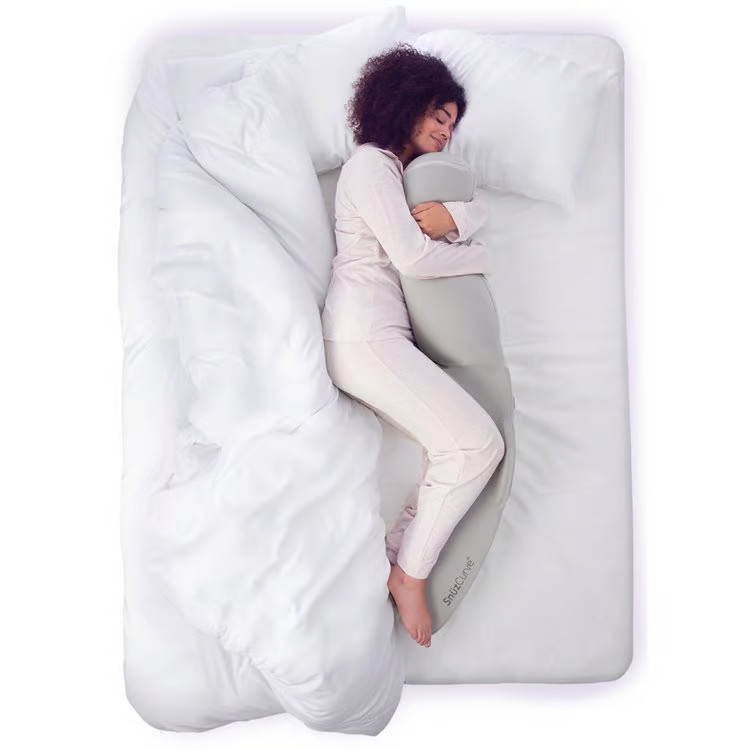
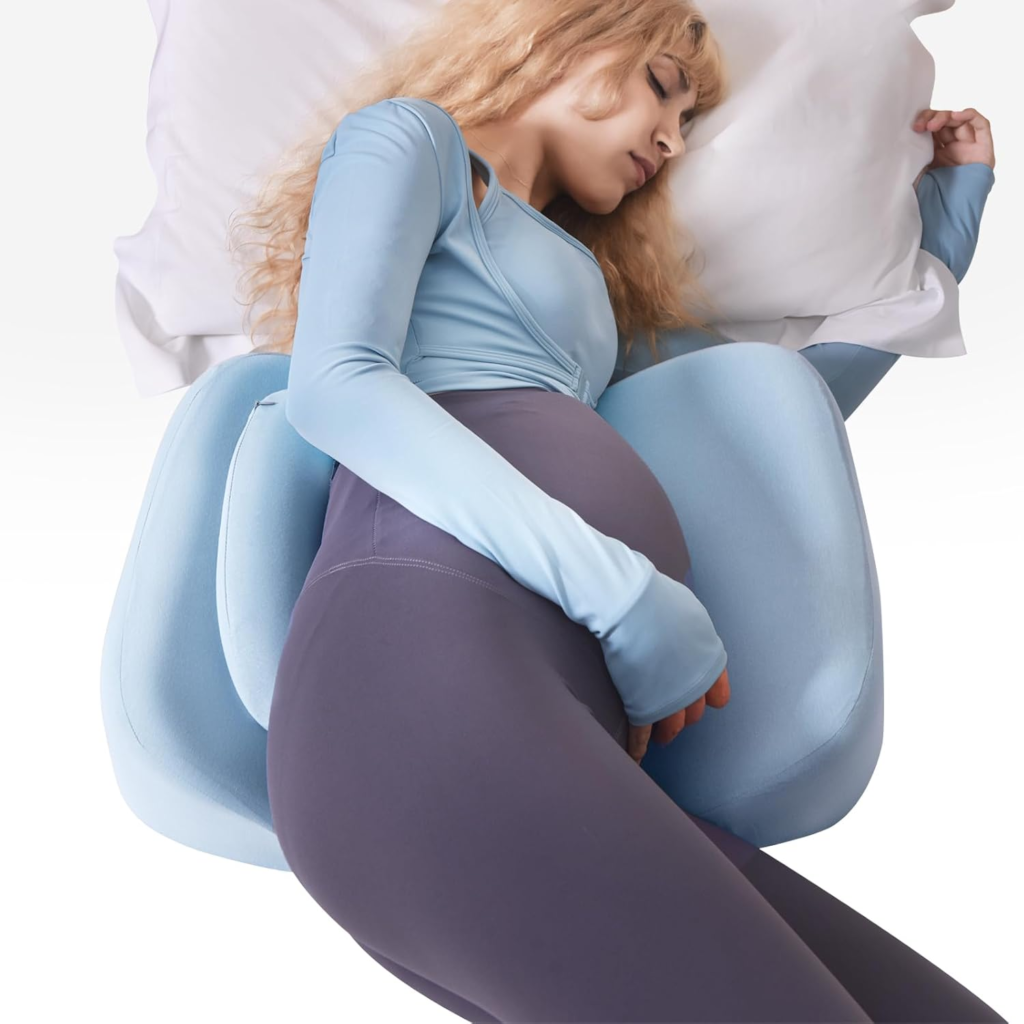
A pregnancy pillow is a specially designed pillow that provides full-body support, cradling your bump, back, and legs. Pregnancy pillows come in various shapes and sizes, including U-shaped, C-shaped, and wedge pillows. These pillows offer support to help alleviate pain and pressure, making it easier to sleep comfortably as your pregnancy progresses.
Many women start using pregnancy pillows as soon as they begin to feel discomfort, typically around the second trimester. However, you can start using one as soon as you notice your sleep being affected by physical discomfort or restlessness. In your third trimester, a supportive pillow becomes essential to managing your growing belly and promoting a comfortable sleep position.
Tools to aid sleep for pregnant women
Pregnancy pillows
Pregnancy/maternity pillows are great because they can support the weight of your bump and back as you get bigger, encouraging less disruption during sleep.
Maternity pillows come in all shapes and sizes, so here is a rundown of what to look for:
Rounded pregnancy pillows
Rounded pregnancy pillows are generally multifunctional and also used for breastfeeding. They’re also cheaper and require less space in the bed. You place the pillow under your bump or to support your back, but during the latter stages, you may require extra support as most of these pillows don’t wrap all the way around.
CLICK HERE* TO BUY THE BEST ROUNDED PREGNANCY PILLOW ON AMAZON
V Shaped pregnancy pillows
V-shaped pregnancy pillows are naturally shaped into a V to support both the head and neck. You can also use this kind of pillow to support the bump or the back so it’s multifunctional too. These pillows are best used if you don’t have enough space to use a full-body pregnancy pillow, like the one below.
CLICK HERE* TO VIEW V SHAPED PREGNANCY PILLOWS ON AMAZON RIGHT NOW
Full body pregnancy pillows
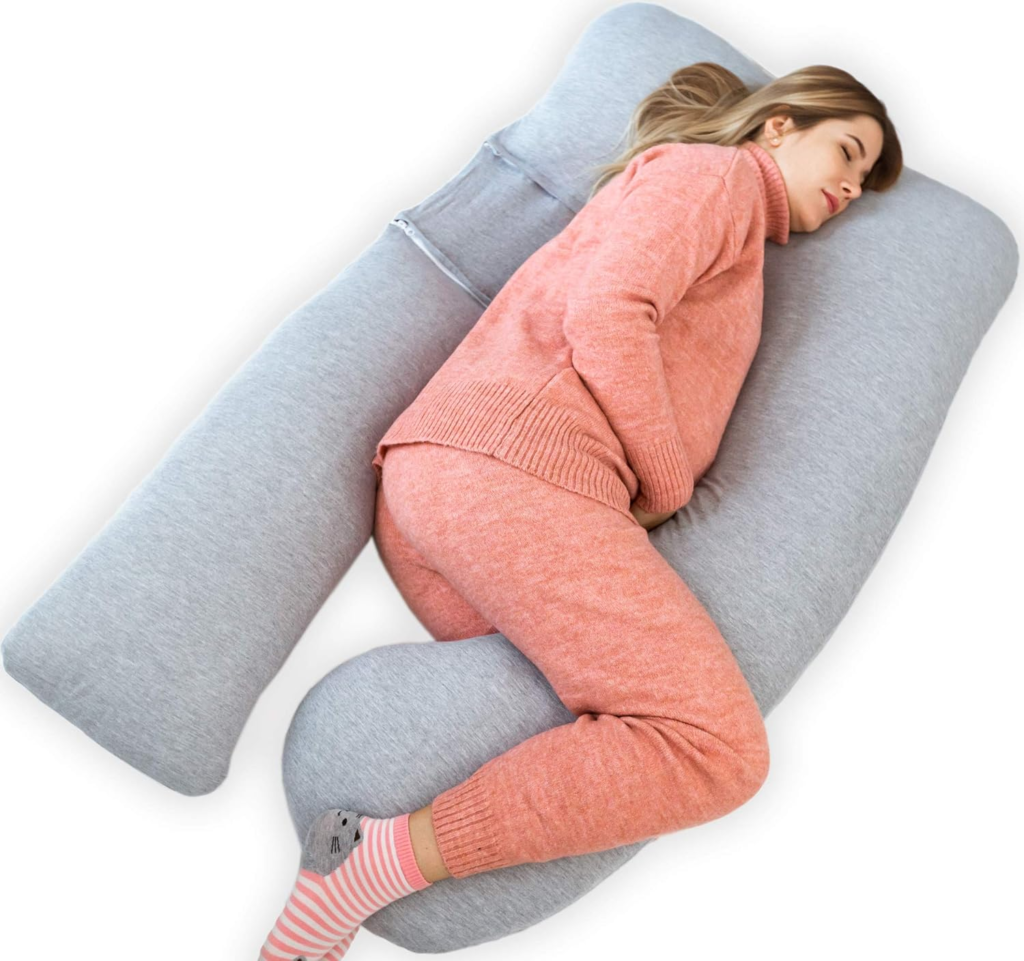
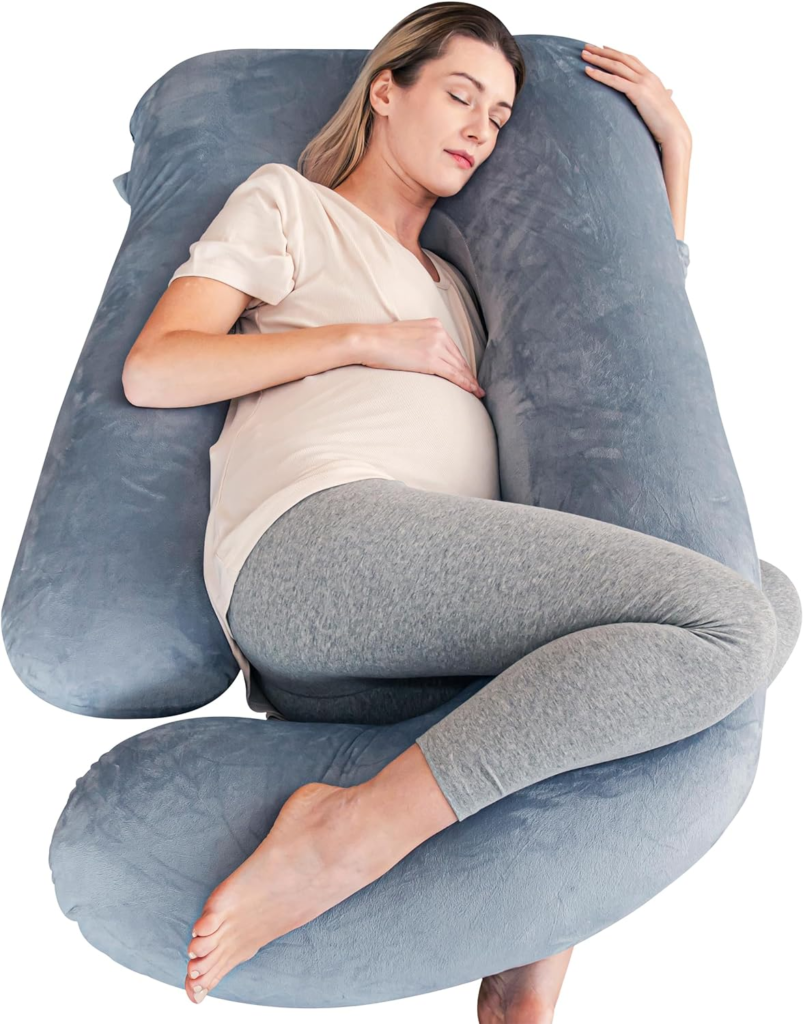
Full body pregnancy pillows* are the pillow of choice at the moment because they provide the most all-round support for your bump and back. You can mould the U-shaped pillow to support the entire body which helps ease pregnancy symptoms, including pregnancy-induced sciatica and pelvic girdle pain. Some pregnancy pillows like the one on the left have a detachable extension which can be used as its own full body pillow or attached to the main body pillow for additional back or belly support. Just make sure you have a large bed to accommodate for the pillow, which brings me onto my next point.
CLICK HERE* TO BUY THE BEST FULL BODY PREGNANCY PILLOW ON AMAZON RIGHT NOW
Bed frames
Thanks to your growing body you’ll soon start to find that you’ll take up quite a good chunk of the bed, especially when you have full body pregnancy pillows* taking up one side. If you can and you have space, invest in a super king-size bed so your partner (and any extra kids) can cuddle up to you while still having ample space in the bed.
A firm wooden frame with wooden feet will provide enough stability to house an extra bump in bed. The Birlea Balmoral Grey Fabric Bed in Superking size has a large headboard with a soft velvet feel to offer the perfect comfort when you’re cuddling up with your baby bump and partner or when you’re stretched out like a starfish.
A comfortable mattress
A strong bed frame is important, but a comfortable and supportive mattress is essential.
Look for a mattress which has/is:
Memory foam to mould perfectly to your body and adapt to your growing bump. You can find fully adjustable mattresses from Ausbeds.
A breathable mattress with Octasprings which provides 8x more breathable fabric than pure memory foam. The constant airflow keeps the mattress cool when you’re overheating from that energetic bump!
A hypo-allergenic mattress to keep allergies away and protect against dust mites and bacteria, so you have the healthiest sleeping environment for you and your baby
Medium firmness which allows for the mattress to not be too hard or too soft (so it’s just right!)
Supportive – Find a mattress which also provides optimal support for your head, shoulders and hips, so your hips are not singing in pain when you’re lying on your side for too long
As your bump grows, it becomes harder to find a comfortable sleeping position. Some positions, like sleeping on your back or stomach, may not be safe later in pregnancy.
An NIH-funded study suggested that the sleeping position up to the 30th week of pregnancy didn’t actually affect the risk of stillbirth, low birth weight babies or other pregnancy disorders like high blood pressure. However, the study cautioned that it did not provide information on whether back or right-side sleeping in late pregnancy could increase the risk of birth or pregnancy complications.
So let’s look at all the sleep positions separately and gauge which is the most effective and safest position in which to sleep during pregnancy.
Sleeping on your stomach during pregnancy
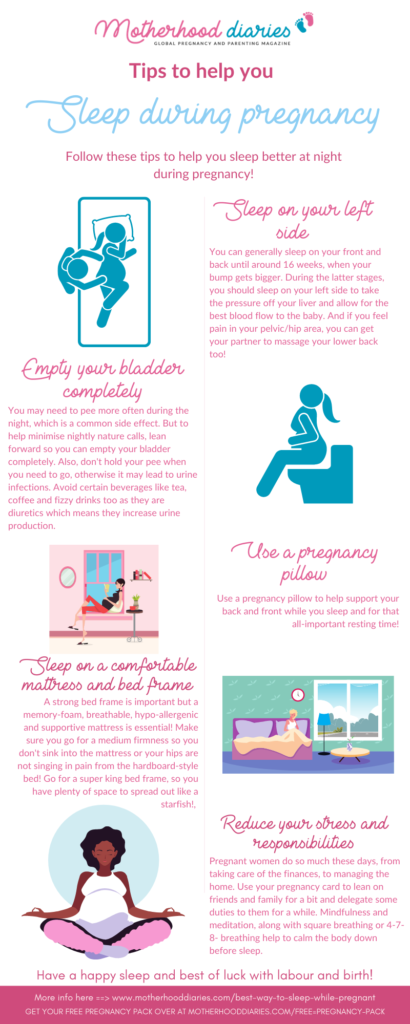
Sleeping on your stomach is generally regarded as ok until you reach around 16 weeks, when the bump gets bigger and it’s no longer comfortable to sleep on your front. But, comfort is where it ends. Amniotic fluid and the uterine walls protect your baby from being squashed, so you won’t have to worry about squishing your baby during sleep.
If you really want to continue sleeping on your stomach, you should consider getting an inflatable stomach sleeping pillow (more on that below) or cut out a large hole in your pillow for your belly. Just be careful not to overheat the baby if your room is too hot and allow for plenty of ventilation during the night.
Sleeping on your back while pregnant
Sleeping on your back is generally regarded as safe during the first trimester, but from the second trimester, you should avoid sleeping on your back for the remainder of the pregnancy. New research shows that the risk of stillbirth is doubled if women go to sleep on their backs in the third trimester. And, some other studies, albeit small in size, have linked sleeping the whole night on your back to stillbirth, however, it is not as clear cut as that. Other issues like sleep apnea may also factor in pregnancy and birth complications too.
Sleeping on your back may also result in other complications like poor circulation, back pain, digestive issues and haemorrhoids. As you get on during the pregnancy, you may find that you’ll get lightheaded and dizzy when sleeping on your back for long periods anyway.
If you wake up in the middle of the night and find that you’re on your back, don’t fret. Placing a pillow wedge underneath will catch you from rolling onto your back and allow for more circulation and blood flow to your baby.
Sleeping on your left side
During pregnancy, you may often hear that you should sleep on your left side during pregnancy. But, do you know why that is?
It’s because your liver is on the right side of your bump, so sleeping on your left side not only keeps the uterus off the liver, but it improves circulation to the heart and allows for the best blood flow to the baby, kidneys and your uterus. Using a U-shaped pregnancy pillow can help maintain this position throughout the night by offering belly support and keeping your hips aligned.
But, it hurts to sleep on my side while pregnant
You may feel some pelvic pain from sleeping on your left side for too long, so you’ll find that changing position during sleep is a natural occurrence. So if you find yourself on your back or on your right side, this is normal and nothing to worry about. As soon as you realise just shift yourself back to your left side.
Start by lying on your side with your knees bent to take the weight off your heart’s large vein (the inferior vena cava) which carries blood back to the heart from your feet and legs. Then as you progress into the latter stages of your pregnancy, add pillows to your front and back to support the weight evenly.
Propping with a C-Shaped Pillow
C-shaped pillows are ideal for women experiencing lower back pain. Tuck the curve of the pillow behind you for back support, and place the long part of the pillow between your legs to help align your hips and reduce strain.
If you prefer sleeping on your side but need more support for your growing bump, you can place a pregnancy wedge pillow under your belly to alleviate pressure. This specific pillow can help relieve discomfort in the pelvic area.
Sleeping upright to prevent acid reflux
If you suffer from acid reflux or heartburn, consider propping yourself up with pillows to sleep in a more upright position. This can help prevent stomach acid from travelling up the oesophagus during sleep, promoting better blood flow and reducing discomfort. But in late pregnancy, you may find that you’ll be short of breath, so it’s better to switch to your left side when you are ready to settle to sleep at night.
Common sleep problems during pregnancy
The National Sleep Foundation created a poll in 1998 called the ‘Women and Sleep’ poll. They found that a whopping 78% of women reported more sleep disturbance during pregnancy than at any other time. They also found that:
15% of women developed restless leg syndrome (which we’ll go into later) during the third trimester of pregnancy
51% of pregnant/recently pregnant women reported having at least one weekday nap
60% reported having at least one weekend nap
Difficulty sleeping is common during pregnancy, so it’s vital to find ways to sleep that minimises disruption to your body and any health risks to the baby. Pregnancy is taxing on the body so it’s really important that you’re getting the recommended daily amount of sleep (some of you will sleep like a champion during the first trimester anyway) so you’re fit and strong for not just pregnancy, but for labour and birth too.
Pregnant women often experience a variety of sleep disturbances. Here are some common issues and how you can address them:
Frequent urination
Increased blood volume and pressure on your bladder can lead to more bathroom trips during the night. To minimise disruptions, limit your fluid intake before bedtime and make sure to empty your bladder completely before going to sleep.
You’ll find, especially in the first and third trimesters that you’ll need to go to the toilet more often, and this is down to the following reasons:
Your blood volume increases during pregnancy
You have almost 50 per cent more blood in your body than before which means more fluid is being processed in your kidneys, so your bladder fills up more frequently.
Hormonal changes
The hormonal changes in your body make your blood flow to your kidneys more quickly, filling up your bladder more frequently too.
Your growing uterus
As your little angel grows in your tummy, your uterus grows along with them, adding more pressure to your bladder, which brings back the need to pee frequently.
What can you do?
Unfortunately, frequent urination is a common and natural symptom of pregnancy, so you can’t avoid it completely. But you can limit nightly bathroom visits by doing the following:
Skip certain drinks
Skip drinks like coffee and tea, as well as carbonated drinks like soda because they are diuretics, i.e. they increase the amount of urine being made in the body.
Don’t hold your pee
Go to the bathroom when you need to because the more you strain your pelvic floor muscles, the more they will weaken, especially during pregnancy and birth.
Empty your bladder completely
When you go to the toilet, lean forward so you can empty your bladder as much as possible.
Drink most of your water during the day
You should still drink when thirsty of course, but try to limit most of your water intake to during the day. Never hold off on drinking though – the body needs lots of water, especially during pregnancy, so it’s better to go to the toilet than be dehydrated and risk getting a urine infection, which could cause complications to you and the baby.
Restless leg syndrome (RLS)
Around 1 in 5 pregnant women experience RLS in their last three months of pregnancy and this normally causes sleep issues. But what exactly is RLS?
RLS is this overwhelming urge to move your legs, which can also cause an unpleasant crawling or creeping sensation in the feet, calves and thighs. RLS is often worse in the evening and may affect the arms too. There’s no obvious cause of RLS, but some scientists reckon it may have something to do with how the body handles the chemical dopamine which is involved in controlling muscle movement. The problem does go away after birth though.
What can you do?
You can start by making sure you have a good bedtime routine and avoid caffeine at night too. Get in some gentle exercise every day during pregnancy as well to help get rid of any excess negative energy.
Leg cramps
You may feel this sudden sharp pain usually in your calf muscles or your feet which causes you to wake abruptly from your slumber. Around 30 to 50 per cent of women get leg cramps during pregnancy so leg cramps are a common part of pregnancy.
But why do you get leg cramps? Well, it’s not entirely clear why women get leg cramps, but scientists suggest little or too much exercise, an imbalanced metabolism, electrolyte imbalances or vitamin indeficiencies. The good news is leg cramps should disappear as soon as your baby is born.
What can you do?
Regular, gentle exercise will help to reduce leg cramps and often help ease symptoms when it happens too. When you experience an attack, do the following:
Bend and stretch your foot continuously and vigorously for around 30 seconds to 1 minute
Rotate the foot one way for around ten times and then the other way. Repeat with the other foot if needed.
Then with your fingers, pull your toes up to the ceiling to stretch the back of the calf and rub the muscle firmly at the same time with the other hand
Try getting out of bed and walking around on your heels before heading back to sleep
Keep bedding loose so you can do these exercises as and when needed without hopefully disturbing sleep or getting out of bed
Have a nice warm bath before bed to relax the muscles
Elevate your feet in bed by propping them up on a pillow with toes pointing up.
Insomnia
Fluctuating hormones, anxiety, and physical discomfort can all contribute to pregnancy insomnia, which can happen at any time during pregnancy and, with most pregnancy-induced problems, can be down to the fluctuating hormonal levels during pregnancy.
For most women, pregnancy insomnia attacks the hardest during the third trimester and you likely will have no idea when it will hit and how long it will end. You may find that you’ll fall asleep easily but staying asleep could be the issue.
What can you do?
Help your mind and body get into a set routine so your biological clock knows when it’s bedtime and your brain can get in line.
Avoid caffeine (you should be avoiding this anyway) and foods high in sugar and acid to avoid heartburn and/or a sudden burst in energy
It’s easier said than done but try to take your mind off your worries about not sleeping by thinking about something that makes you happy.
Practice the 4-7-8 breathing technique where you breathe in for four seconds, hold for seven seconds and exhale for eight. You might find the breathing duration difficult when you’re pregnant but as long as you are exhaling for longer than you are inhaling, the breathing will help you to calm down and eventually allow you to drift off to sleep.
Sleep apnea
Your breathing may change during pregnancy as your bump gets bigger and more pressure is placed on your lungs and airways. If you didn’t snore before or you were a soft snorer, you may find you’ll wake the house now with your loud snores. You may even experience some pauses or disruption in breathing and this disruption is called sleep apnea if the pauses last longer than ten seconds. Fortunately, the risk of developing sleep apnea in pregnancy is low – around 10 per cent of pregnant women are affected. However, if you’re overweight, obese, or experience excessive weight gain during your pregnancy, you may have an increased risk of developing sleep apnea.
What can you do?
It’s important to treat pregnancy-related sleep apnea as soon as possible as it could develop into complications for both you and your baby. Sleep apnea is also associated with gestational diabetes, diabetes and unplanned caesarean sections, so make sure you’re eating a healthy, balanced diet during your pregnancy. Make sure you sleep on your side too, to alleviate any pressure on the back and lungs
In severe cases treatment is available where a machine provides a constant flow of pressurised air to help maintain an open airway during the night. These are only used in extreme cases, but it’s worth checking with your doctor to ensure your sleep apnea is not placing any undue risk on you and your baby.
Otherwise known as heartburn, which is a common pregnancy symptom in the third trimester thanks to hormonal changes again and your growing baby pressing on your stomach. The muscles in your stomach relax during pregnancy causing stomach acid to escape back up the throat, which causes that burning sensation.
You’re likely to get indigestion/heartburn if you had indigestion in your previous pregnancies or you’re in the latter stages of your pregnancy.
Some symptoms include:
Feeling or being sick
Burning or pain in your chest and throat
Feeling heavy, bloated and full
Burping/belching
Bringing up food
What can you do?
Think about what you eat and how you eat it. Making changes to your eating and drinking habits can help to control symptoms if they are mild. Here are some tips:
Keep meals small and often rather than eating three large meals a day.
Don’t eat within three hours of going to bed at night
Cut down on caffeinated drinks and fatty, spicy and rich foods
Sit upright when you eat which will take the pressure off your stomach
Elevating your head and shoulders when you go to bed can help from stomach acid coming up when you sleep
Smoking and drinking can seriously harm you and your unborn baby’s health, but it also contributes to indigestion. If you need help to stop smoking and/or drinking talk to your midwife who can provide you with some support networks that you can call. NHS also has a Smokefree helpline which you can call on 0300 123 1044
If you’re still experiencing symptoms then speak to your midwife or GP who can examine you and provide further assistance and medicine if required
Excessive sleeping during pregnancy
Not getting enough sleep is an issue, but what if you’re getting too much sleep? Is there even such a thing as too much sleep during pregnancy?
According to the National Sleep Foundation, you should get around seven to nine hours of sleep each day. If you’re routinely sleeping more than nine to ten hours unbroken, good quality sleep, then this may be a sign of excessive sleep.
One study argued that women who slept for more than nine continuous hours without disturbance and they routinely had non-restless sleep in the last month of their pregnancy had a greater chance of stillbirth. However, this study was argued by other scientists who claimed that the non-restless nights were down to decreased foetal movement and not the cause of stillbirth.
What can you do?
If you are routinely sleeping for more than nine hours a night, then wow, lucky you! But it’s worth keeping some of those hours resting in bed, reading a book or writing, for example, to avoid oversleeping during the night.
Other major causes of sleep disturbance during pregnancy
Hormonal changes play a significant role in sleep disruption during pregnancy. Physical discomforts also contribute to restless nights for many pregnant women.
Exposure to technology
Blue light from digital screens can interfere with sleep quality. It affects the release of melatonin, a hormone that regulates sleep cycles. Pregnant women using electronic devices before bed may struggle more with falling asleep.
Hormonal changes
As mentioned before, hormonal changes during pregnancy significantly impact sleep patterns. Hormones like progesterone rise and can cause daytime drowsiness, which disrupts normal sleep cycles at night. Increased levels of oestrogen also lead to more frequent bathroom trips, interrupting deep sleep.
Lack of a healthy routine
An inconsistent schedule can lead to poor sleep quality and disrupted sleep patterns. Pregnant women who do not follow a regular bedtime may find themselves struggling with insomnia or waking up frequently at night.
Best pregnancy pillows 2024
With so many pregnancy pillows on the market, it can be hard to know which one to choose. Here are some top-rated options, along with their pros, cons, and where to buy them:
1. WEIKA Memory Foam Pregnancy Pillows for Sleeping
Price: £35.99 Rating: 4.8 out of 5 stars (41 ratings) Special Features: Portable, lightweight, adjustable, detachable cover, breathable. This pillow* provides excellent full-body support making it perfect for supporting your bump, back, neck, and legs. With its concave curve, ideal for side sleepers. The adjustable design allows you to customise it for your growing belly, hips, back, and legs. Its memory foam adapts to your body temperature, distributing pressure for optimal comfort. It also comes with a machine-washable cover. It’s also multi-purpose, as it can be used for breastfeeding or to support older babies during playtime. Best for: Pregnant women in all stages, relieving pain and discomfort in multiple areas.
2. Kolbray®️ U Shape Pregnancy Pillow – Full Body Maternity Pillow
Price: £42.99 Rating: 4.6 out of 5 stars (2,291 ratings) Special Features: Adjustable, includes a removable jersey cover. A UK-made pillow*, this U-shaped design provides full-body support for back, belly, legs, and hips. It comes with a detachable extension, so you can use it as a nursing pillow or for added comfort while sleeping. The soft-knit jersey cover keeps you cool throughout the night, and the machine-washable cover is easy to clean. Best for: All sizes and body types, providing comfort from pregnancy to nursing.
3. MOON PARK Pregnancy Pillows for Sleeping – U Shaped Full Body Maternity Pillow
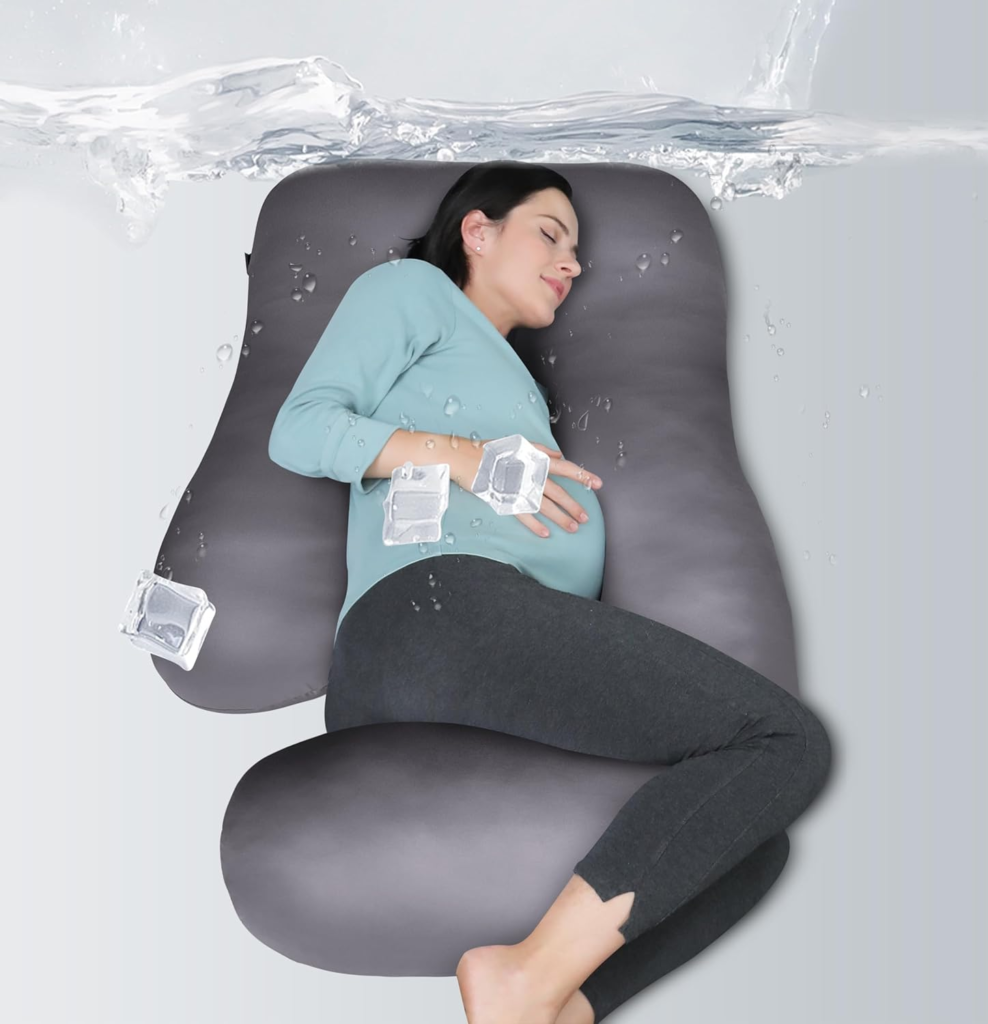
Price: £71.28 Rating: 4.6 out of 5 stars (1,404 ratings) Special Features: Cooling cover, flexible, full-body support. This 57-inch pregnancy pillow* is designed with ergonomic features to support every part of your body, from your head to your feet. The cooling cover ensures that you don’t overheat, and the pillow provides relief from back pain, leg swelling, and other pregnancy discomforts. It is versatile enough to be used while nursing, reading, or relaxing. Best for: Pregnant women needing both comfort and cooling during sleep.
Price: £37.43 Rating: 4.6 out of 5 stars (965 ratings) Special Features: Flexible, removable, durable. This 57-inch full-body pregnancy pillow * offers premium comfort, replacing the need for multiple pillows. It supports your head, back, belly, sides, knees, hips, and feet. The polyester filling provides long-lasting support while maintaining its shape over time. Its soft, removable cover can be machine washed, making it ideal for frequent use. Best for: Expectant mothers looking for long-term support and versatility for various body positions.
Here are some additional tips to improve your sleep during pregnancy:
1. Develop a sleep routine
Establish a bedtime ritual that signals your body it’s time for rest. Engage in calming activities like reading, taking a warm bath, or practising gentle stretches before bed. Avoid using electronic devices as they can interfere with your ability to wind down. Consistent routines will help ensure quality sleep.
2. Stay active
Regular exercise can significantly enhance sleep quality during pregnancy. Engaging in physical activity helps reduce anxiety and fatigue, making it easier to fall asleep and stay asleep.
3. Limit caffeine and heavy meals
Caffeine, nicotine, and alcohol can significantly interfere with sleep quality during pregnancy. Opt for herbal teas or warm milk as bedtime beverages instead of caffeinated options.
4. Manage acid reflux
If you suffer from acid reflux, avoid lying down immediately after eating and try to elevate your head when you sleep to prevent heartburn.
5. Back massage
Lying on one side for too long can cause hip and lower back pain, so get your partner to massage the lower back to relieve some of the pressure built up when lying in one position for too long.
6. Nasal strips
You may find during pregnancy that you’re stuffy, even if you don’t have a cold. So if the snoring is waking up the whole town or the congestion is waking you up at night, your doctor may advise nasal strips to help open the airways and relieve nasal congestion.
CLICK HERE* TO BUY THE BEST NASAL STRIPS ON AMAZON RIGHT NOW
7. Diet can help
A ‘Sleep and Dietary Patterns in Pregnancy’ study in 2017 found that a good diet may help pregnant women sleep better at around 26 – 28 weeks gestation, with the Mediterranean diet coming up at the top of the list to helping combat sleep problems like insomnia. The Mediterranean diet is high in vegetables, legumes, fruits, cereals and fish, but low in dairy, saturated fat and alcohol, so it seems laying off heavy, unhealthy food and drink might help you to sleep at night.
The same study found that the Japanese diet which is rich in rice lowered the risk of poor sleep quality by 46 per cent. Suggested explanations were that rice has a high glycaemic index and is also high in melatonin which is the natural chemical we make in our bodies to help us sleep. Apparently even eating less of the seafood-noodle pattern can help you sleep better too!
8. Reduce your stress and responsibilities
We live in an age where we are sharing parental roles and duties. No longer does the old-school man-makes-fire-brings-in-the-bread-woman-is-the-homemaker work in this cultural and digital world.
This is great! Women can now be free from the kitchen-sink role and express themselves in the workplace, through their business, and at home, all while growing a baby. And, incidentally, men can take a more paternal role and share the load of looking after the kids.
However, because of the extra responsibility, sleep often gets pushed to the back of the priority list, resulting in sleep deprivation during pregnancy, which this study found was linked to postnatal depression, complicated birth and preterm delivery due to more pro-inflammatory serum cytokines released from the lack of sleep.
What does this mean?
It means that your mental health is affected as much as your physical health and when you’re pregnant you need sufficient sleep to nourish the development of your baby. This topic begs its own article but I found that running a business while being pregnant often didn’t help me get to sleep at night because I would be tapping away on my laptop screen for a long period while worrying about finances and whether we could afford to move to a bigger place.
Sometimes you have to learn to delegate certain duties and so I leaned more on my husband and parents to help me get through the tough later months of pregnancy and the vital fourth trimester where they did the school runs for me and took over some of the bills, of which I was very grateful because I needed the recovery time!
9. Mindfulness and meditation
Mindfulness and meditation, along with the 4-7-8 breathing technique can help to reduce some of the stress you feel during pregnancy. Breathing is a fantastic tool to instantly calm the body down and can even help to drift you off into the land of nod. Click here for more information on how mindfulness and meditation work to help you sleep during pregnancy.
One study urged that due to the high percentage of women who experience significant sleep disruption during pregnancy, there should be regular screening and treatment provided for sleep disturbances, especially the impact that sleep disruption has on the pregnancy, the baby and postnatal depression. I think this is a great idea!
It’s important that if you are finding it difficult to sleep during pregnancy, you should speak to your doctor, who can provide you with actionable, manageable steps to help you sleep better during pregnancy.
FAQ Section: How to sleep with pillows when pregnant
How should you sleep with a pregnancy pillow?
Sleeping with a pregnancy pillow depends on the type of pillow you have. For example, a U-shaped pillow can be used to support your entire body, while a wedge pillow is placed under your belly to relieve pressure.
When should you start using a pregnancy pillow?
Most women start using a pregnancy pillow during their second trimester when they begin to experience discomfort while sleeping.
Is it safe to sleep on your back while pregnant?
It is generally not recommended to sleep on your back during the second and third trimesters.
Can you sleep on your stomach while pregnant?
Sleeping on your stomach is usually fine in the early stages of pregnancy. However, by the second trimester, your bump may make it uncomfortable.
Final thoughts on sleep during pregnancy
Sleeping during pregnancy can be a challenge, but with the right tools, techniques, and support, you can improve your rest. Whether you’re using a pregnancy pillow, following a consistent sleep routine, or practising relaxation techniques, every small change can make a big difference.
Always consult your healthcare provider if you have concerns about your sleep during pregnancy. Their guidance, combined with these tips, can help ensure you get the restful sleep you need.
*Motherhood Diaries was gifted a Superking bed frame from Mattressman and a Superking mattress from Wayfair for the purposes of a review, but all opinions are 100% our own.
*This is a collaborative feature article, which also contains affiliate links, where if you click through and purchase, I may earn a small commission at no extra cost to you. Thank you for your support.
*As an Amazon Associate I earn from qualifying purchases.*
How to deal with an unsupportive husband during pregnancy
During pregnancy, it sometimes feels like you’ve signed up as a round-the-clock baby caterer. Finding time for yourself can seem nearly impossible between the morning sickness, mood swings, and preparing for your new arrival. Add an unsupportive partner into the mix, and it feels like you’re fighting an uphill battle. But here’s the thing: sharing the load during pregnancy is not only doable, it’s essential for your mental health and overall family welfare.
Whether you’re dealing with a partner who’s overwhelmed, distant, or simply clueless, there are ways to cope and even bring them on board. Because trust me, you deserve the support, and it’s vital for a healthy relationship. Let’s dive into how to deal with an unsupportive husband during pregnancy.
1. Establish open communication
Why it matters: Whether your partner is distant or just not as hands-on as you’d like, open communication is the first step toward maintaining your emotional health. Pregnancy is already a time full of emotional changes and physical symptoms, and having a partner who is a good listener and provides practical support can make all the difference. Without it, unresolved issues can lead to feelings of emotional distress.
How to do it: Set aside time for a proper chat. Lay your cards on the table—discuss how you’re feeling, what you’re finding hard, and what you need from them. This conversation is essential for a healthy pregnancy and ensures that you both understand each other’s emotional needs. It’s also a great way to prevent future hurtful comments or miscommunications. Getting these conversations out of the way early prevents any build-up of resentment or confusion as you both adjust to new roles.
2. Create a feeding system that includes your partner
Why it matters: Sharing the load of duties is crucial for both you and your partner. Whether you’re planning to breastfeed or use formula, allowing your partner to step in creates time for you to relax and focus on yourself. It’s also an excellent way to reduce the emotional distress that can come from doing it all alone, especially during the first trimester, when the physical and hormonal changes are most challenging.
How to do it: If you’re planning to breastfeed, pumping can allow your partner to grab a good baby milk bottle and step in during night feeds or when you need to take some “me time.” This is important not only for your mental health but also for your partner’s connection with the baby. Remember, shared baby care builds strong emotional bonds, creating a healthier family dynamic.
Tip: Shared feeding time is a good idea because it will help your partner connect with your baby and give you a well-deserved break to focus on your own emotional needs.
3. Lean on technology
Why it matters: These days, technology can help you keep track of all those little things, like feeding schedules and baby’s naps. Using baby tracking apps can reduce stress by keeping both you and your partner on the same page, especially during those tough times when sleep is scarce.
How to do it: When the time comes, sync baby apps with your partner’s phone, so you both know who’s doing what, whether it’s nappy changes, feeds, or tracking emotional milestones like your baby’s first smile. It helps avoid repeating tasks and ensures that you’re sharing responsibilities equally, which is a sign of a healthy relationship. Plus, these tools allow you both to stay organised, which is crucial for new parents.
Tip: Using technology to streamline baby care can not only prepare you for your baby but also get him involved in pre-baby preparations and improve your family welfare by reducing the mental load on both parents.
4. Utilise your support network
Why it matters: If your partner isn’t stepping up or you feel overwhelmed, it’s vital to lean on your broader support network—family, friends, or even a single-parent group. Mental health can take a hit when you’re trying to do everything on your own. Your support network can help lighten the load, offering practical support during challenging times like the first trimester or after baby’s arrival.
How to do it: Don’t be afraid to ask family members or close friends for help, whether it’s bringing over dinner or helping with pre-baby care, so you can attend antenatal courses or prenatal appointments. It’s all about teamwork, and relying on your support network is key to maintaining a healthy relationship and your emotional well-being.
Tip: If you’re struggling with a selfish or unsupportive partner, having a trusted friend or family member to talk to can provide emotional support and help you regain your strength.
5. Be assertive
Why it matters: Your needs during pregnancy are just as important as your baby’s. If you’re not getting the support you really need, don’t be afraid to speak up. Sometimes, partners don’t realise what’s needed unless it’s made clear to them. This can be especially true if they’re going through their own emotional changes or feeling overwhelmed by the weight of new responsibilities.
How to do it: Ask for specific help. Maybe it’s attending antenatal classes with you, helping with household chores, or simply providing more emotional support as you deal with morning sickness or mood swings. By clearly outlining what you need, you prevent future misunderstandings and ensure that your mental health is prioritised.
Tip: Assertiveness in communicating your needs is crucial, especially if you’re dealing with an unsupportive partner who might not be aware of the emotional impact their behaviour is having on you.
6. Schedule regular check-ins
Why it matters: Regular communication during pregnancy helps avoid emotional distress, especially as you face physical changes, emotional highs and lows, and increased responsibilities. Check-ins are vital for ensuring both partners feel supported and for discussing any emotional or practical challenges that have come up.
How to do it: Set aside time each week to sit down with your partner. These check-ins allow you to adjust to the demands of your pregnancy, address any relationship problems, and discuss upcoming baby events like the birth plan or prenatal appointments. Having these discussions early can help avoid last-minute stress, ensuring the smooth arrival of your baby.
Tip: Weekly check-ins are a great way to maintain a healthy relationship by making sure both you and your partner are on the same page about practical support and emotional needs.
7. Embrace imperfection
Why it matters: Let’s face it—things won’t always go as planned, and that’s okay! Your baby doesn’t care if their outfit doesn’t match or if the house isn’t spotless. What matters most is the emotional connection and unwavering support that both parents provide. Letting go of perfection is crucial for your mental health and for maintaining a balanced and healthy relationship.
How to do it: If your partner isn’t doing things exactly how you would, don’t stress. What’s important is that they’re trying, even if it means they occasionally fumble a nappy change or forget a prenatal appointment. Perfection is not the goal here—love and support are.
Tip: Allow your partner the space to make mistakes and learn, which can lead to a stronger emotional connection between you both.
8. Focus on yourself
Why it matters: Pregnancy is a time when your body and emotions are going through a lot, and it’s crucial to take care of yourself. Whether it’s taking time for rest or doing something that makes you feel good, focusing on your well-being helps you manage the stresses of pregnancy and ensures you’re in a good headspace to support your baby.
How to do it: Carve out time for yourself, even if it’s just a few minutes each day. Take a walk, do some gentle exercise, or indulge in a hobby that makes you happy. Practicing self-care during pregnancy can help alleviate stress and give you the emotional resilience you need to deal with any relationship problems or pregnancy symptoms.
Tip: Self-care isn’t selfish. Taking care of your emotional and physical well-being is essential for a healthy pregnancy and a strong emotional connection with your partner.
9. Consider professional help
Why it matters: If you’ve tried everything and your relationship still feels strained, consider reaching out for professional help. Sometimes, counselling is the best option for addressing deeper relationship issues, and it can provide you with the tools to navigate this challenging time.
How to do it: Couples therapy or individual counselling can offer a neutral space to discuss your concerns. If your partner is struggling with their role, therapy can help them gain a different perspective on how to provide the emotional and practical support you need during your pregnancy.
Tip: Seeking professional help is a sign of strength, not weakness. It shows that you’re committed to building a supportive and healthy relationship for the benefit of your growing family.
FAQs on how to deal with an unsupportive husband during pregnancy
Q: My partner doesn’t seem interested in my pregnancy. What’s wrong?
A: Your partner might be feeling overwhelmed or unsure of their role. Open communication can help them understand how their emotional distance affects you and your mental health.
Q: My partner and I have argued non-stop since I became pregnant. What can I do?
A: Pregnancy brings a lot of emotional changes, both for you and your partner. Regular check-ins, coupled with open communication, can help ease the tension. If arguments continue, consider relationship classes or counselling to work through the issues together.
Q: Why doesn’t my partner seem excited about the baby?
A: Some partners struggle to bond with the unborn child because they don’t experience the physical changes. The initial shock of becoming a parent can also make them feel disconnected. Bringing them along to prenatal appointments and antenatal classes can help them feel more involved.
Q: My partner is acting distant during my pregnancy. Is this normal?
A: It’s common for partners to feel unsure or overwhelmed, especially during a first pregnancy. Sometimes, they may withdraw as a coping mechanism. Creating space for open conversations can help them feel more connected and supportive.
Q: How should my husband behave during pregnancy?
A: Your husband should be emotionally supportive, provide practical help, and pay close attention to your needs. Simple things like attending prenatal appointments, helping with household chores, or providing emotional reassurance go a long way in showing unwavering support.
Q: Is it normal to fight with your partner during pregnancy?
A: Yes, pregnancy puts pressure on relationships, often because of hormonal changes, stress, and new responsibilities. It’s important to maintain open communication and schedule regular check-ins to prevent these fights from escalating into more significant relationship problems.
Q: How can I cope with an unsupportive husband during pregnancy?
A: If you’re dealing with an unsupportive or selfish husband, lean on your support network and consider setting up couples’ counselling. Assertiveness in asking for what you need and setting boundaries is crucial. Focus on your well-being and don’t hesitate to ask for practical support from family and friends.
Q: Can stress during pregnancy affect my baby?
A: Yes, prolonged stress can impact both your baby’s development and your overall pregnancy health. It’s essential to find ways to reduce stress, whether through self-care, open communication with your partner, or seeking professional help.
16 ways to return to running postpartum after pregnancy
You’ve just had a baby and you’re thinking about going back to running. But, you may be thinking, “Am I really ready for this?” or “Is it even safe to lace up those trainers again?” I’ve been there—four times, in fact! Juggling nappies, night feeds, and finding time for yourself can feel like a marathon, but if running was your thing before, or you’re looking to make it your new thing, you can get back out there. It just takes time.
I’m here to share some honest, down-to-earth advice on returning to running postpartum. We’ll cover everything from when it’s safe to start to what signs you should look out for that might need a doctor’s attention. Plus, I’ll give you the lowdown on strengthening that all-important core and pelvic floor (because, let’s be real, we don’t want to deal with leaks while pounding the pavement).
Whether you’re a newbie to running or a seasoned pro, this guide is packed with practical tips to help you get back to it safely and confidently. So, grab a cuppa, get comfy, and let’s talk about 16 ways to return to running postpartum after pregnancy.
Disclaimer
Always consult with a healthcare provider before beginning any gentle exercise program postpartum, especially running, to ensure you are physically ready and avoid potential injuries.
Can you safely return to running postpartum?
Yes, many postnatal women can safely return to running during the postpartum period, but it’s important to do so gradually. Make sure your body is ready by checking for any lingering issues such as diastasis recti, pelvic floor dysfunction, or ongoing pain. A great place to start would be to consult with a physical therapist who specialises in postpartum recovery time and can provide you with a personalised assessment and plan.
When can I start running postpartum?
The general recommendation is to wait until at least 6 to 8 weeks postpartum before resuming running, but this can vary depending on the type of delivery (vaginal delivery or caesarean) and any complications you may have experienced. You should listen to your body and only start when you feel ready and have received clearance from your doctor.
Signs you should see a doctor or physical therapist
If you experience any of the following signs when you start running postpartum, seek medical advice:
Pelvic pain or a feeling of heaviness in the pelvic region.
Urinary incontinence (leaking urine) or difficulty controlling your bladder.
Diastasis recti (abdominal separation) that hasn’t improved.
Painful joints or ongoing discomfort that doesn’t subside with rest.
How to strengthen your core and pelvic floor for running postpartum
Strengthening your abdominal muscles and pelvic floor is essential before you start running again. So, incorporate exercises such as pelvic tilts, Kegels, and gentle core work into your routine. These will help restore stability and support, reducing the risk of injury.
An important note about alignment
Proper alignment is key to running safely postpartum. Focus on maintaining an upright posture, keeping your shoulders relaxed, and aligning your feet under your hips to minimise strain on your joints.
An important note about breath
Breathing is another critical aspect of running postpartum. Practice diaphragmatic breathing to strengthen your core and ensure you’re breathing efficiently during your runs.
How to do diaphragmatic breathing
Diaphragmatic breathing involves inhaling deeply into your belly rather than your chest. This technique engages your diaphragm and supports your core, which is especially important during postpartum recovery.
How to start running postpartum
When you’re ready to start running again, start with short, manageable runs or run-walk intervals. Gradually increase your mileage or speed over time, so your body adapts naturally to the increased intensity. Remember, slow and steady progress is key to avoiding injury.
More postpartum running tips
1. Set realistic goals
Start by setting small, achievable goals. Whether you’re aiming to run a certain distance or improve your pace, clear goals will keep you motivated and give you that sense of accomplishment as you progress. It’s tempting to compare yourself to where you were pre-pregnancy, but remember, your body has been through a lot, and it’s important to be kind to yourself. Setting realistic goals will help you stay on track without feeling overwhelmed.
It’s also important to recognise that your postpartum body differs from what it was before pregnancy. Your energy levels might fluctuate, your body might feel different, and your recovery process is uniquely yours. When setting goals, take into account your current fitness level and life circumstances, like sleep patterns, time availability, and overall well-being. Instead of jumping straight into a 5K, consider setting a goal to run consistently three times a week, no matter the distance. This will help you establish a sustainable routine that fits your new life as a mum.
Celebrate the small victories—whether it’s completing a run without stopping or gradually increasing your speed. These little successes will boost your confidence and keep you motivated as you continue your postpartum fitness journey.
2. Invest in good trainers
Having the right running shoes is crucial, especially postpartum when your body is still adjusting. Investing in good trainers that support your foot shape and provide adequate cushioning can reduce the risk of injury and improve your comfort. It’s worth trying on different brands and styles to find the pair that suits you best. Pregnancy can change the size or shape of your feet, so getting properly fitted by a specialist can make a big difference in your running experience.
During pregnancy, it’s common for feet to swell, and sometimes they may even permanently change in size or arch shape due to the extra weight and hormonal shifts that loosen ligaments. This means your old trainers might not give you the support you need anymore. Visiting a running store where experts can analyse your gait and recommend the best shoes for your new foot shape is a smart investment. Look for shoes that offer stability, cushioning, and support tailored to your specific needs, whether you have high arches, flat feet, or anything in between.
The right shoes won’t just make running more comfortable—they’ll also help prevent common postpartum running injuries like plantar fasciitis, Achilles tendonitis, or shin splints. It’s also a good idea to have a couple of pairs to rotate, as this can extend the life of your trainers and provide slight variations in support that can benefit your feet over time.
3. Use easy running hairstyles
Keep your hair out of your face to stay focused on your run. Easy running hairstyles like a slick-back ponytail or a half-up, half-down ponytail can help prevent distractions and make your run more enjoyable. It’s not just about looking good; it’s about feeling good and staying focused. When you don’t have to constantly adjust your hair, you can concentrate better on your form and breathing.
While it might seem like a small detail, your hairstyle can really impact your running experience. Loose hair can easily become a distraction, especially if it’s windy or you’re sweating a lot. Choosing the right hairstyle can help keep you cool, reduce the need for adjustments, and allow you to focus fully on your run. Additionally, using hair ties that don’t snag or pull your hair can help prevent headaches and discomfort. For those with longer hair, braids can be a great alternative to ponytails, as they minimise bouncing and tangling. Remember, comfort leads to better performance, so find a hairstyle that works for you and stick with it.
4. Focus on form and technique
Focus on maintaining proper running form to prevent injury and boost your efficiency. Keep your body upright, your arms at a 90-degree angle, and aim to strike the ground with your midfoot. Consistently practising good form will help you run more effectively and comfortably. Proper form also reduces the risk of common running injuries like shin splints, knee pain, and lower back pain, which can be especially problematic postpartum when your body is still in recovery mode.
Good running form starts with your posture. Keep your head up, eyes looking forward, and shoulders relaxed. Avoid hunching over or leaning too far forward, as this can strain your back and hinder your breathing efficiency. Your arms should swing naturally at your sides, with elbows bent at about 90 degrees, moving forward and back rather than across your body.
As you run, try to land softly on your midfoot, directly under your hip, to minimise the impact on your knees and hips. Pay attention to your cadence (the number of steps you take per minute) and aim for a light, quick turnover to reduce the risk of injury. By regularly practising these techniques, you’ll improve your running efficiency, making each run more enjoyable and less tiring.
5. Listen to music
If you love running with music, pick tracks that match your pace to help set the tempo and keep you motivated throughout your run. Music can be a great tool for pushing through those tough moments, but some new mums also find value in the peace and quiet of running without it, focusing instead on their breathing and the world around them. Whether you prefer music or silence, it’s all about finding what works best for you.
Music has a big impact on how you feel and perform during exercise. Upbeat, rhythmic songs can help you keep a steady pace, making it easier to push through when you’re feeling tired. If you’re unsure which tempo is right for you, some apps can match your music to your running cadence, so every beat helps you keep moving forward.
On the flip side, running without music can be a meditative experience. It gives you a chance to really tune into your body’s signals and enjoy your surroundings, which can be especially refreshing for new mums who need some quiet time to think and process their thoughts. Whether you’re running with or without music, the key is to ensure it enhances your experience without becoming a distraction.
6. Incorporate pelvic floor exercises
Regular pelvic floor exercises are essential for postpartum runners. These exercises help rebuild muscle strength and prevent issues like incontinence, so it’s important to make them part of your daily routine as you ease back into running. Strengthening your pelvic floor can also help prevent pelvic organ prolapse, a condition where the pelvic organs drop lower than normal due to weakened support muscles.
To perform a Kegel, simply contract the muscles you’d use to stop the flow of urine, hold the contraction for a few seconds, and then release. You can find full instructions on how to use a device to practice your pelvic floor here. Try to do several sets throughout the day. As your strength increases, you can add more repetitions and hold the contractions for longer. These exercises are discreet and can be done anywhere, making them easy to fit into your routine. Over time, a strong pelvic floor will provide better stability and support during your runs.
7. Listen to your body and rest when needed
Rest is just as vital as running. Be sure to include rest days in your routine to give your body the time it needs to recover and rebuild. If you’re feeling overly fatigued or experiencing pain, it’s a signal to step back and rest—pushing through could lead to injury. Postpartum healing is an ongoing process, and overtraining can set you back. Rest days allow your muscles to repair, which is crucial for making progress.
During sleep, your body goes through significant repair processes, so make sure you’re also getting adequate rest at night. If you notice persistent pain, especially in areas like your lower back, hips, or pelvic region, it might be a sign that your body needs more time to recover or that your exercise routine needs adjusting. Don’t ignore these signs; instead, use them as a cue to reassess and modify your approach to running postpartum. Remember, rest isn’t a sign of weakness—it’s a key part of building long-term strength and endurance.
8. Consider running while breastfeeding
If you’re breastfeeding, you can still run, but it’s helpful to plan around your feeding schedule. Many mums find it more comfortable to run after feeding when their breasts are less full. Wearing a supportive sports bra can also make a big difference in reducing discomfort. Staying hydrated is especially important when you’re breastfeeding and running, as both can quickly deplete your body’s fluids. Keep a water bottle handy and consider feeding your baby or expressing milk before your run to make things more comfortable.
Choosing the right sports bra is also key. Look for one that provides full coverage, minimises bounce, and is made from moisture-wicking fabric to keep you dry and comfortable. Some mums prefer nursing sports bras, which can make it easier to feed or express milk before or after your run. Timing your runs around your baby’s feeding schedule can help minimise discomfort and make your run more enjoyable. Additionally, keep in mind that breastfeeding burns extra calories, so you might need to adjust your diet to ensure you have enough energy for both running and nursing.
9. Stop competing against others
Everyone’s postpartum journey is different, and comparing your progress to others can be discouraging. Instead, celebrate your achievements, no matter how small, and remember that consistency is more important than speed.
To expand on this, it’s easy to get caught up in comparing yourself to others, especially in the age of social media, where people often showcase their highlights. However, everyone’s postpartum recovery and fitness journey are unique. Factors like the type of delivery you had, any complications, your baby’s needs, and your own physical and emotional health all influence how quickly you can return to your pre-pregnancy fitness level.
Rather than focusing on what others are doing, set personal benchmarks that reflect your own progress. For example, if you managed to run for 10 minutes without stopping last week, aim for 12 minutes this week. Celebrate these small victories, and use them as motivation to keep going. Over time, these incremental improvements will lead to significant gains in your overall fitness and well-being, and you’ll see steady progress in your running abilities. Even if you feel you can’t run now, you will become really good at running eventually if you stick at it.
10. Run with rhythmic music
If you enjoy running with music, try choosing tracks with a rhythm that matches your pace. Music can help set your tempo and keep you motivated throughout your run. For some mums, though, the peace and quiet of running without music—focusing instead on breathing and the surroundings—can be just as rewarding. Music is a great tool for maintaining rhythm and motivation, especially on days when getting out the door feels like a challenge.
To dive deeper into this, research shows that music can significantly enhance your running experience. It has been proven to improve endurance, reduce the perceived effort, and even elevate your mood. When selecting music for your run, consider creating a playlist that matches the tempo of your desired running pace. For instance, songs with 120 to 140 beats per minute (BPM) are ideal for most running cadences.
On the other hand, if you’re seeking a more relaxed, meditative run, slower, calming music can help you focus on your breathing and the rhythm of your footsteps. Alternatively, running without music allows you to tune into your body’s signals—like your breathing rate, heart rate, and any discomfort—that might indicate a need to adjust your form or pace. Whether you choose to run with or without music, the key is to find what keeps you motivated and enhances your running experience.
11. Incorporate diaphragmatic breathing
Learning how to practice diaphragmatic breathing can help you maintain proper breathing during your runs. This technique strengthens your core and helps you run more efficiently. Diaphragmatic breathing involves taking deep breaths into your diaphragm rather than shallow breaths into your chest, which can reduce fatigue and improve oxygen delivery to your muscles. This technique is especially beneficial postpartum, as it also aids in engaging and strengthening your core muscles.
As you inhale deeply through your nose, focus on expanding your belly while keeping your chest relatively still. This ensures that your diaphragm is fully engaged. Exhale slowly and completely, letting your belly fall. Regular practice of this technique, both during your runs and in everyday life, can help you maintain a steady, relaxed breathing pattern even during more intense exercise. Additionally, diaphragmatic breathing is an effective way to engage and strengthen your core muscles, which is particularly important for postpartum women who may be recovering from abdominal separation (diastasis recti).
12. Wear comfortable running clothes
Choose comfortable, breathable clothing that fits well and doesn’t restrict your movement. Postpartum bodies change, so invest in gear that makes you feel confident and supported while running. Look for moisture-wicking fabrics to keep you dry, and consider layers if you’re running in cooler weather. A good pair of running tights or shorts with a supportive waistband can make a huge difference in your comfort level, especially if you’re dealing with postpartum belly changes.
In cooler weather, layering is key. Start with a moisture-wicking base layer, add an insulating layer for warmth, and top it off with a windproof or waterproof jacket if needed. Postpartum, you may also want to invest in high-waisted leggings or shorts that offer gentle compression around your midsection. This can provide additional support and help you feel more secure, especially if you’re still adjusting to changes in your abdominal area. Ultimately, wearing clothes that make you feel good and perform well will boost your confidence and make your runs more enjoyable.
13. Consult with a healthcare professional
Before you start running postpartum, it’s a good idea to check in with your healthcare provider. They can assess your readiness and offer personalised advice to ensure you’re safely returning to your fitness routine. A professional can help identify any underlying issues, such as diastasis recti or symptoms of pelvic floor dysfunction, that need to be addressed before you begin running. This step is crucial to avoid long-term damage or setbacks in your postpartum recovery.
Additionally, a provider can evaluate your pelvic floor strength and function, as well as any joint or musculoskeletal concerns that might have arisen during pregnancy or childbirth. By addressing these issues early, you can develop a tailored plan that supports your return to running while minimising the risk of injury or setbacks. This proactive approach ensures that your postpartum fitness journey is both safe and effective.
14. Gradually increase your mileage and speed
Don’t expect to pick up where you left off before pregnancy. Start with short, manageable runs and gradually increase your mileage or speed as your strength and endurance return. This slow progression will help you avoid injury and keep you motivated. Postpartum, your connective tissues and muscles are still recovering, and pushing too hard too soon can lead to injuries like shin splints, stress fractures, or plantar fasciitis. A gradual increase allows your body to adapt to the physical demands of running again.
As your endurance and strength improve, you can slowly increase your running duration and intensity. For example, if you start with 10 minutes of running, you might add 2-5 minutes each week, depending on how your body feels. It’s also important to monitor your body’s response to increased mileage or speed—if you notice any signs of strain or discomfort, such as persistent soreness or pain in your joints, it’s a sign that you may need to scale back. Consistent, incremental progress is more sustainable and will lead to better long-term results.
15. Check your alignment and posture
Proper alignment and posture are crucial when returning to running postpartum. As you run, maintain an upright stance with relaxed shoulders and a neutral spine. This helps prevent strain on your joints and ensures a more efficient running form. Your body undergoes significant changes during pregnancy, including shifts in posture and alignment due to the added weight and altered centre of gravity. Correcting these changes postpartum is essential to prevent injury and improve running efficiency.
To ensure proper alignment, engage your core muscles by drawing your belly button towards your spine, which supports your lower back and stabilises your pelvis. Keep your shoulders down and back, avoiding the temptation to hunch forward. Your head should remain in line with your spine, and your gaze should be forward, not downward. Paying attention to these details will reduce the risk of joint strain, particularly in your knees, hips, and lower back. Regularly checking in with your posture during a run can also help you maintain efficient form and prevent fatigue.
16. Consider a postpartum running program
Following a structured postpartum running program can provide guidance and ensure a safe return to running. Programs designed specifically for postpartum women take into account their unique needs and recovery timelines, helping you gradually rebuild your fitness. A good program will include a mix of aerobic exercise, strength training, and rest days to help you progress safely onto high-impact exercise when you’re ready. Whether you’re 6 months postpartum or 12 months postpartum, a tailored running plan can help you achieve your fitness goals without risking injury.
By following a program, you can make sure you’re not doing too much too soon, which is a common mistake that leads to injury. Additionally, a well-designed program will include regular rest days, which are crucial for recovery and preventing overtraining. Whether you follow an online program, work with a coach, or join a postpartum running group, having a structured plan can keep you on track and motivated as you work towards your fitness goals.
FAQ
Can you run while breastfeeding?
Yes, you can run while breastfeeding, but there are a few considerations. To avoid discomfort, try running after feeding when your breasts are less full, and wear a supportive sports bra. Additionally, stay hydrated, as breastfeeding can increase your fluid needs.
How soon after giving birth can I start running?
It’s generally recommended to wait at least 6 to 8 weeks postpartum before starting to run. However, this can vary based on your delivery type and any complications you may have had. Always consult with your healthcare provider before starting.
Is it safe to run postpartum if I had a C-section?
Running after a C-section requires extra caution. It’s important to wait until your incision has fully healed and you’ve been cleared by your healthcare provider. Focus on core and pelvic floor strengthening exercises before resuming running.
Can running postpartum cause prolapse?
Running too soon postpartum or without proper pelvic floor strength can increase the risk of pelvic organ prolapse. It’s essential to build up your pelvic floor muscles and listen to your body to avoid this risk.
How can I tell if I’m ready to start running again?
Consider taking a postpartum running readiness test or consulting with a physical therapist to assess your readiness through physical therapy. Look out for signs of strength, stability, and the absence of pain or incontinence.
What is the best running plan for postpartum?
The best running plan for postpartum is one that gradually increases in intensity and is tailored to your fitness level and recovery stage. It should include a mix of running, walking, strength training, and rest days to ensure you build endurance safely.
Can walking or running help with postpartum weight loss?
Yes, walking and running can be a great way to support postpartum weight loss. Combined with a balanced diet, regular cardiovascular exercise like running helps burn calories and improves overall fitness.
How can I manage low energy levels when running postpartum?
Low energy levels are common postpartum due to the demands of new motherhood. Ensure you’re getting adequate rest, nutrition, and hydration. Start with short, manageable runs, and gradually increase as your energy levels improve.
Is running good for postpartum mental health?
Running can be beneficial for postpartum mental health. It releases endorphins, which can help improve mood and reduce symptoms of postpartum depression. Running also provides a valuable time-out for self-care.
What should I do if I experience pain while running postpartum?
If you experience pain while running postpartum, stop immediately and assess the discomfort. Common issues include pelvic pain, joint pain, or low back pain. Consult a healthcare provider or physical therapist to determine the cause and get appropriate treatment.
How ran I avoid common running injuries postpartum?
To avoid common running injuries postpartum, focus on proper form, start slowly, and incorporate strength training exercises to support your joints and muscles. Investing in good trainers and listening to your body are also key to preventing injuries.
Can you run postpartum if you have diastasis recti?
Running with diastasis recti requires caution. It’s important to work on closing the gap through specific core exercises before attempting high-impact activities like running. A physical therapist can guide you on safe exercises and determine when it’s appropriate to start running.
What are the benefits of running postpartum?
Running postpartum offers numerous benefits, including improved cardiovascular health, weight management, and enhanced mental well-being. It also provides an opportunity for alone time and helps in building strength and endurance.
How long should you wait to start running postpartum?
Waiting at least 6 to 8 weeks is generally recommended before starting to run postpartum, but this can vary. Listen to your body, ensure you’re healed, and consult with a healthcare provider to determine the right time for you.
What should you consider before running postpartum?
Before running postpartum, consider your overall health, energy levels, and whether you’ve regained sufficient core and pelvic floor strength. Also, think about practical aspects like your breastfeeding schedule and finding time to run in your new routine.
Final thoughts
Returning to running postpartum is a journey that requires patience, strength, and mindfulness. By focusing on your body’s needs, setting realistic goals, and following the tips in this guide, you can safely and enjoyably return to the physical activity you love.
*Collaborative feature post*
Winter postpartum wardrobe capsule essentials for new moms
If you’re anything like me after giving birth, especially when you’ve had your first baby, getting dressed in the morning might feel like an Olympic sport. Suddenly, your wardrobe doesn’t seem to fit quite right, and finding something comfortable yet stylish is a real challenge. As a mum of four, I’ve been through those postpartum period days enough to know that a well-planned wardrobe can make all the difference to your changing body.
As winter creeps in, it’s time to get cosy while still feeling like your authentic self. Whether you’re lounging at home or venturing out with the pram, a few key pieces will help you stay warm, comfy, and stylish during this special yet challenging time.
In this post, I’ll share my winter postpartum wardrobe capsule essentials for new moms, designed to keep things simple, practical, and a little bit chic—because let’s be real, you deserve to feel fabulous, even when you’re knee-deep in nappies and you haven’t felt fabulous in a long time! Plus, you don’t need to buy a whole new wardrobe—these basic pieces can be combined and circulated to make a limitless number of outfit alternatives!
Let’s dive in, shall we?
Managing postpartum body changes
As demanding as pregnancy is, and with all the changes your body goes through during childbirth, it’s no surprise that your body might take some time to get back to full strength after delivery. Here are a few strategies to help manage the physical challenges you may face:
Exercising your pelvic floor
After childbirth, your pelvic floor muscles can become weakened, leading to issues like incontinence and discomfort. Strengthening these muscles through targeted exercises, such as Kegels, can help restore their tone and function. Regularly practising these exercises can improve bladder control and support the healing process.
Alleviating your pain
Back pain is a common complaint among new mothers, often due to the strain of pregnancy and the physical demands of caring for a newborn. Gentle stretches and exercises designed to strengthen your back and core muscles can provide relief. Some women find that using CBD oil products can help manage pain and inflammation, but it’s best to avoid CBD if you’re still breastfeeding.
Toning your stomach muscles
Many women experience diastasis recti, a condition where the abdominal muscles separate during pregnancy. To help tone and repair these muscles, focus on gentle core strengthening exercises like pelvic tilts and controlled movements. Avoid exercises that put too much strain on your abdomen, such as traditional crunches, until your muscles have had time to heal.
Understanding hormonal changes
The sudden drop in pregnancy hormones after childbirth can significantly impact your body and mood, sometimes leading to conditions like postpartum depression or anxiety. Understanding that these hormonal changes are normal and temporary can help you navigate this period. Don’t hesitate to seek support from healthcare providers, family, and friends if you’re struggling.
Postpartum essentials
Before clothing, consider the practical needs of your postpartum phase:
Postpartum underwear: High-waisted options provide gentle compression and support.
Comfortable tops: Loose tees and tanks are ideal for everyday wear.
Maternity jeans: Continue to provide comfort and style post-pregnancy.
For moms recovering from a C-section, the best clothes to wear after a C-section include soft, non-restrictive items like high-waisted leggings and loose dresses.
Sipping your way through recovery
Recovery after giving birth takes time and care. Incorporating postpartum teas into your routine can aid in recovery, offering soothing properties that help with digestion and relaxation.
How to feel cute postpartum without breaking the bank
Creating a stylish postpartum capsule wardrobe doesn’t have to be expensive. Focus on versatile, high-quality basics that you can mix and match. For example, Old Navy maternity clothes offer affordable options that don’t compromise on style.
Capsule wardrobe for pregnancy and beyond
A capsule wardrobe that transitions into your postpartum phase is a smart investment. This includes maternity items like midi skirts, maxi dresses, and black leggings that remain useful even after the baby arrives.
Outfit ideas and postpartum dressing tips
Postpartum dressing is all about finding what makes you feel comfortable and confident. Whether it’s a variety of styles in flattering dresses or different outfits that work for both home and outings, the goal is to simplify your wardrobe while enhancing your personal style. So let’s go through what works!
Postpartum wardrobe capsule essentials
Your postpartum wardrobe should include key pieces that offer both comfort and practicality. This includes high-waisted jeggings/jeans for support, nursing-friendly tops, and cosy cardigans for layering. Whether you’re looking for clothes to wear after delivery or wondering how to dress after giving birth, focusing on a capsule wardrobe can simplify your daily dressing routine.
What is a capsule wardrobe?
A capsule wardrobe is a collection of timeless, essential items that can be mixed and matched to create various outfits. For new moms, this concept is particularly useful in building a nursing wardrobe or a new mom capsule wardrobe that includes postpartum comfy clothes and flattering dresses for post-pregnancy.
Building a postpartum capsule wardrobe for different seasons
Fall/Winter postpartum capsule wardrobe
As the temperatures drop, your wardrobe needs to adapt to keep you warm, comfortable, and stylish during the postpartum period. A Fall/Winter postpartum capsule wardrobe is all about selecting versatile pieces that can be layered and mixed to create various outfits, ensuring you feel good and look great, even on the coldest days. Here are the key items you should focus on:
High-waisted jeggings/jeans
These are a staple in any postpartum wardrobe. High-waisted jeggings or jeans offer much-needed support around your midsection, helping to smooth and hold everything in place while providing a polished look. They’re perfect for pairing with just about any top, and their high waist ensures that you can move comfortably without worrying about anything slipping or feeling too tight. Opt for darker washes during the fall and winter months for a slimming effect and to easily match with touhe rest of your wardrobe.
Nursing bras and tanks
Nursing bras and tanks are essential for any breastfeeding wardrobe, providing both convenience and comfort. During the colder months, layering becomes key, and a nursing tank can serve as a perfect base layer. They allow easy access for breastfeeding while keeping you warm. A good nursing bra should offer support without underwires that could cause discomfort, and it should be easy to unhook with one hand. Investing in a few high-quality nursing tanks and bras can make feeding on the go or at home much more manageable.
Cosy cardigans with neutral colours
Merino Maternity Cardigan
Cardigans are the ultimate layering piece, adding warmth and style to any outfit. Choose cosy cardigans in neutral colours like grey, beige, or black to ensure they pair easily with everything in your wardrobe. The Merino Maternity Cardigan is an excellent option for its soft, breathable fabric and classic cable knit design, which adds a touch of elegance while keeping you comfy. Cardigans are also practical because they can be easily removed or added as the temperature changes throughout the day.
Zorah | Sub-Zero 3 in 1 Maternity Parka
Warm outerwear
A good winter coat is a must-have when the weather turns cold. Look for something that is both stylish and functional, like the Zorah Down Lined Parka. This coat offers warmth without adding bulk, thanks to its down lining, and features like a zip-off kangaroo panel for babywearing make it especially practical for new moms. Choose a coat that’s long enough to cover your hips and thighs for added warmth, and one with a hood to protect you from the wind and rain.
Winter accessories for new mums
When the temperature drops, having the right accessories can make all the difference in staying warm and comfortable while navigating winter outings with your little one. One standout accessory every pram-pushing parent needs this winter is the hUDOMA Chelsea Pram Gloves.
Why hUDOMA pram gloves are a must-have:
Convenient Design: These gloves attach directly to your pram handle, so you never have to worry about misplacing them. They’re always ready to keep your hands warm as you stroll.
Superior Warmth: Lined with ultra-soft faux fur, the gloves provide incredible cosiness even on the coldest days.
Weather-Resistant: With their durable, water-resistant outer material, these gloves shield your hands from rain, wind, and snow, making them perfect for all-weather conditions.
Universal Fit: Designed to attach securely to all types of prams and strollers, these gloves are as versatile as they are practical.
As a mum who juggles multiple school and nursery runs with a buggy/trike, I found the hUDOMA Pram Gloves a game-changer. They made those brisk winter walks much more bearable, freeing me to focus on my child rather than fumbling with traditional gloves. Priced at £45 per pair, they’re an affordable luxury for keeping your hands toasty.
Where to Buy: You can grab a pair of these award-winning gloves at www.hUDOMA.com. They’re also a thoughtful gift for new mums during the holiday season.
Spring/summer postpartum capsule wardrobe
As the weather warms up, your wardrobe will need to shift towards lighter, breathable fabrics that keep you comfortable and cool. A Spring/Summer postpartum capsule wardrobe focuses on airy, flowy pieces that can easily transition from casual days at home to outings with your little one. Here’s what you’ll need:
Comfortable tops
Nursing tanks and loose tees are perfect for warm weather. They offer breathability and ease of movement while still allowing you to nurse your baby comfortably. Look for tops made from soft, natural fabrics like cotton or bamboo, which are gentle on your skin and help wick away moisture on hot days.
Flattering dresses
Dresses are a go-to in the summer for their ease and comfort. Opt for flowy dresses and midi skirts that provide coverage while still allowing air to circulate. These pieces are great for looking put-together without sacrificing comfort. Nursing-friendly options, such as those with front buttons or wrap styles, are especially useful for breastfeeding on the go.
High-waisted leggings
Bamboo Maternity Leggings from Seraphine
Even in the summer, leggings can be a versatile part of your wardrobe, especially on cooler days or when you want to stay comfortable at home. High-waisted leggings offer gentle support to your postpartum belly and can be dressed up with a cute tunic or dressed down with a basic tee. Look for lightweight, breathable materials that won’t overheat you as the temperatures rise.
How to create a nursing capsule wardrobe in four easy steps
Building a nursing capsule wardrobe is all about simplicity and practicality. Here’s how you can do it:
1. Start with basics
Begin by investing in a few nursing bras, nursing tanks, and loose tees that offer easy access for breastfeeding. These pieces are the foundation of your nursing wardrobe and should be comfortable enough to wear all day.
2. Add layers
Layering is key, especially during the transitional seasons. Cosy cardigans, button-down shirts, and lightweight jackets like a denim jacket or leather jacket can be worn over your basics. These layers not only keep you warm but also allow you to quickly adjust your outfit for nursing by simply removing or unbuttoning a top layer.
3. Incorporate versatile pieces
High-waisted jeggings and stretchy basic tees can be paired with different tops for various looks. These versatile pieces help you create multiple outfits with minimal effort, making it easier to get dressed each day. Jeggings provide a structured look while maintaining the comfort of leggings, and stretchy tees can be worn under cardigans, jackets, or on their own.
4. Include comfortable footwear
Comfy but cute sneakers and supportive slippers are must-haves for any new mom. Sneakers are perfect for running errands or taking your baby for a walk, offering the support you need while still looking stylish. At home, slippers keep your feet warm and supported as you go about your daily routine.
The wardrobe hack that saved my postpartum sanity
Embracing the concept of a postpartum capsule wardrobe is the ultimate hack for new moms. It saves time, reduces stress, and ensures that you always have stylish outfits ready to go. By focusing on capsule wardrobe essentials, you can navigate the postpartum phase with ease and confidence.
Loungewear essentials for new moms
Cosy Robe: Essential for early mornings and late-night feedings, a cosy robe keeps you warm and is easy to throw on.
Stylish PJs/Nightshirts (Nursing-Friendly): Nursing-friendly pyjamas or nightshirts offer comfort and practicality, making nighttime feedings easier without sacrificing style.
Joggers: High-waisted joggers are versatile for lounging at home or running quick errands.
Nursing Camis: A nursing cami is a staple for easy breastfeeding access and can be layered under other tops for extra warmth.
Comfy Sweatshirts: An oversized, soft sweatshirt is essential for layering during winter like the Bold Stripe Cotton Knit Maternity & Nursing Jumper
Stretchy Basic Tees: Perfect for layering under sweaters or cardigans.
Loose Tees and Tanks: Provide easy access for nursing and comfort throughout the day.
Cosy Cardigans: Great for layering, adding warmth and style to any outfit. The Merino Maternity Cardigan in Size 10 is an ideal choice, offering both comfort and a polished look.
Outerwear
Warm Winter Coat: A must-have for winter, a stylish and functional coat is essential. The Zorah Down Lined Parka in Size 10 is an excellent choice, providing ample warmth and a sleek design for cold days.
Dresses
Nursing-Friendly Dresses: Opt for dresses that provide easy nursing access while keeping you stylish. Knit dresses are perfect for warmth and can be paired with tights and boots.
Simple Dress: A comfortable dress versatile enough to wear at home or for casual outings.
Bottoms
High-Waisted Jeggings/Jeans: Provide support and comfort while giving you a polished look.
High-Waisted Postpartum Leggings: Options like the Kindred Bravely Maternity Louisa Postpartum Support Leggings and Preggo Leggings Snapback Postpartum Leggings offer gentle compression and support.
Undergarments
Nursing Bra: A supportive, comfortable nursing bra is essential.
Postpartum Underwear: High-waisted postpartum underwear provides gentle compression and support, aiding in healing and comfort.
Shoes and slippers for postpartum comfort
When navigating postpartum life, comfortable and supportive footwear is a game-changer. Whether running errands, chasing after older kids, or relaxing at home, the right pair of slippers can make all the difference.
Simba slippers: luxury comfort for new mums
Simba has taken comfort to the next level with its new range of luxury slippers, combining style and advanced reflexology-inspired technology. The ROK slipper, in particular, is a standout option for postpartum mums. These moccasin-style slippers are crafted from premium materials like leather and feature 9-Zone Reflexology technology, designed to gently massage the soles of your feet. This innovative design helps improve circulation and relieve pressure, making them perfect for long days on your feet or cosy nights.
Available in multiple styles and colours, including grey for men and beige for women, these slippers are a thoughtful addition to any postpartum wardrobe. They also offer the versatility of indoor and outdoor use, so you can transition seamlessly from home to school drop-offs without missing a step.
Why Simba slippers are a must-have
Comfort Meets Wellness: The reflexology zones provide gentle stimulation, promoting relaxation, and recovery.
Premium Quality: Made with soft leather and durable materials for lasting use.
Stylish Design: Available in neutral tones, they pair well with loungewear or casual outfits.
Practical Features: With a sturdy rubber outsole, they are ideal for both indoor wear and quick trips outside.
Where to Buy: Simba slippers, including the ROK (£89), STORMUR (£69), and YLUR (£79) styles, are available at Simba Sleep. They’re a perfect holiday gift for new mums or anyone seeking comfort and style.
Slippers: Warm, supportive slippers are necessary for keeping your feet cosy at home.
Comfy but Cute Sneakers: Supportive sneakers are perfect for everyday wear, especially when you’re out and about with your little one.
A note on the Seraphine collection
I’m excited to share that we’ve partnered with Seraphine, known for its beautiful and practical maternity and postpartum clothing. Check out their collection of postpartum essentials. With the right wardrobe, you’ll feel more like yourself as you adjust to life with your new baby.
FAQs
Postpartum wardrobe questions
How do I build a postpartum wardrobe?
Start with versatile, comfortable pieces that can be mixed and matched. Focus on essentials like high-waisted leggings, nursing-friendly tops, cosy sweaters, and supportive underwear. Include a few outerwear items like a warm coat and boots for winter.
What should I wear postpartum?
Choose clothes that are comfortable and easy to wear, and provide support where needed. High-waisted leggings, loose tops, nursing bras, and soft fabrics are key. Layering pieces like cardigans and scarves are also great for warmth and style.
Body changes questions
Why do I still have stomach creases even when I’m underweight?
Stomach creases can result from loose skin or diastasis recti (separation of abdominal muscles) after pregnancy. This is common and can improve over time with targeted exercises and proper care.
General fashion questions
What fashion questions are moms asking?
Moms often ask about comfortable yet stylish postpartum clothing, how to dress for different body changes, and tips for quick and easy outfits that work for both home and outings.