Kegel8®: pelvic floor exercises postpartum to regain strength
Having a baby comes with so many surprises, some of which you may not have prepared for, like the uproar of hormones, your droopy stomach, and how your downstairs feels like a runaway freight train that’s collided with a wall.
However surprising these symptoms are, they’re actually quite common. You could experience pelvic floor weakness even a few years after giving birth, and even if you’ve had a C-section and preserved your front bottom from being stretched like a balloon animal at a kid’s party, the pressures, hormonal changes and age can still affect your pelvic floor.
But, it’s important to note that even though over 60% of women in the UK and more than 15 million women in the U.S. suffer from a weak pelvic floor, it isn’t normal to suffer like this. There are ways you can strengthen your pelvic floor, so you don’t have to worry about leaving the house without a toilet nearby (something which I suffered with for years). Practising your pelvic floor exercises postpartum to regain strength can prevent and treat weaknesses that cause these accidents and make you feel confident to take on the world as well (honestly, you’ll be surprised at how much a strong pelvic floor makes you feel like a superwoman!)
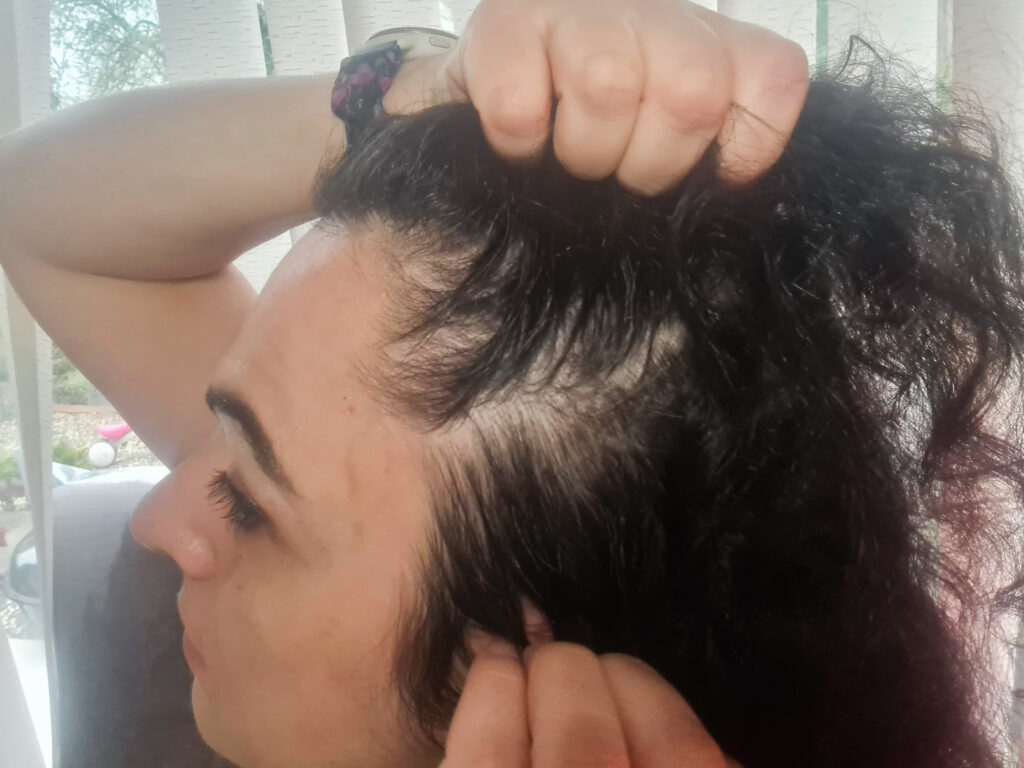
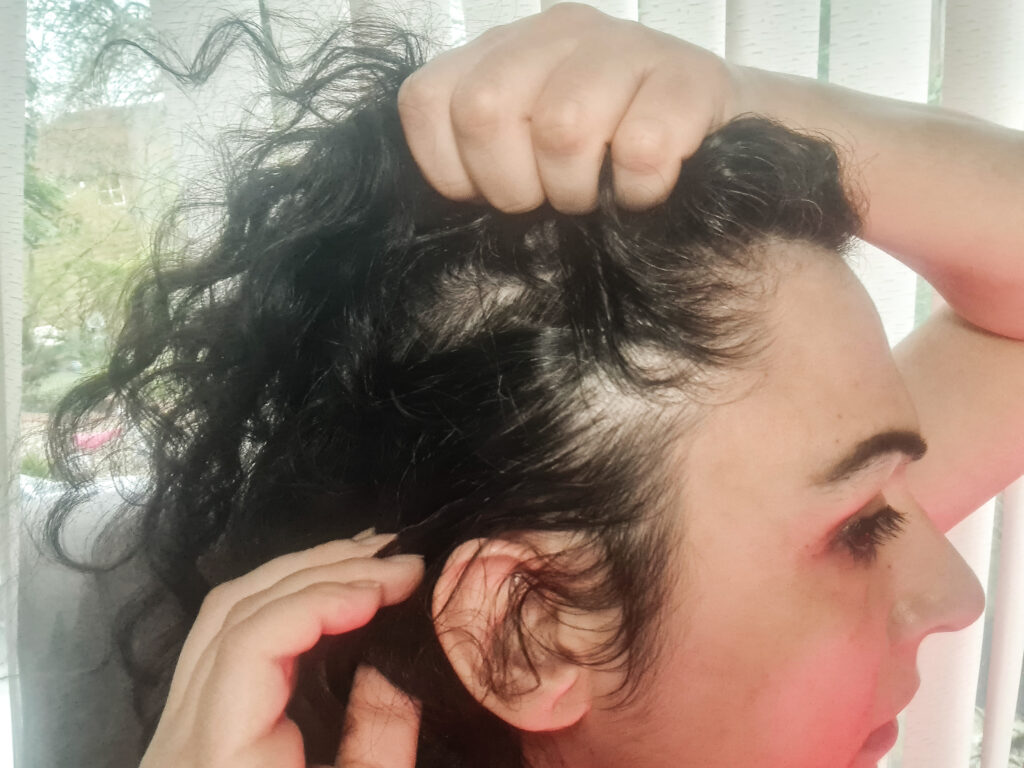
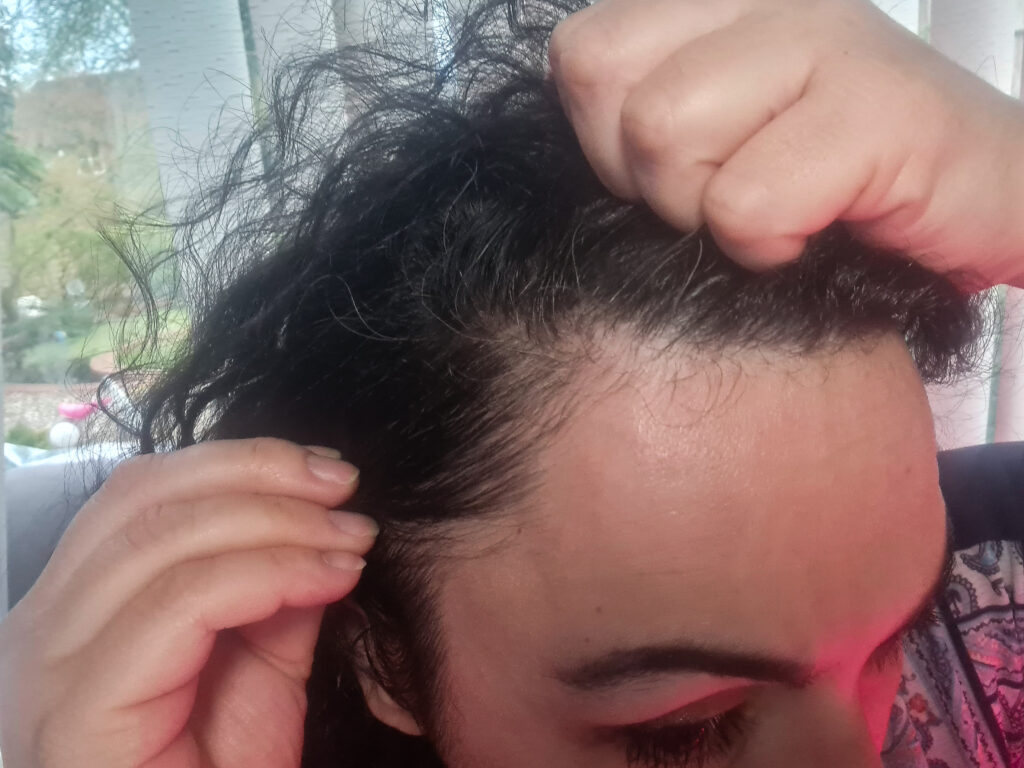
As a mother of four (with the last two being vaginal births) my pelvic floor felt broken and even three years postpartum, I struggle to hold my bladder when I’m dying for the loo. This is known as urge incontinence, which I’ll go through in more detail later, and it has caused so much frustration, anxiety and even depression too. I can’t just decide to go for long walks because I have to think about where the nearest toilet would be. And, without realising, I’ve only ever worn black leggings because I think if I have an oops moment, hopefully no one would notice.
Not a way to live, is it?
Well, we don’t have to live like this anymore!
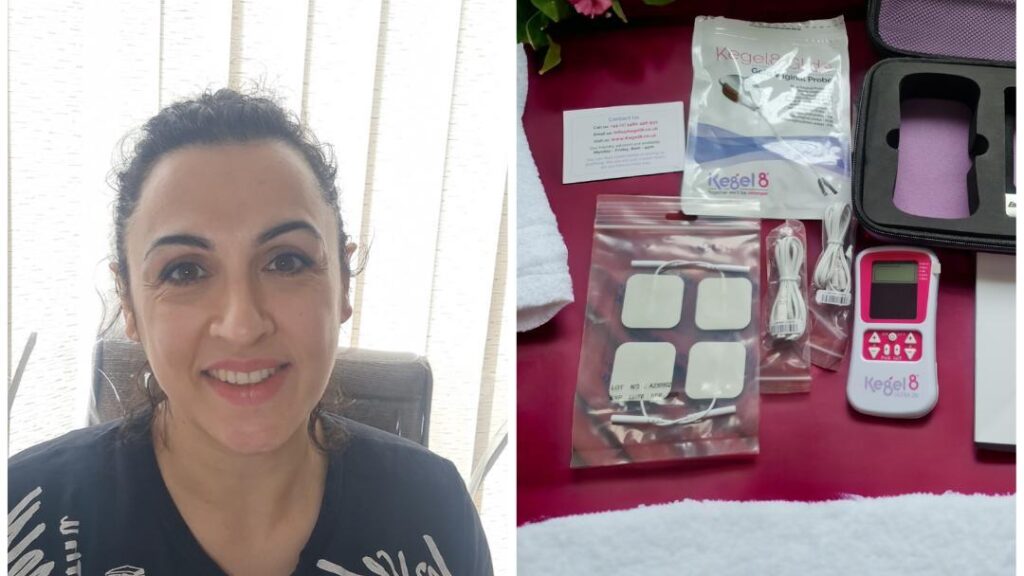
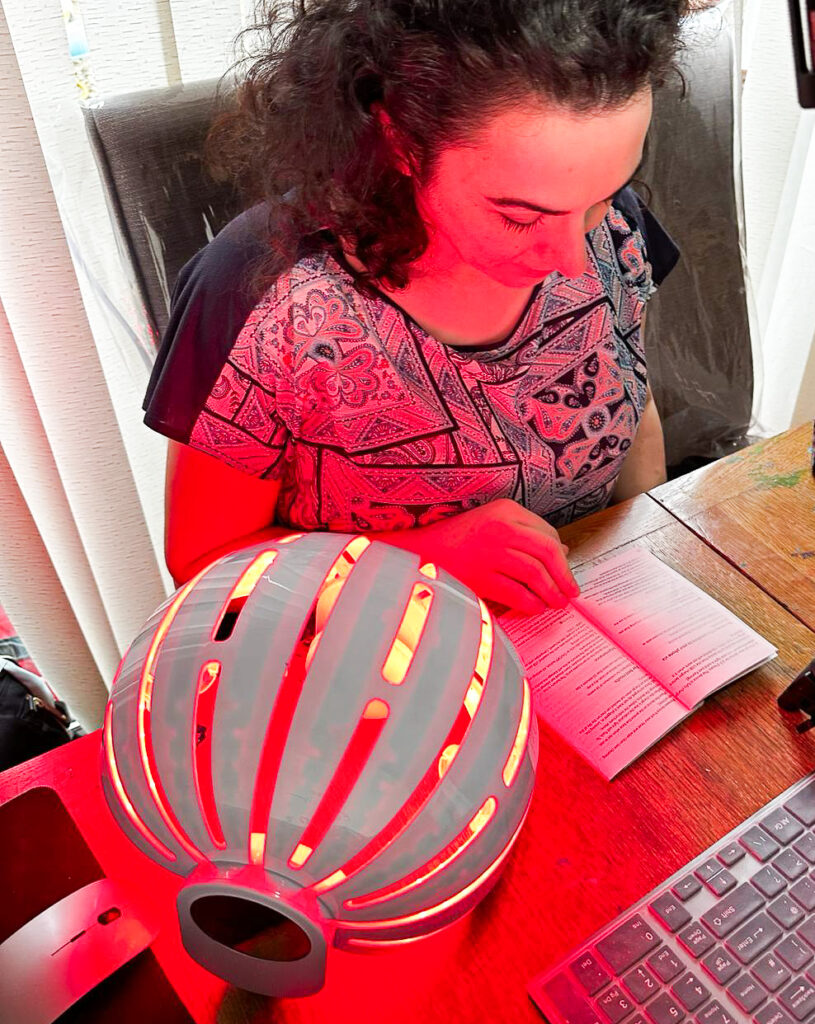
I teamed up with Kegel8®, the leading brand in electronic pelvic floor trainers and Amanda Savage MCSP MSt, a chartered physiotherapist, women’s health specialist and an expert in pelvic floor health, to dig deep into the science behind our pelvic floor muscles and trial the Kegel8® Ultra 20 V2 Toner* and Kegel8®, Biofeedback Pelvic Trainer Vaginal Probe for three months, to see if I can improve my pelvic floor.
The results have legit been astonishing!
Plus, I have an exclusive 10% discount code for Motherhood Diaries’ readers because I want you to try these amazing Kegel8® Ultra 20 V2 Toners*. I can wholeheartedly say that everything has changed since I’ve used it.
So, let’s muscle on (:D) with the article and I’ll share how I got on.
Welcome to your post-pregnancy body
Childbirth changes your body in many ways and the postpartum period can leave you feeling a bit low. If you’ve suffered injuries during birth, then the recovery process may take a little longer too. Perhaps you had an assisted vaginal delivery which resulted in a tear or you had C-section. Even if you came out with no scars, the weight of a baby could have had some bearing on the lower half of your body. Injuries suffered during birth are common, but with the right interventions and a gradual recovery program, you should be able to bounce back from them. Consistent exercise, a healthy diet, and proper pelvic floor exercises can help your body recover and regain strength.
These changes don’t happen overnight, though, and the age-old adage is generally true – it took nine months to make a baby, and so it will take at least that long to get back into shape again.
What about your pelvic floor?
“Don’t make me laugh or I’ll pee myself!”
I’m sure you’ve heard that saying multiple times in your life. That’s your pelvic floor making you leak when you laugh because of the stress laughing puts on those muscles – the one area we overlook and the one muscle we so wish we had exercised when it’s too late.
I’m guilty of forgetting to do my pelvic floor and, even though I and 90 per cent1 of ladies know the importance of doing our pelvic floor post-pregnancy (it improves your sex life too by the way!), still, 61 per cent of us are not training these muscles when we know we should be. According to research from lights by TENA, one in three2 women in the UK experience light bladder weakness and this is a common occurrence for 69 per cent3 of pregnant women and new mums.
So, you’re definitely not alone.
This leaky bladder after pregnancy is so common that over 200 million people worldwide suffer from incontinence. And, the problem is that women suffer from low mental health because of this symptom, but we are too ashamed to talk about it.
Can I just grin and bear it?
Well, yes, you can. But, do you want to live in fear of accidents all your life? And if you’re sexually active, don’t you want increased sensation? Also, a weakened pelvic floor can lead to more serious concerns if not treated, like urinary incontinence (we’ll go through the different types below), which is also a prevalent issue amongst women, as pregnancy exacerbates this problem. Pregnancy hormones relax the muscles and the increasing baby weight adds to the pressure on the bladder and pelvic floor, which results in accidental urine leakages. One other well-known side effect of pregnancy is constipation, which can also overstretch the pelvic floor muscles, weakening them even further.
So, you must recognise whether you have an issue with your pelvic floor and then take the steps to exercise and strengthen the muscles to prevent any further unnecessary leakages.
But, how do you do that?
By understanding exactly what your pelvic floor is!
So, let’s get down to the science:
Below are your pelvic floor muscles
The pelvic floor is a group of muscles and connective tissue that spans the area underneath your pelvis. These muscles form a hammock-like structure from the pubic bone at the front to the tailbone (coccyx) at the back and from one sitting bone to the other. They support the bladder, uterus (womb), and bowel (colon), helping maintain control over the bladder and bowel movements, and play a crucial role in sexual function.
“Since giving birth, many women notice a change in sexual sensation and satisfaction, which can be related to pelvic floor weakness. Exercising these muscles brings blood flow to the area, tones and tightens the muscles, and can improve the ability to feel the vaginal walls during sex, often leading to easier and more powerful orgasms.”
Amanda Savage, MCSP MSt, chartered physiotherapist, women’s health specialist, pelvic floor health expert
Your pelvic floor stretches under a lot of weight and springs back up again. You can see above that these groups of muscles (called the pelvic floor muscles or ‘levator ani muscles’) are sitting directly under the weight of your growing baby.
During pregnancy, the muscles and tissue can become overstretched and exhausted from bearing the burden for so long, which is why it is massively important to exercise and strengthen your pelvic floor muscles before you get pregnant, throughout your pregnancy and after birth, too. Did I listen to the experts tell me this, though?
No, I didn’t. These pelvic floor muscles are often overlooked, especially postpartum. And, despite the common belief that having a C-section might protect the pelvic floor from damage, many women still experience pelvic floor weakness due to various factors as mentioned above, i.e. hormonal changes, the pressure of carrying a baby and ageing.
“Childbirth is one of the most predictable influences on pelvic floor condition but it is a muscle just like others in the body so can be affected by incidences later in life too – maybe a further muscle deconditioning due to another event, like things that can sneak up on you such as weight gain, chronic cough, constipation or having treatment for another condition like cancer.
Amanda Savage, MCSP Mst, chartered physiotherapist, women’s health specialist, pelvic floor health expert
Recognising pelvic floor weakness
Recognising you need to strengthen your pelvic floor is the first step to treating it. There are actually different types of incontinence, the most common being stress incontinence (pee leaks out when your bladder is under pressure) and urge incontinence (Pee leaks out when you feel the sudden urge to pass urine – or soon afterwards). More details below:
Stress incontinence
Pee leaks out when your bladder is under pressure, for example, when you cough, sneeze or laugh, and is usually the result of a weakening or damaging of the pelvic floor muscles used to prevent urination. Symptoms can stem from or be exacerbated during pregnancy and vaginal birth.
“Stress incontinence is particularly common after childbirth, as the pelvic floor muscles may be weakened or damaged during the process. It’s important to start pelvic floor exercises as soon as possible after birth to help strengthen these muscles and prevent further issues.”
Amanda Savage, MCSP MSt, chartered physiotherapist, women’s health specialist, pelvic floor health expert
Urge incontinence
Pee leaks out when you feel the sudden, intense urge to pass urine – or soon afterwards. This is usually the result of an overactive bladder due to the detrusor muscles, which control the bladder. Obesity, a family history of incontinence and age, can increase the chances of bladder weakness (although, this is not an inevitable side effect from ageing).
How to recognise you have a weakened pelvic floor
There is a common misconception that you think you have a weak bladder because you’ve leaked urine after you’ve coughed, sneezed, laughed, lifted heavy items or done anything which has resulted in having the sudden urge to go to the loo. But what 5.4 million women in the UK thought was a weak bladder was in fact weak pelvic floor muscles that were not holding the bladder and urethra in the correct position.
But, what if you want more children?
Each person and their pelvic floor are unique. Problems do not necessarily change further with each pregnancy or delivery. However, there are risk factors such as maternal age, your collagen type, family history, size of babies’ heads, and type of delivery. Some are in your control but many are not.
No one would want you to limit the size of your family through fear of body changes. But everyone decides on their family size with many factors in mind: financial, mental, and physical coping capacity.
They are developing tools to help women and doctors predict better and help make birth/delivery choices (e.g., UR CHOICE), but these are not well developed yet. If you have a traumatic delivery or suffer with incontinence or prolapse symptoms after childbirth, you will be offered time to discuss your plan for your next delivery with your midwife and/or a consultant.
If you feel that your pelvic floor is vulnerable, perhaps take a bit more of a break between pregnancies to allow yourself to get strong again. It can take 18 months to rebuild vitamin and mineral levels and similarly pelvic floor strength.
Amanda Savage, MCSP MSt, chartered physiotherapist, women’s health specialist, pelvic floor health expert
Do you need to pee a lot?
Remember, you don’t have a weak bladder. You have weak pelvic floor muscles.
“An overactive bladder is a common condition. The bladder muscle becomes more sensitive and contracts too often, even before the bladder is full. Symptoms include peeing more than seven times a day or more than once at night (nocturia), and a sudden, urgent desire to pass urine. It can happen in conjunction with leakage or without.”
Amanda Savage, MCSP MSt, chartered physiotherapist, women’s health specialist, pelvic floor health expert
Do you feel like you can’t get to the loo in time?
Again, that feeling is not related to a weak bladder; it’s your pelvic floor muscles.
Do you feel you can’t fully empty your bladder?
If you’re straining to pee and it feels difficult to fully empty your bladder, this is more likely due to your pelvic floor muscles rather than your bladder itself.
Do you accidentally leak sometimes?
If you sneeze, cough, laugh, jump or do any heavy lifting and experience an unintentional leak, then you may have stress incontinence. These actions put stress on the bladder, and if your pelvic floor muscles are not tightening enough, this will cause an involuntary leak, which is the most common form of female incontinence.
Do you have pelvic pain?
Tension or problems in the pelvic floor muscles can cause pelvic pain after pregnancy, but this may also be a sign of infection. Visit your doctor as soon as you feel any pelvic pain after childbirth or pubic pain after birth in the area.
Do you feel a loss of sensation during sex?
A weakened or damaged pelvic floor may mean that you experience a loss of enjoyment during sex. However, those who can squeeze and relax their pelvic floor muscles correctly experience more intense orgasms – need there be any more reason to exercise your pelvic floor!
Do you leak during sex?
A large proportion of women with incontinence experience leakage during sex due to a weak pelvic floor because sexual activity puts pressure on the bladder or urethra.
Do you accidentally pass wind?
The inability to hold wind is another sign of a weakened pelvic floor because it supports the bowel as well as the bladder and so is responsible for all the openings.
Do you have backaches or bad posture?
Another sign of weak pelvic floor muscles is poor posture or suffering from backaches. An exercised pelvic floor should support the entire core, a stronger midsection and a flatter tummy, as well as better posture.
You may be thinking you’re doomed, but you’re not. It’s never too late to strengthen your pelvic floor muscles and stop any unwanted leakages.
But, why should you strengthen your pelvic floor muscles?
Suppose you don’t strengthen already weakened muscles, then your pelvic floor will get weaker and could lead to incontinence or worse, pelvic organ prolapse, which is when one or more of the organs (womb (uterus), bowel, bladder or top of the vagina) in the pelvis slip down from their normal position and bulge into the vagina. A prolapse can cause postpartum pain and discomfort, but it isn’t life threatening. Other symptoms may include faecal incontinence, which is the inability to control your bowels.
I do my pelvic floor exercises post-pregnancy, but I still have a weak pelvic floor
Did you know that 50% of women in the UK cannot activate their pelvic floor muscles correctly, so any exercises they do already are ineffective and can lead to postpartum pelvic pain? Don’t worry, we’ll show you how to do your pelvic floor muscles correctly and even show you how to use a device (Kegel8® Ultra 20*) which can do it for you if you are post-12 weeks postpartum!
How to strengthen your pelvic floor after birth
You can strengthen your pelvic floor by either physically exercising them every day, multiple times a day, using pelvic floor physical therapy through strengtheners, or treatment options by a pelvic floor physical therapist/physiotherapist and devices you can use at home. We’ll go through exercising your pelvic floor muscles yourself first.
You should be able to locate your pelvic floor muscles
To use your pelvic floor muscles correctly, you need to know where to find them. As mentioned before, the pelvic floor muscles start from your pubic bone and run through to the tailbone at the back.
You are often told to think about holding your wee in mid-stream to connect with your pelvic floor muscles, but a better way is to imagine stopping the wind from your back passage and then stopping a wee from the front. You then pull these two points in and up together. Doing it this way will help you learn where they are and therefore, connect to them better if you get problems.
So, to use your pelvic floor muscles correctly, you:
Imagine stopping the wind from your back passage
Then stop the wee from the front
Pull these two points in and up together
The above three steps are the correct way to exercise your pelvic floor muscles and avoid pelvic problems after pregnancy.
Did you know that exercising helps to strengthen your pelvic floor muscles too?
The more active you are during pregnancy, the easier it will be for your body to adapt to the weight gain and increased pressure. Exercising also helps strengthen your core and encourages you to feel emotionally and physically strong – this includes your pelvic floor too.
Recruit your entire pelvic floor when exercising
Muscles should have strength, length, and balance. So, you should not only think about contracting the muscle but letting it relax too. A great way to do this is to imagine you are pulling your pelvic floor muscles up through 5 floors – like a lift going up.
Then, you go back down through the levels before you lift up again.
Work your pelvic floor the hardest
Focus predominantly on your pelvic floor muscles when exercising, so they can strengthen over and above the other muscles that take over, like the glutes (the bum) and the abs.
Do not hold your breath
Holding your breath creates tension in the body that can cause pressure, increasing stress on some muscles, including the pelvic floor. While exercising your pelvic floor muscles, take deep breaths and, as you inhale, try to relax and feel your pelvic floor.
Lifestyle changes can also help
You can make certain lifestyle changes to help prevent the onset of bladder weakness and pelvic pain after delivery. These may include:
Losing weight and cutting down on alcohol and caffeine
Train your bladder to wait a little longer between needing to urinate and passing urine.
Use an award-winning muscle re-trainer like the Kegel8® Ultra 20* below, which stops you from worrying about your bladder by re-training the pelvic floor muscles.
Regardless of whether you have a weakened pelvic floor, get into the habit of exercising your pelvic floor muscles every day. But suppose you still find you are not exercising the muscles correctly, especially when you’re in a rush or forget altogether, there is another very awesome way to ensure you exercise your pelvic floor muscles correctly every time.
Introducing the Kegel8® Ultra 20 V2 Electronic Pelvic Toner!
The Kegel8® Ultra 20 Toner can do the pelvic floor exercises postpartum for you!
Pelvic floor strengtheners ensure you’re doing your pelvic floor exercises properly, so you can achieve quicker results. And as this article is all about the very awesome Kegel8® Ultra 20 V2 Electronic Pelvic Toner (Kegel8® Ultra 20*), let’s dig into how this amazing contraption got me from leaking the moment my bladder was half full to walking five miles with a full bladder and managing to get home with no leakage in sight!
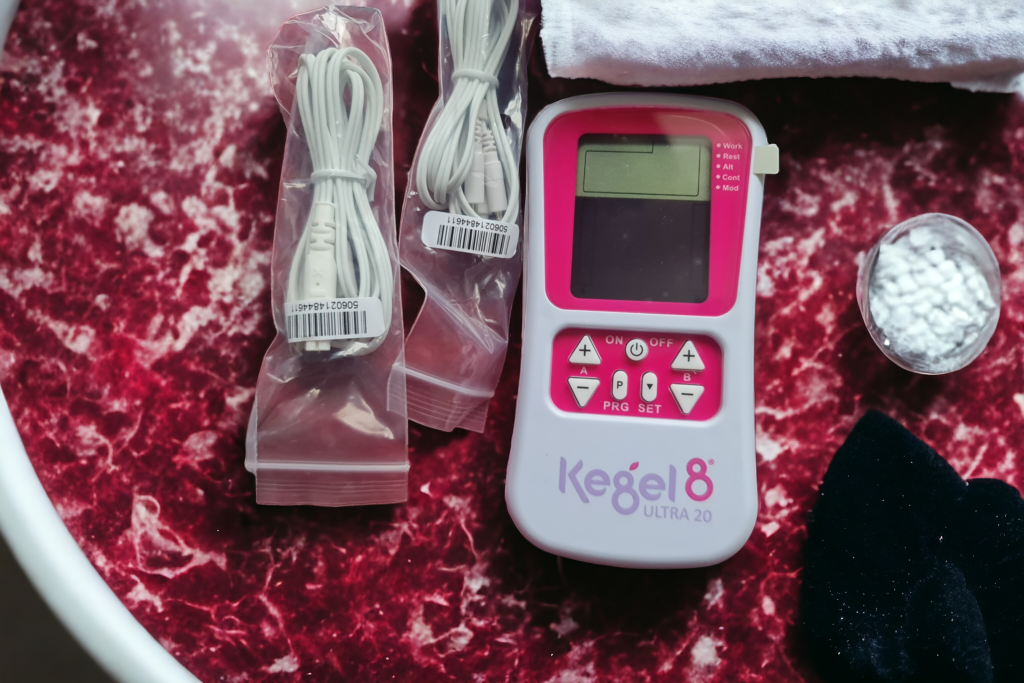
The Kegel8® Ultra 20 is a sophisticated device designed to strengthen and rehabilitate weak pelvic floor muscles in the comfort of your own home. Created especially for women, the Kegel8® Ultra 20 is a safe and effective neuromuscular stimulator (STIM) that works by producing electrical pulses that gently stimulate the muscles and nerve fibres in your pelvic area and automatically activate these muscles, even if you can’t do them manually.
This was my first time using a STIM device, so I was apprehensive about using it. The box comes with wires and cables, but I can assure you, once you read the manual first and follow the instructions for proper use, it is so easy and very comfortable to use.
What do you get in the box?
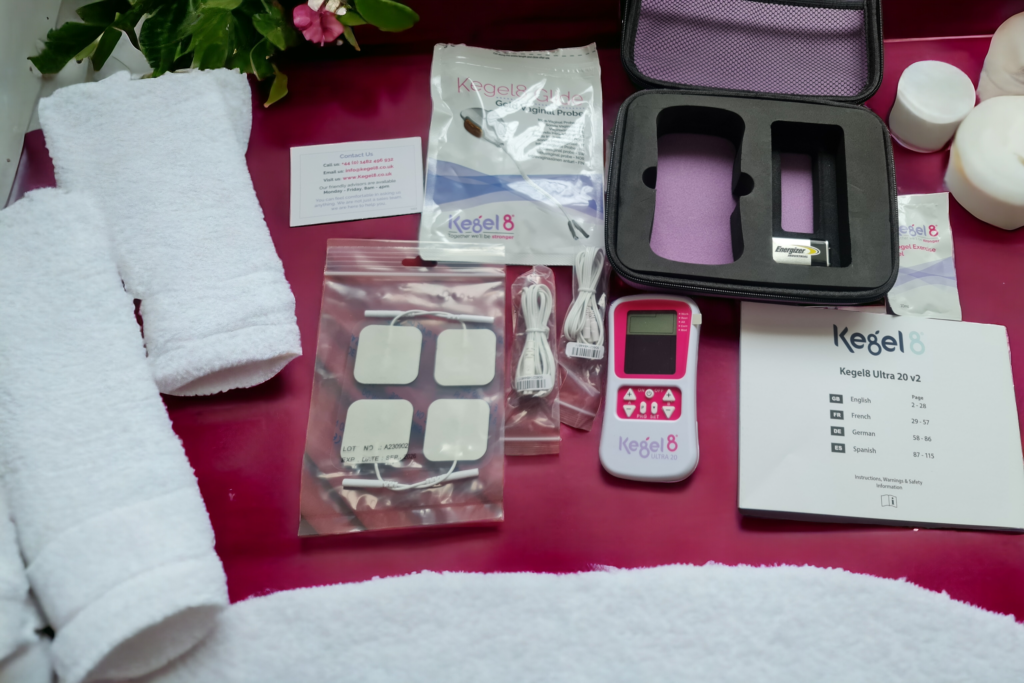
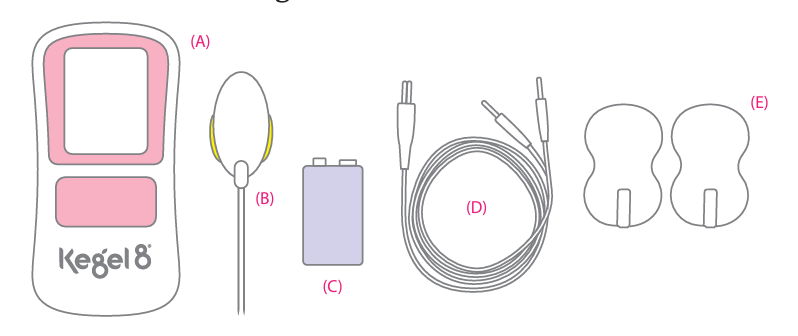
Your package should contain the following items:
1 x Kegel8® Ultra 20 device (A)
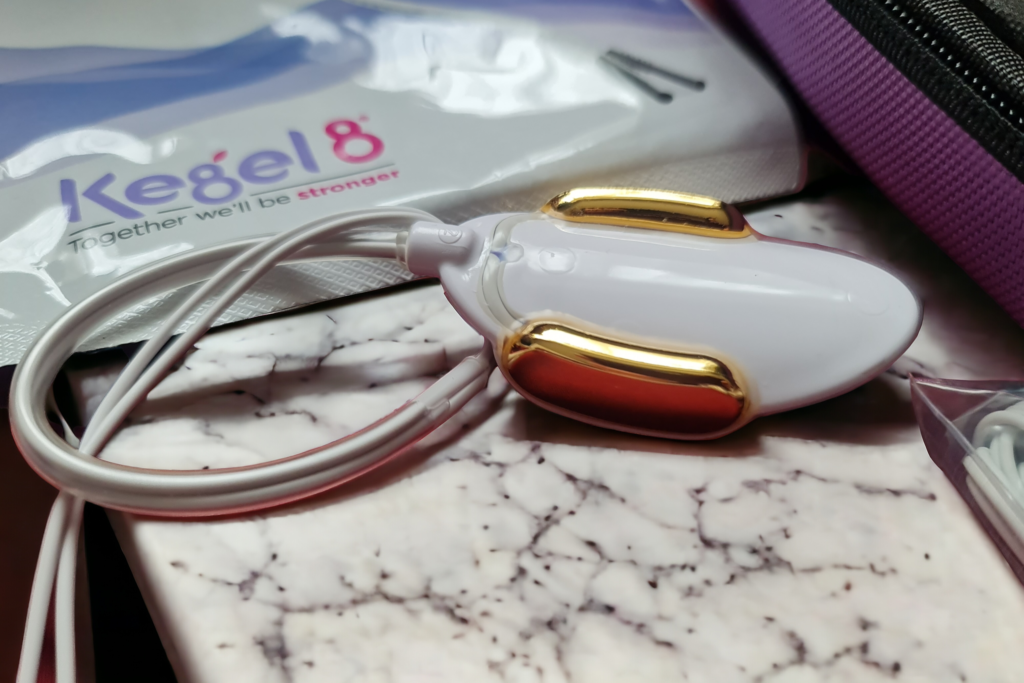
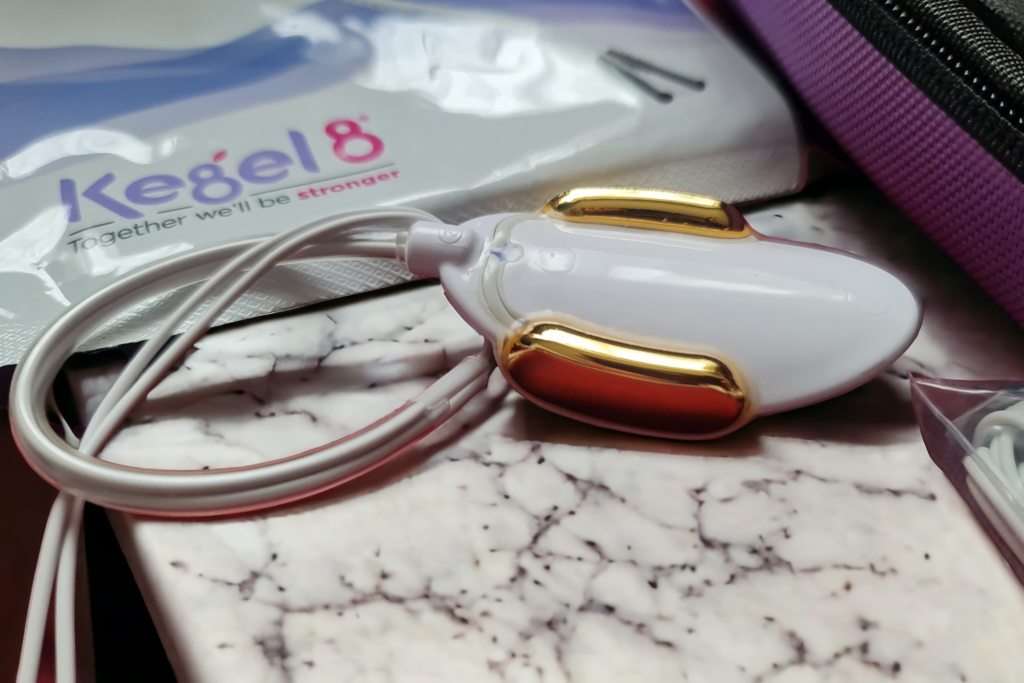
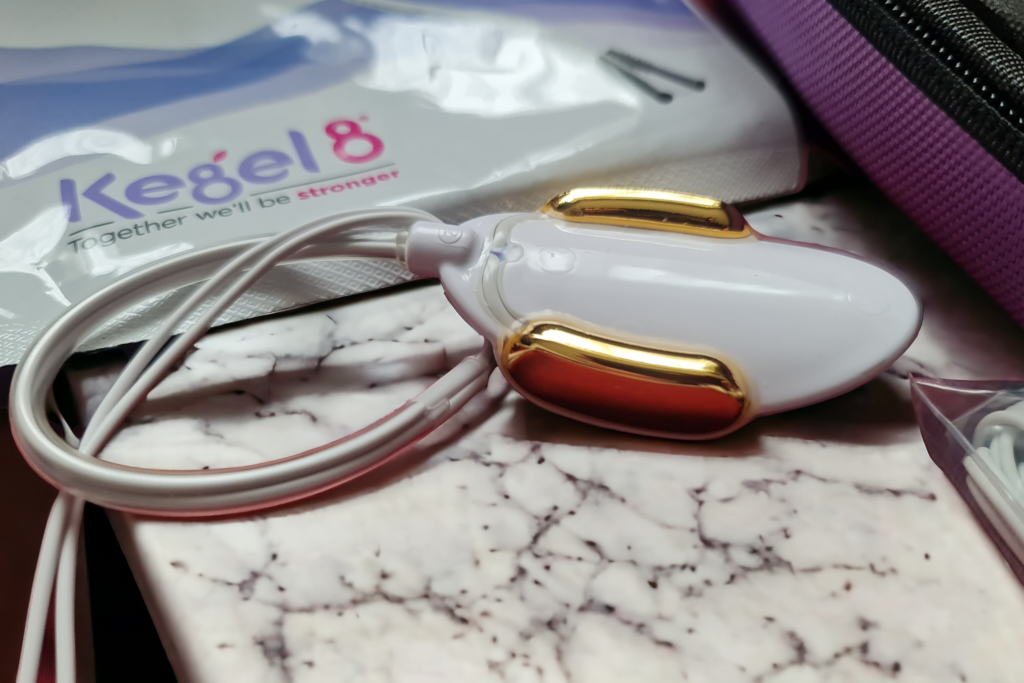
1 x Kegel8® Ultra 20 Probe (B)
1 x 9 Volt Battery (C)
2 x Kegel8® Ultra 20 Lead Wires (D)
4 x Kegel8® Ultra 20 Electrode Pads (E)
1 x Kegel8® Ultra 20 User Manual
Who can use the Kegel8® Ultra 20?
You can use the Kegel8® Ultra 20 if you have the following issues:
Stress urinary incontinence
Overactive bladder
Faecal incontinence
Pelvic and back pain
Natural ageing
Painful intercourse
Lack of sensation during sex
Who shouldn’t use the Kegel8® Ultra 20?
You should not use the Kegel8® Ultra 20 at home without the guidance of a medical professional if you fall under any of the below categories:
You are pregnant
If you are fitted with a demand-style cardiac pacemaker
If you have an undiagnosed pain condition
If you have an undiagnosed skin, vaginal, or rectal condition
If you have active pelvic cancer
If you don’t understand the user instructions – don’t worry, the manual is super easy to understand
If you are immersed in or near water
If you are connected to a high-frequency device
If you are operating a motor vehicle or potentially dangerous machinery
Let’s get started!
If you can use the Kegel8® Ultra 20 after checking off the above criteria, then let’s move on to the fun part – using the toner to get those pelvic floor muscles nice and tight!
Once you’ve read the manual fully, you’ve completed the initial set-up, i.e. inserted the battery and connected the probe/electrodes to the Kegel8® Ultra 20 Device (Insert the lead wire into Channel A at the top left of the device and connect your probe/electrodes to the lead wire connectors), turn on your Kegel8® Ultra 20 Device by pressing the on/off button once.
Consult your manual to learn how to set up your Kegel8® Ultra 20 for the first time. Make sure you clean your probe with warm water before and after use or spray with an antibacterial spray, then store your Kegel8® Ultra 20 in the carrying case you receive conveniently with the device. You should never share your probes or electrodes with anyone else – this device is just for you to use!
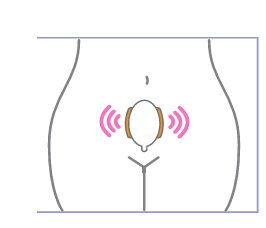
Insert your probe by applying a small amount of Kegel8® Conductivity Gel on the metal parts of the probe. Insert the probe into your vagina, with the metal sides facing “hip-to-hip”. Avoid placing it in too deep; you should be able to touch the base of the probe with your fingertip still, approximately one knuckles depth inside the entrance to the vagina.
If you’re using electrodes (I never used these personally), place them in the desired position and make sure they’re stuck on properly.
Selecting a programme
The tingling/knocking sensation means that the programme is starting to work. You should keep at this level for your sensation test (more on that below) and the first week of your routine before increasing the mA level by 1-2 mA’s every 1-2 weeks. Don’t set the mA level too high as this may cause the pelvic floor and surrounding muscles to overwork and create discomfort. You can pause a programme at any time by pressing the P button. When you’re ready to continue press the + button.
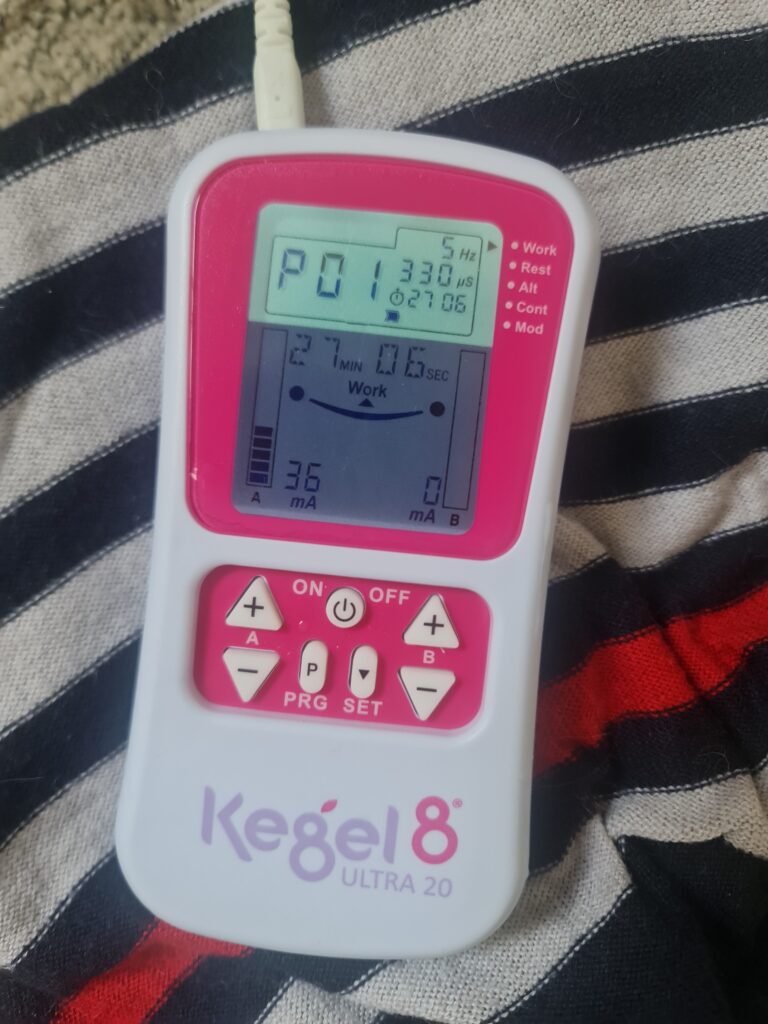
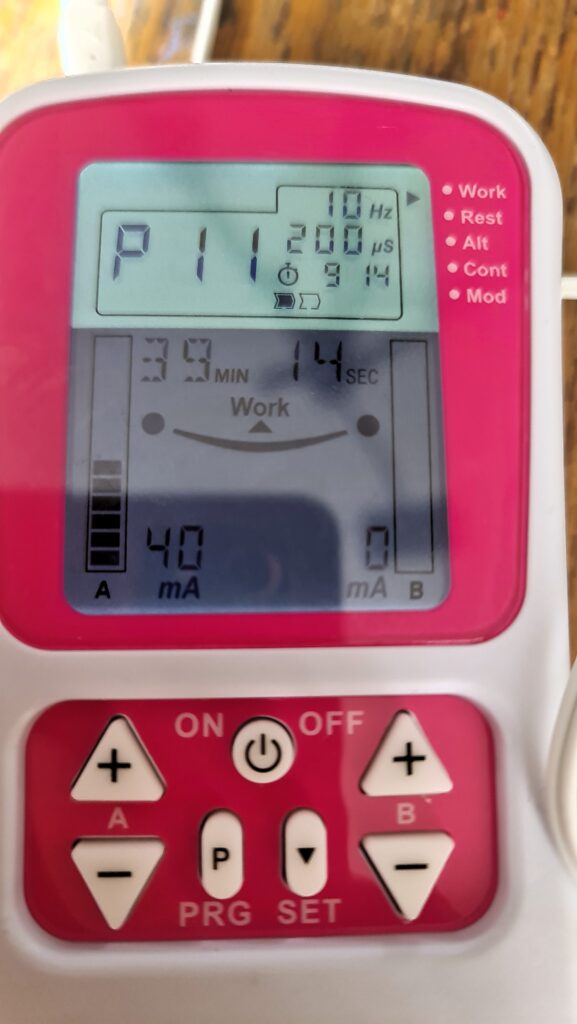
You can choose a programme by pressing the PRG button until the screen shows which programme you want to use. When you’ve selected the programme you want, press the A+ button to increase the intensity (displayed as mA, which means milliamps). If you feel the sensation is too strong, then you can decrease it by pressing the A- button. The amount of current you need to stimulate your pelvic floor muscles will vary. So, starting from 0 mAs, consider increasing the mA power to the level where you can feel the effects of the electrical pulse without any discomfort.
The aim is to gradually increase until you feel the muscles contract and relax with the electrical cycles, but it should never be painful. Some programmes have different phases, but you can play with the intensity level by using the + and – to increase and decrease the mAs back to a comfortable level.
What programmes should I start with?
With the Kegel8® Ultra 20, you get 20 pre-set programs and 3 customisable options. These programs are designed to target the various conditions above, which include urinary and bowel incontinence, light bladder weakness, overactive bladder, pelvic pain and, of course, postpartum recovery. We’ll go through what programmes you get and then what you should start with, depending on your situation. For this article, we will be focussing on postpartum recovery.
Functional Continence Training (with skin electrodes)
2
9
P14
PNC1
Postnatal / Post-Surgical Care 1
2
35
P15
PNC2
Postnatal / Post-Surgical Care 2
2
30
P16
BOW1
Bowel (Faecal) Incontinence 1
2
10
P17
BOW2
Bowel (Faecal) Incontinence 2
2
40
P18
PAIN
Chronic Pain Relief (with skin electrodes)
1 or 2
∞
P19
CIRC
Pelvic Floor Circulation
1 or 2
60
P20
RELX
Pelvic Floor Relaxation
2
20
List of 20 Pre-Set Programmes to use with the Kegel8® Ultra 20
What the different programmes mean
Looking at the table above, you can place the programmes into three distinct categories. These are:
Sensation tests
P01 and P02 are designed to test your sensation levels. If this is your first time, you should start with the P01 Sensation Test 1, to find out whether you can feel the current safely. If you can’t feel the current, use P01 at 50mA once a day for 4 weeks before you progress onto P02.
Muscle exercises
The following programmes are muscle exercises for strengthening your pelvic floor muscles:
P13 – Functional Continence Training (with skin electrodes)
P14 – Postnatal/Post-Surgical Care 1
P15 – Postnatal/Post-Surgical Care 2
P16 – Bowel (Faecal) Incontinence 1
P17 – Bowel (Faecal) Incontinence 2
Neuromodulation programmes
The following programmes are for calming overactive nerves, circulation, relaxation and pain relief:
P08 – Sensory Modulation (TENS)
P09 – Overactive Bladder Neuromodulation
P12 – Mixed Incontinence
P18 – Chronic Pain Relief (with skin electrodes)
P19 – Pelvic Floor Circulation
P20 – Pelvic Floor Relaxation
How to start the road to postpartum pelvic floor recovery
You’ll find in the guide there are lots of tailored condition guides by Amanda Savage, who is a specialist physiotherapist4, that address specific issues. These condition guides combine several pre-set Kegel8® Ultra 20 programmes. These are:
More Effective Pelvic Floor Exercises
Bladder Weakness & Stress Incontinence
Uncontrollable Gas/Wind & Bowel Control
Menopause, Perimenopause & Postmenopause
Pelvic Organ Prolapse
Pelvic Pain
Postpartum Recovery
Vaginal Looseness & Lack of Sensation
Rehabilitation After Gynaecological Surgery
In this section, we’ll go through the advised process for pelvic floor exercises postpartum to regain strength. I will coincide this section with my journey too, so we can see real-life action results and find out whether the Kegel8® Ultra 20 actually works (hint, it does!)
If you want more information on the other condition guides, please consult the manual.
Month 1 – The beginning of the postpartum pelvic floor journey – Testing the sensitivity
If you have given birth less than 12 weeks ago, you need to start with the physical pelvic exercises without using a STIM device first. If you have given birth more than 12 weeks ago, you are safe to continue.
Here’s a video on Instagram, introducing my journey and partnership with Kegel8®:
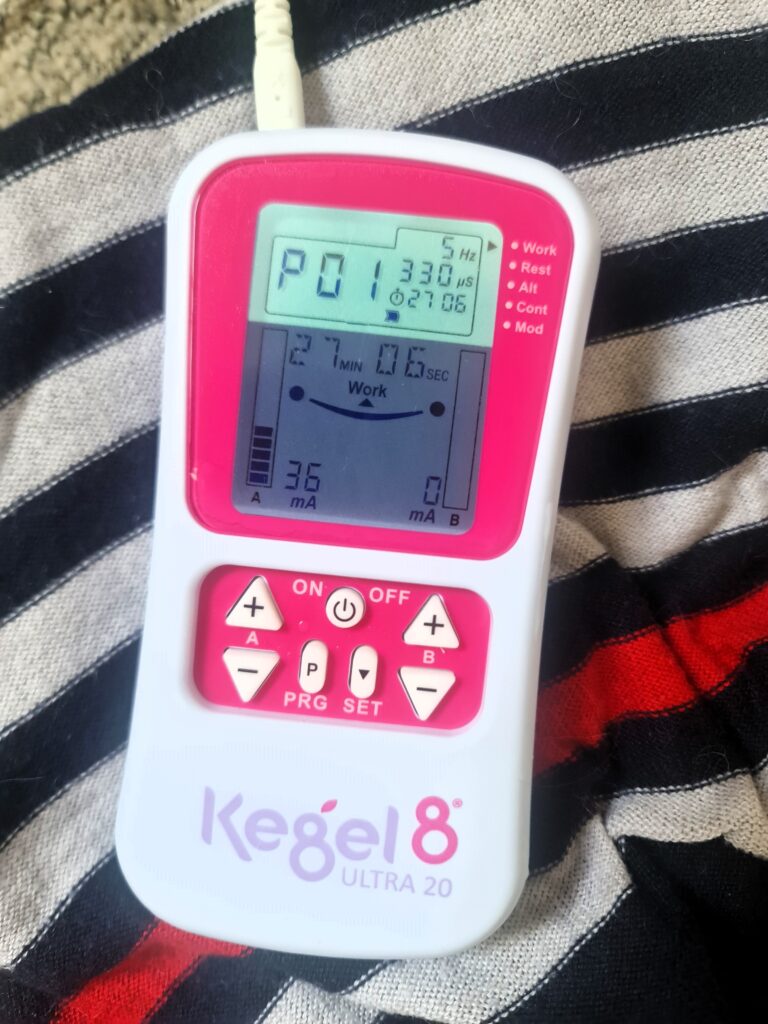
The programme guide suggests you start with P01 – Sensation Test 1 to test whether you can feel the current safely. So this is what I did.
Use the + button on the same side you are plugged into the machine to turn up the mA current. If you can feel a sensation, like a warm tickling, below 50mA then you can progress to the second sensation test P02.
If you can’t feel a tickling sensation below 50mA, it can be a sign of nerve damage or difficulty conducting messages. This is quite common after childbirth or surgery.
P01 can be your treatment programme to help you recover, at 50mA (or less), once a day for four weeks before progressing onto P02. If you can’t feel any sensation returning after one month, then you should consult a medical professional for advice.
I was impressed I could feel something at 30mA which meant I still had feeling down there, so I felt I could move nicely onto P02 – the second sensitivity test.
Progressing onto P02 – Second sensation test
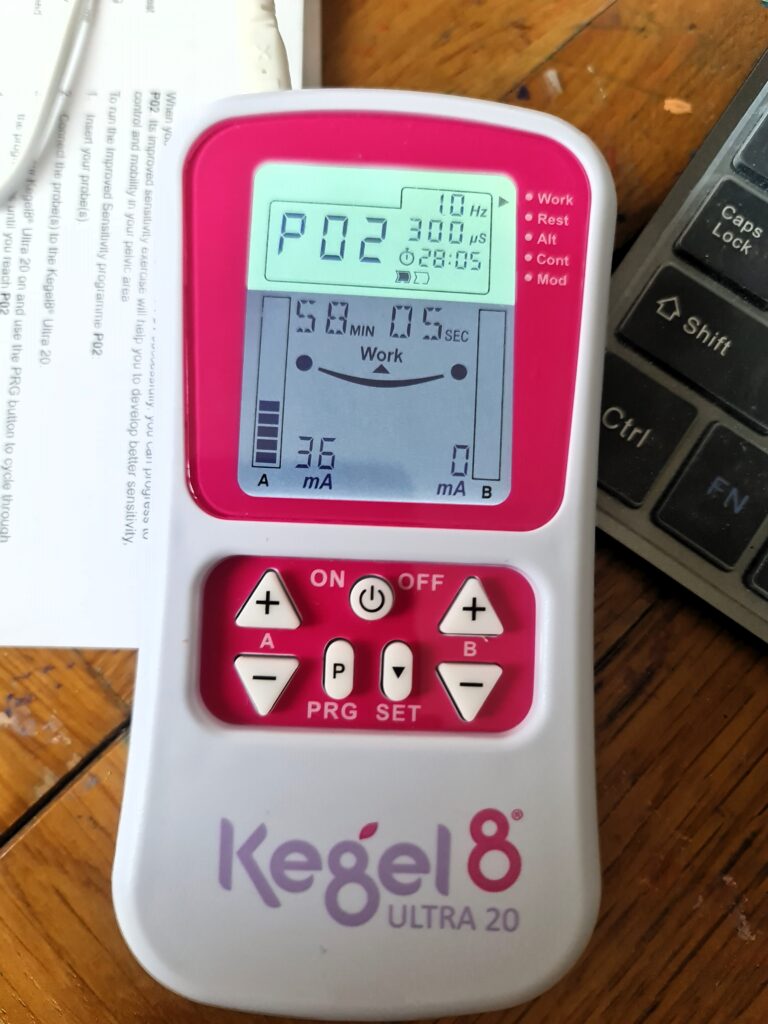
This second test introduces new frequencies and if you can feel a sensation from the internal probe below 50mA on P02, you can progress to one of the Kegel8 treatment programmes (P03-P20).
If you can’t feel a sensation below 50mA it can be a sign of nerve damage. Use P02 at 50mA once a day for a further four weeks. Again, if you do not feel any sensation returning, contact your doctor or physiotherapist for advice.
P02 was a full 60 minutes long, a length of time a mother of four doesn’t have the luxury of enjoying, so I decided to discreetly train my pelvic floor as I sat at my desk working and no one was none the wiser! I cranked it up to 36mA and thought that was a great place to start. I did this for a few days before I felt I could move forward with P14. It’s important to note that the higher the mA the stronger the current, but not necessarily a stronger pelvic floor. The effectiveness of the mA depends on how the muscles respond to the stimulation. Some muscles might contract more effectively with lower currents, while others might require higher currents. Quality and proper engagement of the muscles during the practice is what matters here.
Week 1 – “Find and Feel” your pelvic floor muscles with P14 – Postnatal / post-surgical care 1
Once you’ve taken the sensitivity tests, it’s time to move on to a 25-minute gentle exercise programme, which is designed for vulnerable mums after childbirth.
Phase 1 is a 20-minute continuous low-frequency current that improves the awareness of the muscle position, blood flow and nerve sensitivity. The point of this program is to relax as much as possible.
Phase 2 is 15 minutes and uses a higher frequency current to stimulate the fast and slow pelvic floor muscle fibres by contracting for 6 seconds and then relaxing for 18 seconds. This is because you need long rest phases when your muscles are learning to work again. Much like exercising your core after pregnancy.
It’s important to allow the sensations to come and go and for you to learn where your pelvic floor muscles are. Use this program on alternate days until you get used to the probe.
I cranked the mA up to 40mA and was happy I could complete the program quite easily at this stage.
Week 2 – Continue then take a rest – P14 – Postnatal / post-surgical care 1
If you were comfortable in Week 1, then use the Kegel8® Ultra 20 every day for six days, then take a rest day. If you’re feeling particularly uncomfortable or irritable internally then take an extra rest day, or do alternative days.
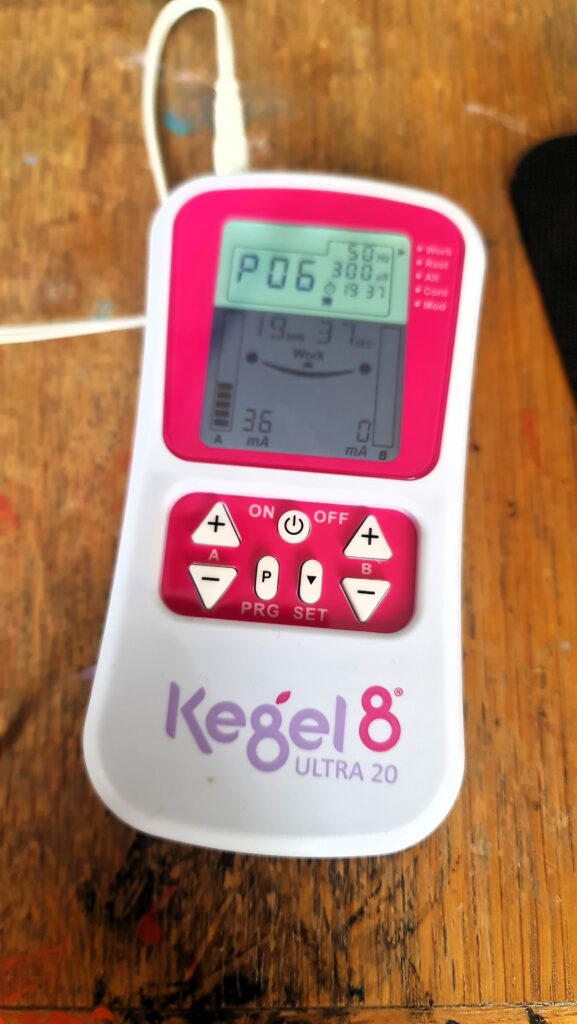
I have to say, I got bored with P14 as I was three years postpartum so I wasn’t ‘vulnerable’ down there. So I went off on a tangent at this point and started messing about with all the programs. I tried P11 – Gentle incontinence program and cranked it up to 40mA. Then I went for P06 – Increased sensitivity program. In this program I could really feel the muscles working on the sides of my walls, even at 36mA! I even took a work call while doing my exercise – that’s multitasking for you! I could feel the pressure towards the back passage too, so I felt I had worked them enough in this program.
It was actually during this month I realised I didn’t have stress incontinence, but urge incontinence. So I also hit P09 – Overactive Bladder Neuromodulation on 40mA because it’s only twenty minutes long. I actually found this easy.
P03 exercises your muscles for a longer 45 minutes, with a shorter recovery time between muscle contractions. Phase 1 has a low frequency at 15 minutes and then Phase 2 hits a higher frequency for 30 minutes. I found this a tad more challenging but still sailed through at around 36mA. I did this for a couple more days before the end of the month hit and my period was nigh.
End of month 1 update
Three days before my period and coming up towards the end of the month, I tried P09 – Overactive Bladder Neuromodulation and I couldn’t even get it to 30mA! I wondered whether everything down there was more sensitive just before your period. This is a very interesting point. I decided to consult ChatGPT which said:
“Yes, it’s actually quite common for women to experience increased pelvic floor sensitivity and even some changes in pelvic floor function during different phases of their menstrual cycle. In the days leading up to your period, hormonal fluctuations can make tissues more sensitive, and you may retain more fluid, which can affect how comfortable electrical stimulation feels. This could be why you’re having difficulty reaching the usual intensity on your device. It’s completely normal to need to adjust the intensity of your Kegel8® device throughout your cycle. Listen to your body, and only use a level of intensity that feels comfortable and effective for you.”
At the end of the month, I didn’t notice any physical improvements yet, but I fell in love with doing my pelvic floor exercises with the Kegel8®, especially I could feel the device working my pelvic floor muscles without me having to knowingly remember, thanks to my scatty brain! So, I’m sure whatever is happening down there is progression. And practice makes progression!
Month 2 – Weeks 1 – 4 – Do more of the same, but with longer muscle contractions now
In month 2, you now use P04 – Pelvic Floor Muscle Exercises 2 which features longer muscle contraction times (8 seconds) with a similar long rest time in each cycle. There are four phases to change between stimulation frequencies more often, which is often the case when working your body through fitness as well. You want to trick the muscles and make them work differently so they don’t get tired or bored. I totally understood why this was indeed the case for the pelvic floor muscles too – and I felt it as well!
In this phase, you also needed to get your brain involved in this process and ‘join in’ with some of the stimulation cycles. You can do this by trying to work your pelvic floor muscles in your mind, by drawing in and up when you feel the stimulation (as we showed above in the three-step process – remember hold in the wind, then hold in the pee, then go up 5 levels on the lift, and then back down again while breathing normally). Follow these movements when doing the pelvic floor muscles yourself. And, don’t worry if you can’t do all the seconds at this stage. We’re still new in the process and that’s absolutely fine. Just do what you can and let the machine do the rest.
I actually didn’t find this easy at all. I kept missing the mark and then moved up too quickly, or held my breath. I even kept holding my glutes or tummy. So it took me a while to isolate the muscles and follow the stimulation cycles. By the end of the program, I got it and when I got to the of the month, I had mastered the process and found I could hold all the way through. I was so tired by the end though. It felt like a proper workout!
Using the Kegel8® Biofeedback Pelvic Trainer to monitor results
I was also gifted the Kegel8® Biofeedback Pelvic Trainer which I used to monitor my results. You can use the Biofeedback to take the guesswork out of Kegels because you squeeze and it measures your results. At this stage, I used it to test how well I was doing on my daily practice with the Kegel8® Ultra 20 because I wasn’t strong enough to do the practice yet. You do this by using the test function, which squeezes and relaxes your pelvic floor repeatedly for 45 seconds. It then gives you a level score, so you can track your progress.
The Biofeedback practice phase tends to come in handy when your pelvic floor muscles are a bit stronger and you can do the squeezes yourself. I plan to use the practice phase of the Biofeedback once I’ve hit level 2 on the test phase.
Biofeedback Trainers and Muscle Stimulation Devices like the Kegel8® Ultra 20 can offer different approaches, as you can use the practice phase of the Biofeedback to practice your pelvic floor yourself as well. Here’s a comparison to help you understand their differences and how to incorporate them into your routine:
For very weak or fatigued muscles (Oxford Scale < 2)
Functionality
Provides visual or audio cues for muscle identification, practice, and motivation Use the trainer to identify your pelvic floor muscles in different positions
Uses electrical impulses to stimulate muscle contraction and brain-muscle coordination
Benefits
Helps identify pelvic floor muscles in different positions – Ensures correct practice of contraction and relaxation – Enhances endurance, coordination, and brain skills
Assists the brain in identifying pelvic floor muscles – Stimulates different muscle fibres – Allows for assisted and independent muscle contraction – Supports learning of muscle control during breathing or movement – Can calm bladder overactivity (neuromodulation)
Daily Use
Typically used for 10-15 minutes, once or twice a day, focusing on both quick and sustained contractions.
Recommended for 10-60 minutes daily, depending on the program and muscle condition
Frequency
Can be used daily or as needed to track progress and practice
Often used daily for initial strengthening and can be adjusted based on progress
Examples of Use
Daily tracking to improve muscle strength over 12 weeks – Real-time display of muscle strength during exercises – Real-time feedback allows you to monitor your progress and adjust exercises as needed.
20-60 minutes daily sessions – Programs for stress incontinence, overactive bladder, muscle endurance, and more
My end of month 2 update
I definitely felt a difference during this month. I used the Biofeedback trainer and I went from Level 0 to Level 1 – I was so pleased! I also found out at this point that the mA electrical pulses don’t really tell you how much you’re improving. It’s not about the strength of the mA, it’s more about how you feel down there. When you use the Biofeedback trainer’s test, you can see that you are improving and it really boosts your confidence. The test is about 45 seconds long and the program flexes and relaxes your muscles repeatedly and then it gives you a score at the end,
It’s the little things I’ve noticed now like I don’t leak when I hold my pee in, which has given me a huge confidence boost. This month, I decided to try the programs that alternate between increased sensitivity (P06) and urge incontinence settings (P12). I cranked it up to 40mA which was fine but I was worried I wasn’t feeling it as much. A part of me did wonder if I had created nerve damage from doing too much too soon. But I figured, it’s fine and I’ll just go for it.
Also, I’ve noticed when I have my period and I walk, my period cup stays in rather than slips out. My core feels stronger and I just feel better in myself. What a difference since last month. I’m so eager to keep going!
Month 3 – It’s all about developing more pelvic floor skills now
Weeks 1 – 4 – Use P10 – Stress incontinence 1
Now is the time to work yourself a little harder in phase 2, by joining in with the machine more and having shorter rests between contractions.
Phase 1: First, you enjoy 10 minutes of continuous low-frequency current to improve awareness of the muscle position, blood flow, and nerve sensitivity. You can relax in this phase.
Phase 2: Now comes the work! Do 30 minutes medium frequency current to stimulate the fast and slow pelvic floor muscle fibres, by contracting for 5 seconds and then relaxing for 5 seconds in cycles. Try to join in with some of these contractions, and aim to contract for the entire 5 seconds. Join in for 1 minute then let the machine do the work for 1 minute or count joining in for 6 cycles, then letting the machine do 6 cycles.
Use 6 days out of 7 (or alternate days if your internal tissues are sensitive).
Ongoing maintenance – P05 – Weekly maintenance
Once you’ve completed three months with the Kegel8® Ultra 20, you should see a vast improvement in your pelvic floor. At this stage, ask yourself:
How do you feel now compared to how you felt in Week 1?
Have some of the problems you suffered with gone?
Do you have any of the same concerns?
What’s still bothering you?
My end of month 3 update
For me, I have noticed a huge difference after month three. So here are my answers to the below questions:
I feel so much more confident now than I did in Week 1. My tummy feels flatter, my period is lighter, my cup stays in and I don’t leak
I can hold my bladder for quite a while now and I don’t have to worry about leaking – this was my biggest concern.
Absolutely hand on heart, no concerns right now.
My droopy stomach is still bothering me, but that’s for another article! For now, I know I’m improving, just like my whole body fitness is too – so onwards and upwards and no more giving up.
So, now we move to maintenance!
P05 – Pelvic Floor Muscle Exercises 3 is a maintenance program which contains a mix of frequencies to maintain fast and slow twitch muscle fibres. You can then use P20 – Pelvic Floor Relaxation for 20 minutes once a week to relax and refocus on sensations when you are feeling tense, stressed or disconnected. I have been doing this religiously for a while now and the biggest difference is how long I can tense the muscles now, which makes me feel like Hercules!
Follow the Let’s Get Started Guide for more details on the above Postpartum Recovery process or follow any one of the other guides related to your current condition, to exercise those pelvic floor muscles into fighting fit status! You can download the Let’s Get Started guide here –> Let’s Get Started User Guide
Discover pelvic health with Kegel8®’s free eBooks
Kegel8® has an exclusive eBook library of resources aimed at enhancing your understanding of pelvic floor health. These eBooks are meticulously crafted by Kegel8®’s team of experts to address a wide array of pelvic health conditions and topics.
Whether you’re seeking to strengthen your pelvic muscles or your partner is interested in improving bladder control and intimate wellness their range of eBooks provide valuable information, practical advice, and step-by-step guidance. These resources cover everything from basic pelvic floor exercises to more specialised advice on managing pelvic pain, prolapse, and sexual intimacy.
Available eBooks Include:
Leaks
Postnatal Care
Pelvic Pain
Sexual Intimacy
Prolapse
Men’s Pelvic Health
Each eBook is readily available for download, offering expert insights to help you improve your pelvic health. Click here* or on the banner below to visit their library.
As technology advances, what’s the future of pelvic floor rehabilitation?
As technology advances, pelvic floor rehabilitation is evolving. Amanda perceives certain future trends to include:
Devices that interact with a therapist so you get the best of both worlds: working at home while having someone able to review your results and coach you remotely.
Smaller devices, although this may be tougher for those suffering from eyesight issues.
Non-invasive methods to affect or measure the pelvic floor, like a magnetic chair, although it’s not very portable or affordable for home use.
Final words of encouragement from Amanda Savage
“Remember that YOU are amazing. Your body is hugely capable, adaptable and resilient. Your body wants to heal and restore itself – but it may need your help and encouragement. And it will need is your time and every tiny step will add up.
Rehabilitation results can feel slow… but progress will continue for YEARS ahead. These problems have arisen during the phase of life when you have the most demand on your time, your sleep, and your energy. And when you have the most extra load on your body. Believe it or not, a time will come when your children can get in the car independently and carry their own stuff. You will sleep through the night. And have a bit more time for your own needs.
Right now to do the best you can in your personal circumstances, seek professional help if you have an inkling that you don’t know what you are doing – or what you should be doing – or if DIY isn’t going to be enough. Make a promise to your future self that when you find your mothering load a little lighter your first re-focus won’t just be on your career or a new external project – you will make sure you come back to your body first to cross the t’s and dot the ‘is that might have to be a little skipped out at present.”
Final words from me
It has taken me almost three years to accept my body after four kids – and it is still a work in progress! I know how overwhelming the postpartum recovery journey can be. But, with the right tools and guidance, you can learn to love yourself again.
Thanks to the Kegel8® Ultra 20, I feel stronger, fitter and more confident. I know longer wear baggy clothes or black leggings because I’m afraid to pee on the street. It’s a long game, but the rewards are so totally worth it!
Stay committed to your pelvic floor exercises like you do with regular fitness and listen to your body. When you are ready to move to the next step why not try my postpartum core exercises and share your recovery journey with me over at @motherhooddiaries.
Can I use the Kegel8® Biofeedback Trainer and Kegel8® Ultra 20 during my period?
Amanda advises you can use the Kegel8® Biofeedback Trainer and Kegel8® Ultra 20 during your period, though it can be a bit messy, so most women choose to take a break. Remember that hormone changes can make your pelvic floor less responsive just before your period, so don’t be disheartened if your performance varies throughout the month.
Pelvic floor issues and recovery
I have a tight pelvic floor after birth. What does this mean?
“A shortened or tight muscle may be just as incapable as exerting force as a long or loose muscle. Being tight does not mean your pelvic floor is strong. Neither tight nor loose are healthy or desirable.”
How long does it take for your pelvic floor to recover after childbirth? How long does it take for your pelvic floor to heal after birth? How long to regain pelvic floor after birth?
“It’s important to exercise your pelvic floor postpartum. Pelvic floor recovery time takes up to 6 months. The change in the area of the levator hiatus with Valsalva reflects the stiffness of the pelvic floor; that is, its ability to withstand the increased abdominal pressure accompanying pelvic loading.”
What happens to your pelvic floor after birth? Does our pelvis get bigger after giving birth?
“After giving birth, it might look wider than it did before and could feel looser, softer and more open. It might also look and feel bruised or swollen. But all of this should settle in a few days. You may also find that your vagina feels drier, especially if you are breastfeeding.”
I am experiencing pelvic pain after birth. What do I do? How do I know if I have postpartum pelvic pain syndrome? Does pelvic floor pain go away after birth?
“A trained pelvic floor physical therapist can help you teach your muscles how to function optimally again. In particular, Kegels are helpful for muscle strengthening and endurance. They’re especially important for women with urinary or anal incontinence and pelvic floor weakness.”
“To strengthen your pelvic floor muscles, sit comfortably and squeeze the muscles 10 to 15 times. Do not hold your breath or tighten your stomach, bottom or thigh muscles at the same time. When you get used to doing pelvic floor exercises, you can try holding each squeeze for a few seconds.”
I have no pelvic floor muscles after birth. What can I do?
Follow the tips above and consult your doctor about a plan to start retraining them again. Slow and steady wins the race!
What is pelvic floor therapy after birth?
“Pelvic floor therapy is a type of physical therapy that helps with problems involving the group of muscles that – along with surrounding ligaments and tissues – hold your pelvic organs in place. The pelvic organs include the bladder, urethra, intestines, rectum, uterus, cervix, and vagina.”
“Urinate in a warm shower. Run water in the background. Place your hand in cold water as you empty your bladder. Your pelvic floor muscles are important for healthy bladder function.”
How long does it take for your belly to go back to its normal size after giving birth? Do women get their bodies back after pregnancy?
“It takes six to eight weeks for your uterus to return to its normal size, but for some mums, it may take much longer for their post-pregnancy belly to return to ‘normal.’ For other new mums, they may find that their bellies take on a permanently different new appearance.”
“Birth and parenthood are likely to change the kind of sex you have and how often you have it. For women, interest in sex can return 1-3 months after having a baby, but it’s normal for it to take longer. Unless your doctor has advised otherwise, you can have sex again when you feel ready.”
Did anyone else get diastasis recti after laparotomy abdominal surgery?
You can find an answer to this question here: Quora
Do you have any home remedies for pelvic floor dysfunction?
“Self-care. To reduce strain on your pelvic floor muscles, avoid pushing or straining when using the bathroom. Relaxation techniques such as yoga and stretching can also help to relax your pelvic floor muscles. Taking warm baths is another useful technique.”
My pelvic floor muscle is always tight it is as if I am always trying to hold myself from going to the bathroom even when I am not going.How can one strengthen a weak or damaged pelvic floor muscle without physical therapy?
Are there any effective home exercises for this?
How can pelvic floor physiotherapy benefit women’s health and what are some effective exercises to strengthen the pelvic floor muscles?
How long does it take for pelvic floor muscle exercises to make you feel better or notice any change in pain levels?
Is holding my pelvic floor muscle for 2-3 minutes while taking deep breaths a good or bad exercise to strengthen it?
How can you tell if you have weak pelvic muscles and what are some ways to strengthen them?
What are some recommended exercises for women with incontinence?
What are some ways to strengthen the pelvic muscles after giving birth?
Do Kegel exercises work?
Can you get too good at it that it becomes painful for your partner?
What are the best exercises and lifestyle choices to support strong pelvic floor muscles?
What exercises can help improve pelvic floor strength and function while running?
For all these questions, the following advice applies:
“To strengthen your pelvic floor muscles, sit comfortably and squeeze the muscles 10 to 15 times. Do not hold your breath or tighten your stomach, bottom or thigh muscles at the same time. When you get used to doing pelvic floor exercises, you can try holding each squeeze for a few seconds.”
Amanda Savage is a member of the Professional Network of Pelvic Obstetric & Gynaecological Physiotherapy and a graduate of the University of Cambridge. ↩︎
*Links marked with a ‘*’ are affiliate links, which means, as an Amazon Associate I may earn a small commission at no extra cost to you for qualifying purchases.
*Sponsored by Kegel8®, but all thoughts and opinions are my own
Newborn baby bathing products: a step-by-step guide
Your beautiful little one has arrived into this world and now you’re faced with the overwhelming task of bathing them. But how do you start? Where do you bath them? Which newborn baby bathing products do you use? And should you bath them every day?
Bath time for babies is more than just cleaning; it’s a special moment to connect with your little one. It can even help your baby’s brain grow and make bedtime smoother, as long as you’ve got the right approach.
This comprehensive guide is designed to walk you through the process of bathing your baby, from preparation to the actual bath and beyond, so you can make sure your little one is comfortable, clean, and ready for a good night’s sleep. We’ll cover everything you need to know about setting up for bath time, the best practices while bathing your baby, and tips on helping them settle down afterwards for a restful sleep. Here’s what we’ll cover:
Choosing the Right Time and Place: Learn the best settings and times to make bath time relaxing for both of you.
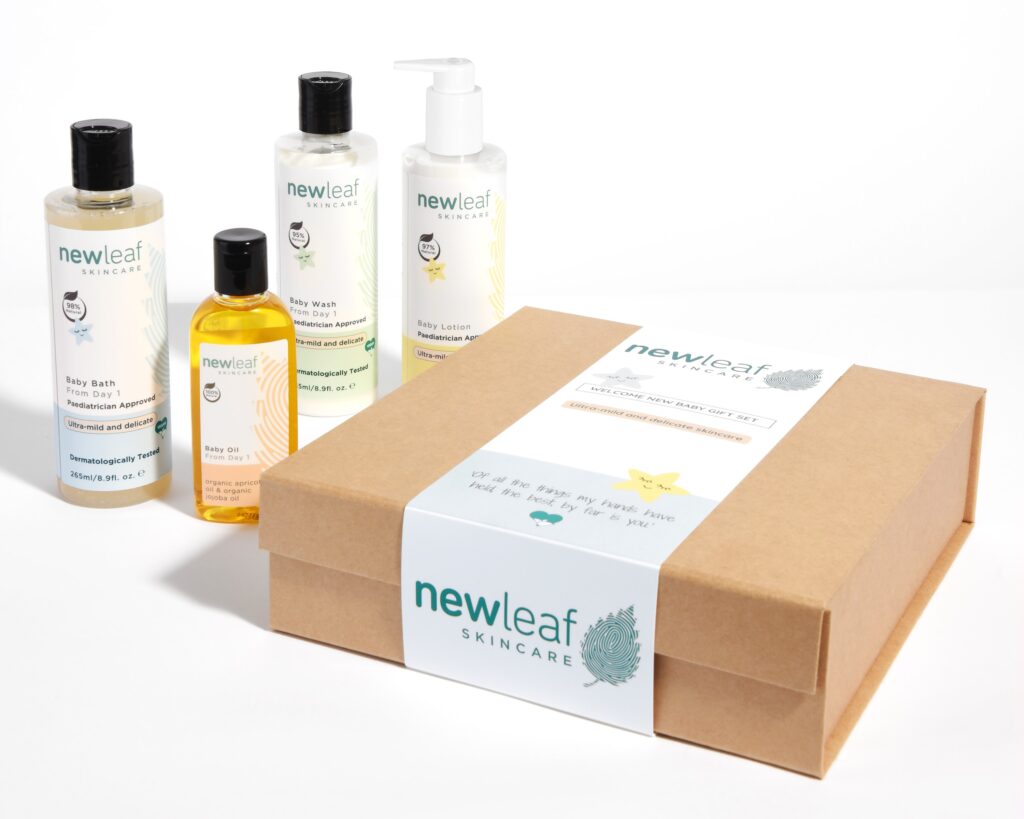
Essential Bathing Products: Discover why the New Leaf Essential Baby Gift Set approved by paediatricians and made with over 95% natural ingredients, is perfect for your baby’s delicate skin.
Gentle Washing Techniques: Find tips on how to gently cleanse your baby, to ensure their comfort and safety.
The Importance of Moisturising: How New Leaf’s Baby Lotion and Baby Oil can protect and nurture your baby’s skin, keeping it soft and hydrated.
Creating a Soothing Environment: We offer suggestions for a warm and calm bath time that will help your baby feel secure and loved.
After Bath Care: We’ll finish up with some advice on wrapping up bath time with soothing massages and a peaceful bedtime routine.
What newborn baby bathing products do I need for a newborn?
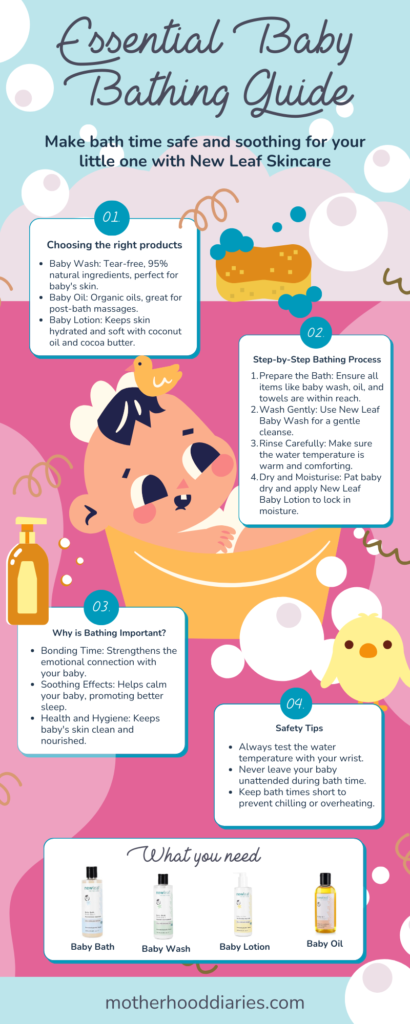
For a newborn, you’ll want to gather a few essential bath products designed specifically for their delicate skin. These should include:
Baby wash or Baby bath
Look for a gentle, tear-free baby wash or baby bath like New Leaf’s Baby Wash or Baby Bath.that’s free from harsh chemicals and fragrances. It should be mild enough for daily use, even on newborn skin.
Baby shampoo
If your baby has hair, a mild, tear-free baby shampoo can help. Like the wash, it should be gentle and free from any irritants.
Soft washcloths
Soft, gentle washcloths are better for your newborn’s skin than sponges, which can be too abrasive.
Baby bathtub or support
A specially designed baby bathtub or support pad can help keep your newborn safe and comfortable during bath time.
Hooded baby towels
Soft, absorbent, and with a hood to keep your baby’s head warm, these towels are perfect for wrapping up your baby after their bath.
Baby Lotion, Oil or Moisturiser
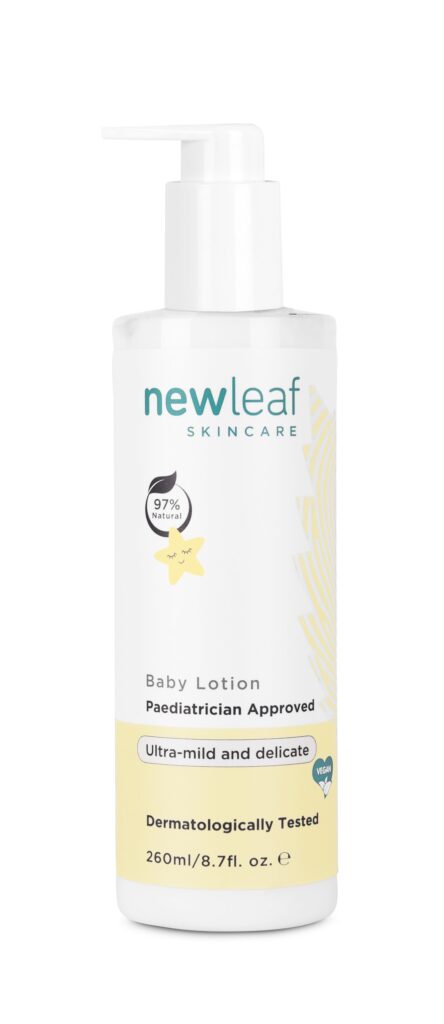
After bathing, a gentle baby moisturiser can help keep your newborn’s skin soft and prevent dryness. Look for products specifically formulated for babies, free from dyes, perfumes, and parabens. New Leaf offers two exceptional products for this purpose: the Baby Oil and the Baby Lotion. The Baby Lotion, enriched with coconut oil and cocoa butter, provides deep moisturisation while ensuring the skin’s natural barrier is protected.
For a more intensive care option, the Baby Oil, crafted with organic oils from day one, is perfect for nurturing and soothing baby’s skin, making it an ideal choice for baby massage or for treating dry spots. Both products are formulated without harmful additives, ensuring your baby’s skin receives the gentlest care.
Bath thermometer
To ensure the water is at a safe temperature for your newborn, consider using a bath thermometer. The ideal water temperature is around 37°C (98.6°F). If you haven’t got a bath thermometer, then the best place to check the temperature is on the wrist or elbow. These areas are more sensitive to temperature changes than your hands and can give you a better sense of whether the water will be comfortable for your baby.
When choosing bath products for your newborn, prioritise items that are designed to be gentle and safe for their sensitive skin. Products like those found in the New Leaf Baby Gift Set are formulated with organic and natural ingredients, making them an excellent choice for newborns.
Newborn baby bath products to avoid
Avoid using regular soaps, bubble baths, or any products not formulated for babies, as these can be too harsh and strip the natural oils from your newborn’s skin. The New Leaf Essential Baby Gift Set, for example, includes baby bath products for newborns, so they are gentle enough while still keeping your baby clean and comfortable.
Why is bathing important for babies?
Bathing your baby isn’t just about keeping them clean; it’s a key part of their care that does so much more. It’s also a chance to bond with your little one, which is so important for their emotional growth. Plus, bath time is great for their brain development, thanks to all the new sensations they experience with water and the way you engage with them during bath playtime.
When it comes to taking care of your newborn, picking the right baby bath time products is a big deal. Babies have super sensitive skin that can easily react to harsh chemicals found in some products. That’s why we recommend going for organic options like the ones in the New Leaf essential Baby Gift Set. These products in the newborn baby bath set are made with gentle, natural ingredients that are safe for your baby’s skin, reducing the chance of any irritation or allergies.
It is generally advised that you allow your newborn’s skin to only come into contact with water for the first few weeks before you introduce external products, but New Leaf’s bath products for babies are suitable from birth.
For the first six weeks, particularly for dry areas, midwives recommend using oil. This is where New Leaf’s 100% natural Baby Oil comes into play, blending organic apricot and jojoba oils. Ideal for post-bath moisture retention or baby massages, it’s also a favourite among mothers for reducing stretch marks post-pregnancy. After three months, you can switch to the Baby Lotion, which features coconut oil, cocoa butter, and glycerine for deep hydration, safeguarding the skin’s delicate barrier and leaving it smooth and nurtured.
Should I bathe my newborn everyday?
You don’t have to bath your newborn every day, as they don’t get very dirty. In fact frequent bathing can actually dry out their delicate skin. But it is important to keep their face, neck, hands, and nappy area clean between baths, which can be done with a sponge bath or wipes. As your baby grows and becomes more active, then you can bath them more frequently. Always use gentle, baby-specific products that are kind to their sensitive skin, like those found in the New Leaf Essential Baby Gift Set.
What are the best baby bath products for bathing a newborn?
Choosing the right bathing products for babies is key to keeping their delicate skin protected and healthy. Look for gentle, hypoallergenic, and fragrance-free products designed specifically for babies. The New Leaf Essential Baby Gift Set offers organic options that are safe for your baby’s sensitive skin. This set includes the Baby Oil, Baby Lotion, Baby Wash, and Baby Bath, all formulated without harsh chemicals, so your baby can have a safe and soothing bath time.
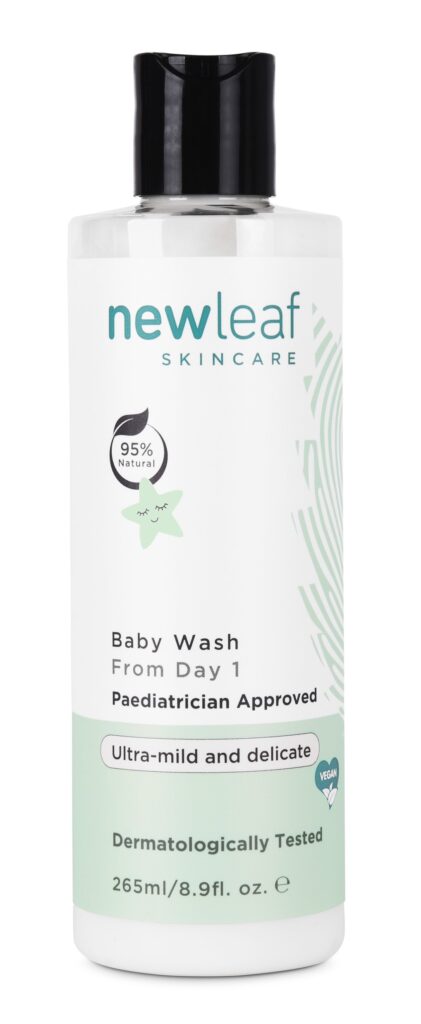
The New Leaf Baby Wash is ideal for newborns’ delicate skin and hair. Crafted with shea butter and camellia seed oil, it locks in moisture and protects against dry skin conditions, ensuring your baby’s skin and hair are cleansed gently. This 95% natural formula is paediatrician approved and dermatologically tested, making it safe for use from the very first bath. Suitable for newborns 3kg and up, it’s a one-stop solution for hair, head, and body, offering peace of mind with each use.
Remember, the best bath products for baby are those that clean effectively while being gentle on your baby’s skin, to avoid any unnecessary irritation or dryness. The New Leaf Baby Bath is fragrance free with emollient-rich oat extract, while shea butter softens and moisturises.
Where do you bathe a newborn?
You can bathe your newborn in several safe and comfortable places, depending on what works best for you and your baby. A small baby bathtub (we used this one*) is a popular choice because it’s designed to support a newborn’s head and body. You can place the baby bathtub on a flat, stable surface like the counter, the floor, or even inside your own bathtub to make it easier to manage water and supplies.
You may prefer using a sink, especially in the early weeks. Just make sure the sink is clean and use a sink liner* or a soft towel at the bottom for extra comfort and to prevent slipping.
Wherever you choose to bathe your newborn, it’s advisable to keep everything you need within arm’s reach, and make sure the room is warm. Also, never leave your baby unattended, not even for a second. Comfort, safety, and being prepared are key to a safe and successful newborn bath time.
Preparing for newborn bath time
Before you start bathtime, set up your environment first, which should be a soothing and secure environment that promotes bonding and maximises baby’s comfort and safety. So, let’s explore how you can set the scene for a perfect bath time experience and what newborn bath time essentials you’ll need.
Set the scene
Start by creating a calming atmosphere for a stress-free bath time. Here are some tips on how to make bath time a serene experience:
Use dimmed lights or candles out of reach
Soft lighting helps soothe your baby, making the bath time experience more relaxing. Bright lights can be overstimulating for your little one’s sensitive eyes, so using dimmed lights or placing candles safely out of reach can create a soothing environment that mimics the warmth and comfort of the womb.
Put on light classical music or sleep meditation music in the background
The gentle flow of classical music or the soothing tones of sleep meditation music can have a calming effect on both you and your baby. Music stimulates babies’ brain development, soothes their emotions, and can make bath time feel like a peaceful retreat from the day’s excitement. It’s a simple way to enhance the sensory experience of bath time, making it more enjoyable for everyone involved.
Choose a time when the baby is awake and happy
Timing is everything. A well-rested baby who is alert and in a good mood is more likely to enjoy the bath. So, observing your baby’s daily patterns will help you choose a time when they are most receptive to new experiences.
Try not to bathe your baby straight after feeding or when they’re hungry/tired
Bathing your baby immediately after a meal can cause discomfort or fussiness due to their full stomach. Similarly, a hungry or overly tired baby may not enjoy bath time and become more difficult to soothe, as mentioned above. Wait for a while after feeding and make sure your baby isn’t hungry or too tired before you start the bathtime process.
Keep the room temperature nice and warm
Babies lose heat more quickly than adults, and a chilly room can make bath time an unwelcome shock. Keeping the room warm ensures your baby remains comfortable and prevents the cold air from causing distress. And a warm room will make the transition from bath to towel more gentle for your baby’s delicate body.
An ideal room temperature for bathing a baby should be around 75°F (24°C) to help create a cosy environment and minimise the risk of your baby feeling chilled.
Have all your bath essentials for baby within distance
Having everything you need within arm’s reach is crucial for a smooth and safe baby bath time. This includes New Leaf’s Baby Oil, Baby Lotion, Baby Wash, and Baby Bath. Additionally, prepare soft washcloths, a clean towel, a fresh nappy, and any other bathing accessories you might need. We’ll go through each of these in more detail in a moment but organising these items beforehand ensures you can always keep one hand on your baby at all times.
Please remember to keep all skincare products out of reach of infants at all times.
A soft towel or cushion to protect your knees
Your comfort is just as important as your baby’s. Using a soft towel or cushion to kneel on can reduce strain on your knees and back, making bath time more enjoyable for you as well. When you’re comfortable, you’re more likely to be patient, which in turn helps your baby stay relaxed.
Bathing your newborn step-by-step
Now for the actual bath experience!
For the initial months, your baby’s bath should be a gentle affair. Here’s what you’ll need:
A bowl of warm water maintained at a cosy temperature close to the baby’s body temperature, around 37°C (98.6°F).
Soft cotton towels for drying your baby after the bath.
Cotton wool balls for cleaning delicate areas gently.
A fresh nappy and a set of clean clothes.
A nappy bag for conveniently disposing of used cotton wool.
Topping and tailing is a great way to introduce bathing
If the idea of a full bath seems daunting initially, consider topping and tailing — a simpler method focusing on cleaning the baby’s face, neck, and nappy area. This method allows you to gradually get accustomed to handling your baby during bath time. The steps include:
Holding your baby on your knee or laying them on a changing mat.
Removing clothes, leaving the vest and nappy, and wrapping your baby in a towel.
Using damp cotton wool to clean the baby’s eyes, ears, face, and neck gently.
Changing the nappy and cleaning the baby’s bottom with fresh cotton wool and warm water.
When you’re ready to transition to the baby bath
Bathing your baby need not be a daily routine, but it’s such a great way to bond with your baby. Here’s how to bathe a newborn baby:
Make sure the bath water is warm, using your wrist or elbow to test the temperature.
Begin by cleaning your baby’s face, as done in topping and tailing.
Carefully wash your baby’s hair with plain water, supporting their head and neck.
Gently lower your baby into the bath, using one hand to support their head and shoulders.
With the other hand, gently splash water over your baby’s body, avoiding any direct pouring of water on the face.
When you’re finished, carefully lift your baby out of the bath, and pat them dry, focusing on getting the folds of the skin dry to prevent irritation.
When you’re ready, you can start to introduce bathing products to the bath routine
Bath time dos and don’ts
Do: Use just plain water for the baby’s skin in the initial weeks until your baby’s skin gets used to its environment.
Don’t: Leave your baby unattended during bath time.
Tip: If your baby isn’t enjoying bath time, try joining them in the bath to make them feel more secure.
Enhance bathtime fun with music and eventually bath toys
Enhancing bathtime with music and, as your baby grows, introducing bath toys, can turn a routine activity into a great learning and bonding experience. Soft music and singing to your baby can not only soothe them, but support emotional connection and language skills. As they get older, introducing toys designed to boost hand-eye coordination and visual tracking, such as floating toys or those in high-contrast colors like black, white, and red, adds fun and encourages developmental milestones. Light-up toys offer visual stimulation, making bath time both entertaining and educational.
Beyond bathtimes – what to do after the bath
What happens after bathtime isn’t just about getting dry; it’s a whole new chapter of care for your baby. In this part, we’ll share tips on feeding, burping, and how to make baby massage a soothing ritual. Plus, we’ll talk about the importance of regular nappy changes and setting up a cosy bedtime routine.
Creating a soothing bedtime routine
Creating a soothing bedtime routine is all about consistency and calmness. Start with a quiet activity, like reading a gentle story or playing soft music, to signal that it’s time to wind down. Make sure the sleeping environment is comfortable, with dim lights and a cosy temperature. Incorporating a predictable sequence of steps, such as a bath followed by massage and then feeding, helps your baby understand that sleep time is near. The key is regularity; doing the same activities in the same order every night can significantly improve your baby’s sleep patterns. Here are some things you can include in your routine before bedtime.
Grooming time
Grooming your baby after bath time is crucial for comfort and safety. It’s essential to take care of their nails to prevent them from scratching themselves accidentally, which means using special baby nail scissors or a fine emery board designed for their delicate nails. Make sure you’re working in a well-lit area and hold your baby’s hand gently but firmly. You may find it easier to cut their nails when they are asleep.
The benefits of baby massage
Baby massage is a soothing practice that has several benefits, including promoting relaxation, aiding digestion, enhancing parent-baby bonding, improving sleep patterns, and stimulating neurological development. It’s also known for its role in strengthening the immune system, reducing crying, and easing muscle tension.
Starting around one month old, gently massage your baby with safe oils like New Leaf Baby Oil. Here’s a simple guide:
Choose a quiet, warm room and a comfortable surface.
Warm a small amount of baby oil in your hands.
Begin with gentle strokes on your baby’s feet, moving upwards towards the legs, tummy, chest, arms, and back.
Use soft, circular motions and avoid any sensitive areas.
Maintain eye contact and softly talk or sing to your baby, enhancing the bonding experience.
This calming routine can aid in your baby’s sensory development and sleep quality.
Nappy changing essentials
Regular nappy changes are essential to keep your baby’s skin healthy and prevent irritation and nappy rash. Using gentle wipes or water during changes helps clean the skin softly without causing dryness or discomfort. Setting up an organised changing station ensures everything you need—like nappies, wipes, and rash cream—is within reach. Creating a comfortable and well-equipped changing area can make nappy changes a smoother part of your daily bathtime routine.
Establish a feeding and burping routine
Establishing a feeding and burping routine after bathtime can help soothe and prepare your baby for a good night’s sleep. Create a comfortable space for feeding, by utilising supportive pillows and/or nursing chairs, so there’s no rush for you and baby. For burping, gently patting or rubbing your baby’s back in an upright position can help release trapped air and ease any discomfort. If you’re breastfeeding, you can find some great tips on how to do this here.
Final thoughts
As we conclude our guide on newborn care during bathtimes, it’s evident that the steps from bathing to establishing a soothing bedtime routine are crucial for your baby’s health and wellbeing. The New Leaf Essential Baby Gift Set offers a foundation of gentle and organic care for your baby, ensuring comfort and protection from the beginning.
It’s so important to embrace these nurturing moments with your baby, as they are fleeting. When you’re ready to get started, participate in our competition below for a chance to win the New Leaf Essential Baby Gift Set and arm yourself with the tools you need for a fantastic bathtime experience with your baby!
Baby bath essentials – Printable checklist
If you’re looking for more, I have a baby bath essentials list, which you can use when you’re preparing for bathtimes for your baby. You can either pin this baby bath supplies checklist or print it out and stick it on your bathroom wall.
FAQ
Choosing baby bath products
Can I use regular soap or body wash on my newborn or do I need to use specific baby products?
What products should a parent be using to bathe their newborn?
Which are the best products for babies? What products do newborn babies need?
Should I use soap or body wash for my 3-month-old baby?
Is it necessary to use baby products on babies or can we use regular body wash?
How do I choose baby wash for babies?
Which is the best baby lotion and baby soap for newborns?
What are some alternative bath care products for babies instead of Johnson & Johnson?
Are there any natural ways to bathe a baby without using chemical-filled shampoo and soaps?
What should I avoid in bath products for a baby?
What are the best types of baby shampoo and body wash for a newborn’s sensitive skin?
When choosing bath products for your newborn, it’s crucial to select items specifically formulated for their delicate skin. Regular soaps and body washes designed for adults may contain harsh chemicals and fragrances that could irritate a baby’s sensitive skin. Instead, opt for gentle, hypoallergenic baby bath care products free from harmful substances.
For newborns, consider using products that are mild and have been dermatologically tested for baby skin. Products like the New Leaf Baby Gift Set offer a range of organic skincare items, including baby wash, lotion, and oil, ensuring your baby’s skin is nurtured from day one without the risk of irritation.
When selecting a baby wash or shampoo, look for ones that are free from parabens, sulfates, and phthalates, and prioritise those with natural ingredients. The best bath products for babies are those that clean gently without stripping the skin of its natural oils. For babies over three months, you can start introducing products like a gentle shampoo if your baby has more hair, but always ensure they are suitable for sensitive skin.
For parents seeking alternatives to mainstream brands like Johnson & Johnson, organic and natural product lines, such as those offered by New Leaf, provide excellent options that focus on using ingredients that are safe and beneficial for baby’s skin. Many parents are turning towards natural ways to bathe their babies, using products with organic ingredients that offer a gentle cleanse without the use of harsh chemicals.
It’s advisable to avoid bath products that contain strong fragrances, dyes, and potential allergens. Instead, look for products with soothing ingredients like aloe vera, chamomile, and oatmeal, which are known for their gentle properties on sensitive skin.
In summary, choosing the right baby bath products involves looking for gentle, safe, and hypoallergenic options that cater to the unique needs of a newborn’s skin. Brands like New Leaf offer a range of products designed with these criteria in mind, providing parents with safe and nurturing choices for their baby’s bath time.
Specifics on soap and shampoo
How important is it to use soap for newborns?
Can I use soap for my newborn baby?
Is it safe to use regular baby shampoo and lotion when bathing a newborn?
Which soap is good for a one-month-old baby to bathe?
What’s the best bath products for newborns?
When can I use baby bath products on my newborn?
When bathing your newborn, using soap may not always be necessary, especially in the first few weeks. Newborns don’t get very dirty, so washing with warm water alone can often suffice for their face, hands, and nappy area. However, if you choose to use soap, opt for a very mild, fragrance-free soap formulated specifically for babies. Regular baby shampoo and lotion can be introduced, but it’s essential to ensure they are suitable for newborns, meaning they should be free from harsh chemicals and fragrances that could irritate their delicate skin.
For a one-month-old baby, a gentle, hypoallergenic baby soap or wash is ideal. Products that contain natural ingredients like aloe vera or chamomile can be soothing for a baby’s skin. The New Leaf Baby Gift Set offers excellent options for newborns, including baby wash and shampoo that are designed to be gentle on sensitive skin.
You can start using baby bath products on your newborn from the first bath, but it’s crucial to choose products designed for their delicate skin. In the early days, you may wish to limit the use of products and gradually introduce them as your baby gets older and their skin becomes more accustomed to bath time.
The best bath products for newborns are those that clean gently without drying out the skin or causing irritation. Look for organic, natural products that are specifically formulated for newborns, like those in the New Leaf Baby Gift Set, which are designed to nourish and protect while being gentle on your baby’s skin.
Baby bathing essentials
What are some baby bathing essentials?
What baby bath products do I need?
What do I need to bath my baby?
What’s your favourite baby bath product that makes bath time fun?
When preparing for baby bath time, there are several essentials you’ll need to ensure a safe, soothing, and enjoyable experience for both you and your baby. The basics include:
A baby bathtub or a bath support pad – A secure space designed for your baby makes bath time easier and safer. Consider features like non-slip surfaces and ergonomic designs that support your baby comfortably.
Gentle baby wash – A tear-free, hypoallergenic baby wash that’s formulated for sensitive skin is essential. It should clean without stripping natural oils from your baby’s skin.
Baby shampoo – Similar to baby wash, a mild baby shampoo that doesn’t irritate the eyes is crucial for keeping your baby’s hair clean and soft.
Soft washcloths – Use gentle washcloths to clean your baby’s body. Avoid rough materials that could irritate their sensitive skin.
Hooded baby towels – After bath time, wrap your baby in a soft, absorbent hooded towel to keep them warm and dry their skin gently.
Baby lotion or oil – Moisturising your baby’s skin after a bath can prevent dryness. Look for products specifically formulated for infants, such as those included in the New Leaf Baby Gift Set.
A bath thermometer – Ensuring the water temperature is just right (around 37°C or 98.6°F) is crucial for your baby’s comfort and safety.
Fun bath toys – As your baby grows, introducing safe, age-appropriate bath toys can make bath time an enjoyable experience, encouraging play and development.
Among these essentials, a favourite product that adds fun to bath time is bath toys designed for little hands. Toys that float, squirt water, or are easy to grip can turn bath time into an enjoyable playtime, making it an experience your baby looks forward to.
*This post is sponsored by New Leaf*
Red light therapy for hair loss after birth: does it work?
Losing hair can feel like losing a piece of your identity, especially after birth when you need to put your baby first. My thick, curly hair had always grown back except after my fourth, where clumps came out in my hands and there was no sign of regrowth. I was devastated! Maybe it’s down to my age, in which case, I’m scared my hair won’t ever grow back. It’s not just about vanity; it’s about how you see yourself and, in many ways, how you believe the world sees you. The psychological impact can be significant.
For those experiencing postpartum hair loss, this feeling is all too familiar. You’ve just brought a new life into the world, and as you navigate this beautiful yet challenging journey, you’re also dealing with changes to your own body, including your hair.
Enter red light therapy for hair loss – a glimmer of hope for us postpartum mums, as it’s non-invasive, and there’s science to back up its claims. The CurrentBody Skin LED Hair Growth Helmet* is a prime example of this technology in action. As someone who’s walked the path of trying to reclaim not just the fullness of my hair but also a piece of myself, I’ve decided to share my personal experience with this device. From the anticipation of unboxing to the day-to-day routine of wearing the helmet, I’ll take you through every step of my journey.
But first, let’s dig a little deeper into what causes hair loss, with a special focus on the postpartum hair-shedding rollercoaster. We’ll explore why red light therapy, particularly through devices like the CurrentBody Skin LED Hair Growth Helmet* is worth considering. Along the way, I’ll unpack the science behind red light therapy, how it compares to laser treatments, and its specific role in tackling postnatal hair loss.
Understanding hair loss
Losing hair can hit harder than just seeing more strands in your brush. So, understanding why hair falls out, how it affects us, and what we can do about it is the first step in dealing with it. Maybe your hair’s getting thinner all over, you’re spotting some bare patches, or it’s just coming out easier than before. By looking into how hair normally grows and what throws it off track, along with all the ways to tackle the issue, from doctor-recommended treatments to simple tweaks in how we live, we start to peel back the layers of this tricky problem. Let’s dive in and find some light at the end of the tunnel.
What causes hair loss?
You may start to lose hair due to genetics, hormones going haywire, not getting the right nutrients, too much stress, or even some kinds of medical treatments. Sometimes hair loss is just for a little while; other times, it might stick around, depending on what’s causing it.
One of the most common reasons people lose their hair is something called androgenetic alopecia. It’s mostly about your genes and it can affect anyone, but men usually have it more visibly. Other issues like thyroid problems, autoimmune conditions like alopecia areata, and even how you live your life – like what you eat and how much stress you’re under – also have a big impact.
Losing hair after having a baby, is actually pretty common. After the baby arrives, the big drop in pregnancy hormones can make a lot of hair start to fall out. It sounds scary, but most of the time, it gets better on its own in a few months.
When does postpartum hair loss start and stop?
Losing hair after having a baby, otherwise known as postpartum telogen effluvium, is something new parents go through. It’s all because of the big hormone changes that happen after you give birth. While you’re pregnant, you’ve got more oestrogen floating around, which makes your hair grow more and not fall out as much, giving you that great pregnancy hair. But after the baby comes, those hormone levels drop, and suddenly a lot of hair starts to shed.
So, when does this all start? Usually, about three to four months after you have your baby. It might be a bit different for everyone, but essentially your body is trying get back to how it was before you were pregnant.
And when does it stop? Don’t worry, this isn’t forever. Most of the time, your hair will get back to how it was by the time your baby’s blowing out their first birthday candle. You should see things getting back to normal anywhere from six to twelve months after you start noticing the loss.
It’s really important to remember that this kind of hair loss is totally normal and just part of the process. But, if you’re still seeing a lot of hair falling out after a year or it seems like too much, it might be a good idea to talk to a doctor or a skin specialist just to make sure everything’s okay. Eating well, being kind to your hair, and maybe some supplements can all help your hair get back to its pre-baby state.
How to treat postpartum hair loss?
Tackling hair loss after having a baby is all about taking care of yourself in different ways, as mentioned above, from what you eat to how you treat your hair and even managing stress. Plus, some specific treatments can help, like red light therapy. Let’s break down what you can do:
Eating right
If you’re dealing with hair thinning, make sure you’re eating a balanced diet. Getting enough iron, zinc, vitamin D, and those B vitamins is important for keeping your hair healthy. If you’re not sure you’re getting all the nutrients you need from your meals, talking to your doctor about supplements might be a good move, especially if you have certain foods you can’t eat.
Be kind to your hair
When it comes to looking after your hair, the gentler, the better. Try to steer clear of tight hairstyles that pull on your hair, harsh chemicals, and use a lot of heat to style your hair. A shampoo that adds volume and a conditioner that’s moisturising can make your hair look thicker and keep your scalp happy. Use a decent hairdryer like the mdlondon BLOW hairdryer that has a cool setting, so the direct heat doesn’t damage the hair.
Keep stress in check
Stress can actually make hair loss worse, so finding ways to relax and stay calm is really important. Things like yoga, meditation, or just getting in some regular exercise can help keep stress levels down.
Watch your hormones
After having a baby, it’s normal for your hormones to be all over the place, but they usually settle down on their own. If you’re worried your hormones are still out of whack and it’s affecting your hair, it might be worth chatting with your doctor to see what’s going on.
Medical treatments
Sometimes your doctor might suggest trying topical treatments like minoxidil, also known as Rogaine. It’s important to chat about whether these treatments are safe, particularly for parents who are breastfeeding.
Consulting with a specialist
If you’re losing a lot of hair after your baby arrives and it’s not getting better, it might be time to see a dermatologist. They can take a closer look at what’s going on and recommend the best way to tackle it. This might include checking whether red light therapy is a good fit for you. We will focus on red light therapy in this article.
What is red light therapy for hair?
Red light therapy is a spotlight solution for hair loss that’s been creating quite the buzz. This innovative approach involves a device that emits a soothing red light, aimed at revitalising your scalp right down to the follicles, by boosting blood flow and cranking up energy production.
How does it work?
The magic of red light therapy lies in its ability to nudge dormant hair follicles back into action, propelling them from the lazy days of their resting phase into the bustling growth phase. This not only encourages new hair growth but can also enhance the health and vitality of your scalp.
Recommended by healthcare professionals, these at-home devices are user-friendly, requiring just a few minutes of your time, a couple of times a week.
Is red light therapy a good choice?
There are quite a lot of studies out there suggesting red light therapy can help with growing hair back, and the best part is it doesn’t come with scary side effects. But, just like anything else, what works for one person might not work for another. Listening to what healthcare pros suggest and following how you’re supposed to use these gadgets is pretty much the golden rule here.
Let’s dive a little deeper
The cool thing about red light therapy is that it goes straight to the source – your hair follicles. By boosting blood flow and kicking metabolism into higher gear right at the scalp, it gets the growth of new hair going. It also increases ATP, that all-important cell energy, encouraging more hair to sprout. Plus, if you’ve got inflammation on the scalp, this therapy can help calm things down, creating a better environment for hair to grow and stick around longer in the growth phase.
Who should give it a try?
If you’re struggling with pattern hair loss, noticing your hair isn’t as thick as it used to be, or you’re a new mum dealing with hair falling out after birth, then red light therapy could be a good choice.
What’s the difference between laser therapy and red light therapy?
A lot of people think red light therapy is laser therapy, but actually the two are quite different. Let’s break down the difference between red light therapy and laser therapy.
Red light therapy
Red light therapy uses red LED lights that shine at certain wavelengths, usually between 630nm and 700nm.
The devices for red light therapy have a wide beam that covers a bigger area but with a softer touch than lasers.
It’s great for surface-level stuff because the light only goes a few millimetres deep into the skin, making it perfect for improving skin health, speeding up wound healing, and helping your hair grow.
Low-Level Laser Therapy (LLLT)
LLLT includes red light therapy but also brings low-level lasers into the mix. They use gentle lasers or LED light to wake up the cells in your hair follicles.
While LLLT often gets talked about in the same breath as red light therapy for hair growth, it’s actually a bigger umbrella that covers more types of light therapy.
Laser treatments
These treatments use lasers that are more focused and powerful, and they can zero in on specific tiny spots and go deeper into your body.
You’ll find lasers being used for medical situations, like surgeries, clearing up acne, and helping with deep tissue issues.
Because lasers are so intense, you’ll usually see a doctor or another healthcare pro if you’re getting a laser treatment done.
So, in a nutshell, red light therapy is like a soft, wide light blanket for surface-level issues, while laser therapy is more like a high-powered, precision light pen for deeper or more specific problems.
The CurrentBody Helmet and Red Light Therapy
The CurrentBody Skin LED Hair Growth Helmet* uses red light therapy to tackle hair loss head-on. It shines red light at the sweet spot of 640nm wavelength, which is just the right kind of light to wake up the hair follicles, boost blood flow, and get more oxygen and nutrients moving to your scalp. This specific wavelength is good at getting through to your scalp without being too intense. It has been proven to be the right wavelength (not too strong and not too gentle) to help your hair grow.
How does red light therapy help with postnatal hair loss?
Red light therapy can help address postnatal hair loss because it’s non-invasive, pain-free, and effective to support hair regrowth and scalp health.
Calming inflammation
If your scalp’s feeling a bit inflamed after childbirth, you’re not alone. This inflammation can make hair loss even worse. Red light therapy can help create a more fertile ground for your hair follicles to thrive and produce new hair.
Helping with hormone changes
While red light therapy doesn’t directly juggle your hormones back into place, it supports a healthier scalp. And a happy scalp means it can better handle whatever hormonal changes come its way, helping your hair grow back stronger.
Why it’s great for new parents
Red light therapy is a safe and hassle-free way to address hair loss. It’s gentle, non-invasive, and doesn’t come with nasty side effects, making it a perfect match for the postpartum period. Plus, using red light devices at home, like hair growth helmets, means you can treat your hair without adding another appointment to your already packed schedule.
The CurrentBody Skin LED Hair Growth Helmet experience
Diving into the world of red light therapy for hair loss, let’s talk about an industry game-changer: the CurrentBody Skin LED Hair Growth Helmet.* This neat gadget brings the power of red light therapy right into your living room, offering an easy and effective way to help with thinning postpartum hair.
You can use the CurrentBody Helmet in the comfort of your own home. This means you get all the fancy benefits of red light therapy without having to step foot outside, making it convenient for busy parents.
Cracking open the box of the CurrentBody Skin LED Hair Growth Helmet is like discovering something from another world. The box is like a gift package, opening from the centre. Once opened you’re greeted by the helmet itself, a pretty hefty piece of kit that smells like it just came straight from a lab. Inside, you’ll find everything you need to get started:
The CurrentBody Skin LED Hair Growth Helmet comes in a small/medium size (you can also get a larger size, but there’s a handy size guide included to make sure it fits you just right.)
A Protective Non-Charging Base where your helmet can rest when you’re not using it, keeping it safe and sound.
A USB Charging Cord to power up your helmet. Just a heads up, there’s no wall plug in the box, so you’ll need to have one handy.
The User Manual is your go-to for all the details on how to use the helmet properly. It’s packed with everything you need to know to get the most out of your new hair growth buddy.
How to use the CurrentBody Helmet
Getting started with the CurrentBody helmet is pretty easy and fits right into your daily routine. Here’s a quick guide to get you going:
Setting It Up: First things first, pop the helmet onto its protective base. Then, grab the USB cord it came with and plug it in to give it a full charge before you use it for the first time.
Before You Start: Make sure your hair’s clean and completely dry. This helps the LED light do its thing without anything getting in the way, like oils or moisture.
Turning It On: Now, put the helmet on your head and find the screen on the side. Hit the start button, and you’ll see a 10-minute timer pop up on the display, along with some cool red light starting to glow.
Killing Time: To make those 10 minutes fly by, you can connect your phone to the helmet using Bluetooth and listen to your favourite podcasts or tunes. Pretty neat, right?
While It’s Working: You’ll feel a slight warmth while the helmet’s on—it’s just the LED lights doing their job on your scalp. It’s made to be comfy, so just relax and enjoy the warmth.
Wrapping Up: When the helmet beeps after 10 minutes, that means it’s done. It’ll turn itself off, so you just take it off, put it back on its resting port, and go about your day. Easy peasy!
First impressions and setup
The initial unboxing and setup process is impressively user-friendly. The futuristic design of the helmet, coupled with its clinical smell, immediately sets it apart as a sophisticated piece of technology. Setting up the device is intuitive, thanks in part to the clear instructions provided in the user manual. The ability to connect to Bluetooth for entertainment during treatment is a thoughtful addition, enhancing the overall user experience.
How often should you use the CurrentBody Helmet for red light therapy?
It really depends on what kind of red light therapy device you’ve got, how serious your hair loss is, and how your body reacts to the treatment. You can use the CurrentBody Helmet for just ten minutes a day and experts say you should see visible results in four months. But don’t worry, there’s a general game plan you can follow to get the most out of red light therapy for growing your hair:
Starting Out: Most of the time, if you’re using a red light therapy device meant to help your hair grow back, you’ll want to use it around 3 to 4 times a week when you first start. This helps wake up your hair follicles without overdoing it.
How Long for Each Session?: Expect to spend about 10 to 30 minutes per session, based on what CurrentBody recommend. It’s important to stick to their advice to keep things safe and effective.
Keeping It Going: After you’ve been at it for at least three months—and you start noticing some good changes, you might dial it back to just once or twice a week to keep those gains without needing to do as much.
But wait, there’s more:
Follow the Manual: Each red light therapy device can be a bit different, so make sure you’re doing what the manual says. The company that made your device should tell you how often and how long to use it, based on the kind of light it uses and how it works.
How Much Hair You’re Losing: If you’re losing a lot of hair, you might need to use red light therapy more often at first.
Your Personal Results: Everyone’s different. You might need to use it more or less often, depending on how your hair responds.
Mixing Treatments: If you’re using red light therapy with other hair loss treatments, the number of red light therapy sessions you do might change based on what else you’re doing.
Keeping it safe and effective
Red light therapy is usually pretty easy on you, but don’t go overboard to avoid irritating your scalp.
Stick with it regularly, according to the schedule. It’s better than trying to cram all your sessions into a shorter time frame.
Talk to a professional
Before you jump in with red light therapy, chat with a dermatologist or a hair loss expert, so they can give you advice tailored just for you, making sure red light therapy is a good fit.
While the typical advice is to aim for 3 to 4 therapy sessions a week for hair loss, remember to check out your device’s instructions and maybe get some professional guidance to figure out the best plan for you. With the CurrentBody Helmet, you can use it for ten minutes daily.
What can you start to see results with the CurrentBody helmet?
Here’s what your journey might look like:
First few weeks (0 to 4 weeks)
At the start, the LED light in the helmet gets busy boosting blood flow to your scalp, waking up hair follicles that weren’t doing much. It’s also putting the brakes on DHT, a hormone that’s no friend to your hair. You might not see changes right away, but it’s laying down the groundwork for new hair to grow.
The middle stage (4 to 8 weeks)
Now, things get exciting. That improved blood flow starts to rejuvenate sleepy follicles, and your scalp begins to feel like a more hair-friendly place. Those follicles are ready to switch from chill mode to grow mode.
Seeing changes (8 to 16 weeks)
This is when the magic happens. From about two months in, you’ll start noticing new hair. Studies show that by week 16, you could see a 33% boost in the number of hair follicles. Keeping up with the treatment is key to getting and keeping those gains.
How does the CurrentBody Helmet stack up against other treatments?
Against Finasteride – The helmet can ramp up hair growth by 126% in 16 weeks. Finasteride, a hair loss drug, doesn’t match up to this without continuous use.
Compared to laser treatments – It’s also been found to be way more effective than some laser treatments, outperforming them by 126%.
Versus Minoxidil – Against the topical solution Minoxidil, the helmet brings 62% more new hairs, minus the daily hassle and potential skin issues.
So, if you’re eyeing the CurrentBody helmet as your choice against hair loss, it looks like it could be a pretty solid option.
Personal and customer reviews of initial experiences
With 34 reviews averaging 4.5 out of 5, people really like the CurrentBody Helmet for its solid build and how easy it is to use. While the scores on seeing results dip a bit, it’s key to stick with it for about four to six months to start seeing your hair come back. Christine K. from Canada was hoping for quicker results in just three months. The team at CurrentBody, with Zubda leading the charge on beauty tech advice, stresses sticking it out for about six months to really see the difference.
People like JCS and Liz O. are happy about how well red light therapy works and how top-notch the helmet feels. Hadas from Israel and Nils P. from the Netherlands have seen their hair get thicker and healthier. Though Hadas did point out that it can snag your hair, tossing your hair into braids seems to fix that right up.
On the expert front, Craig Ziering, a big name in hair restoration, promotes using red light therapy to get those hair follicles moving and bumping up hair density without the downside of harsh side effects. Celestine Gitau also favours using red light therapy alongside good eating, keeping stress in check, and taking care of your scalp to tackle hair loss.
CurrentBody helmet results: before and after
Lots of people who’ve stuck with using the CurrentBody Skin LED Hair Growth Helmet* have seen some real changes. Their hair feels thicker and denser, and their scalp seems healthier too. Everyone’s experience is a bit different, but the before and after pictures people share usually show a pretty big decrease in how much their hair is thinning. Most agree that if you keep up with it regularly, just like the manual suggests, you’re more likely to see good results.
My before and after
As I’m only on Week 1 of using the CurrentBody Skin LED Hair Growth Helmet* I can’t show you any actual results yet. But watch this space as I will be updating my journey here and via social media too. I’m very hopeful!
Where can I buy the CurrentBody Skin LED Hair Growth Helmet?
Lots of research out there is giving a thumbs up to red light therapy for dealing with hair loss, with a whopping 128% boost in how fast hair grows back, meaning people are seeing thicker, stronger hair after sticking with red light therapy for a while. And compared to options like minoxidil or finasteride, which might irritate your scalp or lead to other side effects, red light therapy is pretty chill with hardly any downsides reported.
Pros
No Surgery Required: Red light therapy doesn’t involve any cutting or poking, making it a gentle choice for many.
Easy on You: Side effects are pretty rare, especially if you’re comparing it to drugs for hair loss.
Do It at Home: You can get your red light therapy session in without having to step out, thanks to gadgets you can use in your living room.
Happy Scalp: It’s not just about more hair; red light therapy can make your scalp healthier, cutting down on problems like inflammation.
Cons
Time: You’ve got to commit to using it regularly over a long stretch to see results, which might not be everyone’s cup of tea.
Costs Upfront: Getting your own red light therapy setup at home can be a bit pricey at the start, though it could save you money down the road compared to other treatments.
Mixed Results: How well it works can really depend on the person. Some might see big changes, while others might only notice a little difference.
Beyond the Helmet: Are there any hair loss treatment alternatives to red light therapy?
Stepping out from under the CurrentBody Helmet, let’s look at other options to tackle hair loss if red light therapy isn’t your go-to.
Medications
Minoxidil (Rogaine): You can grab this topical treatment you massage into your scalp at your local pharmacy. It’s got a thumbs up for both men and women, but you’ve got to keep at it without a break to keep the gains.
Finasteride (Propecia): More of a behind-the-counter pick, this pill slows down hair loss and might even invite new growth. This is aimed at men, though, and it’s not without its set of potential side effects, especially in the bedroom department.
Medications bring results, no doubt, but they’re not free of side effects. Red light therapy, on the other hand, keeps things gentle and non-invasive.
Platelet-rich plasma (PRP) therapy
You utilise your own blood, which is processed to concentrate platelets, so PRP therapy injects it into the scalp. This method aims to stimulate hair growth by enhancing tissue repair and cellular functions.
PRP therapy requires clinical visits and is more invasive, potentially accompanied by discomfort and higher costs. Red light therapy, alternatively, offers a non-invasive, pain-free treatment option that can be conveniently administered at home, though PRP may provide faster results for some people.
Hair transplant surgery
Hair transplant procedures, such as Follicular Unit Extraction (FUE) and Follicular Unit Transplantation (FUT), offer permanent hair loss solutions by redistributing hair from denser to sparser areas.
While hair transplant surgery delivers immediate and targeted results, it involves significant financial investment, recovery time, and surgical risks. Red light therapy is a gentle alternative or a complementary treatment to support healing and enhance hair growth without the need for surgical intervention.
Microneedling
Microneedling for hair loss involves a process where very fine needles create tiny punctures on the scalp. This action is meant to kickstart the skin’s healing process, potentially encouraging hair growth. It’s often used alongside other treatments to help them penetrate deeper and work more effectively. You can use the CurrentBody Helmet device in conjunction with microneedling if you wanted to.
Compared to the simplicity of red light therapy, microneedling is more direct, with a bit of discomfort due to its invasive nature. While it can be effective, especially when combined with other hair loss treatments, red light therapy offers a gentler, non-invasive alternative that’s easy to use regularly at home.
Both approaches have their place in the array of hair loss treatments available, from the straightforward application of medications to advanced techniques like red light therapy. Each method offers different benefits, and the best choice can depend on your individual needs, preferences, and the specific condition being treated.
Final thoughts, recommendations, and guidance
The CurrentBody Skin LED Hair Growth Helmet is a pretty cool tool in the fight against hair loss, mixing smart tech with everyday hair care. It’s got a thumbs-up from both science and real users, making it a solid pick for handling hair loss right at home. This helmet is all about using light in a gentle way to help out thinning hair without any fuss. If you’re thinking about giving it a try, here’s what you might want to keep in mind:
Do Your Homework: Take a closer look at how red light therapy works and why it might be good for your hair. Look for solid research and trials to back up what the helmet promises. Places like PubMed or NIH are great for finding trustworthy studies.
Check What You Need: Think about how much hair you’re losing and if this kind of therapy fits your situation. Sometimes, other conditions might need a different approach.
Weigh the Costs: Consider what you’re spending upfront against what you’ll save by not having to keep buying treatments or going for more drastic measures.
Listen to Others: Check out what people who’ve been in your shoes have to say about their experience with the helmet.
Look for FDA Approval: Especially in the U.S., knowing the device is FDA-cleared can give you a bit more peace of mind about its safety and effect.
Check the Warranty: Make sure you know what kind of support and warranty comes with it, so you’re covered if anything goes sideways.
Be Patient: Remember, good things take time. Consistent use is key to seeing a real change, so stick with it as recommended.
Track Your Journey: Taking before and after photos can be a great way to really see the difference over time.
Keeping these points in mind, the CurrentBody helmet seems like a pretty smart pick for those looking to tackle hair loss head-on. It offers you a non-scary way to help your hair out, backed by science and good reviews from users. Just like with anything big in healthcare, chatting with a pro and thinking it through can help you decide if it’s the right move for you.
FAQs
Is red light therapy for hair loss safe?
Absolutely, red light therapy is generally considered safe for hair loss. It’s non-invasive and doesn’t come with the scary side effects some treatments might have. Just make sure to follow the guidelines for your device to keep things smooth.
Can red light therapy make hair loss worse?
There’s no evidence to suggest that red light therapy worsens hair loss. In fact, it’s known for its benefits in stimulating hair growth and improving scalp health. If you’re concerned, chat with a healthcare professional.
Is red light therapy for hair painful?
Not at all. red light therapy is a gentle, pain-free treatment, so if you’re not a fan of the ‘ouch’ that comes with some other treatments, red light therapy could be up your alley.
Can red light therapy reverse grey hair?
Red light therapy is more about encouraging hair growth and improving the health of your scalp and hair. There’s not much out there to say it can bring back your original colour if you’re going grey.
I’m thinking of buying a red light lamp for my fiancé who has back pain and hair loss – would any red lamp work?
It’s best to look for a device specifically designed for the issues you’re tackling. Red light therapy devices for hair loss and back pain might have different specifications, like wavelength, so picking one that’s meant for hair loss is your best bet for seeing results.
Can an LED mask with red light also be used on the scalp for hair loss treatment?
Some LED masks are versatile enough to be used on different parts of the body, including the scalp. A normal LED mask will help a little as it does penetrate the skin at a cellular level. But it’s important to choose a device that has the correct wavelengths to reach the follicles, which is usually a different wavelength than the face LED masks. So the hair-focused helmet will work better, as it will reach the correct level. Just check the manufacturer’s recommendations to ensure it’s safe and effective for hair loss treatment.
Does light therapy stop hair loss, or is it just for regrowth? Can it replace Finasteride if you do it every day?
Red light therapy is known for both halting hair loss and encouraging regrowth by stimulating the follicles. As for replacing finasteride, it’s a bit of an apples and oranges situation. Red light therapy offers a non-drug, side-effect-free method, but whether it can replace finasteride for you depends on your specific situation and what your healthcare provider suggests.
Resources for further reading and understanding
Systematic reviews and meta-analyses
“Effects of Low-Level Laser Therapy on Male and Female Pattern Hair Loss“: A systematic review and meta-analysis in Lasers in Medical Science (2014) examining the efficacy of LLLT in treating pattern hair loss. The study concluded LLLT to be an effective and safe treatment, noting significant improvements in hair density and thickness.
Clinical trials
“Treatment of Androgenetic Alopecia with LLLT“: Published in the Journal of Cosmetic and Laser Therapy (2013), this study involved individuals with androgenetic alopecia treated with LLLT and reported significant improvement in hair count and density after 26 weeks.
“LLLT for Women with Androgenetic Alopecia“: A study in Lasers in Surgery and Medicine (2014) highlighted the positive effects of LLLT in increasing hair density in women, compared to placebo groups.
Comparative studies
“Comparing LLLT with Minoxidil“: Published in The American Journal of Clinical Dermatology (2014), this study found LLLT to be as effective as a 5% minoxidil solution in promoting hair growth in men with androgenetic alopecia.
*This post is sponsored by CurrentBody but all thoughts are 100% my own. Please note that links marked with a ‘*’ are affiliate links, which means I may earn a small commission when you click through at no extra cost to you.
12 crucial vaccinations that every child must have
According to the Centers for Disease Control (CDC), vaccines prevent the death of 4 million children annually. Yet, there is still opposition against vaccines because of misinformation and religious beliefs. The COVID-19 pandemic didn’t help boost immunisation numbers, either. Because of lockdowns all over the world, the number of zero-dose children or children who have yet to receive a single dose of vaccine from the below list of vaccinations which fight against childhood diseases stood at 18.1 million in 2021.
Fortunately, subsequent vaccination drives decreased the number to 14.3 million the following year. While this is a significant improvement, the number still represents the millions of children at unnecessary risk because whatever reason they weren’t vaccinated.
Your baby’s vaccinations protect them and others from harmful diseases, so it’s important to stick to the immunisation schedule offered by your healthcare provider. But, which vaccines are given in childhood? When should these be administered? To give you an idea, here’s a comprehensive child and adolescent immunisation schedule by age.
1. BCG (Bacillus Calmette-Guérin) or the Tuberculosis Vaccine
In the battle against tuberculosis, the BCG vaccine is the best defence for children. Given at your paediatric clinic to protect against this airborne bacterial disease, BCG has proven instrumental in regions where tuberculosis remains a threat.
In these parts of the world, the vaccine is administered right after birth or any time after birth until the baby turns 6 months old. By building a robust defence early on, children are protected from the devastating impact of tuberculosis.
2. DTaP (Diphtheria, Tetanus, and Pertussis)
The triple threat of diphtheria, tetanus, and pertussis requires a powerful defence, and that’s precisely what the DTaP vaccine provides.
Diphtheria: This is a pretty nasty infection that affects the throat and can cause breathing problems. It’s contagious and can be quite serious, especially for kids.
Tetanus: You might know this one as ‘lockjaw’. It’s caused by a toxin released by bacteria, often entering the body through cuts or wounds. It can lead to really painful muscle stiffness all over the body.
Pertussis (Whooping Cough): This one causes severe coughing fits and it’s very contagious. It’s especially dangerous for babies, who can have a hard time eating, drinking, or even breathing when they catch it. The acellular pertussis vaccine specifically targets pertussis. It’s called “acellular” because it contains purified components of the pertussis bacteria, not the whole bacteria itself. This makes it different from older pertussis vaccines that used the whole cell of the bacteria.
It’s typically administered in a series of doses during infancy and early childhood, starting at 2 months of age. Subsequent doses are given at 4 months, 6 months, 15-18 months, and 4-6 years.
3. OPV (Oral Polio Vaccine)
In the quest for a polio-free world, the oral polio vaccine (OPV) (inactivated poliovirus vaccine) plays a starring role. Polio or poliomyelitis is caused by the poliovirus, which primarily spreads through contaminated water or food. In worst-case scenarios, polio can result in paralysis. Thanks to widespread vaccination efforts, the incidence of polio has significantly decreased globally, bringing the world closer to eradicating this debilitating disease.
The OPV is typically administered in multiple doses as part of routine childhood immunisation. The first dose is often given at 2 months of age, followed by additional doses at 4 months, 6-18 months, and a booster dose around 4-6 years of age. This schedule may vary based on local health guidelines.
4. IPV (Inactivated Polio Vaccine)
Complementing OPV, the inactivated polio vaccine (IPV) adds another layer of protection against this crippling disease. This dual approach strengthens immunity, emphasising the global commitment to wiping out polio and securing a healthier future for generations to come.
The recommended schedule for IPV may vary by country, but a common schedule includes doses at 2 months, 4 months, 6-18 months, and a booster dose around 4-6 years of age.
5. HiB (Haemophilus influenzae Type B)
Haemophilus influenzae type b (Hib) is a bacterium that can cause severe diseases, including meningitis and pneumonia. The HiB vaccine stands as a guardian against this bacterium and is often administered at 2 months of age, followed by additional doses at 4 months and 6 months.
6. PCV (Pneumococcal Conjugate Vaccine)
Respiratory infections pose a significant threat to children worldwide. For diseases caused by Streptococcus pneumoniae, the pneumococcal conjugate vaccine or PCV acts as a potent shield.
The vaccine is administered starting at 2 months of age, with additional doses given at 4 months and 6 months, and a booster shot around 12-15 months.
7. RV (Rotavirus Vaccine)
Diarrhoeal illnesses are often underestimated but they can have severe consequences for young children. Through the help of the rotavirus vaccine (RV), parents can help their children avoid severe cases of diarrhoea and allow children to thrive without the burden of preventable diseases.
RV is administered to infants in a series of doses, which begins at 2 months of age and is followed by additional doses at 4 and 6 months
8. Varicella (Chickenpox Vaccine)
Chickenpox was once considered a rite of passage but is now preventable with the varicella vaccine. It not only spares children from itchiness and discomfort but also prevents potential complications associated with the virus.
Varicella is administered to children in two doses, with the first dose recommended at 12-15 months of age and the second dose at around 4-6 years of age.
9. MMR (Measles, Mumps, and Rubella)
The combined power of the MMR (measles, mumps, rubella) vaccine addresses three viral adversaries—measles, mumps, and rubella. As measles sees a resurgence in some regions, the MMR vaccine remains a formidable weapon in the world’s healthcare arsenal. This 3-in-1 immunisation eliminates these threats through the first dose given around 12-15 months of age and the second dose at 4-6 years of age.
10. Hepatitis A Vaccine
The hepatitis A vaccine stands as a guardian of liver health. This vaccine is typically administered in a two-dose series, with the first dose recommended around the age of 1, and the second dose administered 6 to 18 months later for long-term immunity.
11. Hepatitis B Vaccine
Early protection against hepatitis B pays dividends throughout a lifetime. The hep B vaccine vaccine prevents chronic liver infections and is usually given in a series of doses. The first is given at birth or shortly after, followed by additional doses at 1-2 months and 6 months of age as part of the routine childhood immunisation schedule.
12. Flu (Influenza Vaccine)
As seasons change, so do the threats posed by the flu and the annual influenza vaccine becomes a seasonal defense for children. The vaccine protects from the potentially serious complications of this common yet formidable virus.
Childhood vaccinations are an investment in the future and a commitment to safeguarding the well-being of our children and the generations that follow. As a parent, you are responsible for ensuring your child receives their vaccine as scheduled to protect them from serious childhood diseases that can claim lives and futures.
FAQ
What is the full list of vaccinations every infant and baby should have in their lifetime?
Do you have a baby vaccination chart or a schedule of infant vaccines?
Below is a full list of vaccines for children by age:
Age
US Vaccinations
UK Vaccinations
Birth
Hepatitis B
BCG (if at risk), Hepatitis B (if at risk)
2 months
Hepatitis B, DTaP, Hib, Polio, PCV, RV
6-in-1 (DTaP/IPV/Hib/HepB), PCV, RV, MenB
4 months
DTaP, Hib, Polio, PCV, RV
6-in-1 (DTaP/IPV/Hib/HepB), PCV, MenB
6 months
DTaP, Hib, Polio (3rd dose between 6-18 months), PCV, RV, Hepatitis B
6-in-1 (DTaP/IPV/Hib/HepB), PCV (3rd dose)
12 months
MMR, PCV, Hib, Hepatitis A
Hib/MenC, MMR, PCV, MenB
15-18 months
DTaP, Hepatitis A
MMR (1st dose), MenB
4-6 years
DTaP, IPV, MMR, Varicella
4-in-1 (DTaP/IPV), MMR (2nd dose)
11-12 years
Tdap, HPV, MenACWY
HPV, 3-in-1 (Td/IPV), MenACWY
13-18 years
MenACWY (booster)
MenACWY (booster)
Notes:
DTaP: Diphtheria, Tetanus, Pertussis
IPV: Inactivated Poliovirus
Hib: Haemophilus Influenzae Type b
PCV: Pneumococcal Conjugate Vaccine
RV: Rotavirus Vaccine
MMR: Measles, Mumps, Rubella
Varicella: Chickenpox
Tdap: Tetanus, Diphtheria, Pertussis (adolescent and adult formulation)
HPV: Human Papillomavirus
Hepatitis A/B: Liver infection vaccines
MenACWY: Meningococcal ACWY vaccine
MenB: Meningococcal B vaccine
Hib/MenC: Combined Haemophilus Influenzae Type B and Meningococcal C vaccine
6-in-1: DTaP/IPV/Hib/HepB is a combined vaccine for Diphtheria, Tetanus, Pertussis, Polio, Hib, Hepatitis B
4-in-1 (DTaP/IPV) and 3-in-1 (Td/IPV) in the UK are booster vaccines for Diphtheria, Tetanus, Pertussis, and Polio.
This table provides a general overview of the child vaccination chart. The actual table of scheduled vaccines can vary slightly based on individual health needs and updates in vaccination policies. Always consult with a health care provider for the most new immunisation schedule table.
How do I find out what vaccines my child has had?
Finding out what vaccines your child has had is pretty straightforward. Here’s how you can do it:
Check the Immunisation Record: When your child gets vaccinated, the healthcare provider usually records each vaccine in an immunisation record or a baby book. It’s a small booklet or card where all the vaccine details are noted down – like the name of the vaccine, the date it was given, and the batch number.
Ask Your Doctor: If you can’t find the record or if you’re not sure it’s complete, the best thing to do is to contact your child’s doctor or healthcare provider. They keep medical records, including a history of vaccinations.
School or Childcare Records: Sometimes, schools and childcare centres require vaccination records for enrollment. They might have a copy or a record of the vaccines your child has received.
Online Immunisation Registries: In many countries, there are online systems where vaccination records are kept. You can access your child’s immunisation history through these systems, often using a personal identification number or health card number.
Contact Previous Healthcare Providers: If you’ve moved or changed doctors, contact the previous healthcare providers. They should be able to provide you with records of the vaccinations administered while under their care.
Remember, it’s important to keep the vaccination record in a safe place and bring it to each medical appointment. This helps ensure your child’s vaccinations and immunisation programme are up to date.
How many vaccines does a child get in their lifetime?
The number of required vaccines a child receives in their lifetime can vary depending on where they live and their specific health needs. However, in general, a child might receive around 14 to 16 different types of vaccines by the time they’re a teenager. These vaccines are often given through multiple doses at different ages, which can add up to quite a few shots over the years.
For example, a child might get multiple doses of vaccines like DTaP (which covers diphtheria, tetanus, and pertussis), polio, MMR (measles, mumps, and rubella), and others during their first few years. Some vaccines, like the flu vaccine, are given yearly, while others, like the HPV vaccine, are added when they get a bit older.
So, while the specific number of shots might differ, it’s not unusual for a child to receive around 20 to 30 shots by the time they reach their late teens, including booster doses for some vaccines. These vaccines play a crucial role in keeping them protected against various diseases throughout their childhood and into adulthood.
What are the optional vaccines for children?
Optional vaccines for children can vary depending on the country and its specific health guidelines. However, there are a few vaccines that are often considered optional in many parts of the world. Let’s take a look at some of them:
Rotavirus Vaccine: This vaccine protects against rotavirus, which causes severe diarrhoea in babies and young children. While highly recommended, it’s optional in some places.
Varicella Vaccine (Chickenpox): Many countries include this in the routine schedule, but in others, it’s optional. It protects against chickenpox.
Influenza Vaccine (Flu Shot): This annual vaccine is often recommended for everyone, including children, but it’s usually considered optional.
Meningococcal Vaccines: These vaccines protect against meningococcal disease, which can lead to meningitis and bloodstream infections. They’re often recommended for adolescents and during outbreaks but might be optional in routine child immunisation schedules in some countries.
Human Papillomavirus (HPV) Vaccine: Aimed at older children, this vaccine protects against the HPV virus, which can lead to certain types of cancers. It’s becoming more common but is still optional in many places.
Hepatitis A Vaccine: This vaccine is recommended in some countries, especially where hepatitis A is more common, but in other countries, it’s optional.
Travel Vaccines: These are specific vaccines recommended when travelling to certain areas. They include vaccines for diseases like yellow fever, typhoid, and Japanese encephalitis.
It’s important to remember that “optional” doesn’t mean “not important.” These vaccines are still very effective at preventing diseases. The decision often depends on factors like the prevalence of the disease in the area, the child’s health, and the advice of healthcare providers. Always best to chat with a doctor to make the right choice for your child’s health.
Where can I get my child’s immunisations?
Getting your child’s immunisations is pretty straightforward, and you have a few options depending on where you live. Here are the most common places:
Paediatrician or Family Doctor: This is the most commonplace. Your child’s regular doctor can administer most, if not all, of the recommended vaccines. It’s also a great way to keep all your child’s medical records in one place.
Local Health Clinics: Many communities have health clinics that offer immunisations. These can be run by the government or local health organisations. They’re often a good choice if you don’t have a regular doctor or if you’re looking for a more affordable option.
Hospitals: Some hospitals have immunisation services, especially in larger cities. They might have specific days or clinics for vaccinations.
Pharmacies: In some countries, pharmacies offer certain vaccinations, like the flu shot. This can be a convenient option since you don’t usually need an appointment.
School-Based Programs: Some places offer vaccines through schools. This is often for vaccines recommended for older children, like the HPV vaccine.
Travel Clinics: If you’re travelling and need specific vaccines for your trip, travel clinics are the place to go. They specialise in travel-related health care.
No matter where you go, it’s always a good idea to bring your child’s immunisation record with you, so you can keep it updated. And if you’re unsure where to go, a call to your local health department or a quick chat with a healthcare provider can point you in the right direction.
When shouldn’t my child be vaccinated?
There are certain situations when it might not be the right time or it could be unsafe to vaccinate your child. Here are some common scenarios:
Feeling Unwell: If your child is moderately or severely ill, it might be best to wait until they’re feeling better. A mild cold or a low fever usually isn’t a problem, but a more serious illness can mean it’s better to postpone the vaccination.
Allergic Reactions: If your child had a severe allergic reaction to a previous dose of a vaccine, or to a component that’s in the vaccine, they might not be able to get more doses of that vaccine. It’s really important to tell your doctor about any allergies your child has.
Certain Medical Conditions: Kids with certain medical conditions might need to avoid some vaccines or get them at a different time. For example, children with weakened immune systems (like those undergoing chemotherapy) may need to wait for some vaccines.
Age Restrictions: Some vaccines are only given at certain ages. For instance, newborns don’t get the measles vaccine — they wait until they’re a bit older.
Pregnancy (in Teens): Some vaccines, like the HPV vaccine, are recommended for older children or teenagers. If a teen is pregnant, some vaccines may need to be delayed until after the baby is born.
It’s always best to talk to your doctor about any concerns or special circumstances before deciding on vaccinations. They can give you the best advice based on your child’s health history and the latest medical guidelines. Remember, vaccinations are a key part of keeping your child healthy, but there are times when it’s better to wait.
What vaccines would I have had as a child?
The vaccines you would have received as a child largely depend on when and where you grew up, as vaccine schedules can vary by country and have changed over the years. However, I can give you an idea of the most common childhood vaccines that have been widely used around the world for several decades. Here’s a general list:
DTP/DTaP/DT: Protects against Diphtheria, Tetanus, and Pertussis (whooping cough). The exact name can vary (DTP, DTaP, or DT) depending on the formulation.
Polio Vaccine (OPV or IPV): This vaccine protects against polio, a disease that can cause paralysis. OPV is the oral polio vaccine, and IPV is the inactivated polio vaccine.
MMR: Protects against Measles, Mumps, and Rubella. It’s usually given in two doses at different ages.
BCG: Mainly given in countries where tuberculosis (TB) is more common. It protects against severe forms of TB in children.
Hepatitis B: Many countries include this in their routine schedule for newborns or young children to protect against the Hepatitis B virus.
Hib (Haemophilus influenzae type b): This vaccine protects against a bacteria that can cause meningitis and other serious infections.
Depending on where you grew up, there could have been additional vaccines on your schedule, like the Varicella vaccine for chickenpox, or a vaccine against Rotavirus, which causes severe diarrhoea in young children.
If you’re curious about your vaccination history, the best place to look is your health records or immunisation card. If you don’t have access to those, your family doctor or local health department might be able to help. Remember, these records are important for understanding your health history and ensuring you’re protected against certain diseases.
Is there an adult immunisation schedule?
Yes, there is an adult immunisation schedule! Just like kids, adults also need vaccines to stay healthy. The specific vaccines recommended for adults can depend on factors like age, overall health, travel plans, and vaccines you had as a child. Here’s a general idea of what’s typically recommended:
Influenza (Flu) Vaccine: This is recommended every year for all adults. The flu virus changes often, so getting the vaccine annually is the best way to stay protected.
Tdap or Td Booster: Adults should get a tetanus and diphtheria booster (Td) every 10 years. If you’ve never had the Tdap vaccine, which also protects against pertussis (whooping cough), you should get it once in place of the Td booster.
HPV Vaccine: If you didn’t get the HPV vaccine as a teenager, it’s often recommended for adults up to age 26, and in some cases, up to age 45, based on individual health circumstances.
Shingles Vaccine: Recommended for adults over 50, this vaccine protects against shingles, a painful rash caused by the same virus that causes chickenpox.
Pneumococcal Vaccine: This vaccine, which protects against some types of pneumonia, is recommended for all adults over 65, and younger adults with certain health conditions.
Hepatitis B Vaccine: If you didn’t get this as a child, or if you’re at increased risk for hepatitis B, you might need this vaccine.
Travel Vaccines: Depending on where you’re travelling, you might need additional vaccines, like those for yellow fever, typhoid, or others.
Other Special Cases: Based on your health, job, or lifestyle, you might need other vaccines, like those for meningitis, hepatitis A, or measles, mumps, and rubella (MMR), especially if you didn’t get them as a child.
It’s always a good idea to check with your healthcare provider about what vaccines you might need. They can give you the most accurate advice based on your personal health history and lifestyle. Remember, staying up to date with vaccines is a key part of staying healthy as an adult!
*Collaborative feature post*
Natural heartburn remedies during pregnancy
Pregnancy is a beautiful journey, but it often comes with a less pleasant companion – heartburn. If you’re looking for natural heartburn remedies during pregnancy, you’re in the right place, as this article is dedicated to helping expectant mothers like you find relief from heartburn using natural methods. From diet changes to simple home remedies, we’ll explore safe and effective ways to ease your discomfort during this special time.
“A many as 8 out of 10 women experience indigestion at some point during their pregnancy.”
Heartburn is a pretty common side effect when you’re pregnant, and loads of women feel these niggly symptoms, which can get quite sore sometimes. Why does it happen? It’s all down to hormone changes when you’re expecting. And, in the later months, as your baby grows, your womb presses on your stomach. This can cause what we call acid reflux or heartburn. This is when stomach acid sneaks up into your food pipe (the oesophagus).
If you’ve got heartburn, you might feel a sort of tight or burning feeling in your throat and chest, usually just behind the breastbone. Sometimes, you might get a bitter or sour taste in your throat or even feel queasy.
It is important to note that indigestion and heartburn are harmless to you and your baby, but it can be painful and leave you feeling uncomfortable.
“… By the third trimester, nearly three quarters of pregnant women can suffer from heartburn.”
www.gaviscon.co.uk.
Natural heartburn remedies during pregnancy
What helps heartburn in pregnancy? There are some easy ways to help calm it down. Sometimes, it’s just about tweaking what you eat or how you sit and sleep. Eating more alkaline foods – stuff like milk and ginger, which are brilliant for acid reflux – can balance out the acid and ease the heartburn. And a little tip: if you sit or sleep a bit more upright, it helps keep the acid down in your stomach and away from your oesophagus. Simple changes like these can make a big difference.
But, when indigestion and heartburn can become too much for you to bear, asking your GP or midwife for some safe medication for heartburn to relieve symptoms may be an option.
What helps with indigestion and heartburn during pregnancy – Antacids and alginates
Antacids can be taken to provide immediate relief from indigestion. They work by neutralising the acid in the stomach (making it less acidic) so it no longer irritates the protective lining (mucosa) of the digestive system.
Some alginates can be combined with antacids to relieve any indigestion caused by heartburn (when acid leaks back up the oesophagus and irritates the protective lining.)
If you’re struggling with heartburn during pregnancy, your GP or midwife might suggest Gaviscon. It’s safe to use, even if you’re breastfeeding. Gaviscon is pretty clever – it creates a sort of protective layer over your stomach contents. This layer stops the acid from moving up to your oesophagus. The best part? It doesn’t even need to get into your bloodstream to work its magic and give you relief.
Gaviscon Original, Gaviscon Double Action, and Gaviscon Advance come in liquid and tablet forms, and they’re all okay to use when you’re pregnant or breastfeeding.
Heartburn and indigestion can be a real bother during pregnancy, so, it’s important to get on top of those symptoms quickly. And if you’re not sure what to do, just have a chat with your GP or midwife.
Just a heads-up, though – some medicines might not be great for your baby on the way. So, always check in with your GP or pharmacist before taking anything while you’re pregnant.
Get online for help
Managing your health needs can be a daunting task. Thankfully, an online pharmacy can be a convenient solution. Purchasing medicine online saves you a trip to the high street and offers the comfort of getting your healthcare needs delivered right to your doorstep. A pharmacy online in the UK typically provides a wide range of products, from over-the-counter medicines to prescription drugs.
Many online chemists offer expert advice and consultations with qualified healthcare professionals. This means you can receive guidance on medication and health concerns without having to schedule an in-person visit, saving precious time in your busy day. Using an online pharmacy can often be more cost-effective, with competitive pricing and the convenience of comparing products from your home.
Alternative safe home remedies for heartburn during pregnancy
Besides the remedies we’ve already mentioned, there are other simple, natural ways to ease heartburn during pregnancy. Here are some other ideas:
How to naturally treat heartburn during pregnancy – relax and unwind
Popular natural heartburn remedies can also include anxiety relief, which could cause heartburn. Giving yourself time to relax and unwind, perhaps through meditation or just some deep breathing exercises, can work wonders for your mental well-being. Eating right is also key. Quick, nutritious meals can boost your energy levels throughout the day. And it’s okay to ask for help – sharing household chores can free up some much-needed ‘you’ time.
Natural ways to prevent pregnancy heartburn – use technology
If you’re doing too much, natural ways to relieve pregnancy heartburn can include using technology, like apps for reminders or managing your to-do list efficiently. Also, remember the power of saying no. It’s okay to decline requests that don’t fit into your schedule or priorities. Involve your family in the daily routine. Assigning age-appropriate chores to children not only eases your load but also teaches them responsibility. With these small adjustments, your daily life can become more manageable, leaving you with precious moments to relax and rejuvenate, in turn, allowing you time to recover and regenerate.
FAQ
How can I stop acid reflux at night while pregnant?
First off, try not to eat big meals right before bed. Keep it light and easy. Also, spicy or fatty foods are not your friends right now, so try to steer clear, especially in the evening.
You can also prop yourself up with a few extra pillows. Sleeping a bit more upright can help keep that pesky acid where it belongs – in your stomach. Also, don’t forget to keep sipping water throughout the day, but maybe not too much right before bed. Staying hydrated is good, but you don’t want to overfill your stomach at night.
If none of this is doing the trick, have a word with your GP or midwife. They might suggest something like Gaviscon as previously mentioned above, which is generally safe during pregnancy.
Remember, every mum-to-be is different, so what works for one person might not work for another. It’s all about finding what suits you best.
What drink is good for heartburn when pregnant?
A good, simple choice is milk. It can help neutralise the acid in your stomach. Just go for a glass of skim or low-fat milk; it’s easier on the stomach compared to the full-fat kind.
Also, ginger tea can be a real winner. It’s gentle and can help settle your stomach. Just steep some fresh ginger in hot water for a few minutes, and you’re good to go. But remember, keep it to a cup or two a day, as too much ginger isn’t ideal when you’re pregnant.
And of course, water is always your best bet. It keeps you hydrated and helps things move along in your digestive system.
Just a little tip: try to avoid drinks that are too hot or too cold – lukewarm is the way to go when you’ve got heartburn.
Is honey good for heartburn during pregnancy?
Honey can be quite helpful. Honey is naturally soothing and has a bit of a coating action, which might ease the burn in your throat. Just a spoonful in warm (not hot) water or tea can make a nice, gentle remedy.
But, as with anything during pregnancy, don’t go overboard. A little bit of honey goes a long way. And of course, if you’re still struggling with heartburn, it’s a good idea to have a chat with your midwife or GP for more advice.
Indian home remedies for acidity during pregnancy?
Amla, or Indian gooseberry is good for acidity. You can have a teaspoon of amla powder with a bit of water or honey. It’s natural and gentle.
Then, there’s buttermilk. Sipping on a glass of buttermilk with a pinch of asafoetida (hing) and a bit of black salt can help balance the acidity in your stomach.
You might also want to try fennel seeds (saunf). Just chew on a few after meals. They’re known for aiding digestion and can help ease acidity.
And of course, coconut water! It’s super hydrating and has a cooling effect on the stomach.
Just remember, while these remedies are natural, it’s always a good idea to check with your doctor or midwife before trying anything new, especially during pregnancy.
How to relieve heartburn during pregnancy with apple cider vinegar?
Some people find apple cider vinegar helpful for heartburn, but the trick is to dilute it because it’s pretty strong stuff. Try mixing a teaspoon of apple cider vinegar in a glass of water and sip it before meals. It might help balance your stomach acid levels.
But here’s the thing – apple cider vinegar isn’t for everyone, especially when you’re pregnant. It’s quite acidic, so if you have a sensitive stomach or if it makes your heartburn worse, you might want to skip it.
It’s always a good idea to have a quick chat with your midwife or GP before trying it out, just to be on the safe side.
What can pregnant women take for heartburn during the third trimester?
During the third trimester, heartburn can be a real nuisance. But don’t worry, there are safe things you can take.
First, have a look at your diet. Try eating smaller, more frequent meals instead of big ones. Avoiding spicy, fatty, or very acidic foods can also help.
For quick relief, over-the-counter antacids like Tums are usually considered safe during pregnancy. They can neutralise the stomach acid pretty quickly. But remember, don’t overdo it and always check the label.
If antacids aren’t doing the trick, your GP or midwife might suggest something like Gaviscon. It forms a barrier on top of your stomach contents to stop acid from coming up.
And, of course, simple home remedies like sipping on milk or eating yoghurt can also provide some relief.
Just a heads-up, it’s always a good idea to run any medication or supplement by your healthcare provider before taking it, especially when you’re in the later stages of pregnancy.
What can help reduce heartburn during pregnancy if you can’t have dairy?
If dairy is off the table and you’re dealing with heartburn during pregnancy, no worries, there are still plenty of other ways to help soothe it.
First up, think about what you eat. Try to avoid spicy, greasy, or super acidic foods. Eating smaller meals more frequently instead of big meals can also help keep heartburn at bay.
Ginger is a great natural remedy. You can have it as ginger tea or even chew on a small piece of fresh ginger.
Almond milk can be a good dairy-free option. It’s soothing and has a neutral pH, which might help balance stomach acid.
Stay a bit more upright after eating, and prop your head up with some extra pillows when you sleep. This can help keep that acid down.
And, of course, as mentioned earlier, water. Drinking plenty of water throughout the day helps digestion and can dilute stomach acid.
Just remember, if heartburn’s really bothering you, it’s a good idea to chat with your midwife or GP. They can help you find the best way to manage it during your pregnancy.
How to get rid of heartburn during pregnancy fast when you’re suffering during the night?
Other questions asked were:
What helps acid reflux while pregnant?
What to take for heartburn when pregnant?
Dealing with heartburn during pregnancy can be a real bother, but when you need pregnancy heartburn relief at night, here’s what you can do to get some quick relief:
Prop Yourself Up: Use some extra pillows to elevate your head and upper body. This helps keep the stomach acid down and might stop it from bothering your throat, thus offering relief for heartburn when pregnant
Sip Some Water: Drinks that help with heartburn during pregnancy must include water! Sometimes, just sipping a little bit of water can help wash down the acid that’s crept up your throat.
Chew Gum: If you’ve got sugar-free gum handy, give it a chew. Chewing gum increases saliva production, which can help neutralise stomach acid and provide relief from heartburn during pregnancy
Antacids: Acid reflux during pregnancy third trimester can be really tough. Over-the-counter antacids, like Tums, can work fast to neutralise acid. Just make sure they’re pregnancy-safe – most are, but it’s always good to double-check.
Eat an Apple: Some women find that eating an apple helps with heartburn. It might be worth a try for indigestion relief during pregnancy!
Breathing and Relaxation: Pregnancy heartburn remedies can include deep breathing and trying to relax can help reduce heartburn symptoms.
If you keep getting heartburn at night, it might be worth looking at what you eat in the evening and avoiding big meals or spicy foods before bed.
And as always, if you’re not sure or if heartburn’s really bothering you, have a chat with your GP or midwife. They can offer more personalised advice.
Can you list the foods that help with heartburn during pregnancy?
Other questions asked were
What helps with acid reflux while pregnant?
What helps heartburn during pregnancy?
When you’re dealing with heartburn during pregnancy, some foods can be real lifesavers. Here’s a list of ones that can help:
Ginger: Home heartburn remedies during pregnancy can include a bit of ginger in your food or sipping ginger tea can calm your stomach.
Bananas: Natural remedies like bananas are soft and soothing, and great for coating your stomach lining.
Oatmeal: A nice, gentle start to your day, oatmeal’s great for absorbing acid.
Yoghurt: It’s cool and creamy, which can help ease the burn.
Green Veggies: Foods to help heartburn during pregnancy should include greens! Think broccoli, asparagus, green beans, and spinach – they’re not acidic.
Lean Meats: Pregnancy indigestion relief can include chicken or turkey (grilled or baked, not fried!) as they are good, gentle protein options.
Melons: Remedies for acid reflux when pregnant can include watermelon, cantaloupe, and honeydew as they are mostly water, so they’re easy on your tummy.
Rice and Whole Grains: These can help absorb acid and keep things calm in your stomach.
Almonds: A small snack of almonds can balance your stomach’s acidity.
Just remember, everyone’s different, so what works for one person might not work for another. And, of course, if heartburn’s a big problem, it’s always a good idea to chat with your midwife or GP.
Overcoming mask discomfort when you can’t sleep with CPAP
Sleep apnea is a common sleep problem that affects a lot of people all over the world, and it can really mess with your health. But the good news is, there’s a treatment called Continuous Positive Airway Pressure, or CPAP for short, that works well to help handle sleep apnea.
That said, as transformative as CPAP therapy can be for those who suffer from sleep apnea, its success hinges on the comfort and compatibility of the CPAP mask. And some people find they can’t sleep with CPAP. The mask is the conduit through which pressurised air flows to maintain an open airway. However, not all masks are made equally. CPAP is not easy and there are common complaints that can become a source of discomfort for many users who can not go to sleep, potentially hindering the effective use of CPAP therapy.
In our guide, we talk about how sometimes CPAP masks can be so uncomfortable that you can’t fall asleep or stay asleep. We’ll look at the usual problems people have, like masks that don’t fit right, annoying air leaks, and skin irritation. Is your CPAP therapy keeping you awake at night? We’ll dig into why these things happen and give you some handy CPAP tips for beginners to make things better.
By figuring out what’s causing the trouble and making the right changes, you can make wearing your CPAP mask a lot more comfortable. This way, you can get a good night’s sleep and feel refreshed in the morning.
What is sleep apnea?
Sleep apnea is a pretty common problem where you stop breathing for short periods when you’re asleep. This happens because you’re airway either partly or totally gets blocked.
The most common kind is called obstructive sleep apnea (OSA). It’s where the muscles in your throat relax too much and cause a blockage. There’s also another kind called central sleep apnea (CSA), which happens when your brain doesn’t send the right signals to the muscles that control your breathing.
Good sleep is essential to good health so if you don’t get sleep apnea treated, it can lead to some serious issues. You might feel really tired all the time because of the difficulty falling asleep, have trouble thinking clearly, or even have more serious issues like heart problems.
Are you at risk of sleep apnea?
To figure out if you have sleep apnea, doctors will often need to do sleep studies. A common way to treat it is with something called Continuous Positive Airway Pressure, or CPAP therapy. This treatment helps ease the symptoms and lowers the chances of health problems that can come with sleep apnea.
Understanding CPAP therapy – How CPAP works
At its core, CPAP therapy involves using a specialised machine that delivers a continuous stream of pressurised air through a mask (like a CPAP mask from CPAP Direct) worn over the nose, mouth, or both.
The main goal of using a CPAP machine is to make sure your airway stays open while you sleep, so you don’t stop breathing like what happens with sleep apnea. By keeping a steady flow of air, CPAP therapy helps you breathe normally during sleep and cuts down the risks that come with untreated sleep apnea. These risks can be things like heart problems or feeling tired during the day.
Getting the basics of how CPAP therapy works is really important. It’s the first step to getting better sleep and feeling good overall.
Benefits of CPAP therapy
CPAP therapy is a really important treatment for people with sleep apnea, and it comes with a bunch of benefits.
What it does is send a steady flow of air into your airway when you’re sleeping. This stops the airway from getting blocked, which is what causes sleep apnea. Because of this, people who use CPAP breathe better when they’re asleep, get more oxygen, and don’t have as many sleep interruptions.
Using a CPAP machine can help you sleep better at night and feel more awake and sharp during the day. Sticking with CPAP therapy over time can help with sleep apnea symptoms and make a big difference in your overall health and happiness. It’s a treatment that can change and improve your life.
Best of all, most of the cost of CPAP treatment is covered on Medicare. So it is very affordable.
Can’t sleep with CPAP? 7 tips for sleep and avoiding common problems
Starting to use a CPAP machine to get better sleep can be a bit tough, and sometimes people find the CPAP masks uncomfortable.
This article lays out the 7 most troubleshooting issues with CPAP tolerance and provides solutions to common issues like fit problems and air leaks. By dealing with these issues, you can be more comfortable and make the most out of this helpful sleep apnea treatment.
1. CPAP machines and masks – which ones are right for you?
When shopping for CPAP, it’s really important to have a CPAP mask that fits just right. The wrong size or style of CPAP mask, i.e. if it’s too tight or too loose, can rub your skin the wrong way, cause sore spots, or let air leak out.
To prevent this, you need to pick a mask that’s the right size and shape for your face. Most masks have straps you can adjust. You want them to be tight enough to stay in place, but not so tight that they’re uncomfortable. Sometimes, you might have to try a few different types of masks to find the one that fits you the best.
Tip – Make small adjustments to your CPAP mask nightly
When you wear a CPAP mask, sometimes it doesn’t fit perfectly right off the bat. It might be a bit too tight, too loose, or just not sitting right on your face. Making small adjustments means you fiddle with the straps or the position of the mask each night, just a little, to get a better fit.
The idea is to find that ‘just right’ spot where the mask is snug but not too tight, and it doesn’t leak air or bug you while you’re trying to sleep. It’s like tuning a guitar – a little tweak here and there until it sounds perfect. In the case of your mask, you’re adjusting it bit by bit for the best comfort.
2. Air leaks
Making sure your mask fits well and doesn’t leak during your therapy is key. If air leaks out of the mask, the treatment won’t work as well, and it might bother your eyes and skin.
To stop this from happening, regularly check your mask for any cracks or damage and adjust the straps so it fits securely.
If you still have leaks, think about trying a different kind of mask, like nasal pillows or full-face masks. These might work better for your specific needs and stop the leaks.
3. Dry mouth or nose
The steady stream of air from the CPAP machine might make your mouth and nose feel dry, which can be uncomfortable. To fix this, you can use a heated humidifier with your CPAP machine. This adds moisture to the air and helps prevent dryness.
Some masks have special features that keep the air moist, which is great for avoiding dryness. Also, drinking plenty of water during the day can help keep you from feeling too dry.
4. Claustrophobia
Wearing a CPAP mask might feel weird at first, and it can even make you feel a bit trapped or uncomfortable, which might be why it’s hard to fall asleep with it on or fall asleep right away. You will have trouble getting used to wearing the CPAP mask at the beginning, but there are ways to make it easier to get used to.
One thing you can try is to wear the mask for a little while during the day, and then ease yourself into CPAP slowly, wearing it for longer periods. Practising breathing with the mask on can also help you feel more at ease with it.
If you still feel closed in after trying the mask for a few days, you might want to try a mask with a simpler design or one with nasal pillows. These kinds of masks can feel more comfortable and less in the way.
Tip – Use your CPAP mask every time you sleep
You should use your CPAP mask every single time you go to sleep, whether it’s at night or even during a short nap during the day. The idea is to make sure you’re always getting help from your CPAP machine to keep your breathing steady while you sleep. It’s like wearing your seatbelt every time you’re in a car – it’s just a good habit to keep you safe and healthy. So, whether it’s a full night’s sleep or just a quick snooze on the couch, pop on that CPAP mask to make sure your sleep is as good as it can be!
5. Skin irritation
Wearing a CPAP mask for a long time can sometimes cause skin problems like irritation, redness, or even sore spots. This happens because the mask needs to fit closely to work right, and that can rub against your skin.
To help with this, it’s a good idea to clean the mask regularly using a gentle, skin-friendly soap. This keeps any buildup off the mask that could irritate your skin. Also, using something like mask liners or barrier creams can make a big difference. They act like a cushion between your skin and the mask, cutting down on rubbing and protecting your skin.
Taking these steps can make wearing your CPAP mask a lot more comfortable and lower the chances of having skin issues.
6. Noisy mask
Some CPAP masks can be noisy, making sounds like whistling or air leaks, and this noise can bother both the person wearing the mask and their sleeping partner. It’s important to figure out where the noise is coming from so everyone can sleep better.
Start by checking the mask parts to see if anything is loose or broken. Make sure everything is connected tightly. If there’s still noise after that, talking to a healthcare provider can be helpful. They might suggest different masks that are quieter and more comfortable.
Dealing with a noisy mask right away is key. It not only makes things more comfortable for the person wearing it but also helps create a better sleep environment for everyone.
7. Congestion or nasal issues
People who already have stuffy noses or other nose problems might find it tricky to get used to some types of CPAP masks. This can make it hard to breathe comfortably and affect how well the therapy works.
If this is a problem, trying a nasal mask or nasal pillows might work better if you have a stuffy nose. Also, using a saline nasal spray before bed can help clear uhup the congestion, making sure the air flows smoothly and making the CPAP experience more comfortable.
Choosing the right kind of mask to suit nose issues can help you breathe easier and deal with stuffy nose problems while using your CPAP machine.
Tip – Use AutoRamp on your CPAP machine
AutoRamp is a cool feature on some CPAP machines. When you first put on your mask and turn on the machine at night, the AutoRamp setting starts with a lower air pressure. As you fall asleep, the machine automatically increases the pressure to the level your doctor set for you.
This is great because it makes it more comfortable to fall asleep. See if there’s a ramp setting on your CPAP machine where you don’t have to start with the full pressure right away, which can feel a bit overwhelming. AutoRamp starts gently and then gradually gets stronger as you snooze. It’s all about making it easier to drift off to sleep while using your CPAP.
How to know if CPAP is not right for you
Treating sleep apnea when CPAP masks don’t help is doable with CPAP alternatives, but it’s always good to chat with your doctor for advice on how to sleep with sleep apnea without CPAP. Is your CPAP therapy keeping you awake at night? Here are some other options you can try:
BiPAP therapy
It’s like CPAP but with two pressure levels – a stronger one when you breathe in and a gentler one when you breathe out. Some folks find this more comfy.
Oral appliances
If you can’t get to sleep with your CPAP, you can try oral appliances. Think of these as special mouthpieces that adjust your jaw and tongue position. They work well for a lot of people, especially if your sleep apnea isn’t super severe.
Lifestyle changes
Sometimes losing some weight, quitting smoking, or cutting back on booze can make a big difference.
Positional therapy
If your sleep apnea gets worse in certain sleeping positions, there are ways to train yourself not to sleep on your back.
Surgery
For some, surgery might be the answer, especially if something in your throat or nose structure is causing the problem.
Supplemental oxygen
Adding extra oxygen at night can help, sometimes along with CPAP or BiPAP.
Adaptive Servo-Ventilation (ASV)
New CPAP innovations can help like this fancy new type of air machine mainly for a specific kind of sleep apnea.
Nerve stimulation
There are several new treatment options available now, one of which is nerve stimulation where doctors zap a nerve to help keep your airway open.
Lifestyle adjustments
Not drinking before bed, keeping a regular sleep schedule, and sleeping on your side can also help with sleep apnea. You can also try to prepare your sleep space and create good sleep habits like preparing your sleep area to keep it ambient for sleep.
Alternative therapies
Yoga or acupuncture might give some relief, but they’re more like extras, not the main solution.
Conclusion
If you have sleep apnea, getting comfortable with your CPAP mask is important for the treatment to work well. But sometimes, you might run into problems like the mask not fitting right, air leaks, your nose and mouth getting dry, or skin irritation.
The good news is that these issues can be fixed to make wearing the mask more comfortable and help you stick with the treatment. Don’t let your sleep suffer. It’s all about being patient and trying different things to see what suits you best. And if you keep having trouble, it’s a good idea to talk to a healthcare professional to make sure you’re getting the most out of your treatment.
With the right mask, accurate health information from your doctor, and a few adjustments, you can benefit from this therapy and enjoy a better night’s sleep.
FAQ
I can’t tolerate CPAP. What can I do?
I get it, CPAP machines aren’t for everyone. But don’t worry, there are other ways to tackle sleep apnea. Check out the tips above for when you’re struggling with sleep and check out some troubleshooting issues with CPAP tolerance too.
Why do I sleep with my mouth open with a CPAP?
If you sleep with your mouth open while using a CPAP machine, it could be because of the following:
Habit: Sometimes, it’s just a habit to breathe through your mouth, especially if you’ve done it for a long time.
Nose issues: If your nose is stuffy or blocked, you might open your mouth to breathe easier while asleep.
CPAP pressure: The air pressure from the CPAP might feel too strong, making you open your mouth.
Mask fit: If your CPAP mask doesn’t fit just right, you might open your mouth without realising it.
To help with this, you could try a chin strap to keep your mouth closed, or a full-face mask that covers both your nose and mouth. Also, a humidifier can make breathing more comfortable.
To enhance your sleep environment alongside CPAP therapy, consider incorporating the Crane 2.0 4-in-1 Humidifier into your nightly routine. This innovative device offers more than simple humidification; it emits a soothing ultrasonic cool mist to alleviate congestion and coughs, features a built-in sound machine to drown out background noise for a calmer sleeping atmosphere, and includes an aroma diffuser for the safe use of essential oils, creating a relaxing environment conducive to sleep.
Additionally, its optional nightlight provides a gentle, comforting glow, easing the transition into sleep. By addressing common sleep disturbances, the Crane 2.0 4-in-1 Humidifier complements CPAP therapy, making it an essential tool for achieving a restful night’s sleep. For more details and purchase options, visit the Cheeky Rascals website, and discover how this device can improve your sleep quality and comfort.
How do you wear a full face mask?
Full face masks tend to be a learning curve. Here’s how to do it:
Position the mask: Hold the mask against your face, covering both your nose and mouth. The cushion should fit comfortably.
Adjust the straps: Pull the headgear over your head. There are straps you can adjust to make sure it’s snug but not too tight. You want it just right so there’s no air leaking but it doesn’t press into your skin.
Check the fit: Once the mask is on, turn on your CPAP machine. If you feel air leaking out around the edges, you might need to adjust the straps a bit more.
Get comfortable: It might feel a bit odd at first, but you’ll get used to it. Lying down with the mask on before you turn on the machine can help you get comfortable.
Remember, the key to how to stay asleep for longer is that the mask should feel secure on your face, but not too tight. It’s like finding the perfect pillow – it might take a little adjusting, but once you get it right, you’re all set for a good night’s sleep!
Can CPAP cause insomnia? I can’t get to sleep
Using a CPAP machine can sometimes lead to trouble sleeping, especially when you’re just starting with it. It’s pretty common actually. The feeling of the mask on your face, the sound of the machine, or the sensation of the air pressure – all these things can feel a bit strange and might make it harder for you to fall asleep at first. It’s like getting used to a new pillow or blanket, but a bit more challenging.
But don’t worry too much – many people adjust to it after a while. It’s like getting used to any new thing in your routine. If you continue having trouble sleeping though, it’s a good idea to chat with your doctor or a sleep specialist. They might have some tips to make it more comfortable for you or adjust the settings on your machine. Hang in there, it often gets easier with a bit of time!
What does a CPAP machine do when you stop breathing?
A CPAP machine is like a little assistant that watches over your breathing while you sleep. When you stop breathing, which can happen in a condition called sleep apnea, the CPAP machine jumps into action. It gently pushes air into your airways to keep them open, making sure that your breathing doesn’t stop. This way, you can keep breathing smoothly throughout the night.
Are there any body changes after CPAP?
Yes, using a CPAP machine can lead to some changes in your body, but mostly good ones! When you start using CPAP, you’re likely to notice:
Better sleep quality: You’ll probably sleep better because the CPAP machine helps keep your breathing steady while you sleep. This means you won’t be waking up as much during the night.
More energy during the day: Because you’re sleeping better, you’ll likely feel more energetic and less sleepy during the day.
Less snoring: CPAP can really cut down on snoring, which is a bonus for anyone who shares your bed or your home!
Improved health: Over time, using CPAP can help lower your blood pressure and reduce the risks of heart problems.
Possible side effects: Some people experience dry mouth, nasal congestion, or skin irritation from the mask. But these can often be managed with a little adjustment to the machine or the mask.
Overall, the changes are generally positive and can really improve your quality of life.
Does sleeping with a CPAP cause gas?
Yes, sleeping with a CPAP machine can sometimes cause gas. This happens because a bit of the air from the machine can get into your stomach while you’re sleeping. It’s like swallowing a little extra air, and this can make you feel a bit bloated or give you some extra burps or even a bit of gas.
It’s not too serious, but it can be a bit uncomfortable. If it bothers you a lot, it’s a good idea to talk to your doctor about it. They might have some tips to adjust the machine or change how you use it to help reduce this side effect.
What happens if you don’t sleep with your CPAP machine?
If you skip sleeping with your CPAP machine, especially if you have sleep apnea, a few things might happen:
Back to snoring: You might start snoring again. The CPAP machine helps keep your airways open, so without it, the snoring could come back.
Poor sleep quality: You might not sleep as well. The CPAP machine helps you breathe smoothly, so without it, you might wake up more often during the night.
Feeling tired during the day: Because your sleep might not be as good, you might feel more tired or sleepy during the day.
Health risks: Over time, not using your CPAP can increase your risk of health problems related to sleep apnea, like high blood pressure or heart issues.
So, it’s really important to use your CPAP machine as your doctor advised, to keep all these things in check. It helps you get better sleep and keeps you healthier!
Do you need less sleep with CPAP?
Not exactly. Using a CPAP machine doesn’t mean you need less sleep, but it can make the sleep you get more effective. Here’s the thing: if you have sleep apnea, you might not be getting good, quality sleep. You might wake up a lot during the night, even if you don’t realise it, because your breathing stops and starts.
When you start using a CPAP, it helps keep your breathing steady all night. So, you’re less likely to wake up, and the sleep you get is deeper and more restful. This means you might feel more refreshed and alert during the day, even if you sleep the same number of hours as before. It’s like the difference between having a bunch of short, interrupted naps and one good, long sleep.
Can CPAP make sleep worse?
Yes, sometimes a CPAP machine can make your sleep feel worse, especially when you first start using it. Here’s why:
Getting used to it: The mask and the sound of the machine can feel strange at first. It’s like trying to sleep with a new pillow that you’re not used to.
Air pressure adjustments: The air pressure might not feel comfortable right away. It can take some time to get the settings just right for you.
Mask fit: If the mask doesn’t fit well, it can be annoying. It might leak air, or you might feel like it’s too tight or too loose.
Side effects: Some people get side effects like a dry mouth, a stuffy nose, or irritation where the mask touches their face.
But don’t worry too much. Many people get used to their CPAP machine after a while and their sleep improves a lot. It’s a bit like breaking in a new pair of shoes – uncomfortable at first, but better over time. If you’re having trouble, it’s a good idea to talk to your doctor. They can help adjust the machine or give you tips to make it more comfortable.
Are there any long-term side effects of CPAP machine?
Using a CPAP machine for a long time can have some side effects, but keep in mind that many people use it for years without major issues. Here are a few things that can happen:
Skin irritation: Where the mask touches your face, you might get some irritation or pressure marks. This usually happens if the mask isn’t fitting quite right.
Nose and throat issues: Some folks experience dryness in their nose or throat or even nosebleeds. This is because of the air blowing in all night. Using a humidifier with the CPAP machine can help with this.
Ear problems: Rarely, the pressure from the CPAP machine can cause issues like earaches or sinus problems, especially if the pressure settings aren’t quite right for you.
Claustrophobia: For some, wearing a mask can feel a bit claustrophobic, but different types of masks can help with this feeling.
Remember, while these side effects can happen, the benefits of using a CPAP machine – like better sleep and reduced risk of serious health problems – often outweigh these issues. If you’re having any troubles with your CPAP machine, it’s always a good idea to chat with your doctor. They can help adjust things to make it more comfortable for you.
Why can’t I seem to stay asleep when using CPAP?
Other questions asked were:
Why can’t I fall back asleep with my CPAP machine?
How do I get a good night sleep with my CPAP machine?
Why can’t I sleep with my CPAP machine?
Is sleeping with a CPAP uncomfortable?
Why can’t I stay asleep with my CPAP mask?
You may have sleep apnea but what if you can’t sleep with a CPAP machine? Trouble staying asleep with your CPAP machine can be frustrating, but it’s pretty common, especially when you’re just getting used to it. Check out the tips above for how to make your CPAP mask comfortable and maintain good sleep hygiene.
It’s a good idea to talk to your doctor or a sleep specialist about these issues. They can help you figure out what’s going on and how to make CPAP work better for you. And remember, it often takes a bit of time to get used to CPAP, so don’t get discouraged!
*Collaborative feature post*
Going to the dentist while pregnant: tips for expecting mums
Amidst the whirlwind of prenatal visits and baby showers, dental health often gets sidelined. But, can you go to the dentist while pregnant?
Yes!
Going to the dentist while pregnant is crucial, not just for the mother but also for the baby as well.
Why is going to the dentist while pregnant important?
During pregnancy, hormonal changes can lead to an increased risk of gum disease, also known as periodontal disease. The gums may become more sensitive, leading to bleeding, swelling, or tenderness.
Additionally, the surge in hormones may cause benign oral tumours or pregnancy granulomas, which, though generally harmless, can be quite uncomfortable. Untreated severe gum disease can increase the risk of premature birth or low birth weight. This correlation showcases the importance of timely dental checkups and procedures during pregnancy.
When to visit the dentist during pregnancy?
It’s important to maintain good oral hygiene and continue dental check-ups throughout your pregnancy.
When should you get dental work while pregnant – safe dental procedures during pregnancy
“Preventive, diagnostic and restorative dental treatment is safe throughout pregnancy.”
The American Dental Association
Contrary to some misconceptions, regular dental cleanings, cavity fillings, and other essential dental treatment when pregnant are perfectly safe during pregnancy. However, elective treatments like teeth whitening or cosmetic procedures are better postponed until after delivery.
Radiographs
X-rays should generally be avoided, especially in the first trimester. That being said, with today’s technology and proper shielding, the radiation exposure from dental X-rays is minimal, making it safe if genuinely needed.
Necessary dental work, like dental fillings during pregnancy or extractions, can be performed under local anaesthesia. Studies indicate that it’s safe for both mother and foetus. But, as always, consult with both your dentist and doctor first.
The best time for a dentist visit during pregnancy
The second trimester is usually the most comfortable time for dental procedures. Morning sickness is generally less frequent, and the belly isn’t large enough to cause discomfort when lying down. Nevertheless, regular checkups can and should be continued throughout the pregnancy. Lying on your back at the dentist while pregnant is usually considered safe and dentists are familiar with the modifications needed to ensure the comfort and safety of pregnant patients. The dentist can elevate your upper body slightly to help prevent compression of the vena cava. They might tilt the chair to the left to help relieve any pressure.
If a procedure is lengthy, the dentist might give you a chance to move or adjust your position periodically. Let your dentist know if you feel light-headed, nauseous, or have any other concerning symptoms while lying on your back. Remember that lying on your back for long periods during pregnancy can double the risk of preterm birth or stillbirth.
It’s important to communicate with both your dentist and your prenatal care provider before any dental procedures. They can work together to determine the safest approach for dental care during your pregnancy, including the best positions for comfort and safety, and appropriate timing for necessary dental treatments.
Regular dental care during pregnancy is important, and most routine care is safe. Urgent dental issues should be addressed regardless of the pregnancy stage to reduce the risk of infection and other complications that could affect your or your baby’s health.
Dental care while pregnant – oral hygiene tips for expecting mothers
Stick to the basics. Nothing should drastically change.
Brush twice a day using fluoride toothpaste and floss daily to remove plaque.
If you’re more susceptible to pregnancy gingivitis, consider using an antiseptic mouthwash.
Pregnancy can often lead to sugar cravings. Opt for healthier snacks, and if you indulge, ensure to brush your teeth afterwards.
Consuming a balanced diet with plenty of vitamin C and B12 can help prevent oral problems.
Managing toothache while pregnant
Life doesn’t stop happening just because you’re pregnant. Toothaches, cavities, swollen gums and accidents can and do occur.
Toothaches during pregnancy are increasingly common and can be especially challenging during pregnancy. The discomfort might range from a mild, dull ache to sharp, excruciating pain, often causing additional stress. Understanding the causes and knowing how to manage them safely during pregnancy is vital.
Causes of toothache during pregnancy
Several factors can contribute to toothaches during pregnancy:
Hormonal changes
Pregnancy-induced hormonal shifts can affect oral health, making teeth and gums more susceptible to bacteria and plaque, leading to cavities and toothaches.
Increased blood flow
The enhanced blood flow to the gums, due to increased hormones, can make them swollen, sensitive, and more prone to bleeding, sometimes causing discomfort.
Sinus pressure
The growth in hormone levels can lead to an increase in mucus production, potentially causing sinus congestion or infections. This increased pressure can sometimes be felt as a toothache, especially in the upper back teeth.
Safe remedies for toothache during pregnancy
If you experience a toothache during pregnancy, address it promptly while ensuring the safety of your baby:
Consult your dentist
This should always be your first step. Describe your symptoms clearly so your dentist can provide immediate relief and suggest further steps.
Effective communication with your dentist in your native language is also critical. There are dental offices that have staff that are fluent in many common languages such as French, Spanish, Tagalog and Chinese.
Warm salt rinse
Dissolve half a teaspoon of salt in a cup of warm water and use it as a mouthwash. This can help in reducing gum swelling and inflammation.
Cold compress
Applying a cold pack to the outside of the cheek for 15-20 minutes can help reduce pain and inflammation.
Safe over-the-counter pain relievers
Some OTC pain relievers can be safe during specific trimesters of pregnancy but ALWAYS consult with both your dentist and obstetrician before taking any medication.
Good oral hygiene
Regular brushing and flossing can prevent further complications that could aggravate the toothache.
Avoid certain foods
Steer clear from very hot, cold, sweet, or acidic foods that might trigger or intensify the pain.
Dental care during pregnancy is indispensable. As the body undergoes numerous changes, oral health should not be neglected. From ensuring safe procedures to practising good oral hygiene, you can protect your well-being and that of your babies.
So, whether you’re expecting or planning to start a family soon, remember to include dental check-ups in your prenatal care routine. Your smile, and your baby’s future, will thank you for it.
FAQ
Is dental anaesthesia safe during pregnancy?
In the UK and in other parts of the world, dental anaesthesia is considered safe for pregnant women when administered properly. The National Health Service (NHS) and various UK dental health organisations acknowledge that local anesthetics are necessary for some dental procedures and there is no evidence to suggest they are harmful during pregnancy.
Can I get dental cleaning while pregnant?
Yes. Pregnancy dental cleaning is not only considered safe during pregnancy, but it is also highly recommended. Pregnancy can lead to increased risks of certain dental problems, such as gingivitis (pregnancy gingivitis) due to hormonal changes, which makes regular dental care during this time even more important.
What safety precautions do I need to think about when going to the dentist while pregnant second trimester?
Going to dentist while pregnant during the second trimester is the safest time to have elective dental work done. During the first trimester, the baby’s major organ systems are developing, and in the third trimester, lying on your back for an extended period could be uncomfortable and may affect blood flow. However, you should still exercise caution to ensure the wellbeing of both you and your baby
Inform your dentist about your pregnancy so they can tailor your treatment plan appropriately and avoid any medications or procedures that might not be recommended during pregnancy. Any medications like local anaesthetics and antibiotics should be reviewed by both your dentist and doctor to ensure they are safe for use during pregnancy. If possible, schedule shorter appointments to avoid discomfort and reduce stress.
Although modern dental X-rays are extremely low risk because of their focused beam and low radiation levels, your dentist will likely avoid them unless absolutely necessary. If you do need an X-ray, they will use a lead apron to shield your abdomen and thyroid as a precaution.
If there are elective procedures that can wait, your dentist may recommend postponing them until after your baby is born.
If you are experiencing morning sickness, work with your dental office to schedule appointments at a time of day when you feel best. Additionally, the smell of dental materials might trigger nausea, so ask the dentist to use odour-free materials if possible.
Stress can affect your pregnancy, so practices that reduce stress during dental procedures, such as listening to music or practicing relaxation techniques, can be helpful.
What safety precautions do I need to think about when going to the dentist while pregnant third trimester?
When you visit the dentist during your third trimester it’s important to consider a few additional safety precautions due to the advanced stage of pregnancy. Always remind your dentist that you are in your third trimester. Adjustments in care may be necessary, and certain treatments may be postponed until after delivery.
As lying flat on your back can be uncomfortable and could potentially cause supine hypotensive syndrome (a condition where the weight of the uterus compresses the vena cava, reducing blood flow to the heart), your dentist should adjust the dental chair to a semi-reclining position. They may also ask you to turn slightly to one side.
Try to keep dental appointments short to avoid any discomfort. It may also be advisable to avoid lengthy procedures unless they are urgent. Elective dental procedures often can be postponed until after delivery to avoid any potential stress on you and the baby. Review any proposed medications or procedures with both your dentist and doctor. This is especially important for any antibiotics or pain relievers that may be prescribed.
If X-rays are absolutely necessary, your dentist will use a lead apron and thyroid collar to minimise exposure to the baby. However, non-urgent X-rays are typically postponed until after the pregnancy. If you have a dental emergency, such as an infection or severe pain, it is important to get it treated promptly to avoid any risk to your health or the baby’s.
If the dentist’s mask or the smell of materials bothers you, request a well-ventilated space or a break during the procedure if needed. Make sure you are well-hydrated and have eaten a light meal before your dental visit to maintain your blood sugar levels and to help prevent feeling lightheaded. You may need extra pillows or supports to help maintain a comfortable position during the procedure.
If you experience any discomfort, such as dizziness, shortness of breath, or contractions during the dental visit, let your dentist know immediately.
How many weeks pregnant can you go to the dentist?
Other questions sked were:
When to see the dentist while pregnant?
When should i go to the dentist while pregnant?
When can you go to the dentist while pregnant?
Should you go to the dentist when pregnant?
Can I go to the dentist when I’m pregnant?
Can I visit the dentist when pregnant?
Can I go to the dentist during pregnancy?
Why is it important to go to the dentist while pregnant?
Why do you have to go to the dentist when pregnant?
Do you have to go to the dentist when pregnant?
Is it okay to go to the dentist while pregnant?
You can go to the dentist at any stage of your pregnancy. It’s important to maintain your oral health throughout pregnancy, as hormonal changes can increase the risk of certain dental issues, such as gum disease (pregnancy gingivitis) and tooth decay.
Are there any dangers of dental work while pregnant?
Other questions asked were:
What dental procedures should be avoided during pregnancy?
Is it safe to have dental X-rays while I’m expecting?
Is it ok to go to the dentist while pregnant?
Is going to the dentist while pregnant safe?
Is it ok to go to the dentist while pregnant
should i go to the dentist while pregnant?
can you go to the dentist when pregnant
Is it safe to visit dentist while pregnant?
Why can’t you go to the dentist while pregnant?
Should you go to the dentist while pregnant?
Is it okay to go to the dentist when pregnant?
Can you go to the orthodontist while pregnant?
Can you still go to the dentist while pregnant?
Can I still go to the dentist while pregnant?
Is it safe to go to the dentist during pregnancy?
Is it safe to visit the dentist while I’m pregnant?
Is it bad to go to the dentist while pregnant?
Can you go to dentist when pregnant?
Why should you go to the dentist when pregnant?
Are you allowed to go to the dentist while pregnant?
Routine dental work during pregnancy is generally considered safe. However, there are some considerations and potential risks associated with dental work at this time.
Certain medications used during dental procedures should be used cautiously. Your dentist should select medicines (like local anesthetics, antibiotics, and painkillers) that are safe for pregnant women. They usually avoid medications that are known to be teratogenic or harmful to the baby.
Dental X-rays should be avoided during pregnancy if possible, especially during the first trimester when the baby is in the crucial stages of development. If X-rays are absolutely necessary (for example, in the case of a dental emergency), your dentist will use a lead apron and thyroid collar to shield you.
Dental procedures can be stressful, which isn’t ideal during pregnancy. Stress can potentially have an impact on your blood pressure and the baby. Also, lying on your back for extended periods, especially in the third trimester, can be uncomfortable and may affect blood circulation.
Non-urgent or elective dental treatments are often postponed until after pregnancy. This is to avoid any unnecessary risks to the baby and to prevent putting you through prolonged procedures that might be uncomfortable or stressful.
While local anaesthetics are generally safe, they cross the placental barrier to some extent. The amount and type of anaesthesia should be carefully considered by your healthcare provider.
Postponing dental work can lead to the risk of infections such as periodontal disease, which has been associated with preterm birth and low birth weight. Therefore, untreated dental infections pose a greater risk than most dental treatments.
For women with high-risk pregnancies, such as those with preeclampsia, preterm labour, or other medical conditions, even routine dental work may require special consideration and coordination with yout doctor.
When should I tell my dentist I’m pregnant?
Other questions asked were:
Do I need to tell the dentist I’m pregnant?
You should tell the dentist as soon as possible, or if you plan to get pregnant, so that your dentist can tailor your dental care to your pregnancy, postponing non-essential treatments and taking special precautions with necessary dental work.
*Collaborative feature post*
How to talk to your daughter about her period
For most girls, the subject of their first period is quite taboo and the thought of discussing menstruation can leave you both feeling a little uncomfortable when the situation arises. But, kids need to learn about periods eventually and the best place to start is at home. Helping your child understand how the body changes during puberty (like growing pubic hair and starting her period) will encourage your daughter to make good decisions about her health going forward.
So below is a parent’s ultimate guide to periods and how to talk to your daughter about her period when the time comes.
How to support your daughter with her first period
Supporting your daughter during her first period is crucial to help her feel confident, understood, and cared for. We will go through some ways you can help support your daughter, from the initial talk to preparing a period kit when her period starts – and everything in between!
Should boys know about periods too?
Boys are sometimes left out of the talk about periods, which means they end up viewing periods as a dirty topic when they’re older. Get any men in your life involved in the conversation about periods as soon as possible, even explaining period embarrassing moments their sister/mum/auntie/wife may go through and what period products to buy if they are ever asked to do so.
The more you discuss girls’ puberty with your sons, the better brothers, husbands and fathers they will become when their close female friends and family finally get their periods.
How early should I talk to my kids about periods?
The right age to talk to your children about periods will vary depending on their maturity level, exposure to information, and personal development.
Follow their lead, as some children will ask questions at an early age. If your child is curious about bodily functions, reproduction, or menstruation, it can be a natural opportunity to discuss why girls have periods.
Many girls will get their period from the age of nine to fifteen, although some may begin earlier or later. Considering the wide age range, it may be a good idea to introduce the concept of periods around age eight to nine years old, or even earlier if you feel they’re ready.
Keep the conversation simple. You don’t need to delve into the scientific intricacies of the menstrual cycle. A simple explanation could be:
“As girls grow into women, their bodies change and they get a period every month, which is a sign they can have babies when they grow up. We wear period products, a bit like nappies, to mop up the bit of red blood that comes out every five days a month.”
Normalise the topic because periods are a natural and very normal part of life. Girls shouldn’t feel ashamed or frightened when they experience their period for the first time and boys should be taught to feel empathetic and understand that for girls, periods can be a difficult time of the month too.
So, what is a period?
A period starts when there are hormonal changes in the body. The ovaries release oestrogen and progesterone and then these same hormones cause the lining of the uterus to build up, to prepare for an egg to fertilise with sperm and start developing into a baby.
However, if there is no fertilised egg, the lining is not needed so it breaks down and bleeds out. The same process happens every month, hence why most girls and women get their period around once a month. Note, however, that for the first few years, a girl’s period may not come regularly, which is normal. Her periods will become regular two to three years after her first period.
When do girls get their period?
Most girls will get their first period around the age of 11 – 15 years. But, every girl has their own body clock and they will start when their body is naturally ready. There will be some clues when your daughter is ready to start her period, which is typically around two years after her breasts develop and she experiences vaginal discharge fluid, which she may see or feel on her underwear. Make sure you discuss vaginal discharge with your daughter as well, so she doesn’t feel that something is wrong with her.
How often do periods happen?
When girls first begin menstruating, their cycles can be irregular. While the average menstrual cycle is 28 days, it can range anywhere from 21 to 45 days in young teens. Over time, periods tend to settle into a more regular cycle.
It’s common for girls in their first few years of menstruating to experience irregular periods. They might skip months or even go several months without a period. This irregularity is primarily due to the body’s adjustment phase as it gets used to the new hormonal rhythms.
How long do periods last?
The length of a period can also vary. Typically, menstrual flow lasts about three to seven days, but it can be shorter or longer, especially in the beginning.
Can your child get pregnant once her period starts?
Yes, and she can even get pregnant right before her first period. A girl’s hormones may already be active, and these hormones may cause an egg to be released from the ovary (ovulation). So, if she has sex, she can get pregnant.
How to talk to your daughter about her period
It may seem like only yesterday when you were holding your baby in your arms and now you are helping your child deal with puberty and periods. But, it’s important to learn how to talk to your daughter about puberty and menstruation so you can help make the situation less awkward for her too. Here are some tips on how to start the period talk:
Remind your child that other people have periods too
For her, it may feel like she’s the only one in the world getting her period, so it’s important to remind her that every woman gets their period and it should be treated like a rite of passage. She is transitioning from a girl to a woman and that is a very normal part of her life.
Try to prepare your daughter for what’s to come with her period as early as you can in advance. This includes period products, physical signs and emotional signs. Here are some tips on how to prepare your daughter for her period.
Talk about possible period signs
Look out for signs your daughter is about to start her period and explain to her that these are normal. Some girls experience cramps, headaches, or other symptoms even before their period starts (premenstrual syndrome). Offer remedies like heating pads, pain relievers (always according to age-appropriate dosages), and techniques for relaxation.
What is Premenstrual Syndrome (PMS)?
PMS is when a girl exhibits emotional and physical mood swings before or during her period. These symptoms can include bloating, acne, moodiness and anxiety. They diminish after the first few days of a period.
Hormonal shifts can lead to mood swings. Reassure her that it’s okay to have fluctuating emotions, and encourage open communication about how she feels.
Consider CBD for cramps
Daye, a gynaecological health startup that aims to raise the standards in vaginal and reproductive healthcare, stocks a rich CBD balm* which provides restorative cooling to cramping bellies. You can also use it on sore muscles.
What’s more, you can invite your daughter’s friends and get free tampons and other goodies with every referral. Anyone who gets a tampon subscription at Daye can use their specific referral code to get £5 off their next order.
When should I call the doctor about my child’s period?
If your daughter hasn’t started her period by 15, then it’s usually a good idea to consult a doctor. Similarly, if she hasn’t established a cycle regularity after two to three years, or if her period stops for more than 90 days, then a doctor’s guidance can be beneficial.
Irregularity is normal at first, but other symptoms like very painful periods, extremely heavy bleeding or other concerns related to periods should be discussed with your daughter’s doctor to rule out any underlying health concerns.
How Daye’s Period Pain Clinic can help your daughter
Daye wants to change that with their virtual Period Pain Clinic* (PPC), which aims to help young women and those assigned female at birth (AFAB) live less of their lives in pain.
55% of people find painkillers ineffective when treating period pain. So with personalised, doctor-approved plans that maximise pain relief and minimise side effects, you can learn more about what’s causing your child’s pain, and fast-track their way to diagnosis with the PPC.
Given that nine out of ten women experience period pain and that its severity can rival a heart attack, there’s a clear need for such a service. Yet, a majority of women don’t voice their discomfort, with over half noting that period pain has affected their work and study capacity. And for far too long, women’s health mysteries like endometriosis went unsolved, causing lifetime suffering. If you want the scoop on the gender pain gap, you can check the link here.*
The PPC is here to change the game, guiding women and AFAB on period health and paving the way to specialist referrals. Daye’s innovative service collaborates with NHS GPs, gynaecologists, and other specialists to facilitate an in-depth assessment of an individual’s symptoms. This ensures a rapid diagnosis of conditions like endometriosis, PCOS, adenomyosis, and fibroids, which are typically associated with chronic pelvic pain. Additionally, the clinic addresses symptoms like infertility, obesity, hair loss, and severe acne, which are often overlooked.
Patients are given a tailored pain management plan, merging both holistic and pharmaceutical approaches. The clinic also suggests scientifically-backed symptom management tools, including CBD tampons, TENS machines, and hormonal contraception. Daye even partners with businesses, such as Myoovi, to offer discounts on the suggested products.
Daye’s PPC has three service tiers ranging from £24.99 to £199.99, offering varying degrees of insights and consultations.
Founder Valentina Milanova emphasised the clinic’s commitment to ensuring no one silently bears the pain or remains unaware of their period pain’s cause or management. The clinic seeks to foster an environment where everyone feels valued, heard, and empowered, leading to enhanced diagnosis accuracy, individualised treatment strategies, and improved overall health outcomes.
Here is a rundown list of how to access the Period Pain Clinic to assess your daughter’s own period pain:
Get a free preview of your daughter’s personalised period pain report and a personalised pain relief routine
Fast-track your daughter’s journey towards diagnosis and learn about the six gynae health conditions that could be affecting their period
Connect with vetted world-class health specialists and discover alternative methods approved by experts
Receive clinically proven lifestyle recommendations and find relief that works for your daughter
Learn how to take painkillers safely and reduce long-term health effects
Have access to innovative treatments
Get prescribed tampons and hormonal contraception
Receive deals and resources worth up to £300 in savings
Your daughter’s personalised report via the Period Pain Clinic* will help her work out if her symptoms match the above conditions quickly. Then you can download her report and discuss the results with her doctor or connect with one of the vetted physicians through Daye’s platform. The Period Pain Clinic gives you the breathing space to share all your daughter’s health concerns, and get the most out of your consultation without being rushed out of the GP room!
What do you get your daughter when she gets her period?
Before your daughter starts her period, it’s helpful for her to know what products are available, where they are in the house, and how to use them. Consider creating a small “period kit” she can carry in her school bag, which can include a selection of tampons, pads, menstrual cups, and/or period pants, as well as a fresh pair of underwear, and some pain relief medicine if you feel it’s appropriate and she knows how to use it.
For the first period, many girls prefer starting with pads* as they can be less intimidating.
Try 100% organic, sustainable tampons
When your daughter is ready to start using tampons, she can try Daye’s 100% organic tampons for free by ordering a Sample Box* to test drive before committing to a subscription. And if she likes the tampons after trialling them, you can create a subscription box for her, which is really easy to do.
Simply match the subscription box to her flow by choosing the tampons here* and then leave the rest to Daye. Daye syncs her box with every cycle length and you can modify, skip or cancel anytime.
Discuss hygiene
Talk to your daughter about the importance of changing menstrual products regularly, washing her hands before and after, and maintaining personal hygiene during her period.
Empower her
Some girls might feel embarrassed about getting their period. Let your daughter know it’s a natural and powerful part of being a woman, and not something to be ashamed of. Some families choose to celebrate a girl’s first period as a rite of passage, with small gifts, a special meal, or another form of acknowledgement. However, gauge her comfort level before doing this. Some girls might love it, while others might prefer to keep things low-key.
Ensure privacy
Respect your daughter’s need for privacy and provide a comfortable environment for her to manage her period in peace.
Stay available
Let her know she can come to you with any questions or concerns. If she doesn’t want to talk about it, that’s okay too. The key is she knows she’s not alone.
Offer resources all about periods
Offer resources so as your child grows and they become more curious, you can offer them age-appropriate books or websites where they can learn more about their period. Let them know they can always come to you if they have questions.
Some children might be curious, while others might be embarrassed or uninterested. Respect their feelings, answer questions as they come up, and ensure they know you’re available for future conversations.
It’s always beneficial to approach these discussions in a positive, open, and non-judgmental manner. Being proactive ensures your child will have accurate information and feel supported when they encounter these natural changes.
Encourage your daughter to track her period
It can be helpful for young girls to keep a menstrual calendar or use an app to track their periods. This can aid them in identifying patterns over time and help them anticipate when their next period might be.
Supporting your daughter when her period arrives is crucial for her to feel as comfortable as possible with the new changes in her body. It’s a tough time for your daughter and her first period is the most monumental event in her life. Help her be prepared by talking to your daughter about periods as if they are a very normal part of her life – because they are.
FAQ – Your teens’ or preteens’ common period questions answered
Is it normal to get your period at age 11?
Other questions asked were:
When do most kids get their first period?
Yes, it is normal for some girls to start their period at age 11. The average age at which girls start menstruating, known as menarche, is around 9 to 15 years. However, some can start a bit earlier or later.
The onset of menstruation is influenced by several factors, for example, genetics, BMI, health and nutrition and environmental factors, as well as other health conditions.
While starting at age 11 is within the typical range, it’s always a good idea for you to have open communication with your daughter about the changes they’re experiencing. If there are any concerns about early or late menstruation, a consultation with a paediatrician or a gynaecologist can provide clarity.
My daughter got her period at 10. Will she still grow?
Yes, many girls who start their period at age 10 or even earlier can still continue to grow. The onset of menstruation is one event in the continuum of puberty and is not an immediate signal that growth has stopped.
What is a period for boys?
Boys do not have a menstrual cycle or a period in the same way that girls do, as they don’t have ovaries or a uterus, and therefore don’t menstruate. However, the phrase “period for boys” might be used colloquially to refer to the physical and emotional changes boys go through during puberty.
Can a woman whose hymen is intact use a tampon?
Yes, a woman whose hymen is intact can use a tampon. The hymen is a thin membrane that partially covers the vaginal opening. It has one or more openings to allow menstrual blood to flow out. The size, shape, and elasticity of the hymen vary from person to person.
When inserting a tampon, it can pass through the natural openings in the hymen without causing any harm. Some girls might feel slight resistance or discomfort the first time they try to insert a tampon, especially if they’re not fully relaxed or if they’re not inserting it at the right angle.
While the hymen is somewhat elastic, using a tampon can stretch it. However, this doesn’t mean the hymen will be “broken” or completely torn. Many activities, not just tampon use, can stretch the hymen, including sports or other physical activities.
In many cultures, an intact hymen has been historically associated with virginity. However, it’s essential to understand that the state of one’s hymen is not an accurate or reliable indicator of virginity or sexual activity. The hymen can stretch or tear due to various reasons unrelated to sexual activity.
At what age should you talk to your daughter about periods?
Other questions asked were:
What do I say to my daughter about her period? What should I talk about?
How do you tell your daughter is about to start her period?
How to talk to your daughter about getting her period?
How to talk to your daughter about starting her period?
How to talk to your 10 year old daughter about her period?
When should I talk to my daughter about periods?
How to talk to your daughter about first period?
When to talk to your daughter about her period?
How to talk to your daughter about her first period?
What to say to your daughter when she gets her period?
What to say to your daughter on her first period?
Are there any expert tips for parents on talking about periods?
How to explain menstruation to a 9 year old?
how to talk to your 9 year old daughter about her period
How to talk to your daughter about menstruation?
How to talk to your daughter about periods?
When should I talk to my kids about periods?
How can you talk about puberty and menstruation
my daughter started her period – how do I broach the subject with her?
The age at which you can start explaining periods to your daughter can vary depending on individual circumstances, cultural contexts, and her developmental stage. However, a general guideline is to start introducing the topic before she begins puberty, so she’s informed and prepared. Considering that some girls can start their period as early as age 9 or 10 (or even earlier in rare cases), it’s a good idea to start the conversation around the ages of 7 to 9.
How does a dad talk to his daughter about her period?
For many dads, the idea of discussing menstruation with their daughter might seem daunting. However, with the right approach, it can be a supportive and bonding experience.
Educate yourself first before you speak to your daughter so you understand the menstrual cycle and what it involves, as well as the common experiences she may face. There are many resources online, including books, articles, and videos, that can provide you with accurate information.
Find a quiet moment when you both can sit down without distractions. This will make the conversation feel more private and focused and start the conversation by letting your daughter know you’re there for her and that she can ask any questions or express any concerns. Your role is primarily to listen, support, and provide information.
Use the tips above to help you talk to your daughter about her periods and acknowledge that menstruating can sometimes be uncomfortable or even painful. Let her know that it’s okay to talk about her feelings or any physical discomfort she might experience.
Encourage questions and seek female support, like a mother, aunt, sister, or family friend as they may be able to provide additional support or information.
This shouldn’t be a one-time conversation. As she grows older, her needs and concerns related to menstruation might change. Regularly check in with her, ensuring she has the supplies she needs and addressing any new questions or concerns.
Remember, the primary goal is to create a supportive environment where your daughter feels comfortable and empowered. Demonstrating understanding and a willingness to engage in the conversation, even if it’s outside of your personal experience, can mean a lot to her.
When the doctor asks when was your last period do you say the day the bleeding started or do you say the day it ended?
When a doctor asks about your last period, they typically want to know the first day of your most recent menstrual cycle. So, you should provide the date when the bleeding started, not when it ended. This date is a standard reference point in medical practice to determine various aspects related to reproductive health, including calculating the possible date of ovulation, estimating gestational age in pregnancy, and assessing menstrual cycle regularity.
Will I get my period during my whole life?
No, you will not have your period your entire life. Menstruation usually starts during puberty, with the onset of the first period called menarche, and it continues regularly until menopause, which is around ages 45 to 55 years old.
*This post is sponsored by Daye but all thoughts and opt are 100% my own. Links marked with a ‘*’ are affiliate links which means I may earn a small commission at no extra cost to you if you click through to buy. Thanks as always for your support!
13 exciting outdoor winter activities for kids
Ah, the great outdoors! There’s nothing quite like the feel of the sun on your face and the wind in your hair, right? But what happens when it’s winter and the weather is cold? How do you entertain kids in cold weather?
If the sun is shining, no matter the weather, then it’s time to bring out some exciting outdoor winter activities for kids. Do you know who needs that natural Vitamin D boost more than we adults do? Our kids!
We frequently struggle to get our kids away from their devices and encourage them to play outside in this age of video games and cartoons, especially during the winter months when cabin fever is at its highest.
So, how do you get them outside?
No fear! We have a list of entertaining outdoor winter games to keep your kids engaged, even when it’s brisk out there. What are your favourite winter outdoor activities for kids? Share in the comments below if we’ve missed yours in our guide.
Why is it important to play outside in the winter?
Playing outside in the winter is essential for child development for lots of reasons. Here are some benefits of outdoor play in the winter:
Improves physical health
Winter play helps children continue their physical activity year-round, maintaining fitness and strengthening immunity.
Exposes kids to more Vitamin D
Shorter and darker days mean less sunlight exposure indoors. Playing outside, even on cloudy days, helps kids get a healthy dose of the sunshine vitamin D, which is essential for bone health and a functional immune system.
Develops skills
Playing on different terrains, especially snowy or icy ones, challenges kids to develop new motor skills and coordination.
Boosts creativity
A change in season transforms familiar surroundings, prompting kids to engage in different play and use their imagination in new ways.
Exposure to varying temperatures and conditions teaches children to adapt and become resilient.
Develops social skills
Group snowball fights, building snowmen, or collaborative winter games can foster teamwork and improve social interactions.
Helps kids appreciate nature
Witnessing seasonal changes first-hand instils an appreciation for nature and the environment.
Improves sleep
Physical activity in the cold can lead to better sleep quality.
Combats cabin fever
Breaking the indoor monotony can reduce feelings of restlessness and provide a change in the environment.
Great for sensory development
The winter environment offers unique sensory experiences, from the crunch of snow underfoot to the feel of cold air, which can stimulate cognitive development.
How to prep for safe outdoor winter play with kids
Although outdoor winter activities are fun, you do need to exercise a bit of extra caution in the winter with kids playing outside. Preparing for safe outdoor winter play with kids needs some planning and awareness so children can stay warm, dry, and injury-free. Here are some tips to ensure safety:
Dress in layers
It’s important to dress in layers during the winter so your temperature is regulated, by adding and taking away garments, especially when you’re walking in cold weather.
You can start with a moisture-wicking layer, like synthetic materials or wool, which can help pull moisture away from the body. Avoid cotton as it keeps moisture in and makes you feel colder.
Then insulate with a middle layer like fleece or wool to trap the warmth. The outer layer can be waterproof and windproof to protect against the snow, rain and wind.
You can add other warm accessories like gloves/mittens, a thick hat that covers the ears, a snug-fitting scarf/neck warmer and waterproof boots.
You need sun protection, even in the winter!
Even during winter, the sun can be intense during family winter walks, especially when reflected off the snow. Use sunscreen on exposed skin and put on sunglasses or goggles with UV protection.
Stay dry
Wet clothes can cool down your body, so have an extra set of gloves and socks, as these tend to get wet first. Change any wet clothing immediately. It’s important you appropriately dress for winter walking, so you can have maximum fun!
Check the weather
Extremely low temperatures and wind chills can lead to frostbite quickly. Limit outdoor play during severe conditions. You don’t need to brave all the seasons!
Set time limits
When it’s very cold, limit the playtime to around twenty minutes with breaks inside to warm up.
Hydrate and refuel
Cold air and physical activity can lead to dehydration, so make sure to drink lots of water and have energy-boosting snacks high in protein.
Make sure your kids are playing in a safe environment
Check the play area for hazards like icy patches, open water, or snowbanks near roads. Teach kids about the dangers of roads, especially if playing near them. If you’re ice skating, ensure the ice is thick and solid. Also teach children to come inside if they feel numbness or if their clothes are wet. Check for signs of frostbite, including pale, gray or blistered skin on the fingers, ears, nose and toes.
Be aware of the signs of hypothermia like shivering, slurred speech, clumsiness, and confusion.
Stay together
Make sure you’re always around the younger kids. For older children, make sure they play outdoor group games and set boundaries for where they can go.
Warm up as soon as you come inside
When coming back indoors, remove all wet clothes immediately. Warm up with blankets and a warm drink. Avoid hot baths or showers right away as they can rapidly change the temperature and shock the body.
How do I get my child to play outside in the winter?
The benefits of spending time outside during the winter far outweigh sitting at home in the warmth and staring at a screen. Dressing appropriately, however, can help motivate your child to go outside if they feel the cold more than others and rewarding them for the effort with fun activities will encourage them to stay outside too.
But, most of the time, it’s the adult who doesn’t want to brave the seasons! And, that’s perfectly understandable! I was like that for many, many years until my then three-year-old refused to step into the car to go to nursery every day. So we walked the 25 minutes to and from nursery, even through the harshest winter months and we barely got sick that year! He single-handedly changed my opinion of the cold.
13 of the best outdoor winter play activities for kids
We all know that outdoor play is essential for children’s development and growth. And what better way to keep your kids entertained while giving them the physical activity they need than with classic outdoor games?
Here are 13 of the best winter activities for toddlers and kids that will have them giggling, running around and having fun under the winter sun:
Things to do with kids outside in winter – Go explore
Your child can be a winter wildlife detective and head out on an outdoor winter nature observation hunt. You can show your child the evergreens in winter where the leaves stay green all year around or find wildlife frozen in time. Outside winter science play not only provides the chance to learn about science for kids, but it also fosters physical health, emotional growth, and a deeper connection to the natural world.
Winter offers unique sensory experiences, from the cold touch of snow to the crunch of frost underfoot. Exploring these sensations can stimulate your child’s curiosity about the world around them.
Help your child to learn about the states of matter by examining how water freezes or melts. They can also explore concepts like insulation, temperature fluctuations, and the principles behind ice fishing.
Fun outdoor winter activities for kids – Go on a winter hike
Go for walks to explore how the neighbourhood or local park changes in the winter. Look for animal tracks in the snow or gather pinecones.
Outdoor activities for kids this winter – Obsta-Course
Have you ever heard of the Obsta-Course? It’s a super fun way to get outside and get moving. Obsta-Course is all about navigating an obstacle course full of challenges like cones, tires, chairs, and other objects you can find around your yard.
It will keep your kids delighted for hours while helping them become more agile and coordinated. Setting a time limit or including money bars in the mix are further ways to make it more difficult. Oh, and if you’re looking for equipment to set up your Obsta Course, be sure to view the range here.
Exciting outdoor winter activities for kids – Tag, You’re It!
Another classic outdoor game for all ages is tag. It’s a simple game where one person is designated as “it,” and then they must tag the other players. The players who aren’t must run away from the person who is before they get tagged.
The tag can be spiced up with variations like “freeze tag”, which requires the player who has been tagged to freeze and stay still until another player unfreezes them. Or you can play flashlight tag at night, similar to regular tag but with a flashlight providing light.
Great outdoor winter activities for preschoolers – Hide and Seek
You can’t go wrong with a game of Hide and Seek. It’s a timeless classic that requires sharp minds and quick reflexes. All you need is an area with plenty of hiding places, such as trees, bushes, or furniture.
One person will be the seeker, who has to count to ten while everyone else hides. The seekers must then find the other players to tag and extricate them. It’s a fantastic game that a small or large group of players may enjoy.
Ideas for winter activities for toddlers – Duck, Duck, Goose
One of the great outdoor activities for toddlers in winter can include the popular game Duck, Duck, Goose. It’s a terrific technique to get kids moving and make them giggle. All you need is a roomy, open location where you may move about.
You start by choosing one player as the goose, who then walks around the circle tapping each person on the head, saying either “Duck” or “Goose”. When they eventually pick the goose, that player then has to chase after the original goose around the circle. If they manage to tag them before they return to their spot, they become the new goose.
Fun winter activities for kids – Capture the Flag
Capture the Flag is an exciting game that yields plenty of physical activity and strategy in a large open space. Divide your players into two teams and assign each team a flag or other item to defend.
Each team must work together to protect their flag while stealing the other’s. The winning team is the first to seize both flags. This game is great for getting kids to work together and strategise in a fun, interactive way.
Outdoor winter activities without snow – Hopscotch
Hopscotch provides a fun twist on running and jumping games. You only need a simple hopscotch board drawn with chalk or other materials.
Players must take turns hopping on one foot to and from each square while trying not to step on any lines. Kids can even build up their skills with some practice by hopping through the course with both feet.
Games and activities to play in the snow – Go for a sled ride – a toddler’s favourite winter activity!
Outdoor snow activities can include an awesome sledge ride. You don’t need a proper sledge. Grab some plastic bags or even a baking tray and make your way down a slippery hill with speed!
Outdoor winter activities for kids at home – Have a winter picnic
A winter picnic can be a magical experience. Choose a location with a beautiful winter view, prepare some hot chocolate in a thermos, grab some snacks, and enjoy a hot picnic outside!
Indoor and outdoor winter activities for kids – Winter crafts for kids
Winter crafts are a delightful way for kids to express their creativity and celebrate the season.
At home activities during the winter can include ice painting with water, food colouring and paper. Simply mix water with the food colouring and freeze in ice cube trays. Once frozen, kids can ”paint” on paper using the coloured ice cubes.
Kids love anything related to family activities, so why not create your own photo frame using wintery materials and stick your favourite family photo inside!
Outdoor winter nature crafts can include stick crafts, creating bird feeders or ice ornaments by freezing water with natural items like berries and leaves inside.
Other winter-themed crafts can include:
Snowflake cut-outs: Use blue or white paper and scissors, fold the paper multiple times and cut out designs to create unique snowflakes. Unfold and admire!
Popsicle stick snowflakes: Grab some popsicle sticks, glue, glitter, and paint. Arrange popsicle sticks in snowflake shapes and glue together. Once dry, paint and sprinkle with glitter.
Paper plate snowman: You’ll need paper plates, coloured paper, markers, glue, and yarn or fabric scraps. Use two paper plates as the body and head of a snowman. Decorate with paper cut-outs for eyes, nose, and buttons. Use yarn for a scarf.
Pine cone trees: Find some pine cones, green paint, small pom-poms, glue, and glitter. Paint the pine cones green and let them dry. Glue colourful pom-poms as ornaments and sprinkle with glitter.
Salt dough ornaments: You’ll need salt dough (made with salt, water, and flour), cookie cutters, and paint. Roll out the dough and use cookie cutters to create shapes. Bake until hard. Once cool, paint and hang as ornaments.
Sock snowmen: Find some white socks, rice, rubber bands, buttons, fabric scraps, and markers. Fill the sock with rice and tie or rubber band sections to create the snowman’s body segments. Decorate with buttons and fabric scraps.
Snow Globe: You’ll need small jars, glycerin, glitter, waterproof trinkets or figurines, and water. Fill the jar mostly full with water, add a drop of glycerin and some glitter. Place the figurine inside and seal the jar. Shake and watch the snow fall.
Winter Wreath: Use a paper plate, tissue paper (blue, white, silver), ribbon, glue. Cut the centre out of the paper plate. Glue crumpled pieces of tissue paper around the ring. Add a ribbon for hanging.
Best outdoor winter activities for kids – Go on a winter scavenger hunt
A winter scavenger hunt is a great nature-themed game and a fantastic way to engage with the chilly season, explore nature, and have some fun outdoors. Hide some items in your yard, a local park, a forest, or a favourite outdoor spot, and give your child a list of things to find. You can also use this readymade scavenger hunt printable.
A checklist of items can include:
Pinecone
Red berries
Animal tracks in the snow
Icicles
Snowman (maybe not one already in your yard)
Something frozen in ice (like a leaf or berry)
A tree with snow on its branches
A bird in flight
A snowflake on black paper (bring along to capture and observe)
Y-shaped twig
Family activities for winter – Explore a winter waterfall
Exploring a winter waterfall with kids can be a magical experience. The frozen landscapes and cascading ice formations can be mesmerising.
Safety first, though! Discuss safety rules with your kids before starting your exploration. For example, never approach the edge of the waterfall or any ice-covered areas without extreme caution. Keep a safe distance, as ice can break unexpectedly.
Also, use trekking poles or walking sticks for additional balance and support.
Final thoughts
Winter activities with kids are not just a fun way to keep your children entertained – they’re vital to their physical and mental well-being.
When the cold sun is shining, there are plenty of outdoor activities in winter. Your backyard or local park can become a world of adventure. So step out into the cold sunshine and create those joyful, memories by playing these fun kids winter activities together.
What are your thoughts on surprising outdoor winter activities, no snow required, that kids can enjoy? What is your favourite outdoor winter activity? Share in the comments below!