How to incorporate movement into your life as a busy parent
In today’s fast-paced world, staying active can feel like a luxury, especially for us parents. Between work deadlines, family responsibilities, nappy changes, and social commitments, exercise often takes a back seat. But movement doesn’t have to mean hours at the gym. Even small bursts of physical activity throughout your day can boost your energy, improve your mood, and support your overall well-being.
According to the World Health Organization, adults should aim for at least 150 minutes of moderate-intensity physical activity per week [WHO, 2022]. That’s just over 20 minutes a day. With the right mindset and strategies, you can easily fit gentle exercise into your everyday routine, even when life gets hectic.
Why movement matters
Before we dive into the how, let’s talk about the why. Movement is essential not only for physical health, but also for mental wellness.
A 2021 study published in Frontiers in Psychology found that just 10 minutes of light activity like walking can lead to measurable improvements in mood and alertness [Basso et al., 2021].
Simple ways to add movement to your busy day
You don’t need fancy equipment or a strict workout plan to get moving. Here are practical, no-excuse ideas to help you stay active, even with a packed schedule, whether you’re pregnant, newly postpartum, or managing life with young children.
1. Turn commutes into movement opportunities
If your workplace is within walking or biking distance, try leaving the car at home. If you rely on public transportation, get off one stop early and walk the rest of the way.
Tip: Keep a pair of comfortable shoes with you for quick walks.
2. Take short movement breaks
Set a timer to remind yourself to stand, stretch, or walk every hour. Even 5 minutes of movement can refresh your mind and body.
Try This: Walk during phone calls, do calf raises while brushing your teeth, or stretch between meetings.
3. Use the stairs
Skip the elevator when possible. Taking the stairs builds strength, boosts your heart rate, and takes only seconds.
According to Harvard Health, climbing stairs burns more calories per minute than jogging and helps build leg muscle [Harvard, 2020].
4. Schedule walking meetings
Instead of holding a conference room meeting, consider having a walking meeting. You’ll brainstorm better, get some fresh air, and sneak in extra steps.
Bonus: Walking side by side can lead to more open and creative conversations.
5. Add movement to daily tasks
You can make housework more active by adding intentional movements. Squat while picking up toys, dance while vacuuming, or do lunges while folding laundry.
Tip: Play upbeat music to keep you moving longer.
6. Stretch or exercise while watching TV
TV time doesn’t have to mean total rest. You can do gentle stretches, yoga poses, or bodyweight exercises like squats or planks while watching your favourite show.
Idea: Use commercial breaks as mini-workout intervals.
7. Use apps and trackers
Fitness apps or step counters can motivate you to move more. Set small, realistic goals like 5,000 steps per day, and gradually increase over time.
Research shows that people who use fitness trackers increase their activity by an average of 1,850 steps per day [Bravata et al., JAMA, 2007].
8. Work out in intervals (micro workouts)
Don’t have 30 minutes? No problem. Break your movement into short, high-energy bursts.
Example Routine:
5 minutes of brisk walking
2 minutes of squats
1 minute of jumping jacks
2 minutes of stretching
Repeat once or twice throughout your day.
9. Make movement a family activity
Include your kids, partner, or friends in physical activities. Go for a family walk, dance in the living room, or play tag in the backyard.
Bonus: You’ll bond more while setting a great example for younger family members.
10. Start your morning with gentle movement
Waking up 10 minutes earlier to stretch, walk, or do yoga sets a positive tone for your entire day.
Try This: Do a simple sun salutation flow or a 5-minute walk around the block to wake up your body and mind.
Movement mindset: consistency over perfection
You don’t have to run marathons or lift heavy weights to see results. The key is consistency. Small, repeated actions build powerful habits.
Here’s how to keep going:
Celebrate small wins: Every step counts
Be kind to yourself: Skipped a day? It’s okay. Start fresh tomorrow
Make it fun: Dance, hula hoop, skip rope – anything that gets you moving with joy
Pair movement with routine tasks: Listen to podcasts while walking or do stretches during Zoom meetings
Note for new parents: If you’re pregnant or newly postpartum, always consult with your GP or midwife before beginning any exercise routine. Gentle exercise for busy mums should work with your body, not against it, especially during recovery.
Hydration + movement = better health
Movement and hydration go hand-in-hand. When you move more, your body needs more fluids to support energy, digestion, and temperature regulation.
Tip: Keep a water bottle nearby to sip throughout the day, especially during or after physical activity.
Final thoughts
You don’t need to overhaul your schedule to stay active. By sprinkling movement throughout your day, you’ll support your physical health, boost your mood, and improve your mental well-being.
Movement is not a chore. It’s a gift you give yourself. One stretch, one walk, one deep breath at a time.
References
World Health Organization. (2022). Physical Activity Factsheet. [https://www.who.int]
Basso, J. C., & Suzuki, W. A. (2021). The effects of acute exercise on mood, cognition, neurophysiology, and neurochemical pathways: A review. Frontiers in Psychology.
Bravata, D. M., et al. (2007). Using pedometers to increase physical activity and improve health: A systematic review. JAMA.
Discover how healing your inner child can help you become the best parent you can be, break generational patterns, and enhance emotional balance for your entire family.
We all carry stories from our childhood, some joyful, others painful. For many mums, these emotional wounds from the past don’t just affect us; they influence how we parent our children. These wounds can manifest as mum guilt, difficulty staying calm during tantrums, anxiety about “getting it right,” or struggling to set healthy boundaries with our little ones. Often, they trace back to unmet needs during our own early development.
That’s where reparenting comes in. Reparenting is giving yourself the care, support, and guidance you may not have received as a child—so you can break generational cycles and parent from a place of healing. It’s a powerful act of self-love, a vital step toward lasting emotional wellness and becoming the mother you want to be. In this article, we’ll explore what reparenting is, why it’s so important for mothers, and how to start this healing journey while raising your children.
What does it mean to re-parent yourself as a mother?
Re-parenting yourself means becoming the nurturing, supportive, and protective figure your younger self needed, while simultaneously nurturing your own children. Instead of unconsciously passing on old patterns, you step in and offer yourself:
Emotional validation
Safety and stability
Boundaries and discipline
Unconditional love and compassion
You’re essentially healing your inner child, which is that part of you still holding onto pain, fear, or unmet emotional needs from the past, so you can parent your children from a place of wholeness rather than wounding.
Why re-parenting is vital for mothers’ mental health
1. It heals unmet childhood needs (so you don’t project them)
Many mums never learned how to self-soothe, trust themselves, or speak up for their needs. When your toddler has a meltdown, your own inner child might feel triggered. Re-parenting fills those gaps.
According to the National Child Traumatic Stress Network, early childhood adversity increases the risk for mental health disorders, including depression and anxiety, later in life, and can affect parenting styles.
Re-parenting helps rewrite those internal narratives: “I’m not a good enough mum,” “I don’t matter compared to my kids,” or “My feelings are too much.”
2. It builds emotional regulation (for you and your children)
When we weren’t taught how to manage emotions healthily, we may find ourselves yelling at our kids or feeling overwhelmed by their big feelings. Through re-parenting, mothers learn how to:
Recognise and name emotions (yours and theirs)
Respond instead of reacting during challenging parenting moments
Self-soothe during stressful times (like bedtime battles or public tantrums)
These skills become the foundation you model for your children.
3. It strengthens your identity beyond “Mum”
If you didn’t receive affirmation or encouragement growing up, your self-worth may depend entirely on being the “perfect mother.” Re-parenting teaches you how to speak kindly to yourself, celebrate your efforts, and affirm your value, both as a mother AND as an individual.
4. It creates healthier family dynamics
Unhealed childhood wounds often play out in how we parent. You may become overprotective, struggle with consistency, or find yourself repeating phrases your parents said. Re-parenting helps you:
Set and honour boundaries with your children (and extended family)
Communicate needs clearly to your partner
Build trust in yourself as a capable parent
When you learn to meet your own emotional needs, you stop expecting your children or partner to fill emotional voids.
Signs you may need re-parenting as a mother
You struggle with mum guilt or feel you’re “never doing enough”
You often criticise or shame yourself about your parenting
You seek validation from other mums or social media
You fear “messing up” your kids
You feel emotionally triggered by your children’s behaviour
You notice yourself repeating patterns from your own childhood
These signs suggest that part of your emotional development may need gentle attention and support for both your sake and your children’s.
How to begin re-parenting yourself while parenting
Re-parenting is a daily practice that can happen alongside raising your children. It’s not about blaming your parents—it’s about taking responsibility for breaking cycles today.
Here are simple steps to start:
1. Connect with your inner child (during quiet moments)
During naptime or after bedtime, visualise yourself as a child. What did you look like? What were you feeling? What were you missing?
Spend time “with” this version of yourself. You can write letters to them, draw pictures, or talk to them gently in your mind.
Example: “I see you. I know you’re scared. I’m here now, and I’ll protect you, just like I protect my baby.”
2. Journal about your needs (not just your kids’)
Ask yourself:
What do I need today as a person, not just as a mum?
What would help me feel safe and supported?
What am I feeling, and why?
Writing helps you become more aware of your emotional world, which enables you to stay regulated when your children need you.
3. Create and respect boundaries (with kids and family)
Boundaries are a key part of re-parenting and healthy parenting. They help you feel safe and respected, and teach your children the same.
Start by saying no to what drains you (like unnecessary playdates) and yes to what nourishes you (like that morning coffee in peace). Remember: setting limits teaches your children self-respect by example.
4. Practice gentle self-talk (especially on hard days)
If your inner voice is harsh or critical about your parenting, it’s time to re-parent that voice. Begin speaking to yourself like you would to a fellow mom who’s trying her best.
Replace “I’m such a terrible mother” with: “I’m learning, and that’s okay.”u “I made a mistake, but I’m still a good mm.”
5. Prioritise consistent self-care (yes, even with little ones)
Re-parenting involves creating a routine that includes rest, nutrition, movement, and play, even in 5-minute increments. It teaches your inner child: “You matter enough to be cared for,” while modelling self-care for your children.
A study in BMC Psychiatry (2020) found that adults with consistent self-care practices had lower levels of anxiety and depression.
Even small acts, such as drinking water or stepping outside for fresh air, build trust in yourself.
6. Try creative expression (with or without your kids)
Drawing, painting, dancing, or singing can help you reconnect with your inner child. Do it alongside your children for double healing – they play, you heal.
You don’t need to be “good” at it – just present.
7. Consider therapy or support groups
Working with a therapist, especially one trained in maternal mental health, inner child work, IFS (Internal Family Systems), or trauma-informed care, can help you explore deeper emotional wounds while navigating motherhood. Many therapists offer virtual sessions, which are perfect for busy moms.
Real-life example: Jasmine’s story
Jasmine, 35, mother of two, spent her life chasing perfection, especially in her parenting. She feared failure and constantly compared herself to other mums. Through therapy, she realised her inner child never felt accepted unless she was achieving something.
She began journaling to her younger self during naptime, practising affirmations, and accepting that “good enough” parenting was actually great parenting.
“I used to think love had to be earned for me and from my kids,” Jasmine said. “Now I know I can give it to myself, and that makes me a calmer, more present mother.”
Final thoughts
Re-parenting yourself as a mother is one of the most healing and empowering journeys you can take for you AND your children. It helps you feel grounded, worthy, and emotionally whole, which naturally flows into your parenting.
You become the safe space you always needed and the safe space your children need. You learn to care for your emotional wounds with gentleness instead of judgment, breaking cycles that may have existed for generations.
Healing doesn’t mean forgetting the past; it means giving yourself what was missing and creating a more compassionate future for your entire family.
“You can’t go back and change your childhood, but you can create the care and love you always deserve – and pass that healing on to your children, starting now.”
References
National Child Traumatic Stress Network. (2021). Effects of Complex Trauma. https://www.nctsn.org
Keles, B., McCrae, N., & Grealish, A. (2020). The impact of self-care on mental health in adults: A review. BMC Psychiatry, 20(1), 1–14.
*Collaborative feature post*
What to know about lash serum during pregnancy and beyond
Medical Disclaimer: This article is for informational purposes only. Always consult your healthcare provider before using any cosmetic products during pregnancy or breastfeeding. Individual experiences may vary, and what works for one person may not work for another.
As a mother of four, I have navigated the peaks and troughs of hormonal changes both in pregnancy and postpartum. Finding safe beauty products is critical for me, especially now that I am in my 40s. This comprehensive guide addresses everything you need to know about lash serums to help with that inevitable postpartum hair loss because, sadly, it doesn’t just happen on your head!
The unique postpartum hair loss challenges we parents face
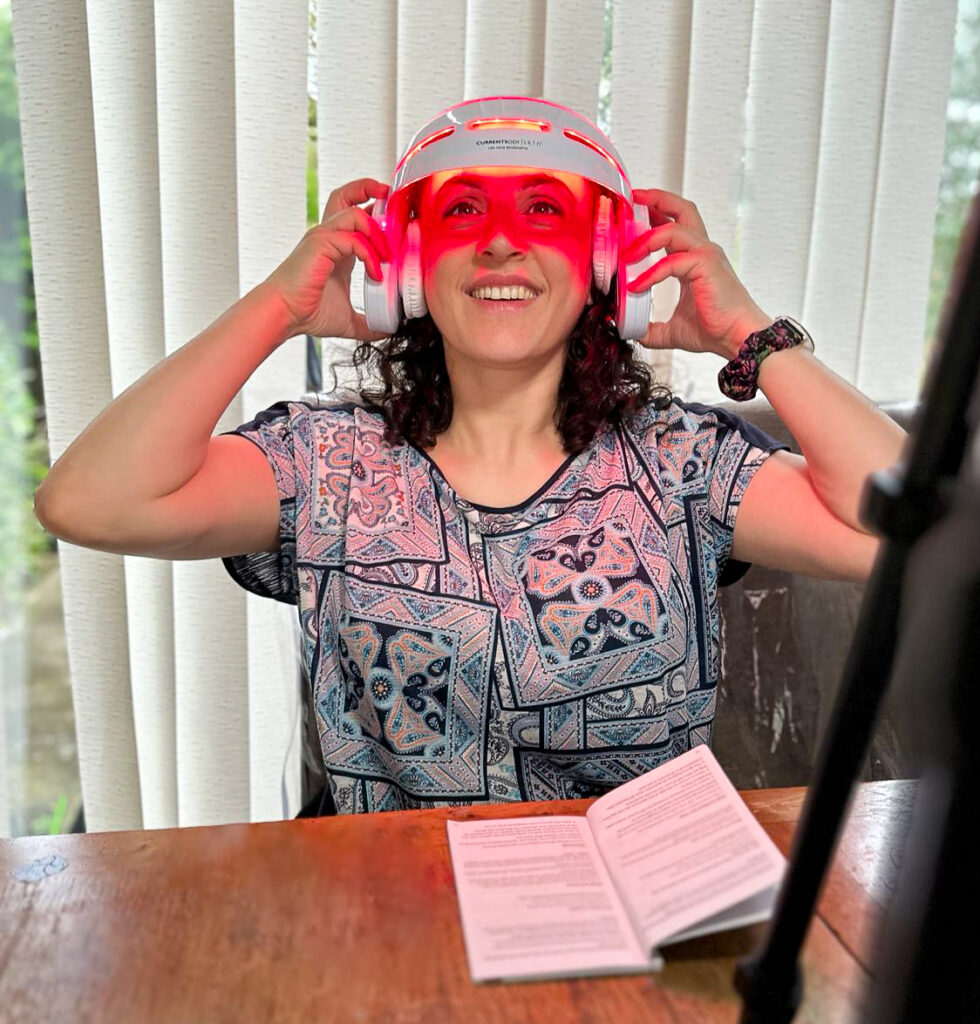
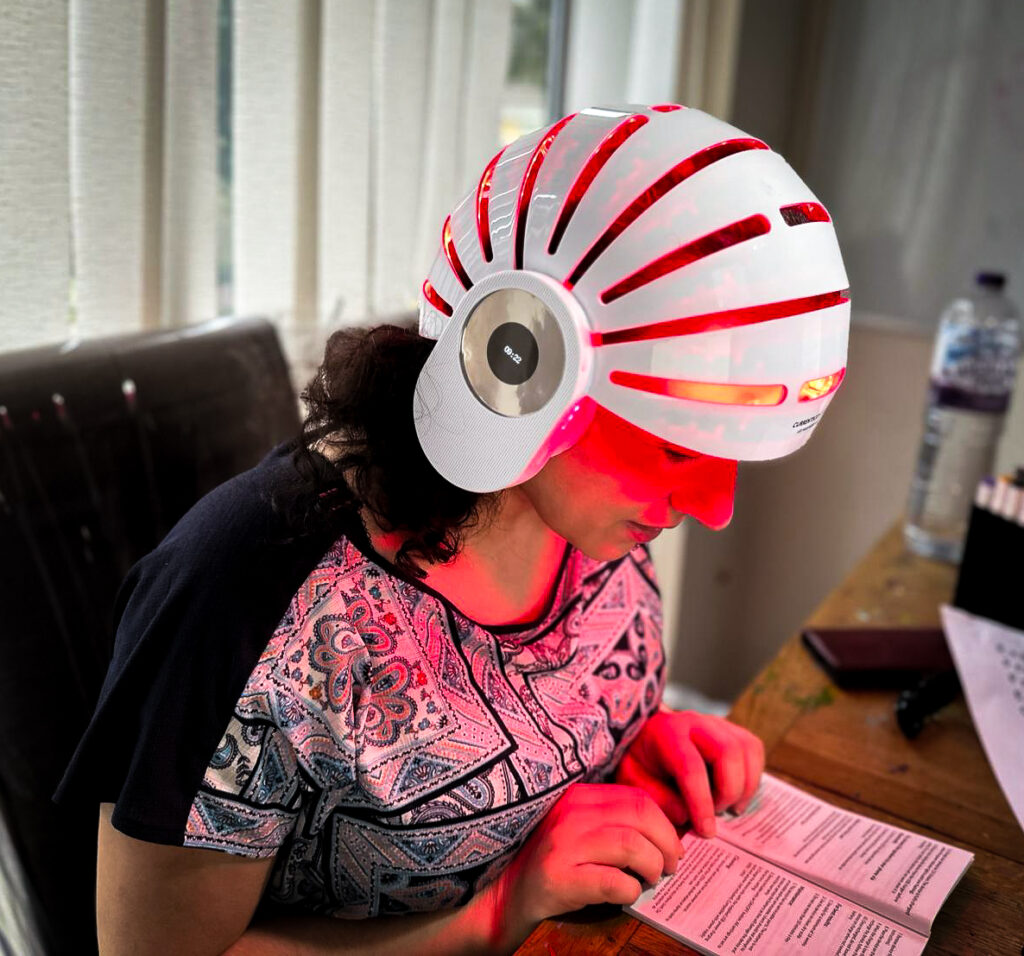
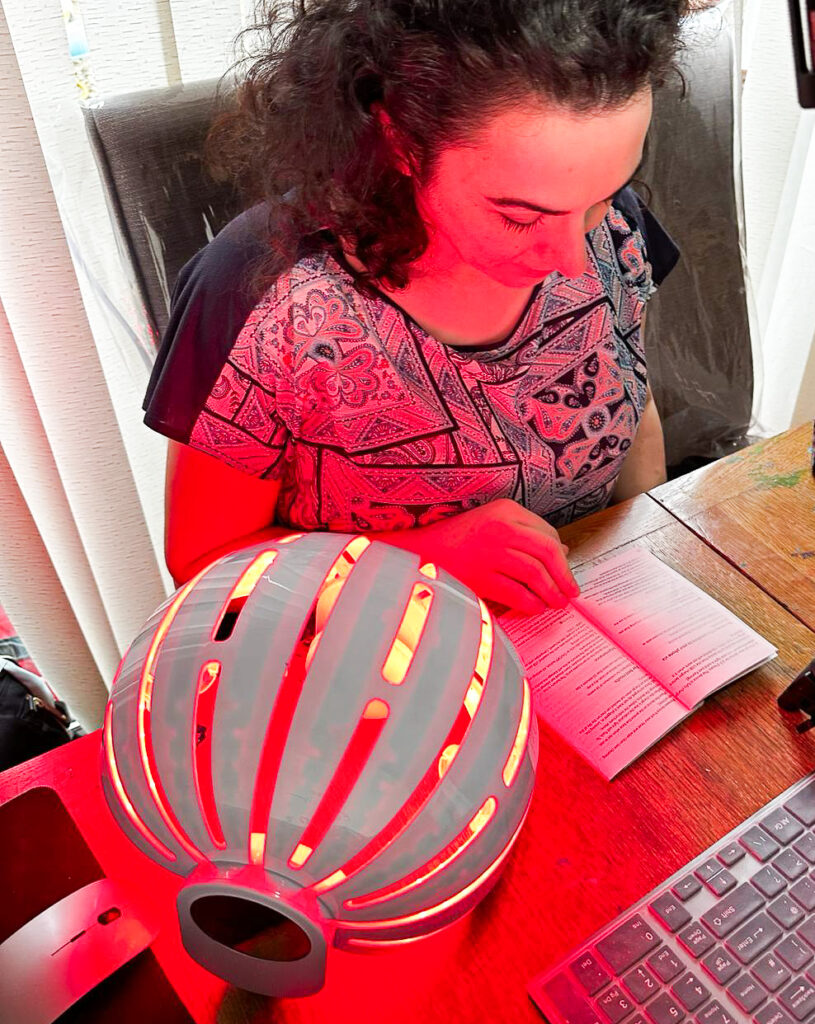
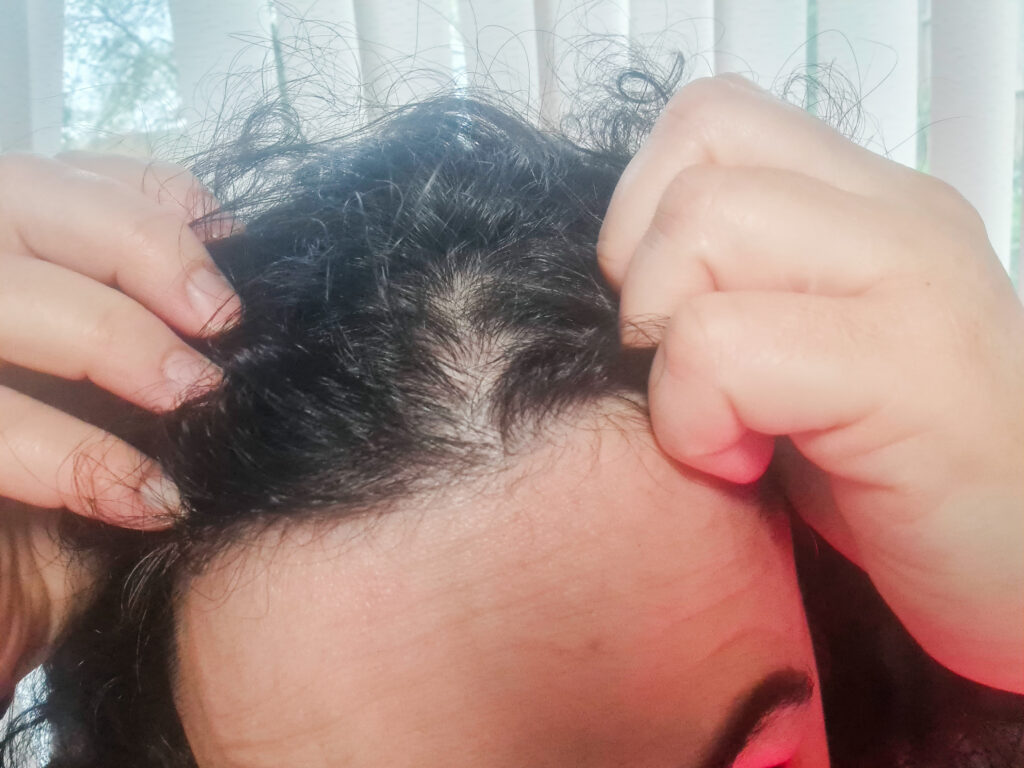
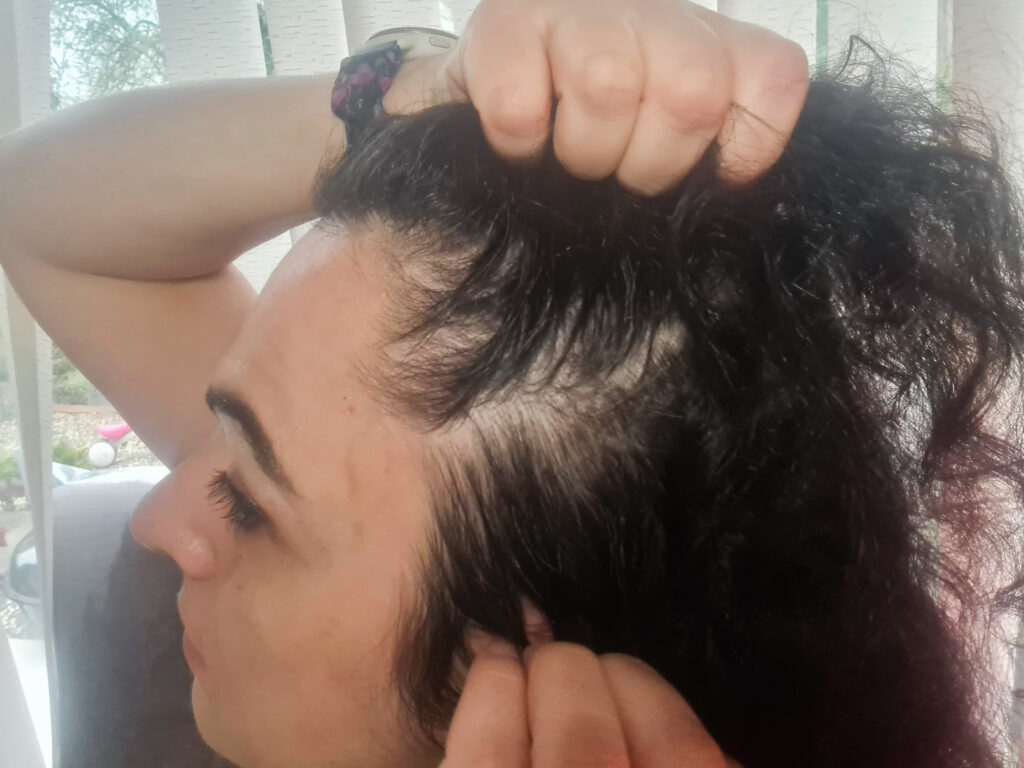
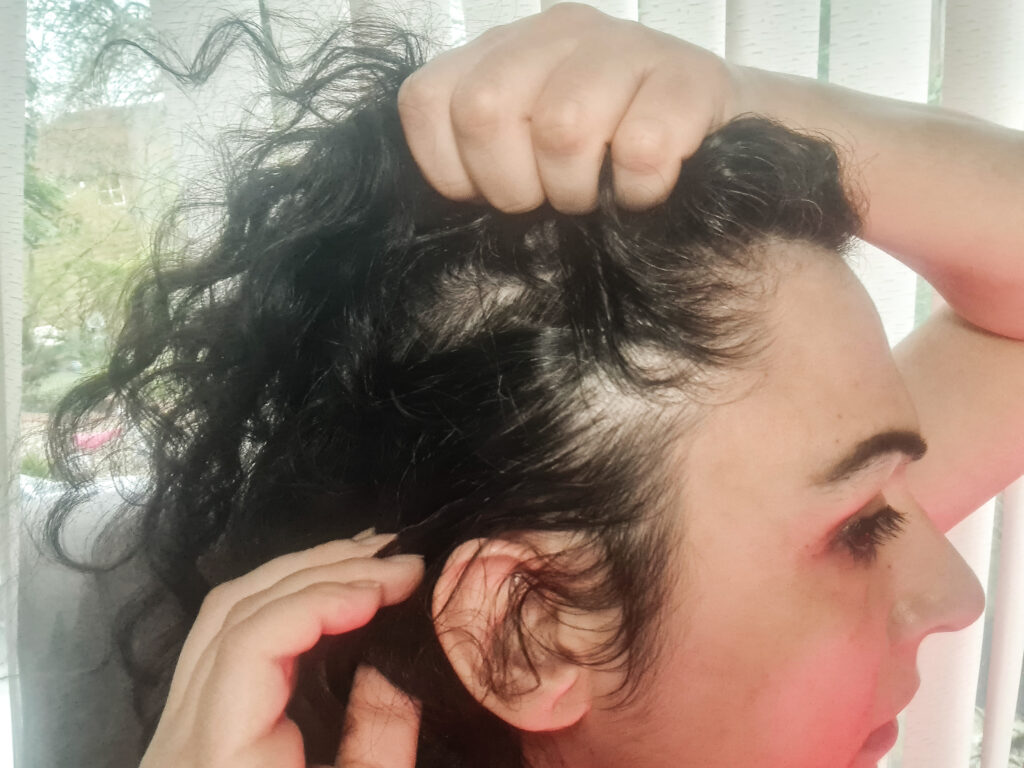
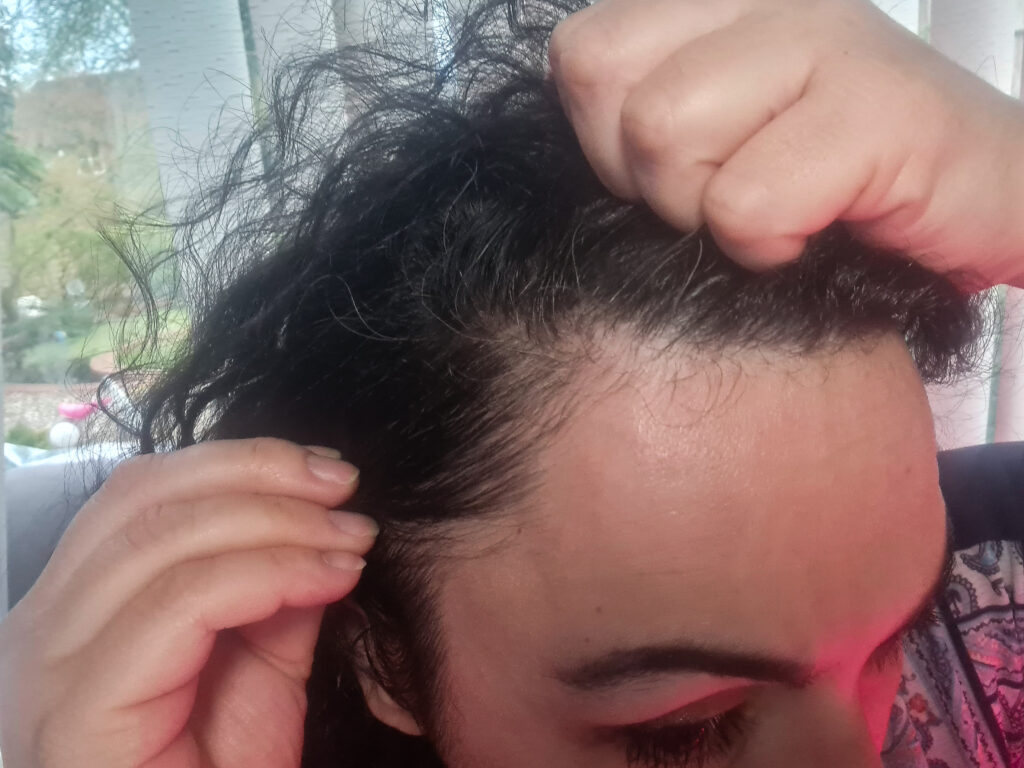
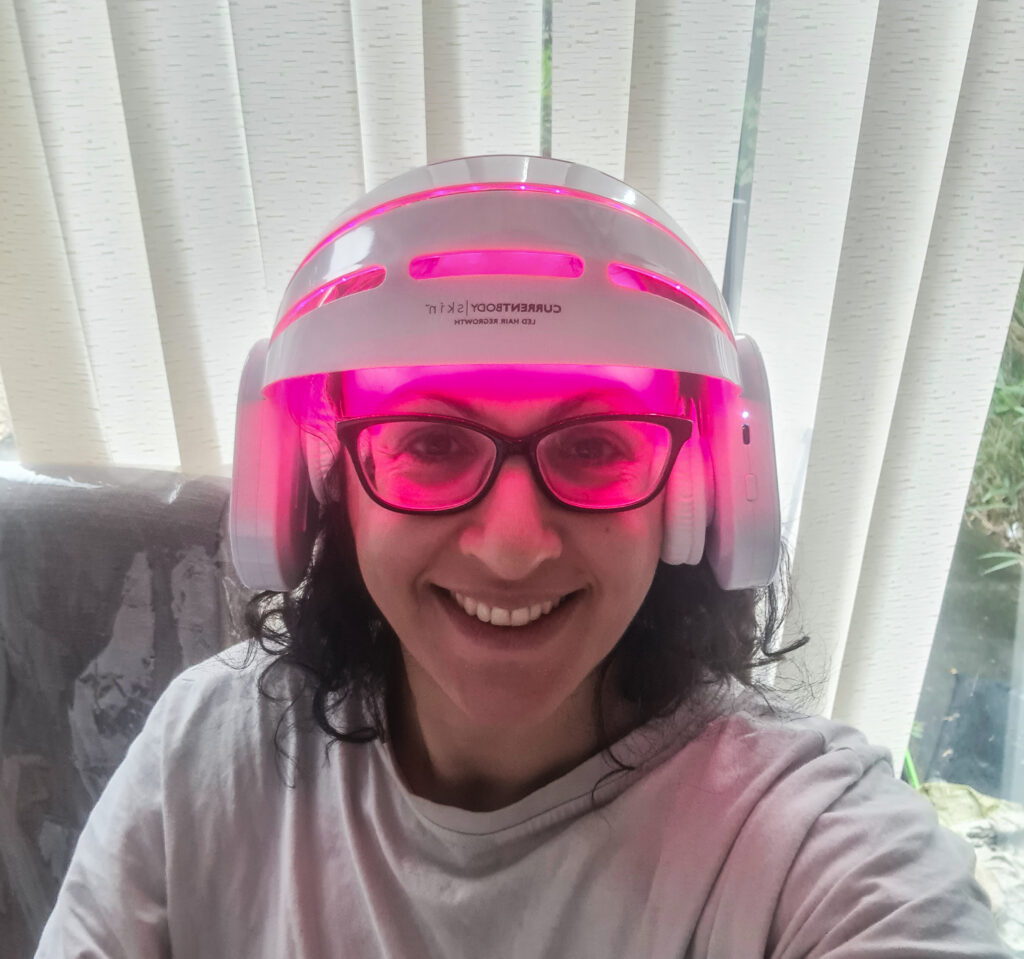
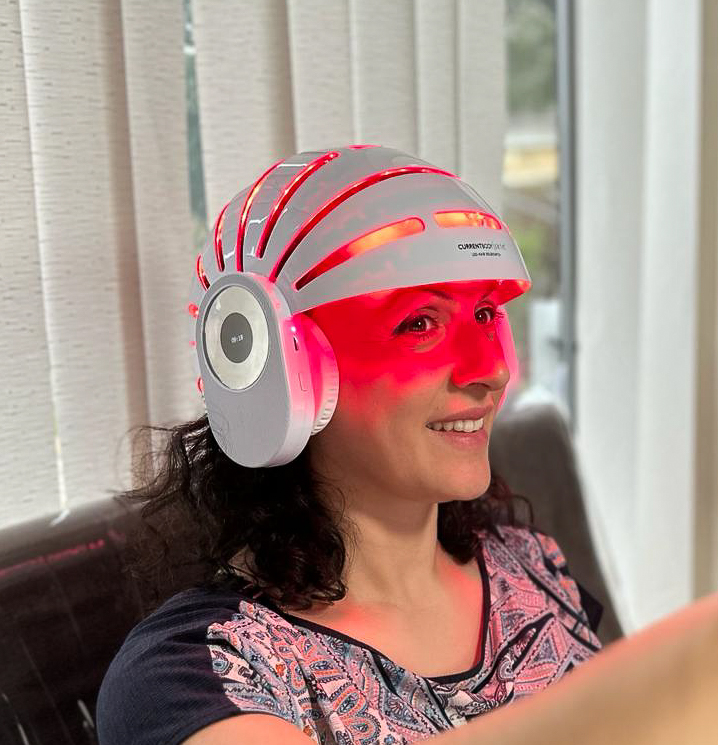
Our hair is thickest during the golden (second) trimester, but then after birth, hair falls in clumps. Many women don’t realise that this often happens with our eyelashes too. I lost a lot with number four and have only seen my hair grow back properly after four years. Not to worry, though. Most women replenish their hair naturally within the first year, but this largely depends on your body, genetics and age. But there are ways to help speed up hair growth (watch this space for a full beauty guide coming soon on how I did this!) Additionally, I recommend checking out my article on red light therapy, which has been extremely helpful for replenishing my curly locks.
Trying a lash serum for the first time is exciting, but it’s also essential to consider whether its safe and effective. For pregnant and breastfeeding mothers, these concerns multiply as hormonal changes affect both lash growth and which products you can use safely.
And not every serum works the same way. Results vary depending on the ingredients and each person’s lash growth cycle. During pregnancy and postpartum, hormonal fluctuations can dramatically impact these results. Some notice fuller-looking lashes within weeks, while others see more gradual changes. Paying attention to application instructions and consistency helps maximise results while reducing the chance of side effects.
However, with the right approach, lash serums can become a simple yet effective addition to a daily routine – even during the demanding months of pregnancy and early parenthood.
In this article, we’ll talk about what lash serums are out there and how to use them safely during pregnancy and beyond!
Essential facts to know before using a lash serum during pregnancy and postpartum
How lash serums work and their benefits
Lash serums are formulated to enhance the appearance of eyelashes by promoting growth and increasing thickness. Cosmetic serums usually work by nourishing the hair follicle, while prescription options containing bimatoprost (a prostaglandin analog) actually extend the natural growth phase of lashes and are clinically proven to lengthen them. However, these prescription serums like Latisse are not recommended for pregnant or breastfeeding women due to potential safety concerns.
Cosmetic serums, which are available over the counter, often emphasise conditioning and strengthening rather than medically altering growth cycles. This difference means results can vary, with some formulas focusing more on overall lash health than dramatic length. A lash serum by ForChics, for instance, is typically compared with other cosmetic options that highlight hydration and resilience. Comparing these side by side reveals how ingredients impact shine, softness, and durability. Choosing between them depends on whether the goal is noticeable growth or simply stronger, healthier-looking lashes. Note: Always verify the pregnancy safety of any specific brand with your healthcare provider before use.
Understanding hormonal effects on lashes
During pregnancy, elevated oestrogen levels can significantly impact lash growth patterns. According to recent studies, many women experience enhanced lash growth and thickness, particularly during the second and third trimesters of pregnancy. However, once you give birth, oestrogen levels plummet, signalling hair follicles to enter the telogen (shedding) phase rapidly.
Many new mothers experience unexpected changes in their hair and lashes. It’s not uncommon to notice your lashes thinning or even eyelashes falling out postpartum. This phenomenon, known as telogen effluvium, typically peaks 3 to 6 months after delivery.
Types of lash serums and key ingredients
There are two main categories: prescription serums and cosmetic serums. Cosmetic serums rely on nourishing ingredients. Common ones include:
Peptides: Support lash strength and reduce breakage.
Biotin: Promotes healthier hair growth.
Castor oil: Provides hydration and conditioning.
Plant extracts: Offer antioxidant and soothing effects for sensitive eyes.
Some cosmetic formulas may also contain prostaglandin derivatives, although in lower concentrations than those found in prescription products. Checking the ingredient list is essential, especially for individuals with allergies or sensitivities.
Pregnancy-safe ingredients to look for
Natural ingredients offer a more organic option for those seeking pregnancy-safe alternatives. Consider incorporating the following ingredients into your lash care routine: Castor Oil: Renowned for its moisturising properties, castor oil nourishes and strengthens lashes.
Safe ingredients during pregnancy and breastfeeding include:
Hyaluronic acid
Collagen
Vitamin E (Tocopherol)
Panthenol
Pumpkin seed extract
Biotin (Vitamin B7)
Potential side effects and safety precautions
While many eyelash serums are well tolerated, side effects can occur. Prescription serums with bimatoprost may cause redness, itching, or darkening of the eyelid skin. In rare cases, they can cause an increase in pigmentation of the iris. Cosmetic serums are generally milder but can still irritate, especially in individuals with sensitive eyes. At the same time, many people incorporate medical grade skincare products into their overall routine, as eye care and skin health often go hand in hand.
To reduce risks:
Apply only to the lash line, never inside the eye.
Use a clean applicator to prevent bacterial contamination.
Discontinue use if persistent irritation occurs.
Consulting an eye care professional is recommended before starting a serum, especially for individuals with pre-existing eye conditions or those considering prescription-strength options.
How to use lash serums safely and effectively during pregnancy and breastfeeding
Preparing your lashes for application
Clean lashes absorb serum more effectively. She should always remove makeup with a gentle makeup remover and wash the eye area thoroughly to clear away mascara, eyeliner, or oils. This prevents buildup that can block the serum from reaching the lash line. Those who wear lash extensions or false lashes require extra care. Oil-based removers can weaken the adhesive, so oil-free cleansers are recommended.
Healthy lashes respond better to treatment. Using a mild lash conditioner can help maintain flexibility and reduce breakage, particularly during the natural growth cycle of your lashes. By starting with clean, conditioned lashes, the serum can work without interference from dirt or product buildup.
Step-by-step guide to applying lash serum
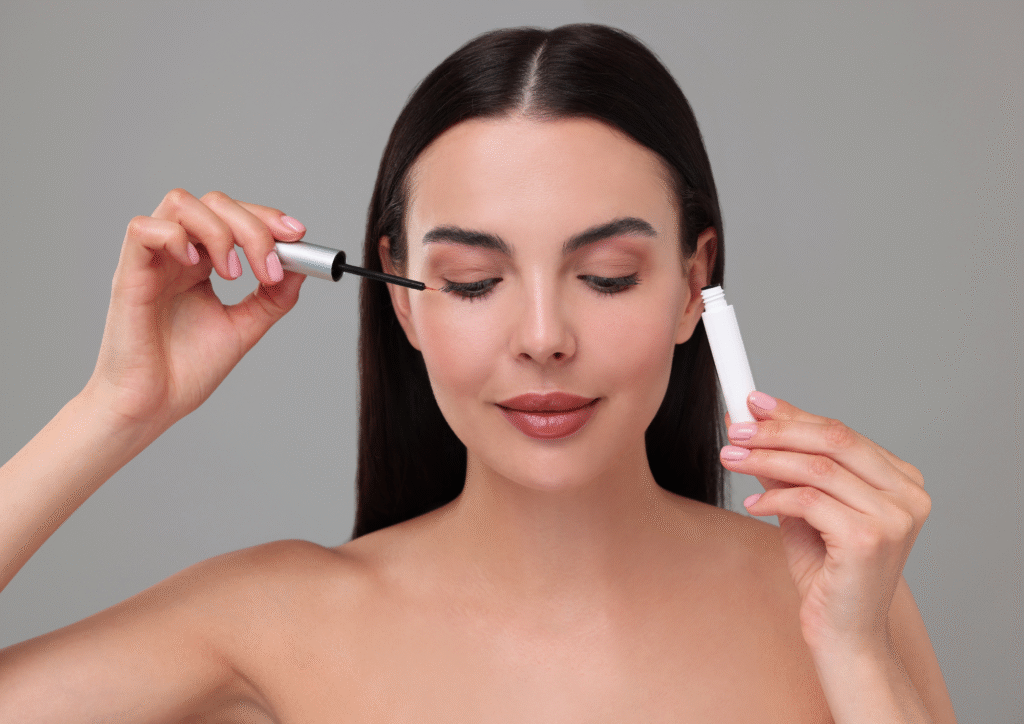
Most lash serums, including options from brands like ForChics, come with a thin applicator brush. Apply a small amount directly along the upper lash line, similar to liquid eyeliner. Only one dip per eye is sufficient, as using more does not expedite results but may increase the risk of eye irritation.
Application should be limited to the upper lash line. The lower lashes do not require direct application, as the serum naturally transfers when blinking. Applying too close to the inner corner of the eye should be avoided to reduce discomfort. After applying, she should allow the serum to dry for at least 90 seconds before using other products. This prevents smudging and ensures the serum fully absorbs into the lash line.
Special considerations for nursing mothers
When breastfeeding, additional precautions ensure both yours and baby’s safety:
Apply serum after the last evening feeding
Wash your hands thoroughly after application
Store products safely away from baby’s reach
Choose formulas specifically labelled as breastfeeding-safe
Managing postpartum lash loss: what to expect
Postpartum hair loss is a regular part of pregnancy and childbirth and won’t affect your baby. But hair that falls out can wrap around your baby’s fingers, toes or other body parts. This rare occurrence is called a hair tourniquet.
Timeline of lash changes
While this issue will likely eventually resolve (1-1.5 years postpartum), understanding the timeline helps manage expectations. Studies show that 68-90% of new mothers experience postpartum hair loss:
During Pregnancy: Enhanced growth due to elevated oestrogen
0-3 Months Postpartum: Initial shedding begins
3-6 Months Postpartum: Many women who have recently had a baby will see noticeable hair loss that peaks after a few months
6-12 Months Postpartum: Recovery and regrowth phase
Nutritional support for lash health
Maintaining a balanced diet with adequate levels of essential nutrients is always crucial for your health — and all the more so when you’re eating for two! Lash loss can be linked to hormonal changes, but it is often more commonly associated with a deficiency.
Essential nutrients include:
Iron (prevents anaemia-related lash loss)
Biotin (Vitamin B7)
Vitamin E
Protein
Omega-3 fatty acids
When to seek professional help
Consult your healthcare provider if:
Lash loss continues beyond 12 months postpartum
You experience sudden, patchy lash loss
Irritation persists after using any lash product
You notice other symptoms like fatigue or weight changes (possible thyroid issues)
Frequently asked questions
Can I use lash serum while pregnant?
Because hormone levels change during pregnancy and breastfeeding, you should use any cosmetic products, including EYELASH AWAKENING SERUM, with caution and always consult with your doctor. Choose serums without prostaglandin analogs and stick to natural, nourishing ingredients.
Is GrandeLash safe during pregnancy?
GrandeLash contains prostaglandin analogs and is generally not recommended during pregnancy or breastfeeding. Many mothers report switching to safer alternatives during this time.
What’s the best pregnancy-safe lash serum?
Some mothers have reported positive experiences with serums like DIME Lash Serum, which has been noted for its effectiveness and safety. Users have reported noticeable improvements in lash length and fullness, with no adverse effects. Other potentially safe options include those containing only peptides, biotin, and natural oils.
Important: Individual experiences may vary. Always consult your healthcare provider before using any lash serum during pregnancy or breastfeeding, regardless of brand claims or user testimonials.
Can lash serum pass through breast milk?
Given the similarities between bimatoprost and other prostaglandin-based compounds found in over-the-counter lash serums, healthcare providers often err on the side of caution and advise against their use during breastfeeding.
How long does postpartum lash loss last?
The shedding should last less than six months. Your hair should regain its fullness by the time your child turns one.
Can I use castor oil on my lashes while breastfeeding?
Pure castor oil applied topically to lashes is generally considered safe during breastfeeding when used in small amounts. However, always consult your healthcare provider first.
Will my lashes grow back after postpartum loss?
Hair loss after childbirth is not permanent. New hair will start growing back as soon as the old hair falls out.
Can thyroid issues cause lash loss after pregnancy?
Yes, thyroid changes are usually also temporary symptoms. These changes within the thyroid glands should resolve once the pregnancy is complete and hormones responsible for hyperthyroidism — human chorionic gonadotropin and oestrogen — return to normal levels.
Is it safe to get lash extensions while pregnant?
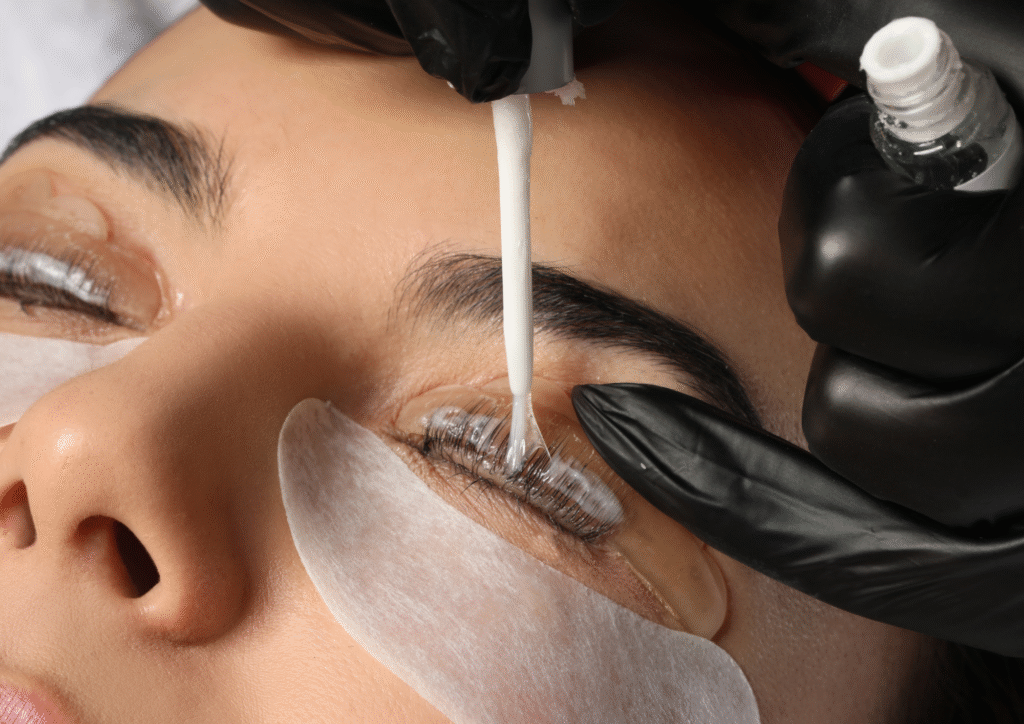
Eyelash extensions can be a safe alternative to lash serums during pregnancy. Unlike serums, which commonly contain prostaglandin analogues, eyelash extensions are applied externally.
What vitamins help with postpartum lash growth?
Key vitamins include biotin (B7), vitamin E, iron, and vitamin D. A quality postnatal vitamin can help support overall hair and lash health.
Final thoughts
Choosing a lash serum requires attention to ingredients, safety, and application – especially during pregnancy and breastfeeding. Products containing peptides, biotin, or plant extracts may support healthier lashes. Avoiding harsh irritants helps reduce the risk of side effects. Not every formula works the same for everyone. Considering personal sensitivity, reviewing product details, and setting realistic expectations help ensure a better experience with lash serums.
For new and expecting parents, understanding the hormonal changes affecting lash growth and choosing pregnancy-safe options provides peace of mind while supporting lash health. Remember that postpartum lash loss is temporary, and with proper care and patience, your lashes will recover. Always consult with your healthcare provider before starting any new beauty regimen during pregnancy or while breastfeeding.
Disclaimer: This article is for informational purposes only and should not replace professional medical advice. Always consult your healthcare provider before using any new products during pregnancy or breastfeeding.
*Collaborative feature post*
The power of parent community support groups to boost mental health
Sponsored by Graco UK • Maternal Mental Health Awareness Week – the theme is parent community
I have four kids and four daily drop-offs, which leaves me approximately 12 minutes per day (well, actually, four hours) to run a business, get fit, and maintain some form of mental sanity. However, something usually gives, and it tends to be me.
I swapped my secure, predictable and painfully tedious legal career for a life promising more flexibility and freedom. And while I wonder whether I’ve just exchanged one boss for four smaller, more demanding ones, I still wouldn’t trade it for the world – even if my ‘office’ is wherever I can find space in the house amongst the constant sea of noise. For proof of the beloved craziness, click here.
What people rarely mention about going freelance or starting your own business, especially as a parent, is the loneliness that often accompanies it. It’s the “am I the only one drowning in invoices while living in a sea of mess?” feeling. It’s the anxiety spike when your toddler’s nursery calls mid-meeting (again) and says she’s coughed and now needs to come home. (Cancel that PM meeting – again!) It’s the partner calling to say he’s going to be late again, and now you have to figure out how to manage four pick-ups, two deadlines, cook meals, keep the house manageable, and deal with clients who are rightfully chasing for their work.
Since 2020, about one in four self-employed Brits joined the hustling game and the headcount of self-employed mums jumped 9% to 601,000 in 2023 alone. It turned out that conventional jobs still didn’t align with the school run and nearly 1 in 5 UK mums quit or considered quitting employment altogether because the childcare/work maths just wasn’t mathing.
In our recent Hand2Hold survey (to be published soon as a study), over a quarter of parents reported feeling isolated, and 85.9% of mothers stated that quick access to mental health and community support was their top priority.
So it turns out, I’m not alone.
The good news? A parent community can fix or at least minimise a lot of the isolation and anxiety us parent entrepreneurs feel almost daily.
You can’t build something incredible entirely on your own. You need community. You need people who understand why you’re typing with one hand and nursing a baby with the other – why you’re staring at an email repeatedly, but your brain says nope because your child has woken up again for the nth time that night.
A parent community isn’t just nice to have—it’s a lifeline for most of us. And in this article, we will unpack why:
There is a surge in parents turning to self-employment, yet feeling more isolated than ever
How a parent community can be one of the biggest pillars of support to combat loneliness and overwhelm
How campaigns like Graco’s focus on Maternal Health Week (5-11 May) and Mental Health Awareness (12-18 May, theme: Community) spotlights exactly why these support circles matter
Simple ways you can join or even create your parent tribe today, plus how to join the conversation on @graco_uk all month and share your story with #maternalmentalhealthmatters
So, grab your (probably reheated) coffee and let’s dive in!
And among these, a huge number are parents who’ve traded commutes for the convenience of home. Whether it’s freelancing during nap time or running an Etsy shop after the school run, the “parentpreneur” movement is in full swing now, so much so, my business partner and I have started a new YouTube channel called TechTalksZone where we review AI and tech tools that enhance productivity for parent entrepreneurs. Post-pandemic, many mums and dads realised they could balance career ambitions with family life – as long as they had flexibility (and a steady supply of caffeine). It’s no wonder nearly half the country’s workforce is working from the kitchen table in one way or another, redefining what a “home office” looks like in 2025.
Working mums are turning side-hustles into full-time gigs too. In the last year alone, the number of “side hustlers” in Britain jumped 20% (to about 460,000), and mums accounted for 21% of those side businesses (up 8% since the year before). The dads are in on it as well – while exact figures for fathers aren’t singled out in this stat, overall self-employment is rising across the board, hitting 4.4 million self-employed Brits by late 2024. The reasons vary: some parents were pushed out by a tough job market or the cost-of-living crunch, others were pulled by the allure of being their own boss. But the trend is clear – parentpreneurs are becoming a formidable part of the economy.
The power of parent community
I’m glad I found this group!
When I first dove into self-employment, a part of me felt relieved that I didn’t have to take the tube or face my boss anymore. However, panic soon set in when I realised I also had to work to get paid – no more regular monthly income, sick pay or annual holidays. Yes, finally I had flexibility, but suddenly I also felt isolation and anxiety. However, throughout my 14 years as a blogger, I’ve genuinely never experienced a more supportive and uplifting community than the one formed by parent bloggers.
Recently, I’ve been actively trying to minimise my time using Facebook groups for solace, especially as WhatsApp became the main channel for client communication. It got me thinking: Why not create a dedicated WhatsApp community specifically for bloggers, particularly parents juggling the relentless demands of work and family life? And thus, the Built for Blogging Community—affectionately known as BBC—was born.
BBC now proudly hosts a tight-knit yet thriving group of around 60 passionate community members, with 21 active chats, spanning topics from general blogger advice to niche support like our ‘Neurospicy Talk’ group. Here, parents openly discuss managing their own neurodiverse minds—or those of their kids—which adds an extra layer of complexity (and sometimes creativity!) to our already chaotic days.
Since launching BBC, the community has buzzed daily with vibrant discussions, sharing invaluable productivity hacks, practical tips on balancing childcare alongside growing businesses, and genuine emotional support on tougher days.
“This group is amazing. I’m glad I found it—I keep telling my husband how grateful I am!”
It wasn’t just a passing comment; it was in response to discovering a new SEO tool shared within our chat, something that significantly boosted her blog traffic. It’s practical, supportive, and exactly why community matters so much.
Then there was the parent who charmingly joked that her toddler was her unofficial “quality control manager” for testing homemade cupcake recipes. Instead of raised eyebrows, the group responded enthusiastically with recipe tweaks and promotion strategies—after all, who better to understand juggling intricate blog work with Peppa Pig blaring in the background than fellow parent entrepreneurs?
These interactions are daily proof that this isn’t merely an online group—it’s a lifeline. Another mum confided during a particularly tough week:
“Hey, sorry for the non-bloggy chat but I’m really struggling…I don’t really know who else I can talk to.”
The response was instant and heartfelt:
“Chat away we’re all here…You’ve got a lot going on. Be kind to yourself.”
Some parents are suffering real life-altering challenges and sometimes a parent community outlet is all they have:
I live in a foreign country where I just about get by day to day with the language barriers. I have one person who I would call a friend locally. This community has given me a group of people, where I may not always have something to say but feel I am in the conversation. Its brought life back to me if that makes sense. When I do have something to say or a problem with blogging or another side hustle, they are always supportive and uplifting.
I’m a single parent who has not got many options for childcare so most evenings once my child is asleep I am home alone and turn to the online community for a chat. What often starts as a discussion about a work related topic ends up being a group chat which becomes a huge part of your life. I’m glad that I’m part of supportive and motivational communities because instead of idle gossip and black hole doom scrolling of social media, we are all productive and have crafted feasible opportunities to turn our hobbies and passions into ways to earn additional income. My biggest cheerleaders are the online community.
This community has helped me through the toughest of times. I’ve met some ladies who I can turn to no matter what and have helped me through the darkest of times – my dad died the day after my second child was born and a group of them were there for me, even miles away, to be a shoulder to cry on and they bought us takeaways and vouchers for ready meals just to take some of the stress off as well as buying something for my oldest who was going through such a mix of emotions at the time and didn’t know how to deal with them. Most of my closest friends are people I’ve met through blogging; some I see often and some I’ve actually never met IRL but I wouldn’t be without them.
A small group of my now best friends are from blogging. They’ve been there through my lonely times and hard times, we can talk about anything and the support is there. We don’t talk every day but when we do it’s right from where we left off. I don’t know where I would be without them over the last few years x
I started my blog when my daughter was just about to leave primary school and I felt sort of redundant as no more school runs etc. then first term into her new secondary school she became ill with a chronic illness. This gave me a lifeline as she became bedbound. I found a great community and made new friends on here as we navigated a new life. It gave me the chance also to share the real story of living with a chronic illness. Then Feb this year my husband suddenly collapsed and died with no warning. I would be totally lost without the support of both my blogging friends and also readers.
These friendships and interactions may be digital, but their impact on mental health and daily wellbeing is profoundly real. According to recent research by the Mental Health Foundation, community support directly reduces anxiety and can significantly lessen symptoms of depression. Given that nearly half (49%) of UK freelancers regularly experience loneliness and isolation (IPSE, 2023), communities like ours aren’t just nice-to-haves—they’re essential.
Why a parent community equals sanity (Graco knows it too!)
The Mental Health Foundation highlights that our connections to others play a pivotal role in safeguarding mental health, something we instinctively know within our BBC circles. In fact, research consistently shows that community support significantly reduces anxiety and symptoms of depression (Mental Health Foundation, 2023).
This May, Graco’s dedicated campaign perfectly highlights why community support is crucial for parental wellbeing. Graco is actively supporting Maternal Mental Health Awareness Week (5–11 May) and Mental Health Awareness Week (12–18 May), whose theme this year is ‘Community’. Their focus mirrors what we parent bloggers know all too well—that parenting was never meant to be done alone. It genuinely takes a village—virtual or otherwise—to support the wellbeing of parents navigating life’s daily challenges.
Graco is also proudly partnering with organisations like PANDAS Foundation, the UK’s leading Postnatal Depression (PND) awareness and support charity. PANDAS provides vital services like their dedicated helpline and WhatsApp chat (available daily from 8am to 10pm UK time) to support parents experiencing anxiety, depression, or overwhelm. Their work underlines why accessible mental health resources and community networks matter enormously in safeguarding parental mental health.
From my experience in our Built for Blogging Community, having reliable support networks transforms how parents manage day-to-day stressors. The small things—like getting quick reassurance when your toddler interrupts a client call, or practical advice for handling a particularly difficult parenting day—are often what keeps us going.
When Graco reached out to me, they emphasised a crucial question:
“What does community really mean to you, and how does the blogger space enhance this?”
For me, community means having a judgement-free zone, full of parents who completely understand the intricacies of trying to maintain a professional identity alongside parenting. The blogging space uniquely supports this because it naturally fosters connection and genuine empathy. Bloggers don’t just share advice; they share vulnerability, struggles, and heartfelt encouragement, creating real bonds despite physical distance.
Over the years, through my blog and now the BBC, I’ve witnessed firsthand how powerful these connections can be. I’ve seen members pull each other out of isolation, share resources that genuinely boost productivity, and offer emotional support during deeply personal hardships. Our community is proof that digital spaces can meaningfully combat loneliness, making parent entrepreneurship sustainable and fulfilling.
What Graco’s campaign means for you
This May, Graco invites you to join the conversation. They’re running expert-led discussions and sharing inspiring parent stories over on their Instagram account @graco_uk. Throughout the month, Graco aims to amplify parent voices and experiences, reminding us that community connection is vital to mental health and overall wellbeing.
Follow @motherhooddiaries on Instagram too as we’ll be sharing their stories on our space too.
Check out The Graco Village for tips on and links to helpful articles to experts and resources
Share your own story using #maternalmentalhealthmatters to connect with others and reinforce that no parent is alone in this journey.
Simple ways to join or create your own parent tribe
So, feeling inspired to tap into the power of community? Good—because if you take just one thing away from this article, let it be this:
You don’t have to do this alone.
Here’s how you can find—or build—your own parent support network:
Jump into existing online groups
You don’t have to reinvent the wheel (we’re too tired for that anyway). Platforms like Facebook still host brilliant parent blogger groups, but WhatsApp communities are really where it’s at now.
With WhatsApp Communities rolled out across the UK, it has never been easier to stay connected 24/7, straight from your phone. No logging into a portal, no endless refreshing—just real conversations, real quick.
This is exactly how our Built for Blogging Community kicked off—one WhatsApp message at a time. Fast forward and we’re a buzzing hive of productivity tips, pep talks, and the occasional “I need to lie down in a dark room” check-ins.
Attend virtual events — or even real-life ones!
Not every brilliant conversation happens in a group chat (even though, yes, our memes are pretty epic). Sometimes, the best inspiration comes from hearing real experts share their stories—live, unfiltered, and from the heart.
Charities like the PANDAS Foundation offer brilliant virtual support groups, Zoom calls, and even WhatsApp peer circles for parents navigating anxiety, postnatal depression, or just… life. It’s real support, without the need to find childcare or put on real trousers. Bliss.
Also, if you’re feeling brave and can make it, real-life events can be just as amazing, if not more so.
Meeting like-minded people in real life reminded me that even though we live in a hyper-digital world, nothing replaces genuine human connection. The smiles, the shared laughs over imposter syndrome, the spontaneous brainstorms over fabulous food—it reignited my creativity and drive in a way that a thousand webinars just can’t.
If you ever get the chance to attend a local parenting event, blogger meet-up, tech show, SEO festival (or even a casual coffee morning at the community centre) grab it! It might feel intimidating at first and you might overthink your outfit. But trust me. One real-world chat can lead to a hundred new opportunities—and a few lifelong friends.
Create your own tribe
Can’t find a group that feels like “your people”? Then start your own!
All it takes is one group chat—on WhatsApp, Slack, Discord, wherever you fancy—and a few parents who are craving connection just like you. (There are always parents craving connection.)
When I created the Built for Blogging Community, it wasn’t polished or perfect—it was real. And that’s what made it powerful. Trust yourself. You’ll be surprised who turns up when you open the door.
Explore local interest groups
And for those days when even WhatsApp can’t quite scratch the human connection itch, look local.
Libraries, children’s centres, and local “What’s On” guides often list meet-ups like baby sensory classes, dads’ pram walks, toddler forest schools—you name it. These real-world spaces offer connection and an excuse to get out of the house without needing to put on full makeup. (Win-win.)
FAQs about parent communities
What is a parent community?
A parent community is a support network where parents share experiences, advice, and emotional support through online platforms or local groups.
Why is community involvement important for parent mental health?
Community involvement significantly reduces feelings of isolation and anxiety, providing emotional support and practical advice crucial for mental wellbeing.
How can parents get involved in a community?
Parents can join existing online groups, attend local or virtual events, start their own community networks, or engage with charity support groups like PANDAS Foundation.
What are some recommended parent support resources?
Where can parents find immediate support in crisis situations?
For urgent support, parents can contact the Parent Stress Line, PANDASFoundation helpline, or their local health services.
Final thoughts
Parenting, freelancing, entrepreneurship and blogging are undeniably challenging—but when you have a community behind you, you’re never truly walking the tightrope alone.
It really does take a village to raise a parent. Whether that’s through WhatsApp chats with fellow bloggers at 3a.m., a supportive postnatal helpline like PANDAS Foundation, or tuning in to real talk from brands like Graco who genuinely champion parental wellbeing—community isn’t a luxury. It’s a lifeline. It’s essential.
This May, during Maternal Mental Health Awareness Week (5–11 May) and Mental Health Awareness Week (12–18 May), Graco is shining a spotlight on how vital community is to our wellbeing as parents. They’re partnering with brilliant organisations like PANDAS to open up honest conversations about mental health, connection, and support—and you’re invited to join.
Here’s how you can get involved:
Follow @graco_uk on Instagram for expert-led discussions, inspiring parent stories, and practical tips throughout the month.
Please share your own story using #maternalmentalhealthmatters and show others they’re never alone.
Check out The Graco Village, Graco’s blog all about helping parents feel seen and understood
Explore charities like PANDAS Foundation for mental health support, whether you need it today or simply want to know help is there if you ever do.
Join communities like Built for Blogging or create your own tribe—because sometimes the first step to feeling better is finding your people.
You can be smashing deadlines, managing tantrums, dreaming up blog posts, making orders and still need someone to remind you—you’ve got this.
And you really do.
Sponsored by Graco
Pregnancy in the summer: Tips for surviving the heat
If pregnancy in the summer has turned you into a walking lava lamp—complete with 3 a.m. sweat puddles—welcome to the club nobody asked to join. Night sweats, swelling, and relentless heat are common when hormones, higher blood volume, and muggy weather collide. This guide distils the latest science and real-world experience into clear, actionable tips for pregnancy in the summer, covering hydration, cooling strategies, and smart wardrobe choices—so you can safeguard your health (and your baby’s) while temperatures climb.
Let’s dive in. (into a pool, preferably!)
Why night sweats (and heat intolerance) hit pregnant women hard
Rising oestrogen in every trimester nudges your core temperature upward. Right after birth, those levels plunge, sparking even more nighttime perspiration. Progesterone also raises metabolic rate, adding internal heat that your body needs to lose. When humid air slows evaporation and you’re also dealing with postpartum recovery, new-baby stress, and breastfeeding, your internal thermostat works overtime.
During the first and third trimesters, blood volume and metabolism peak, which can lower your heat tolerance. Sudden dizziness, headaches, nausea, or a rapid pulse are early warnings of heat exhaustion, which can escalate to heat stroke.
What to do right away
Hydrate: small sips of water or an electrolyte drink every 15 minutes.
Seek cooler air: move to an air-conditioned room or into the shade; a cool shower can lower your core temperature by about 1 °c.
Rest & elevate: prop feet to improve circulation and reduce swelling.
Loosen clothing: swap to light, moisture-wicking layers.
Monitor: If confusion or a temperature of 38 °c or higher appears, call your midwife or seek emergency care.
Prevention strategies
Schedule errands or exercise before 10 a.m. or after 7 p.m.
Use a broad-spectrum SPF 30+ sunscreen, a wide-brimmed hat, and UPF clothing.
Take short “cool-down” breaks indoors.
Listen to fatigue signals; rest rather than power through.
What to look for in a nightgown that actually helps
You can’t switch off hormones, but you can choose sleepwear that works with them, not against them. Use this short checklist the next time you shop.
Feature
Why you need it in summer
Moisture-Wicking Fabric
Skip anything that feels like plastic wrap. Bamboo, modal, or technical blends whisk sweat away so your skin feels cool and dry—vital for summer pregnancy tips that work.
Breathability
Airflow matters. A loose weave lets excess heat escape instead of trapping it. Check out Cool-Jams nightgowns for those nights when you experience night sweats, allowing you to sleep cool without having to blast the AC all night.
Lightweight Feel
Heavy flannel in July? Hard pass. Choose thin layers (that aren’t see-through unless that’s your vibe).
Flexibility & Movement
Side slits or four-way stretch let you shift positions—feeding, burping, or just getting comfortable—without feeling restrained.
Nursing-Friendly Access
Button fronts, crossover panels, or discreet snaps allow quick, low-effort feeds at 3 a.m. when you’d rather not fumble with tight necklines.
Easy Care
Machine-washable, quick-dry fabrics mean you always have a fresh gown ready—important when night sweats strike on repeat.
Best nightgown styles for hot, sleepless nights
Style
Why it rocks in summer
Sleeveless Bamboo Gown
Ultra-soft, breathable, and moisture-wicking—the MVP if you run warm.
Cotton-Modal Sleep Dress
Holds its shape yet stretches with your changing body; ideal as bump and bust sizes fluctuate.
Short-Sleeve Nursing Gown
Snap-down shoulders plus cooling fabric make late-night feeds straightforward and sweat-minimal.
Adjustable Spaghetti-Strap Gown
Light, breezy, and layer-friendly with straps you can loosen or tighten as your body changes well past your due date.
Keep one or two of these in rotation, and you’ll give your body the best chance to regulate temperature—and your mind the best chance at uninterrupted sleep.
Cool tech and gear worth tossing in your basket
Gadget
Why It’s Handy
Evaporative cooling towel
Snap, shake, drape over neck; drops skin temp in seconds without dripping.
USB neck fan
Hands-free breeze on the school run, farmers’ market, or while folding baby grows.
Gel-filled pillow insert
Pop it in the freezer; slide under your pillowcase for a cool-side-of-the-pillow feel all night.
Insulated 1-Litre bottle
Cold water stays cold for 24 h—no excuses to skip sips.
Pros and cons of a summer pregnancy
The Upside
The Trade-Off
Daylight Hours
Longer evenings make it easier to fit in low-impact outdoor activities—think early-morning walks or sunset strolls that help improve circulation and reduce swelling.
Midday sun can push your body temperature into the discomfort zone. Plan errands and exercise for the cooler hours to avoid heat exhaustion.
Seasonal Produce
Markets overflow with hydrating fruit—watermelon, strawberries, peaches—making good nutrition as simple as a snack bowl.
High humidity can dull the appetite, so keep an eye on calorie and protein intake if you’re feeling less hungry.
Lightweight Wardrobe
Breathable dresses, maternity shorts, and sandals put less pressure on ankles and allow feet to expand without feeling squeezed.
Sandals offer less arch support. If you’re prone to foot pain or swelling, alternate with a supportive pair of athletic shoes.
Social Calendar
Summer barbecues and garden gatherings let you stay connected without winter travel headaches.
Hot venues and crowded patios raise the risk of overheating; have a shady exit plan and drink plenty of water.
Natural Vitamin D
Moderate sun exposure supports calcium absorption for both you and baby—good for bone health.
Balance is crucial; overexposure means requiring extra sunscreen applications and an increased risk of heat intolerance or sunburn.
Simpler Layers
Fewer layers mean fewer laundry loads—helpful when energy dips late in the third trimester.
Air-conditioned spaces can feel chilly against bare arms or legs; keep a light cardigan or shawl handy.
Key takeaway: Summer pregnancy brings genuine perks—fresh food, flexible daylight, and less bulky clothing—but you’ll need to manage heat carefully. Schedule activity during cooler parts of the day, prioritise hydration, and rely on breathable fabrics to keep you and your baby comfortable all season long.
Cons of a summer pregnancy
Higher heat risk
As outdoor temperatures rise, your core body temperature also increases. Because your blood volume and metabolic rate are already elevated, you lose fluid more quickly than you can replace it. That raises the chance of dehydration, heat exhaustion, and, if you stay overheated for too long, heat stroke. Early red flags include dizziness, a pounding headache, or a sudden drop in energy. The fix: pace outdoor time, alternate shade with air-conditioned breaks, and drink plenty of water or an electrolyte drink every hour you’re outside.
Daily sunscreen duty
Pregnancy hormones make the skin more sensitive to the sun, and the summer months bring more vigorous UV intensity. A broad-spectrum SPF 30 (or higher) is non-negotiable to lower the risk of sunburn, melasma, and overheating. Reapply every two hours—more often if you’re swimming or sweating—and pair it with a wide-brim hat and UPF clothing for extra protection.
Humidity-driven fatigue
High humidity stalls sweat evaporation, so your body can’t cool itself efficiently. The result is persistent warmth, sluggish circulation, and a heaviness in your muscles that makes a midday nap feel less like a luxury and more like a survival tactic. Schedule essential tasks early, lean on short rest breaks, and use a fan or air conditioning to keep indoor humidity in check.
On-the-road (or beach-day) safety checklist
Seat-belt 101: Lap belt under the bump, shoulder belt between the breasts.
Keep 2 litres of water and a fold-up sunshade in the boot—traffic jams happen.
Never wait in a parked car without AC, even “just for a minute.”
Pack a handheld fan and SPF top-ups if you’re beach-bound.
Summer risks and fast fixes
Risk
Why It Matters in Pregnancy
Practical Fix
Dehydration
Your blood volume is up to 50% higher than usual, and warm weather pulls fluid away through sweating. Even mild dehydration can raise your heart rate and lower blood pressure, leaving you dizzy or lightheaded.
Drink plenty: aim for 8–12 cups of water a day, and add coconut water or a low-sugar electrolyte drink if you spend more than 30 minutes in the heat. Keep a reusable bottle within arm’s reach and take small sips every 15–20 minutes rather than chugging a litre at once.
Swelling (oedema)
Gravity + fluid retention = puffy feet, ankles, and hands, especially late in the day. Swelling can be uncomfortable and make shoes feel two sizes too small.
Elevate your feet above heart level for 15 minutes, two or three times a day. Slip on graduated compression socks for errands, and load up on potassium-rich foods—bananas, sweet potatoes, spinach—to balance sodium and move excess fluid out of tissues.
Heat-Related Illnesses
Heat exhaustion can arrive quickly when the heat index climbs; unchecked, it can progress to heat stroke, which is a medical emergency for you and baby.
Limit outdoor time when the UV index peaks (roughly 11 a.m.–4 p.m.). If the temperature tops 32 °C / 90 °F, keep activities brief, alternate shade with air-conditioning, and listen for early warning signs—dizziness, nausea, rapid pulse.
Sun Exposure
Pregnancy hormones make skin more reactive to UV light, increasing the chance of sunburn and melasma (“pregnancy mask”).
Apply broad-spectrum SPF 30+ every two hours, wear a wide-brim hat, and choose UV-blocking sunglasses. Lightweight UPF clothing offers extra coverage without trapping heat.
Sticky Sweat & Cabin Fever
Constant humidity makes sweat linger, and staying indoors too long can leave you restless.
Try prenatal water aerobics or lap walking in a pool. Water supports joints, lowers core temperature, and gives you a change of scenery—all in one session.
When to call the pros — red-flag symptoms
Your midwife would rather receive a false alarm call than miss something serious. Ring 111 (or head straight to A&E) if you notice:
Core body temp ≥ 39 °C (102 °F) that won’t drop after cooling.
Dizziness or fainting spells that don’t ease once you sit and sip water.
No sweating even though you feel overheated.
Persistent vomiting, severe headache, or blurred vision.
Reduced foetal movements or a sudden gush of fluid.
Better to check and chill than wonder and worry.
Watch the air, not just the thermometer
UK heatwaves often bring pollution alerts. Download the free UK-AIR or NHS Air Quality app:
If particulate or ozone levels spike, move workouts indoors.
Close windows during peak pollution and run a fan or portable purifier instead.
Cool tips for surviving a summer pregnancy
Park a fan by the bed. Even a tabletop model can enhance airflow and aid in sweat evaporation.
Take a lukewarm shower before sleep. A brief rinse lowers core temperature by as much as 0.5 °C, making it easier to drift off.
Use breathable bedding. Swap synthetics for cotton sheets and a thin muslin blanket; they wick moisture and dry quickly.
Keep backups handy. Stash a spare nightgown and small towel on your nightstand so you can change without a complete wardrobe hunt at 3 a.m.
Time your errands. Run necessary outdoor tasks before 10 a.m. or after 7 p.m., when the heat index is lower and UV exposure drops.
Choose icy snacks. Smoothies, frozen grapes, or a small sorbet serve double duty—hydration and a mild, cooling calorie boost.
Smart Snacking Tweaks
Pair watermelon with a handful of roasted chickpeas for a protein-rich and balanced snack.
Greek yoghurt + berries: hydration, calcium, and a probiotic boost.
Swap salty crisps for edamame with sea salt—this keeps sodium levels reasonable and adds potassium to help combat swelling.
Practice gentle prenatal yoga indoors. It encourages circulation, eases back tension, and can help prevent swelling without adding heat stress.
Book appointments strategically. Schedule antenatal check-ups during cooler parts of the day and ask your midwife or obstetrician for personalised summer pregnancy tips based on your health history.
Beat-the-heat workouts
Sunrise stroll (20 min): still cool, still counts.
Pool laps or prenatal aqua-aerobics (≤ 30 min): joint-friendly, instant chill.
Stationary cycling indoors with a fan: talk-test rule—if you can’t chat, dial it back.
Stop if heart rate soars above ~140 bpm or you feel light-headed.
Mind the mood
Heat plus third-trimester fatigue can crank up anxiety. Two quick tools:
Five-minute box-breathing (inhale 4 s, hold 4, exhale 4, hold 4).
Mindfulness apps like Headspace’s “Pregnancy SOS” track—press play while feet-up. Ask your partner or a friend for a daily “how’s your head?” check-in; small question, big impact.
With these targeted strategies, you can navigate the hottest weeks of the year, keep your body temperature in check, and maintain the energy you need for the final stretch toward meeting your baby.
FAQ – Pregnancy in the summer
Does summer affect pregnancy?
Yes. Higher ambient temperatures make regulating body temperature more challenging, increasing the risk of dehydration and heat exhaustion.
Is being pregnant in the summer harder?
Many women find summer pregnancy challenging due to swelling and heat intolerance; however, implementing smart strategies, such as staying hydrated, using air conditioning, and wearing lightweight clothing, can help ease discomfort.
How to survive being pregnant in the summer?
Stay hydrated, rest during the peak heat, opt for breathable fabrics, and keep indoor temperatures cool.
When do you start feeling hot in pregnancy?
Some pregnant women notice heat surges as early as the first trimester, but they commonly intensify in the second and third trimesters.
What outdoor temperature is too hot for pregnancy?
If heat indexes climb above 32 °c (90 °f) or humidity is extreme, limit outdoor activities to brief periods.
How do I reduce internal body heat during pregnancy?
Drink plenty of water, snack on hydrating foods, rest in air-conditioned spaces, and cool your wrists and neck with a damp cloth.
Is hot weather bad for pregnancy?
Extended exposure without breaks can increase the risk of heat stroke. Listen to your body and avoid overheating.
Tips on surviving a summer pregnancy?
Hydrate, wear sunscreen, use fans, and follow the cool-tips list above for common-sense but practical relief.
Final thoughts
Night sweats, swelling, and heat intolerance are familiar companions during pregnancy in the summer, but they don’t have to define the experience. Prioritise hydration, cool sleepwear and strategic self-care to keep both you and baby comfortable. With the right summer pregnancy tips, you’ll cruise through the season and arrive at your due date feeling confident, calm, and ready for that first cuddle.
Disclaimer
This guide is for informational purposes only and is not a substitute for professional medical advice. Always consult your midwife, GP, or obstetrician about individual health concerns.
When it comes to pregnancy and childbirth, both midwives and doctors play essential roles, but their training, approach, and scope of practice vary significantly. Choosing between a midwife vs doctor depends on your personal preferences, medical needs, and the type of care you envision for your pregnancy.
Midwives are trained healthcare professionals who specialise in supporting low-risk pregnancies and natural childbirth. They provide hands-on, personalised care throughout pregnancy, labour, and postpartum. In both the UK and the US, midwives focus on emotional support, patient-centred care, and avoiding unnecessary medical interventions. However, certified midwives have varying levels of training depending on the country. For example:
In the UK, midwives are highly trained professionals registered with the Nursing and Midwifery Council (NMC). They can provide care throughout pregnancy, delivery, and postpartum, even in hospital settings, and work closely with obstetricians if complications arise.
In the US, certified nurse midwives (CNMs) are licensed healthcare providers who can prescribe medication and manage labour, but they typically refer to obstetricians if surgical procedures like C-sections are necessary.
Doctors, specifically obstetricians (OBGYNs), are medical professionals who have completed years of medical school and specialised training in pregnancy and childbirth. They are equipped to handle both low- and high-risk pregnancies and are experts in managing complications. Their care often involves a focus on physical health and safety, making them the go-to option for those with complex medical histories or high-risk pregnancies. In both countries, obstetricians can perform surgical procedures such as caesarean sections and are more likely to recommend medical interventions, such as inducing labour.
Whether you choose a midwife or doctor, both offer excellent care tailored to your needs. Midwives may appeal to those seeking a more natural and personalised experience, while obstetricians are ideal for addressing medical complexities. Understanding the key differences in their roles will help you make the best choice for your pregnancy journey, whether you’re in the UK or the US.
Midwives and the care they provide
Midwives play a vital role in pregnancy care, focusing on a holistic approach that prioritises the wellbeing of you and baby. They provide hands-on support, build trusting relationships with their patients, and often act as advocates for natural birth practices. Midwives are well-suited for low-risk pregnancies, but they also have protocols in place to ensure the safety of mothers and babies should complications arise.
How does a midwife’s education differ from an OBGYN’s/doctor’s?
While both midwives and obstetricians are trained to care for pregnant women, their education and training paths differ. Midwives, such as certified nurse midwives (CNMs) in the US or registered midwives in the UK, complete specialised midwifery education programs. These programs focus on normal, low-risk pregnancies, emphasising natural childbirth and patient-centred care.
In contrast, obstetricians undergo years of medical school, followed by a residency in obstetrics and gynaecology. Their training includes a broader focus on medical and surgical procedures, equipping them to manage high-risk pregnancies and complications. While midwives focus on supporting physiological births, obstetricians are skilled in performing interventions like caesarean sections and handling complex medical situations. Both paths require rigorous training but cater to different types of care needs.
Factor
Midwife
Doctor (OBGYN)
Education Level
Nursing/Midwifery Degree
Medical Degree (MBBS, MD, etc.)
Years of Study
3-5 years
10+ years (medical school + residency)
Focus
Normal, low-risk pregnancies
Low- and high-risk pregnancies, surgery
Certification (UK/US)
Registered Midwife (UK), CNM (US)
Obstetrician certified by RCOG (UK) or ABOG (US)
Scope of Practice
Non-surgical
Includes surgery (e.g., C-sections)
How do midwives deal with labour complications?
Midwives are trained to identify and respond to complications during pregnancy and labour. They are skilled in managing common issues, such as stalled labour or minor blood pressure changes, and use evidence-based techniques to promote a healthy delivery. For example, they might suggest positional changes during labour or natural methods to encourage contractions.
However, in cases of significant complications, such as signs of foetal distress or a need for surgical intervention, midwives collaborate with obstetricians or refer care to a doctor. This partnership allows midwives to focus on their strengths—providing individualised, empathetic support—while making sure medical expertise is available when needed. For high-risk pregnancies, midwives may work as part of a team, ensuring all bases are covered for safe delivery.
Midwives’ adaptability and teamwork make them a valuable part of the healthcare system, as they offer safe and supportive care tailored to the needs of each pregnancy.
Doctors/OBGYNs and the care they provide
Obstetricians, commonly referred to as OBGYNs, are medical doctors specialising in pregnancy, childbirth, and women’s reproductive health. Their extensive training allows them to manage a wide range of situations, from routine care to high-risk pregnancies that require close monitoring and medical interventions. OBGYNs are an essential part of the healthcare system, offering expertise that ensures the safety and wellbeing of both mother and baby, regardless of the complexity of the pregnancy.
OBGYNs are particularly skilled in identifying and addressing complications that may arise during pregnancy. For high-risk pregnancies—such as those involving pre-existing medical conditions, multiple pregnancies, or concerns about foetal development—an OBGYN’s ability to assess and respond swiftly is invaluable. They use advanced tools like ultrasounds, foetal monitors, and diagnostic tests to closely monitor both the baby’s health and the mother’s condition.
In hospital settings, doctors/OBGYNs are often the primary care providers, offering immediate access to a range of medical procedures. These include inducing labour, administering epidurals, and performing caesarean sections when necessary. Their expertise in surgical and non-surgical interventions ensures that even unexpected challenges can be handled safely and efficiently.
Beyond the delivery room, obstetricians play a key role in postnatal care, helping mothers recover physically and addressing any ongoing medical concerns. Their ability to provide both routine gynaecological care and specialised obstetric services makes them a versatile choice for seeking comprehensive healthcare.
Can midwives administer pain medication?
Certified nurse midwives are equipped to manage labour pain, though their approach often emphasises non-invasive, natural comfort measures. These may include breathing techniques, hydrotherapy, and position changes to help reduce discomfort during labour. In hospital settings, CNMs can prescribe and administer certain pain relief medications, such as nitrous oxide or intravenous painkillers, and they can facilitate access to epidurals by collaborating with anaesthesiologists.
For those delivering outside of a hospital, midwives may focus more on holistic pain management techniques, as they typically don’t have access to the same medical resources. This approach makes CNMs an excellent option for individuals who want to explore natural pain relief methods with the reassurance of medical support when needed.
Can midwives perform C-sections?
Midwives are not trained to perform surgical procedures like caesarean sections. If complications arise during labour that require a C-section, the care will be transferred to an OBGYN or a surgical team. Midwives often work in close collaboration with obstetricians in hospitals or birthing centers to ensure a seamless transition if surgical intervention becomes necessary.
While midwives are highly skilled in managing low-risk pregnancies and natural births, their role does not extend to operating rooms. This distinction makes OBGYNs the preferred choice for individuals with a higher likelihood of needing surgical procedures due to high-risk pregnancies or medical conditions.
Researching obstetricians: what to know
Choosing the right obstetrician requires careful research and consideration. Credentials and experience should be your top priorities. Start by compiling a list of prospective doctors and verifying their qualifications. Your OBGYN should be board-certified and have a proven track record of successfully managing pregnancies similar to yours.
Make sure your chosen obstetrician has a clean professional history. Check if they have faced disciplinary actions, medical malpractice claims, or received subpoenas for birth injury settlements. The last thing you want is to risk your safety or your baby’s wellbeing by entrusting your care to someone with a record of negligence.
Should I have a midwife or a doctor deliver my baby?
Deciding between a midwife or a doctor to deliver your baby is a deeply personal choice that depends on several factors, including your medical history, birth preferences, and budget. Both options have their strengths, and understanding what each can offer will help you make the best decision for your unique pregnancy journey.
Medical history
Your health and the risk level of your pregnancy play a significant role in this decision. If you have a low-risk pregnancy, a midwife can provide excellent care, focusing on natural birth practices and minimal interventions. However, for high-risk pregnancies or complications such as gestational diabetes, preeclampsia, or previous cesarean deliveries, an obstetrician (OBGYN) is often the better choice. Doctors are trained to handle complex medical situations and have immediate access to surgical and advanced medical care if needed.
Birth preferences
Your vision for your birth experience is another important consideration. If you’re hoping for a natural birth with minimal medical interventions and a more hands-on, personalised approach, a midwife may align better with your preferences. Midwives often emphasise emotional support and patient involvement in decision-making, helping you feel empowered throughout labour and delivery.
On the other hand, if you prefer to deliver in a hospital setting with access to all medical options, including epidurals and emergency interventions, an OBGYN may be the right fit. Obstetricians can provide a more structured approach, which some people find reassuring, especially if complications arise.
Cost
Cost is another factor to keep in mind, particularly in the US, where healthcare expenses can vary significantly. Midwives are often a more affordable option, especially for home births or deliveries in birthing centres. However, if you’re considering hospital-based care, verify what your insurance covers for both midwives and doctors. In the UK, this decision may involve fewer financial considerations, as midwives and doctors are both accessible through the NHS for most pregnancies.
Ultimately, the choice between a midwife and a doctor comes down to your personal circumstances and what feels right for you and your family.
Cost comparison (average estimates):
US:
Midwife (home birth or birthing center): $2,000 – $4,000
Doctor (hospital delivery): $10,000 – $30,000 (with complications)
With insurance: Hospital births typically cost less, but check coverage for midwife services.
UK:
NHS: Both midwives and doctors are free for eligible individuals.
Private:
Midwife-led care: £2,000 – £5,000.
Doctor-led care: £5,000 – £15,000 (depending on interventions).
FAQs: midwife vs doctor: common questions
Do midwives deliver babies?
Yes, midwives deliver babies. They typically assist with low-risk pregnancies and can provide care in various settings, such as homes, birthing centres, and hospitals. Their focus is on supporting a natural birth process while ensuring safety.
Can midwives do gynaecology?
Certified nurse midwives (CNMs) are trained to provide gynaecological care, such as routine exams, Pap smears, and family planning advice. However, you may need to consult a gynecologist (OBGYN) for more complex gynaecological issues.
Can I have a midwife in a hospital?
Yes, many midwives, especially certified nurse midwives, work in hospital settings. They often collaborate with doctors and other healthcare professionals to ensure comprehensive care, particularly if complications arise.
Can midwives administer pain medication?
Midwives often emphasise non-invasive comfort measures, including:
Breathing techniques and guided relaxation.
Hydrotherapy (e.g., labouring in a warm bath).
Aromatherapy or acupressure.
Position changes to relieve pressure and improve labor progress.
In hospital settings, certified nurse midwives can also administer:
Epidurals (in collaboration with an anesthesiologist).
Nitrous oxide (laughing gas).
Intravenous (IV) painkillers.
Is a midwife a doctor?
No, a midwife is not a doctor. Midwives are trained healthcare professionals specialising in childbirth and women’s reproductive health, but they do not attend medical school or perform surgeries like doctors do.
Can midwives perform C-sections?
Midwives cannot perform C-sections, but they often collaborate with obstetricians in hospitals. According to the World Health Organization (WHO), approximately 21% of all births globally are delivered via C-section, with higher rates in hospital settings. For individuals planning a natural birth, starting with a midwife can reduce the likelihood of surgical interventions unless medically necessary
Are midwives as good as doctors?
Midwives and doctors serve different roles, and their effectiveness depends on the context. For low-risk pregnancies, midwives often provide excellent care with a focus on personalised and natural birthing experiences. Doctors are better equipped to handle high-risk pregnancies or complications.
Can I have a midwife and an OB-GYN?
Research from The Cochrane Review indicates that midwife-led continuity models of care are associated with several benefits compared to other models:
16% reduced likelihood of losing the baby before 24 weeks: There was a decreased risk of foetal loss before 24 weeks’ gestation in midwife-led care models.
Higher rates of spontaneous vaginal births: Women under midwife-led care had increased chances of having a spontaneous vaginal birth.
However, obstetricians are better suited for managing high-risk pregnancies or medical complications requiring surgical interventions.
What is the difference between a midwife and a doula?
A midwife provides medical care during pregnancy, labour, and postpartum, while a doula offers emotional, physical, and informational support. Doulas do not perform medical tasks but focus on advocacy and comfort.
Choosing between a midwife or a doctor to deliver your baby is a deeply personal decision that depends on your medical history, birth preferences, and the level of care you envision for your pregnancy. Midwives offer personalised, holistic support and are ideal for low-risk pregnancies, while obstetricians bring the medical expertise necessary for high-risk situations and surgical interventions.
Whether you choose a midwife for a natural, low-intervention approach or an obstetrician for their specialised skills and access to advanced medical care, the most important thing is that you feel supported, safe, and confident in your decision. Pregnancy is a unique journey, and with the right care team by your side, you can have a positive and empowering experience as you welcome your baby into the world.
*Collaborative feature post*
Kegel8®: pelvic floor exercises postpartum to regain strength
Having a baby comes with so many surprises, some of which you may not have prepared for, like the uproar of hormones, your droopy stomach, and how your downstairs feels like a runaway freight train that’s collided with a wall.
However surprising these symptoms are, they’re actually quite common. You could experience pelvic floor weakness even a few years after giving birth, and even if you’ve had a C-section and preserved your front bottom from being stretched like a balloon animal at a kid’s party, the pressures, hormonal changes and age can still affect your pelvic floor.
But, it’s important to note that even though over 60% of women in the UK and more than 15 million women in the U.S. suffer from a weak pelvic floor, it isn’t normal to suffer like this. There are ways you can strengthen your pelvic floor, so you don’t have to worry about leaving the house without a toilet nearby (something which I suffered with for years). Practising your pelvic floor exercises postpartum to regain strength can prevent and treat weaknesses that cause these accidents and make you feel confident to take on the world as well (honestly, you’ll be surprised at how much a strong pelvic floor makes you feel like a superwoman!)
As a mother of four (with the last two being vaginal births) my pelvic floor felt broken and even three years postpartum, I struggle to hold my bladder when I’m dying for the loo. This is known as urge incontinence, which I’ll go through in more detail later, and it has caused so much frustration, anxiety and even depression too. I can’t just decide to go for long walks because I have to think about where the nearest toilet would be. And, without realising, I’ve only ever worn black leggings because I think if I have an oops moment, hopefully no one would notice.
Not a way to live, is it?
Well, we don’t have to live like this anymore!
I teamed up with Kegel8®, the leading brand in electronic pelvic floor trainers and Amanda Savage MCSP MSt, a chartered physiotherapist, women’s health specialist and an expert in pelvic floor health, to dig deep into the science behind our pelvic floor muscles and trial the Kegel8® Ultra 20 V2 Toner* and Kegel8®, Biofeedback Pelvic Trainer Vaginal Probe for three months, to see if I can improve my pelvic floor.
The results have legit been astonishing!
Plus, I have an exclusive 10% discount code for Motherhood Diaries’ readers because I want you to try these amazing Kegel8® Ultra 20 V2 Toners*. I can wholeheartedly say that everything has changed since I’ve used it.
So, let’s muscle on (:D) with the article and I’ll share how I got on.
Welcome to your post-pregnancy body
Childbirth changes your body in many ways and the postpartum period can leave you feeling a bit low. If you’ve suffered injuries during birth, then the recovery process may take a little longer too. Perhaps you had an assisted vaginal delivery which resulted in a tear or you had C-section. Even if you came out with no scars, the weight of a baby could have had some bearing on the lower half of your body. Injuries suffered during birth are common, but with the right interventions and a gradual recovery program, you should be able to bounce back from them. Consistent exercise, a healthy diet, and proper pelvic floor exercises can help your body recover and regain strength.
These changes don’t happen overnight, though, and the age-old adage is generally true – it took nine months to make a baby, and so it will take at least that long to get back into shape again.
What about your pelvic floor?
“Don’t make me laugh or I’ll pee myself!”
I’m sure you’ve heard that saying multiple times in your life. That’s your pelvic floor making you leak when you laugh because of the stress laughing puts on those muscles – the one area we overlook and the one muscle we so wish we had exercised when it’s too late.
I’m guilty of forgetting to do my pelvic floor and, even though I and 90 per cent1 of ladies know the importance of doing our pelvic floor post-pregnancy (it improves your sex life too by the way!), still, 61 per cent of us are not training these muscles when we know we should be. According to research from lights by TENA, one in three2 women in the UK experience light bladder weakness and this is a common occurrence for 69 per cent3 of pregnant women and new mums.
So, you’re definitely not alone.
This leaky bladder after pregnancy is so common that over 200 million people worldwide suffer from incontinence. And, the problem is that women suffer from low mental health because of this symptom, but we are too ashamed to talk about it.
Can I just grin and bear it?
Well, yes, you can. But, do you want to live in fear of accidents all your life? And if you’re sexually active, don’t you want increased sensation? Also, a weakened pelvic floor can lead to more serious concerns if not treated, like urinary incontinence (we’ll go through the different types below), which is also a prevalent issue amongst women, as pregnancy exacerbates this problem. Pregnancy hormones relax the muscles and the increasing baby weight adds to the pressure on the bladder and pelvic floor, which results in accidental urine leakages. One other well-known side effect of pregnancy is constipation, which can also overstretch the pelvic floor muscles, weakening them even further.
So, you must recognise whether you have an issue with your pelvic floor and then take the steps to exercise and strengthen the muscles to prevent any further unnecessary leakages.
But, how do you do that?
By understanding exactly what your pelvic floor is!
So, let’s get down to the science:
Below are your pelvic floor muscles
The pelvic floor is a group of muscles and connective tissue that spans the area underneath your pelvis. These muscles form a hammock-like structure from the pubic bone at the front to the tailbone (coccyx) at the back and from one sitting bone to the other. They support the bladder, uterus (womb), and bowel (colon), helping maintain control over the bladder and bowel movements, and play a crucial role in sexual function.
“Since giving birth, many women notice a change in sexual sensation and satisfaction, which can be related to pelvic floor weakness. Exercising these muscles brings blood flow to the area, tones and tightens the muscles, and can improve the ability to feel the vaginal walls during sex, often leading to easier and more powerful orgasms.”
Amanda Savage, MCSP MSt, chartered physiotherapist, women’s health specialist, pelvic floor health expert
Your pelvic floor stretches under a lot of weight and springs back up again. You can see above that these groups of muscles (called the pelvic floor muscles or ‘levator ani muscles’) are sitting directly under the weight of your growing baby.
During pregnancy, the muscles and tissue can become overstretched and exhausted from bearing the burden for so long, which is why it is massively important to exercise and strengthen your pelvic floor muscles before you get pregnant, throughout your pregnancy and after birth, too. Did I listen to the experts tell me this, though?
No, I didn’t. These pelvic floor muscles are often overlooked, especially postpartum. And, despite the common belief that having a C-section might protect the pelvic floor from damage, many women still experience pelvic floor weakness due to various factors as mentioned above, i.e. hormonal changes, the pressure of carrying a baby and ageing.
“Childbirth is one of the most predictable influences on pelvic floor condition but it is a muscle just like others in the body so can be affected by incidences later in life too – maybe a further muscle deconditioning due to another event, like things that can sneak up on you such as weight gain, chronic cough, constipation or having treatment for another condition like cancer.
Amanda Savage, MCSP Mst, chartered physiotherapist, women’s health specialist, pelvic floor health expert
Recognising pelvic floor weakness
Recognising you need to strengthen your pelvic floor is the first step to treating it. There are actually different types of incontinence, the most common being stress incontinence (pee leaks out when your bladder is under pressure) and urge incontinence (Pee leaks out when you feel the sudden urge to pass urine – or soon afterwards). More details below:
Stress incontinence
Pee leaks out when your bladder is under pressure, for example, when you cough, sneeze or laugh, and is usually the result of a weakening or damaging of the pelvic floor muscles used to prevent urination. Symptoms can stem from or be exacerbated during pregnancy and vaginal birth.
“Stress incontinence is particularly common after childbirth, as the pelvic floor muscles may be weakened or damaged during the process. It’s important to start pelvic floor exercises as soon as possible after birth to help strengthen these muscles and prevent further issues.”
Amanda Savage, MCSP MSt, chartered physiotherapist, women’s health specialist, pelvic floor health expert
Urge incontinence
Pee leaks out when you feel the sudden, intense urge to pass urine – or soon afterwards. This is usually the result of an overactive bladder due to the detrusor muscles, which control the bladder. Obesity, a family history of incontinence and age, can increase the chances of bladder weakness (although, this is not an inevitable side effect from ageing).
How to recognise you have a weakened pelvic floor
There is a common misconception that you think you have a weak bladder because you’ve leaked urine after you’ve coughed, sneezed, laughed, lifted heavy items or done anything which has resulted in having the sudden urge to go to the loo. But what 5.4 million women in the UK thought was a weak bladder was in fact weak pelvic floor muscles that were not holding the bladder and urethra in the correct position.
But, what if you want more children?
Each person and their pelvic floor are unique. Problems do not necessarily change further with each pregnancy or delivery. However, there are risk factors such as maternal age, your collagen type, family history, size of babies’ heads, and type of delivery. Some are in your control but many are not.
No one would want you to limit the size of your family through fear of body changes. But everyone decides on their family size with many factors in mind: financial, mental, and physical coping capacity.
They are developing tools to help women and doctors predict better and help make birth/delivery choices (e.g., UR CHOICE), but these are not well developed yet. If you have a traumatic delivery or suffer with incontinence or prolapse symptoms after childbirth, you will be offered time to discuss your plan for your next delivery with your midwife and/or a consultant.
If you feel that your pelvic floor is vulnerable, perhaps take a bit more of a break between pregnancies to allow yourself to get strong again. It can take 18 months to rebuild vitamin and mineral levels and similarly pelvic floor strength.
Amanda Savage, MCSP MSt, chartered physiotherapist, women’s health specialist, pelvic floor health expert
Do you need to pee a lot?
Remember, you don’t have a weak bladder. You have weak pelvic floor muscles.
“An overactive bladder is a common condition. The bladder muscle becomes more sensitive and contracts too often, even before the bladder is full. Symptoms include peeing more than seven times a day or more than once at night (nocturia), and a sudden, urgent desire to pass urine. It can happen in conjunction with leakage or without.”
Amanda Savage, MCSP MSt, chartered physiotherapist, women’s health specialist, pelvic floor health expert
Do you feel like you can’t get to the loo in time?
Again, that feeling is not related to a weak bladder; it’s your pelvic floor muscles.
Do you feel you can’t fully empty your bladder?
If you’re straining to pee and it feels difficult to fully empty your bladder, this is more likely due to your pelvic floor muscles rather than your bladder itself.
Do you accidentally leak sometimes?
If you sneeze, cough, laugh, jump or do any heavy lifting and experience an unintentional leak, then you may have stress incontinence. These actions put stress on the bladder, and if your pelvic floor muscles are not tightening enough, this will cause an involuntary leak, which is the most common form of female incontinence.
Do you have pelvic pain?
Tension or problems in the pelvic floor muscles can cause pelvic pain after pregnancy, but this may also be a sign of infection. Visit your doctor as soon as you feel any pelvic pain after childbirth or pubic pain after birth in the area.
Do you feel a loss of sensation during sex?
A weakened or damaged pelvic floor may mean that you experience a loss of enjoyment during sex. However, those who can squeeze and relax their pelvic floor muscles correctly experience more intense orgasms – need there be any more reason to exercise your pelvic floor!
Do you leak during sex?
A large proportion of women with incontinence experience leakage during sex due to a weak pelvic floor because sexual activity puts pressure on the bladder or urethra.
Do you accidentally pass wind?
The inability to hold wind is another sign of a weakened pelvic floor because it supports the bowel as well as the bladder and so is responsible for all the openings.
Do you have backaches or bad posture?
Another sign of weak pelvic floor muscles is poor posture or suffering from backaches. An exercised pelvic floor should support the entire core, a stronger midsection and a flatter tummy, as well as better posture.
You may be thinking you’re doomed, but you’re not. It’s never too late to strengthen your pelvic floor muscles and stop any unwanted leakages.
But, why should you strengthen your pelvic floor muscles?
Suppose you don’t strengthen already weakened muscles, then your pelvic floor will get weaker and could lead to incontinence or worse, pelvic organ prolapse, which is when one or more of the organs (womb (uterus), bowel, bladder or top of the vagina) in the pelvis slip down from their normal position and bulge into the vagina. A prolapse can cause postpartum pain and discomfort, but it isn’t life threatening. Other symptoms may include faecal incontinence, which is the inability to control your bowels.
I do my pelvic floor exercises post-pregnancy, but I still have a weak pelvic floor
Did you know that 50% of women in the UK cannot activate their pelvic floor muscles correctly, so any exercises they do already are ineffective and can lead to postpartum pelvic pain? Don’t worry, we’ll show you how to do your pelvic floor muscles correctly and even show you how to use a device (Kegel8® Ultra 20*) which can do it for you if you are post-12 weeks postpartum!
How to strengthen your pelvic floor after birth
You can strengthen your pelvic floor by either physically exercising them every day, multiple times a day, using pelvic floor physical therapy through strengtheners, or treatment options by a pelvic floor physical therapist/physiotherapist and devices you can use at home. We’ll go through exercising your pelvic floor muscles yourself first.
You should be able to locate your pelvic floor muscles
To use your pelvic floor muscles correctly, you need to know where to find them. As mentioned before, the pelvic floor muscles start from your pubic bone and run through to the tailbone at the back.
You are often told to think about holding your wee in mid-stream to connect with your pelvic floor muscles, but a better way is to imagine stopping the wind from your back passage and then stopping a wee from the front. You then pull these two points in and up together. Doing it this way will help you learn where they are and therefore, connect to them better if you get problems.
So, to use your pelvic floor muscles correctly, you:
Imagine stopping the wind from your back passage
Then stop the wee from the front
Pull these two points in and up together
The above three steps are the correct way to exercise your pelvic floor muscles and avoid pelvic problems after pregnancy.
Did you know that exercising helps to strengthen your pelvic floor muscles too?
The more active you are during pregnancy, the easier it will be for your body to adapt to the weight gain and increased pressure. Exercising also helps strengthen your core and encourages you to feel emotionally and physically strong – this includes your pelvic floor too.
Recruit your entire pelvic floor when exercising
Muscles should have strength, length, and balance. So, you should not only think about contracting the muscle but letting it relax too. A great way to do this is to imagine you are pulling your pelvic floor muscles up through 5 floors – like a lift going up.
Then, you go back down through the levels before you lift up again.
Work your pelvic floor the hardest
Focus predominantly on your pelvic floor muscles when exercising, so they can strengthen over and above the other muscles that take over, like the glutes (the bum) and the abs.
Do not hold your breath
Holding your breath creates tension in the body that can cause pressure, increasing stress on some muscles, including the pelvic floor. While exercising your pelvic floor muscles, take deep breaths and, as you inhale, try to relax and feel your pelvic floor.
Lifestyle changes can also help
You can make certain lifestyle changes to help prevent the onset of bladder weakness and pelvic pain after delivery. These may include:
Losing weight and cutting down on alcohol and caffeine
Train your bladder to wait a little longer between needing to urinate and passing urine.
Use an award-winning muscle re-trainer like the Kegel8® Ultra 20* below, which stops you from worrying about your bladder by re-training the pelvic floor muscles.
Regardless of whether you have a weakened pelvic floor, get into the habit of exercising your pelvic floor muscles every day. But suppose you still find you are not exercising the muscles correctly, especially when you’re in a rush or forget altogether, there is another very awesome way to ensure you exercise your pelvic floor muscles correctly every time.
Introducing the Kegel8® Ultra 20 V2 Electronic Pelvic Toner!
The Kegel8® Ultra 20 Toner can do the pelvic floor exercises postpartum for you!
Pelvic floor strengtheners ensure you’re doing your pelvic floor exercises properly, so you can achieve quicker results. And as this article is all about the very awesome Kegel8® Ultra 20 V2 Electronic Pelvic Toner (Kegel8® Ultra 20*), let’s dig into how this amazing contraption got me from leaking the moment my bladder was half full to walking five miles with a full bladder and managing to get home with no leakage in sight!
The Kegel8® Ultra 20 is a sophisticated device designed to strengthen and rehabilitate weak pelvic floor muscles in the comfort of your own home. Created especially for women, the Kegel8® Ultra 20 is a safe and effective neuromuscular stimulator (STIM) that works by producing electrical pulses that gently stimulate the muscles and nerve fibres in your pelvic area and automatically activate these muscles, even if you can’t do them manually.
This was my first time using a STIM device, so I was apprehensive about using it. The box comes with wires and cables, but I can assure you, once you read the manual first and follow the instructions for proper use, it is so easy and very comfortable to use.
What do you get in the box?
Your package should contain the following items:
1 x Kegel8® Ultra 20 device (A)
1 x Kegel8® Ultra 20 Probe (B)
1 x 9 Volt Battery (C)
2 x Kegel8® Ultra 20 Lead Wires (D)
4 x Kegel8® Ultra 20 Electrode Pads (E)
1 x Kegel8® Ultra 20 User Manual
Who can use the Kegel8® Ultra 20?
You can use the Kegel8® Ultra 20 if you have the following issues:
Stress urinary incontinence
Overactive bladder
Faecal incontinence
Pelvic and back pain
Natural ageing
Painful intercourse
Lack of sensation during sex
Who shouldn’t use the Kegel8® Ultra 20?
You should not use the Kegel8® Ultra 20 at home without the guidance of a medical professional if you fall under any of the below categories:
You are pregnant
If you are fitted with a demand-style cardiac pacemaker
If you have an undiagnosed pain condition
If you have an undiagnosed skin, vaginal, or rectal condition
If you have active pelvic cancer
If you don’t understand the user instructions – don’t worry, the manual is super easy to understand
If you are immersed in or near water
If you are connected to a high-frequency device
If you are operating a motor vehicle or potentially dangerous machinery
Let’s get started!
If you can use the Kegel8® Ultra 20 after checking off the above criteria, then let’s move on to the fun part – using the toner to get those pelvic floor muscles nice and tight!
Once you’ve read the manual fully, you’ve completed the initial set-up, i.e. inserted the battery and connected the probe/electrodes to the Kegel8® Ultra 20 Device (Insert the lead wire into Channel A at the top left of the device and connect your probe/electrodes to the lead wire connectors), turn on your Kegel8® Ultra 20 Device by pressing the on/off button once.
Consult your manual to learn how to set up your Kegel8® Ultra 20 for the first time. Make sure you clean your probe with warm water before and after use or spray with an antibacterial spray, then store your Kegel8® Ultra 20 in the carrying case you receive conveniently with the device. You should never share your probes or electrodes with anyone else – this device is just for you to use!
Insert your probe by applying a small amount of Kegel8® Conductivity Gel on the metal parts of the probe. Insert the probe into your vagina, with the metal sides facing “hip-to-hip”. Avoid placing it in too deep; you should be able to touch the base of the probe with your fingertip still, approximately one knuckles depth inside the entrance to the vagina.
If you’re using electrodes (I never used these personally), place them in the desired position and make sure they’re stuck on properly.
Selecting a programme
The tingling/knocking sensation means that the programme is starting to work. You should keep at this level for your sensation test (more on that below) and the first week of your routine before increasing the mA level by 1-2 mA’s every 1-2 weeks. Don’t set the mA level too high as this may cause the pelvic floor and surrounding muscles to overwork and create discomfort. You can pause a programme at any time by pressing the P button. When you’re ready to continue press the + button.
You can choose a programme by pressing the PRG button until the screen shows which programme you want to use. When you’ve selected the programme you want, press the A+ button to increase the intensity (displayed as mA, which means milliamps). If you feel the sensation is too strong, then you can decrease it by pressing the A- button. The amount of current you need to stimulate your pelvic floor muscles will vary. So, starting from 0 mAs, consider increasing the mA power to the level where you can feel the effects of the electrical pulse without any discomfort.
The aim is to gradually increase until you feel the muscles contract and relax with the electrical cycles, but it should never be painful. Some programmes have different phases, but you can play with the intensity level by using the + and – to increase and decrease the mAs back to a comfortable level.
What programmes should I start with?
With the Kegel8® Ultra 20, you get 20 pre-set programs and 3 customisable options. These programs are designed to target the various conditions above, which include urinary and bowel incontinence, light bladder weakness, overactive bladder, pelvic pain and, of course, postpartum recovery. We’ll go through what programmes you get and then what you should start with, depending on your situation. For this article, we will be focussing on postpartum recovery.
Functional Continence Training (with skin electrodes)
2
9
P14
PNC1
Postnatal / Post-Surgical Care 1
2
35
P15
PNC2
Postnatal / Post-Surgical Care 2
2
30
P16
BOW1
Bowel (Faecal) Incontinence 1
2
10
P17
BOW2
Bowel (Faecal) Incontinence 2
2
40
P18
PAIN
Chronic Pain Relief (with skin electrodes)
1 or 2
∞
P19
CIRC
Pelvic Floor Circulation
1 or 2
60
P20
RELX
Pelvic Floor Relaxation
2
20
List of 20 Pre-Set Programmes to use with the Kegel8® Ultra 20
What the different programmes mean
Looking at the table above, you can place the programmes into three distinct categories. These are:
Sensation tests
P01 and P02 are designed to test your sensation levels. If this is your first time, you should start with the P01 Sensation Test 1, to find out whether you can feel the current safely. If you can’t feel the current, use P01 at 50mA once a day for 4 weeks before you progress onto P02.
Muscle exercises
The following programmes are muscle exercises for strengthening your pelvic floor muscles:
P13 – Functional Continence Training (with skin electrodes)
P14 – Postnatal/Post-Surgical Care 1
P15 – Postnatal/Post-Surgical Care 2
P16 – Bowel (Faecal) Incontinence 1
P17 – Bowel (Faecal) Incontinence 2
Neuromodulation programmes
The following programmes are for calming overactive nerves, circulation, relaxation and pain relief:
P08 – Sensory Modulation (TENS)
P09 – Overactive Bladder Neuromodulation
P12 – Mixed Incontinence
P18 – Chronic Pain Relief (with skin electrodes)
P19 – Pelvic Floor Circulation
P20 – Pelvic Floor Relaxation
How to start the road to postpartum pelvic floor recovery
You’ll find in the guide there are lots of tailored condition guides by Amanda Savage, who is a specialist physiotherapist4, that address specific issues. These condition guides combine several pre-set Kegel8® Ultra 20 programmes. These are:
More Effective Pelvic Floor Exercises
Bladder Weakness & Stress Incontinence
Uncontrollable Gas/Wind & Bowel Control
Menopause, Perimenopause & Postmenopause
Pelvic Organ Prolapse
Pelvic Pain
Postpartum Recovery
Vaginal Looseness & Lack of Sensation
Rehabilitation After Gynaecological Surgery
In this section, we’ll go through the advised process for pelvic floor exercises postpartum to regain strength. I will coincide this section with my journey too, so we can see real-life action results and find out whether the Kegel8® Ultra 20 actually works (hint, it does!)
If you want more information on the other condition guides, please consult the manual.
Month 1 – The beginning of the postpartum pelvic floor journey – Testing the sensitivity
If you have given birth less than 12 weeks ago, you need to start with the physical pelvic exercises without using a STIM device first. If you have given birth more than 12 weeks ago, you are safe to continue.
Here’s a video on Instagram, introducing my journey and partnership with Kegel8®:
The programme guide suggests you start with P01 – Sensation Test 1 to test whether you can feel the current safely. So this is what I did.
Use the + button on the same side you are plugged into the machine to turn up the mA current. If you can feel a sensation, like a warm tickling, below 50mA then you can progress to the second sensation test P02.
If you can’t feel a tickling sensation below 50mA, it can be a sign of nerve damage or difficulty conducting messages. This is quite common after childbirth or surgery.
P01 can be your treatment programme to help you recover, at 50mA (or less), once a day for four weeks before progressing onto P02. If you can’t feel any sensation returning after one month, then you should consult a medical professional for advice.
I was impressed I could feel something at 30mA which meant I still had feeling down there, so I felt I could move nicely onto P02 – the second sensitivity test.
Progressing onto P02 – Second sensation test
This second test introduces new frequencies and if you can feel a sensation from the internal probe below 50mA on P02, you can progress to one of the Kegel8 treatment programmes (P03-P20).
If you can’t feel a sensation below 50mA it can be a sign of nerve damage. Use P02 at 50mA once a day for a further four weeks. Again, if you do not feel any sensation returning, contact your doctor or physiotherapist for advice.
P02 was a full 60 minutes long, a length of time a mother of four doesn’t have the luxury of enjoying, so I decided to discreetly train my pelvic floor as I sat at my desk working and no one was none the wiser! I cranked it up to 36mA and thought that was a great place to start. I did this for a few days before I felt I could move forward with P14. It’s important to note that the higher the mA the stronger the current, but not necessarily a stronger pelvic floor. The effectiveness of the mA depends on how the muscles respond to the stimulation. Some muscles might contract more effectively with lower currents, while others might require higher currents. Quality and proper engagement of the muscles during the practice is what matters here.
Week 1 – “Find and Feel” your pelvic floor muscles with P14 – Postnatal / post-surgical care 1
Once you’ve taken the sensitivity tests, it’s time to move on to a 25-minute gentle exercise programme, which is designed for vulnerable mums after childbirth.
Phase 1 is a 20-minute continuous low-frequency current that improves the awareness of the muscle position, blood flow and nerve sensitivity. The point of this program is to relax as much as possible.
Phase 2 is 15 minutes and uses a higher frequency current to stimulate the fast and slow pelvic floor muscle fibres by contracting for 6 seconds and then relaxing for 18 seconds. This is because you need long rest phases when your muscles are learning to work again. Much like exercising your core after pregnancy.
It’s important to allow the sensations to come and go and for you to learn where your pelvic floor muscles are. Use this program on alternate days until you get used to the probe.
I cranked the mA up to 40mA and was happy I could complete the program quite easily at this stage.
Week 2 – Continue then take a rest – P14 – Postnatal / post-surgical care 1
If you were comfortable in Week 1, then use the Kegel8® Ultra 20 every day for six days, then take a rest day. If you’re feeling particularly uncomfortable or irritable internally then take an extra rest day, or do alternative days.
I have to say, I got bored with P14 as I was three years postpartum so I wasn’t ‘vulnerable’ down there. So I went off on a tangent at this point and started messing about with all the programs. I tried P11 – Gentle incontinence program and cranked it up to 40mA. Then I went for P06 – Increased sensitivity program. In this program I could really feel the muscles working on the sides of my walls, even at 36mA! I even took a work call while doing my exercise – that’s multitasking for you! I could feel the pressure towards the back passage too, so I felt I had worked them enough in this program.
It was actually during this month I realised I didn’t have stress incontinence, but urge incontinence. So I also hit P09 – Overactive Bladder Neuromodulation on 40mA because it’s only twenty minutes long. I actually found this easy.
P03 exercises your muscles for a longer 45 minutes, with a shorter recovery time between muscle contractions. Phase 1 has a low frequency at 15 minutes and then Phase 2 hits a higher frequency for 30 minutes. I found this a tad more challenging but still sailed through at around 36mA. I did this for a couple more days before the end of the month hit and my period was nigh.
End of month 1 update
Three days before my period and coming up towards the end of the month, I tried P09 – Overactive Bladder Neuromodulation and I couldn’t even get it to 30mA! I wondered whether everything down there was more sensitive just before your period. This is a very interesting point. I decided to consult ChatGPT which said:
“Yes, it’s actually quite common for women to experience increased pelvic floor sensitivity and even some changes in pelvic floor function during different phases of their menstrual cycle. In the days leading up to your period, hormonal fluctuations can make tissues more sensitive, and you may retain more fluid, which can affect how comfortable electrical stimulation feels. This could be why you’re having difficulty reaching the usual intensity on your device. It’s completely normal to need to adjust the intensity of your Kegel8® device throughout your cycle. Listen to your body, and only use a level of intensity that feels comfortable and effective for you.”
At the end of the month, I didn’t notice any physical improvements yet, but I fell in love with doing my pelvic floor exercises with the Kegel8®, especially I could feel the device working my pelvic floor muscles without me having to knowingly remember, thanks to my scatty brain! So, I’m sure whatever is happening down there is progression. And practice makes progression!
Month 2 – Weeks 1 – 4 – Do more of the same, but with longer muscle contractions now
In month 2, you now use P04 – Pelvic Floor Muscle Exercises 2 which features longer muscle contraction times (8 seconds) with a similar long rest time in each cycle. There are four phases to change between stimulation frequencies more often, which is often the case when working your body through fitness as well. You want to trick the muscles and make them work differently so they don’t get tired or bored. I totally understood why this was indeed the case for the pelvic floor muscles too – and I felt it as well!
In this phase, you also needed to get your brain involved in this process and ‘join in’ with some of the stimulation cycles. You can do this by trying to work your pelvic floor muscles in your mind, by drawing in and up when you feel the stimulation (as we showed above in the three-step process – remember hold in the wind, then hold in the pee, then go up 5 levels on the lift, and then back down again while breathing normally). Follow these movements when doing the pelvic floor muscles yourself. And, don’t worry if you can’t do all the seconds at this stage. We’re still new in the process and that’s absolutely fine. Just do what you can and let the machine do the rest.
I actually didn’t find this easy at all. I kept missing the mark and then moved up too quickly, or held my breath. I even kept holding my glutes or tummy. So it took me a while to isolate the muscles and follow the stimulation cycles. By the end of the program, I got it and when I got to the of the month, I had mastered the process and found I could hold all the way through. I was so tired by the end though. It felt like a proper workout!
Using the Kegel8® Biofeedback Pelvic Trainer to monitor results
I was also gifted the Kegel8® Biofeedback Pelvic Trainer which I used to monitor my results. You can use the Biofeedback to take the guesswork out of Kegels because you squeeze and it measures your results. At this stage, I used it to test how well I was doing on my daily practice with the Kegel8® Ultra 20 because I wasn’t strong enough to do the practice yet. You do this by using the test function, which squeezes and relaxes your pelvic floor repeatedly for 45 seconds. It then gives you a level score, so you can track your progress.
The Biofeedback practice phase tends to come in handy when your pelvic floor muscles are a bit stronger and you can do the squeezes yourself. I plan to use the practice phase of the Biofeedback once I’ve hit level 2 on the test phase.
Biofeedback Trainers and Muscle Stimulation Devices like the Kegel8® Ultra 20 can offer different approaches, as you can use the practice phase of the Biofeedback to practice your pelvic floor yourself as well. Here’s a comparison to help you understand their differences and how to incorporate them into your routine:
For very weak or fatigued muscles (Oxford Scale < 2)
Functionality
Provides visual or audio cues for muscle identification, practice, and motivation Use the trainer to identify your pelvic floor muscles in different positions
Uses electrical impulses to stimulate muscle contraction and brain-muscle coordination
Benefits
Helps identify pelvic floor muscles in different positions – Ensures correct practice of contraction and relaxation – Enhances endurance, coordination, and brain skills
Assists the brain in identifying pelvic floor muscles – Stimulates different muscle fibres – Allows for assisted and independent muscle contraction – Supports learning of muscle control during breathing or movement – Can calm bladder overactivity (neuromodulation)
Daily Use
Typically used for 10-15 minutes, once or twice a day, focusing on both quick and sustained contractions.
Recommended for 10-60 minutes daily, depending on the program and muscle condition
Frequency
Can be used daily or as needed to track progress and practice
Often used daily for initial strengthening and can be adjusted based on progress
Examples of Use
Daily tracking to improve muscle strength over 12 weeks – Real-time display of muscle strength during exercises – Real-time feedback allows you to monitor your progress and adjust exercises as needed.
20-60 minutes daily sessions – Programs for stress incontinence, overactive bladder, muscle endurance, and more
My end of month 2 update
I definitely felt a difference during this month. I used the Biofeedback trainer and I went from Level 0 to Level 1 – I was so pleased! I also found out at this point that the mA electrical pulses don’t really tell you how much you’re improving. It’s not about the strength of the mA, it’s more about how you feel down there. When you use the Biofeedback trainer’s test, you can see that you are improving and it really boosts your confidence. The test is about 45 seconds long and the program flexes and relaxes your muscles repeatedly and then it gives you a score at the end,
It’s the little things I’ve noticed now like I don’t leak when I hold my pee in, which has given me a huge confidence boost. This month, I decided to try the programs that alternate between increased sensitivity (P06) and urge incontinence settings (P12). I cranked it up to 40mA which was fine but I was worried I wasn’t feeling it as much. A part of me did wonder if I had created nerve damage from doing too much too soon. But I figured, it’s fine and I’ll just go for it.
Also, I’ve noticed when I have my period and I walk, my period cup stays in rather than slips out. My core feels stronger and I just feel better in myself. What a difference since last month. I’m so eager to keep going!
Month 3 – It’s all about developing more pelvic floor skills now
Weeks 1 – 4 – Use P10 – Stress incontinence 1
Now is the time to work yourself a little harder in phase 2, by joining in with the machine more and having shorter rests between contractions.
Phase 1: First, you enjoy 10 minutes of continuous low-frequency current to improve awareness of the muscle position, blood flow, and nerve sensitivity. You can relax in this phase.
Phase 2: Now comes the work! Do 30 minutes medium frequency current to stimulate the fast and slow pelvic floor muscle fibres, by contracting for 5 seconds and then relaxing for 5 seconds in cycles. Try to join in with some of these contractions, and aim to contract for the entire 5 seconds. Join in for 1 minute then let the machine do the work for 1 minute or count joining in for 6 cycles, then letting the machine do 6 cycles.
Use 6 days out of 7 (or alternate days if your internal tissues are sensitive).
Ongoing maintenance – P05 – Weekly maintenance
Once you’ve completed three months with the Kegel8® Ultra 20, you should see a vast improvement in your pelvic floor. At this stage, ask yourself:
How do you feel now compared to how you felt in Week 1?
Have some of the problems you suffered with gone?
Do you have any of the same concerns?
What’s still bothering you?
My end of month 3 update
For me, I have noticed a huge difference after month three. So here are my answers to the below questions:
I feel so much more confident now than I did in Week 1. My tummy feels flatter, my period is lighter, my cup stays in and I don’t leak
I can hold my bladder for quite a while now and I don’t have to worry about leaking – this was my biggest concern.
Absolutely hand on heart, no concerns right now.
My droopy stomach is still bothering me, but that’s for another article! For now, I know I’m improving, just like my whole body fitness is too – so onwards and upwards and no more giving up.
So, now we move to maintenance!
P05 – Pelvic Floor Muscle Exercises 3 is a maintenance program which contains a mix of frequencies to maintain fast and slow twitch muscle fibres. You can then use P20 – Pelvic Floor Relaxation for 20 minutes once a week to relax and refocus on sensations when you are feeling tense, stressed or disconnected. I have been doing this religiously for a while now and the biggest difference is how long I can tense the muscles now, which makes me feel like Hercules!
Follow the Let’s Get Started Guide for more details on the above Postpartum Recovery process or follow any one of the other guides related to your current condition, to exercise those pelvic floor muscles into fighting fit status! You can download the Let’s Get Started guide here –> Let’s Get Started User Guide
Discover pelvic health with Kegel8®’s free eBooks
Kegel8® has an exclusive eBook library of resources aimed at enhancing your understanding of pelvic floor health. These eBooks are meticulously crafted by Kegel8®’s team of experts to address a wide array of pelvic health conditions and topics.
Whether you’re seeking to strengthen your pelvic muscles or your partner is interested in improving bladder control and intimate wellness their range of eBooks provide valuable information, practical advice, and step-by-step guidance. These resources cover everything from basic pelvic floor exercises to more specialised advice on managing pelvic pain, prolapse, and sexual intimacy.
Available eBooks Include:
Leaks
Postnatal Care
Pelvic Pain
Sexual Intimacy
Prolapse
Men’s Pelvic Health
Each eBook is readily available for download, offering expert insights to help you improve your pelvic health. Click here* or on the banner below to visit their library.
As technology advances, what’s the future of pelvic floor rehabilitation?
As technology advances, pelvic floor rehabilitation is evolving. Amanda perceives certain future trends to include:
Devices that interact with a therapist so you get the best of both worlds: working at home while having someone able to review your results and coach you remotely.
Smaller devices, although this may be tougher for those suffering from eyesight issues.
Non-invasive methods to affect or measure the pelvic floor, like a magnetic chair, although it’s not very portable or affordable for home use.
Final words of encouragement from Amanda Savage
“Remember that YOU are amazing. Your body is hugely capable, adaptable and resilient. Your body wants to heal and restore itself – but it may need your help and encouragement. And it will need is your time and every tiny step will add up.
Rehabilitation results can feel slow… but progress will continue for YEARS ahead. These problems have arisen during the phase of life when you have the most demand on your time, your sleep, and your energy. And when you have the most extra load on your body. Believe it or not, a time will come when your children can get in the car independently and carry their own stuff. You will sleep through the night. And have a bit more time for your own needs.
Right now to do the best you can in your personal circumstances, seek professional help if you have an inkling that you don’t know what you are doing – or what you should be doing – or if DIY isn’t going to be enough. Make a promise to your future self that when you find your mothering load a little lighter your first re-focus won’t just be on your career or a new external project – you will make sure you come back to your body first to cross the t’s and dot the ‘is that might have to be a little skipped out at present.”
Final words from me
It has taken me almost three years to accept my body after four kids – and it is still a work in progress! I know how overwhelming the postpartum recovery journey can be. But, with the right tools and guidance, you can learn to love yourself again.
Thanks to the Kegel8® Ultra 20, I feel stronger, fitter and more confident. I know longer wear baggy clothes or black leggings because I’m afraid to pee on the street. It’s a long game, but the rewards are so totally worth it!
Stay committed to your pelvic floor exercises like you do with regular fitness and listen to your body. When you are ready to move to the next step why not try my postpartum core exercises and share your recovery journey with me over at @motherhooddiaries.
Can I use the Kegel8® Biofeedback Trainer and Kegel8® Ultra 20 during my period?
Amanda advises you can use the Kegel8® Biofeedback Trainer and Kegel8® Ultra 20 during your period, though it can be a bit messy, so most women choose to take a break. Remember that hormone changes can make your pelvic floor less responsive just before your period, so don’t be disheartened if your performance varies throughout the month.
Pelvic floor issues and recovery
I have a tight pelvic floor after birth. What does this mean?
“A shortened or tight muscle may be just as incapable as exerting force as a long or loose muscle. Being tight does not mean your pelvic floor is strong. Neither tight nor loose are healthy or desirable.”
How long does it take for your pelvic floor to recover after childbirth? How long does it take for your pelvic floor to heal after birth? How long to regain pelvic floor after birth?
“It’s important to exercise your pelvic floor postpartum. Pelvic floor recovery time takes up to 6 months. The change in the area of the levator hiatus with Valsalva reflects the stiffness of the pelvic floor; that is, its ability to withstand the increased abdominal pressure accompanying pelvic loading.”
What happens to your pelvic floor after birth? Does our pelvis get bigger after giving birth?
“After giving birth, it might look wider than it did before and could feel looser, softer and more open. It might also look and feel bruised or swollen. But all of this should settle in a few days. You may also find that your vagina feels drier, especially if you are breastfeeding.”
I am experiencing pelvic pain after birth. What do I do? How do I know if I have postpartum pelvic pain syndrome? Does pelvic floor pain go away after birth?
“A trained pelvic floor physical therapist can help you teach your muscles how to function optimally again. In particular, Kegels are helpful for muscle strengthening and endurance. They’re especially important for women with urinary or anal incontinence and pelvic floor weakness.”
“To strengthen your pelvic floor muscles, sit comfortably and squeeze the muscles 10 to 15 times. Do not hold your breath or tighten your stomach, bottom or thigh muscles at the same time. When you get used to doing pelvic floor exercises, you can try holding each squeeze for a few seconds.”
I have no pelvic floor muscles after birth. What can I do?
Follow the tips above and consult your doctor about a plan to start retraining them again. Slow and steady wins the race!
What is pelvic floor therapy after birth?
“Pelvic floor therapy is a type of physical therapy that helps with problems involving the group of muscles that – along with surrounding ligaments and tissues – hold your pelvic organs in place. The pelvic organs include the bladder, urethra, intestines, rectum, uterus, cervix, and vagina.”
“Urinate in a warm shower. Run water in the background. Place your hand in cold water as you empty your bladder. Your pelvic floor muscles are important for healthy bladder function.”
How long does it take for your belly to go back to its normal size after giving birth? Do women get their bodies back after pregnancy?
“It takes six to eight weeks for your uterus to return to its normal size, but for some mums, it may take much longer for their post-pregnancy belly to return to ‘normal.’ For other new mums, they may find that their bellies take on a permanently different new appearance.”
“Birth and parenthood are likely to change the kind of sex you have and how often you have it. For women, interest in sex can return 1-3 months after having a baby, but it’s normal for it to take longer. Unless your doctor has advised otherwise, you can have sex again when you feel ready.”
Did anyone else get diastasis recti after laparotomy abdominal surgery?
You can find an answer to this question here: Quora
Do you have any home remedies for pelvic floor dysfunction?
“Self-care. To reduce strain on your pelvic floor muscles, avoid pushing or straining when using the bathroom. Relaxation techniques such as yoga and stretching can also help to relax your pelvic floor muscles. Taking warm baths is another useful technique.”
My pelvic floor muscle is always tight it is as if I am always trying to hold myself from going to the bathroom even when I am not going.How can one strengthen a weak or damaged pelvic floor muscle without physical therapy?
Are there any effective home exercises for this?
How can pelvic floor physiotherapy benefit women’s health and what are some effective exercises to strengthen the pelvic floor muscles?
How long does it take for pelvic floor muscle exercises to make you feel better or notice any change in pain levels?
Is holding my pelvic floor muscle for 2-3 minutes while taking deep breaths a good or bad exercise to strengthen it?
How can you tell if you have weak pelvic muscles and what are some ways to strengthen them?
What are some recommended exercises for women with incontinence?
What are some ways to strengthen the pelvic muscles after giving birth?
Do Kegel exercises work?
Can you get too good at it that it becomes painful for your partner?
What are the best exercises and lifestyle choices to support strong pelvic floor muscles?
What exercises can help improve pelvic floor strength and function while running?
For all these questions, the following advice applies:
“To strengthen your pelvic floor muscles, sit comfortably and squeeze the muscles 10 to 15 times. Do not hold your breath or tighten your stomach, bottom or thigh muscles at the same time. When you get used to doing pelvic floor exercises, you can try holding each squeeze for a few seconds.”
Amanda Savage is a member of the Professional Network of Pelvic Obstetric & Gynaecological Physiotherapy and a graduate of the University of Cambridge. ↩︎
*Links marked with a ‘*’ are affiliate links, which means, as an Amazon Associate I may earn a small commission at no extra cost to you for qualifying purchases.
*Sponsored by Kegel8®, but all thoughts and opinions are my own
Red light therapy for hair loss after birth: does it work?
Losing hair can feel like losing a piece of your identity, especially after birth when you need to put your baby first. My thick, curly hair had always grown back except after my fourth, where clumps came out in my hands and there was no sign of regrowth. I was devastated! Maybe it’s down to my age, in which case, I’m scared my hair won’t ever grow back. It’s not just about vanity; it’s about how you see yourself and, in many ways, how you believe the world sees you. The psychological impact can be significant.
For those experiencing postpartum hair loss, this feeling is all too familiar. You’ve just brought a new life into the world, and as you navigate this beautiful yet challenging journey, you’re also dealing with changes to your own body, including your hair.
Enter red light therapy for hair loss – a glimmer of hope for us postpartum mums, as it’s non-invasive, and there’s science to back up its claims. The CurrentBody Skin LED Hair Growth Helmet* is a prime example of this technology in action. As someone who’s walked the path of trying to reclaim not just the fullness of my hair but also a piece of myself, I’ve decided to share my personal experience with this device. From the anticipation of unboxing to the day-to-day routine of wearing the helmet, I’ll take you through every step of my journey.
But first, let’s dig a little deeper into what causes hair loss, with a special focus on the postpartum hair-shedding rollercoaster. We’ll explore why red light therapy, particularly through devices like the CurrentBody Skin LED Hair Growth Helmet* is worth considering. Along the way, I’ll unpack the science behind red light therapy, how it compares to laser treatments, and its specific role in tackling postnatal hair loss.
Understanding hair loss
Losing hair can hit harder than just seeing more strands in your brush. So, understanding why hair falls out, how it affects us, and what we can do about it is the first step in dealing with it. Maybe your hair’s getting thinner all over, you’re spotting some bare patches, or it’s just coming out easier than before. By looking into how hair normally grows and what throws it off track, along with all the ways to tackle the issue, from doctor-recommended treatments to simple tweaks in how we live, we start to peel back the layers of this tricky problem. Let’s dive in and find some light at the end of the tunnel.
What causes hair loss?
You may start to lose hair due to genetics, hormones going haywire, not getting the right nutrients, too much stress, or even some kinds of medical treatments. Sometimes hair loss is just for a little while; other times, it might stick around, depending on what’s causing it.
One of the most common reasons people lose their hair is something called androgenetic alopecia. It’s mostly about your genes and it can affect anyone, but men usually have it more visibly. Other issues like thyroid problems, autoimmune conditions like alopecia areata, and even how you live your life – like what you eat and how much stress you’re under – also have a big impact.
Losing hair after having a baby, is actually pretty common. After the baby arrives, the big drop in pregnancy hormones can make a lot of hair start to fall out. It sounds scary, but most of the time, it gets better on its own in a few months.
When does postpartum hair loss start and stop?
Losing hair after having a baby, otherwise known as postpartum telogen effluvium, is something new parents go through. It’s all because of the big hormone changes that happen after you give birth. While you’re pregnant, you’ve got more oestrogen floating around, which makes your hair grow more and not fall out as much, giving you that great pregnancy hair. But after the baby comes, those hormone levels drop, and suddenly a lot of hair starts to shed.
So, when does this all start? Usually, about three to four months after you have your baby. It might be a bit different for everyone, but essentially your body is trying get back to how it was before you were pregnant.
And when does it stop? Don’t worry, this isn’t forever. Most of the time, your hair will get back to how it was by the time your baby’s blowing out their first birthday candle. You should see things getting back to normal anywhere from six to twelve months after you start noticing the loss.
It’s really important to remember that this kind of hair loss is totally normal and just part of the process. But, if you’re still seeing a lot of hair falling out after a year or it seems like too much, it might be a good idea to talk to a doctor or a skin specialist just to make sure everything’s okay. Eating well, being kind to your hair, and maybe some supplements can all help your hair get back to its pre-baby state.
How to treat postpartum hair loss?
Tackling hair loss after having a baby is all about taking care of yourself in different ways, as mentioned above, from what you eat to how you treat your hair and even managing stress. Plus, some specific treatments can help, like red light therapy. Let’s break down what you can do:
Eating right
If you’re dealing with hair thinning, make sure you’re eating a balanced diet. Getting enough iron, zinc, vitamin D, and those B vitamins is important for keeping your hair healthy. If you’re not sure you’re getting all the nutrients you need from your meals, talking to your doctor about supplements might be a good move, especially if you have certain foods you can’t eat.
Be kind to your hair
When it comes to looking after your hair, the gentler, the better. Try to steer clear of tight hairstyles that pull on your hair, harsh chemicals, and use a lot of heat to style your hair. A shampoo that adds volume and a conditioner that’s moisturising can make your hair look thicker and keep your scalp happy. Use a decent hairdryer like the mdlondon BLOW hairdryer that has a cool setting, so the direct heat doesn’t damage the hair.
Keep stress in check
Stress can actually make hair loss worse, so finding ways to relax and stay calm is really important. Things like yoga, meditation, or just getting in some regular exercise can help keep stress levels down.
Watch your hormones
After having a baby, it’s normal for your hormones to be all over the place, but they usually settle down on their own. If you’re worried your hormones are still out of whack and it’s affecting your hair, it might be worth chatting with your doctor to see what’s going on.
Medical treatments
Sometimes your doctor might suggest trying topical treatments like minoxidil, also known as Rogaine. It’s important to chat about whether these treatments are safe, particularly for parents who are breastfeeding.
Consulting with a specialist
If you’re losing a lot of hair after your baby arrives and it’s not getting better, it might be time to see a dermatologist. They can take a closer look at what’s going on and recommend the best way to tackle it. This might include checking whether red light therapy is a good fit for you. We will focus on red light therapy in this article.
What is red light therapy for hair?
Red light therapy is a spotlight solution for hair loss that’s been creating quite the buzz. This innovative approach involves a device that emits a soothing red light, aimed at revitalising your scalp right down to the follicles, by boosting blood flow and cranking up energy production.
How does it work?
The magic of red light therapy lies in its ability to nudge dormant hair follicles back into action, propelling them from the lazy days of their resting phase into the bustling growth phase. This not only encourages new hair growth but can also enhance the health and vitality of your scalp.
Recommended by healthcare professionals, these at-home devices are user-friendly, requiring just a few minutes of your time, a couple of times a week.
Is red light therapy a good choice?
There are quite a lot of studies out there suggesting red light therapy can help with growing hair back, and the best part is it doesn’t come with scary side effects. But, just like anything else, what works for one person might not work for another. Listening to what healthcare pros suggest and following how you’re supposed to use these gadgets is pretty much the golden rule here.
Let’s dive a little deeper
The cool thing about red light therapy is that it goes straight to the source – your hair follicles. By boosting blood flow and kicking metabolism into higher gear right at the scalp, it gets the growth of new hair going. It also increases ATP, that all-important cell energy, encouraging more hair to sprout. Plus, if you’ve got inflammation on the scalp, this therapy can help calm things down, creating a better environment for hair to grow and stick around longer in the growth phase.
Who should give it a try?
If you’re struggling with pattern hair loss, noticing your hair isn’t as thick as it used to be, or you’re a new mum dealing with hair falling out after birth, then red light therapy could be a good choice.
What’s the difference between laser therapy and red light therapy?
A lot of people think red light therapy is laser therapy, but actually the two are quite different. Let’s break down the difference between red light therapy and laser therapy.
Red light therapy
Red light therapy uses red LED lights that shine at certain wavelengths, usually between 630nm and 700nm.
The devices for red light therapy have a wide beam that covers a bigger area but with a softer touch than lasers.
It’s great for surface-level stuff because the light only goes a few millimetres deep into the skin, making it perfect for improving skin health, speeding up wound healing, and helping your hair grow.
Low-Level Laser Therapy (LLLT)
LLLT includes red light therapy but also brings low-level lasers into the mix. They use gentle lasers or LED light to wake up the cells in your hair follicles.
While LLLT often gets talked about in the same breath as red light therapy for hair growth, it’s actually a bigger umbrella that covers more types of light therapy.
Laser treatments
These treatments use lasers that are more focused and powerful, and they can zero in on specific tiny spots and go deeper into your body.
You’ll find lasers being used for medical situations, like surgeries, clearing up acne, and helping with deep tissue issues.
Because lasers are so intense, you’ll usually see a doctor or another healthcare pro if you’re getting a laser treatment done.
So, in a nutshell, red light therapy is like a soft, wide light blanket for surface-level issues, while laser therapy is more like a high-powered, precision light pen for deeper or more specific problems.
The CurrentBody Helmet and Red Light Therapy
The CurrentBody Skin LED Hair Growth Helmet* uses red light therapy to tackle hair loss head-on. It shines red light at the sweet spot of 640nm wavelength, which is just the right kind of light to wake up the hair follicles, boost blood flow, and get more oxygen and nutrients moving to your scalp. This specific wavelength is good at getting through to your scalp without being too intense. It has been proven to be the right wavelength (not too strong and not too gentle) to help your hair grow.
How does red light therapy help with postnatal hair loss?
Red light therapy can help address postnatal hair loss because it’s non-invasive, pain-free, and effective to support hair regrowth and scalp health.
Calming inflammation
If your scalp’s feeling a bit inflamed after childbirth, you’re not alone. This inflammation can make hair loss even worse. Red light therapy can help create a more fertile ground for your hair follicles to thrive and produce new hair.
Helping with hormone changes
While red light therapy doesn’t directly juggle your hormones back into place, it supports a healthier scalp. And a happy scalp means it can better handle whatever hormonal changes come its way, helping your hair grow back stronger.
Why it’s great for new parents
Red light therapy is a safe and hassle-free way to address hair loss. It’s gentle, non-invasive, and doesn’t come with nasty side effects, making it a perfect match for the postpartum period. Plus, using red light devices at home, like hair growth helmets, means you can treat your hair without adding another appointment to your already packed schedule.
The CurrentBody Skin LED Hair Growth Helmet experience
Diving into the world of red light therapy for hair loss, let’s talk about an industry game-changer: the CurrentBody Skin LED Hair Growth Helmet.* This neat gadget brings the power of red light therapy right into your living room, offering an easy and effective way to help with thinning postpartum hair.
You can use the CurrentBody Helmet in the comfort of your own home. This means you get all the fancy benefits of red light therapy without having to step foot outside, making it convenient for busy parents.
Cracking open the box of the CurrentBody Skin LED Hair Growth Helmet is like discovering something from another world. The box is like a gift package, opening from the centre. Once opened you’re greeted by the helmet itself, a pretty hefty piece of kit that smells like it just came straight from a lab. Inside, you’ll find everything you need to get started:
The CurrentBody Skin LED Hair Growth Helmet comes in a small/medium size (you can also get a larger size, but there’s a handy size guide included to make sure it fits you just right.)
A Protective Non-Charging Base where your helmet can rest when you’re not using it, keeping it safe and sound.
A USB Charging Cord to power up your helmet. Just a heads up, there’s no wall plug in the box, so you’ll need to have one handy.
The User Manual is your go-to for all the details on how to use the helmet properly. It’s packed with everything you need to know to get the most out of your new hair growth buddy.
How to use the CurrentBody Helmet
Getting started with the CurrentBody helmet is pretty easy and fits right into your daily routine. Here’s a quick guide to get you going:
Setting It Up: First things first, pop the helmet onto its protective base. Then, grab the USB cord it came with and plug it in to give it a full charge before you use it for the first time.
Before You Start: Make sure your hair’s clean and completely dry. This helps the LED light do its thing without anything getting in the way, like oils or moisture.
Turning It On: Now, put the helmet on your head and find the screen on the side. Hit the start button, and you’ll see a 10-minute timer pop up on the display, along with some cool red light starting to glow.
Killing Time: To make those 10 minutes fly by, you can connect your phone to the helmet using Bluetooth and listen to your favourite podcasts or tunes. Pretty neat, right?
While It’s Working: You’ll feel a slight warmth while the helmet’s on—it’s just the LED lights doing their job on your scalp. It’s made to be comfy, so just relax and enjoy the warmth.
Wrapping Up: When the helmet beeps after 10 minutes, that means it’s done. It’ll turn itself off, so you just take it off, put it back on its resting port, and go about your day. Easy peasy!
First impressions and setup
The initial unboxing and setup process is impressively user-friendly. The futuristic design of the helmet, coupled with its clinical smell, immediately sets it apart as a sophisticated piece of technology. Setting up the device is intuitive, thanks in part to the clear instructions provided in the user manual. The ability to connect to Bluetooth for entertainment during treatment is a thoughtful addition, enhancing the overall user experience.
How often should you use the CurrentBody Helmet for red light therapy?
It really depends on what kind of red light therapy device you’ve got, how serious your hair loss is, and how your body reacts to the treatment. You can use the CurrentBody Helmet for just ten minutes a day and experts say you should see visible results in four months. But don’t worry, there’s a general game plan you can follow to get the most out of red light therapy for growing your hair:
Starting Out: Most of the time, if you’re using a red light therapy device meant to help your hair grow back, you’ll want to use it around 3 to 4 times a week when you first start. This helps wake up your hair follicles without overdoing it.
How Long for Each Session?: Expect to spend about 10 to 30 minutes per session, based on what CurrentBody recommend. It’s important to stick to their advice to keep things safe and effective.
Keeping It Going: After you’ve been at it for at least three months—and you start noticing some good changes, you might dial it back to just once or twice a week to keep those gains without needing to do as much.
But wait, there’s more:
Follow the Manual: Each red light therapy device can be a bit different, so make sure you’re doing what the manual says. The company that made your device should tell you how often and how long to use it, based on the kind of light it uses and how it works.
How Much Hair You’re Losing: If you’re losing a lot of hair, you might need to use red light therapy more often at first.
Your Personal Results: Everyone’s different. You might need to use it more or less often, depending on how your hair responds.
Mixing Treatments: If you’re using red light therapy with other hair loss treatments, the number of red light therapy sessions you do might change based on what else you’re doing.
Keeping it safe and effective
Red light therapy is usually pretty easy on you, but don’t go overboard to avoid irritating your scalp.
Stick with it regularly, according to the schedule. It’s better than trying to cram all your sessions into a shorter time frame.
Talk to a professional
Before you jump in with red light therapy, chat with a dermatologist or a hair loss expert, so they can give you advice tailored just for you, making sure red light therapy is a good fit.
While the typical advice is to aim for 3 to 4 therapy sessions a week for hair loss, remember to check out your device’s instructions and maybe get some professional guidance to figure out the best plan for you. With the CurrentBody Helmet, you can use it for ten minutes daily.
What can you start to see results with the CurrentBody helmet?
Here’s what your journey might look like:
First few weeks (0 to 4 weeks)
At the start, the LED light in the helmet gets busy boosting blood flow to your scalp, waking up hair follicles that weren’t doing much. It’s also putting the brakes on DHT, a hormone that’s no friend to your hair. You might not see changes right away, but it’s laying down the groundwork for new hair to grow.
The middle stage (4 to 8 weeks)
Now, things get exciting. That improved blood flow starts to rejuvenate sleepy follicles, and your scalp begins to feel like a more hair-friendly place. Those follicles are ready to switch from chill mode to grow mode.
Seeing changes (8 to 16 weeks)
This is when the magic happens. From about two months in, you’ll start noticing new hair. Studies show that by week 16, you could see a 33% boost in the number of hair follicles. Keeping up with the treatment is key to getting and keeping those gains.
How does the CurrentBody Helmet stack up against other treatments?
Against Finasteride – The helmet can ramp up hair growth by 126% in 16 weeks. Finasteride, a hair loss drug, doesn’t match up to this without continuous use.
Compared to laser treatments – It’s also been found to be way more effective than some laser treatments, outperforming them by 126%.
Versus Minoxidil – Against the topical solution Minoxidil, the helmet brings 62% more new hairs, minus the daily hassle and potential skin issues.
So, if you’re eyeing the CurrentBody helmet as your choice against hair loss, it looks like it could be a pretty solid option.
Personal and customer reviews of initial experiences
With 34 reviews averaging 4.5 out of 5, people really like the CurrentBody Helmet for its solid build and how easy it is to use. While the scores on seeing results dip a bit, it’s key to stick with it for about four to six months to start seeing your hair come back. Christine K. from Canada was hoping for quicker results in just three months. The team at CurrentBody, with Zubda leading the charge on beauty tech advice, stresses sticking it out for about six months to really see the difference.
People like JCS and Liz O. are happy about how well red light therapy works and how top-notch the helmet feels. Hadas from Israel and Nils P. from the Netherlands have seen their hair get thicker and healthier. Though Hadas did point out that it can snag your hair, tossing your hair into braids seems to fix that right up.
On the expert front, Craig Ziering, a big name in hair restoration, promotes using red light therapy to get those hair follicles moving and bumping up hair density without the downside of harsh side effects. Celestine Gitau also favours using red light therapy alongside good eating, keeping stress in check, and taking care of your scalp to tackle hair loss.
CurrentBody helmet results: before and after
Lots of people who’ve stuck with using the CurrentBody Skin LED Hair Growth Helmet* have seen some real changes. Their hair feels thicker and denser, and their scalp seems healthier too. Everyone’s experience is a bit different, but the before and after pictures people share usually show a pretty big decrease in how much their hair is thinning. Most agree that if you keep up with it regularly, just like the manual suggests, you’re more likely to see good results.
My before and after
As I’m only on Week 1 of using the CurrentBody Skin LED Hair Growth Helmet* I can’t show you any actual results yet. But watch this space as I will be updating my journey here and via social media too. I’m very hopeful!
Where can I buy the CurrentBody Skin LED Hair Growth Helmet?
Lots of research out there is giving a thumbs up to red light therapy for dealing with hair loss, with a whopping 128% boost in how fast hair grows back, meaning people are seeing thicker, stronger hair after sticking with red light therapy for a while. And compared to options like minoxidil or finasteride, which might irritate your scalp or lead to other side effects, red light therapy is pretty chill with hardly any downsides reported.
Pros
No Surgery Required: Red light therapy doesn’t involve any cutting or poking, making it a gentle choice for many.
Easy on You: Side effects are pretty rare, especially if you’re comparing it to drugs for hair loss.
Do It at Home: You can get your red light therapy session in without having to step out, thanks to gadgets you can use in your living room.
Happy Scalp: It’s not just about more hair; red light therapy can make your scalp healthier, cutting down on problems like inflammation.
Cons
Time: You’ve got to commit to using it regularly over a long stretch to see results, which might not be everyone’s cup of tea.
Costs Upfront: Getting your own red light therapy setup at home can be a bit pricey at the start, though it could save you money down the road compared to other treatments.
Mixed Results: How well it works can really depend on the person. Some might see big changes, while others might only notice a little difference.
Beyond the Helmet: Are there any hair loss treatment alternatives to red light therapy?
Stepping out from under the CurrentBody Helmet, let’s look at other options to tackle hair loss if red light therapy isn’t your go-to.
Medications
Minoxidil (Rogaine): You can grab this topical treatment you massage into your scalp at your local pharmacy. It’s got a thumbs up for both men and women, but you’ve got to keep at it without a break to keep the gains.
Finasteride (Propecia): More of a behind-the-counter pick, this pill slows down hair loss and might even invite new growth. This is aimed at men, though, and it’s not without its set of potential side effects, especially in the bedroom department.
Medications bring results, no doubt, but they’re not free of side effects. Red light therapy, on the other hand, keeps things gentle and non-invasive.
Platelet-rich plasma (PRP) therapy
You utilise your own blood, which is processed to concentrate platelets, so PRP therapy injects it into the scalp. This method aims to stimulate hair growth by enhancing tissue repair and cellular functions.
PRP therapy requires clinical visits and is more invasive, potentially accompanied by discomfort and higher costs. Red light therapy, alternatively, offers a non-invasive, pain-free treatment option that can be conveniently administered at home, though PRP may provide faster results for some people.
Hair transplant surgery
Hair transplant procedures, such as Follicular Unit Extraction (FUE) and Follicular Unit Transplantation (FUT), offer permanent hair loss solutions by redistributing hair from denser to sparser areas.
While hair transplant surgery delivers immediate and targeted results, it involves significant financial investment, recovery time, and surgical risks. Red light therapy is a gentle alternative or a complementary treatment to support healing and enhance hair growth without the need for surgical intervention.
Microneedling
Microneedling for hair loss involves a process where very fine needles create tiny punctures on the scalp. This action is meant to kickstart the skin’s healing process, potentially encouraging hair growth. It’s often used alongside other treatments to help them penetrate deeper and work more effectively. You can use the CurrentBody Helmet device in conjunction with microneedling if you wanted to.
Compared to the simplicity of red light therapy, microneedling is more direct, with a bit of discomfort due to its invasive nature. While it can be effective, especially when combined with other hair loss treatments, red light therapy offers a gentler, non-invasive alternative that’s easy to use regularly at home.
Both approaches have their place in the array of hair loss treatments available, from the straightforward application of medications to advanced techniques like red light therapy. Each method offers different benefits, and the best choice can depend on your individual needs, preferences, and the specific condition being treated.
Final thoughts, recommendations, and guidance
The CurrentBody Skin LED Hair Growth Helmet is a pretty cool tool in the fight against hair loss, mixing smart tech with everyday hair care. It’s got a thumbs-up from both science and real users, making it a solid pick for handling hair loss right at home. This helmet is all about using light in a gentle way to help out thinning hair without any fuss. If you’re thinking about giving it a try, here’s what you might want to keep in mind:
Do Your Homework: Take a closer look at how red light therapy works and why it might be good for your hair. Look for solid research and trials to back up what the helmet promises. Places like PubMed or NIH are great for finding trustworthy studies.
Check What You Need: Think about how much hair you’re losing and if this kind of therapy fits your situation. Sometimes, other conditions might need a different approach.
Weigh the Costs: Consider what you’re spending upfront against what you’ll save by not having to keep buying treatments or going for more drastic measures.
Listen to Others: Check out what people who’ve been in your shoes have to say about their experience with the helmet.
Look for FDA Approval: Especially in the U.S., knowing the device is FDA-cleared can give you a bit more peace of mind about its safety and effect.
Check the Warranty: Make sure you know what kind of support and warranty comes with it, so you’re covered if anything goes sideways.
Be Patient: Remember, good things take time. Consistent use is key to seeing a real change, so stick with it as recommended.
Track Your Journey: Taking before and after photos can be a great way to really see the difference over time.
Keeping these points in mind, the CurrentBody helmet seems like a pretty smart pick for those looking to tackle hair loss head-on. It offers you a non-scary way to help your hair out, backed by science and good reviews from users. Just like with anything big in healthcare, chatting with a pro and thinking it through can help you decide if it’s the right move for you.
FAQs
Is red light therapy for hair loss safe?
Absolutely, red light therapy is generally considered safe for hair loss. It’s non-invasive and doesn’t come with the scary side effects some treatments might have. Just make sure to follow the guidelines for your device to keep things smooth.
Can red light therapy make hair loss worse?
There’s no evidence to suggest that red light therapy worsens hair loss. In fact, it’s known for its benefits in stimulating hair growth and improving scalp health. If you’re concerned, chat with a healthcare professional.
Is red light therapy for hair painful?
Not at all. red light therapy is a gentle, pain-free treatment, so if you’re not a fan of the ‘ouch’ that comes with some other treatments, red light therapy could be up your alley.
Can red light therapy reverse grey hair?
Red light therapy is more about encouraging hair growth and improving the health of your scalp and hair. There’s not much out there to say it can bring back your original colour if you’re going grey.
I’m thinking of buying a red light lamp for my fiancé who has back pain and hair loss – would any red lamp work?
It’s best to look for a device specifically designed for the issues you’re tackling. Red light therapy devices for hair loss and back pain might have different specifications, like wavelength, so picking one that’s meant for hair loss is your best bet for seeing results.
Can an LED mask with red light also be used on the scalp for hair loss treatment?
Some LED masks are versatile enough to be used on different parts of the body, including the scalp. A normal LED mask will help a little as it does penetrate the skin at a cellular level. But it’s important to choose a device that has the correct wavelengths to reach the follicles, which is usually a different wavelength than the face LED masks. So the hair-focused helmet will work better, as it will reach the correct level. Just check the manufacturer’s recommendations to ensure it’s safe and effective for hair loss treatment.
Does light therapy stop hair loss, or is it just for regrowth? Can it replace Finasteride if you do it every day?
Red light therapy is known for both halting hair loss and encouraging regrowth by stimulating the follicles. As for replacing finasteride, it’s a bit of an apples and oranges situation. Red light therapy offers a non-drug, side-effect-free method, but whether it can replace finasteride for you depends on your specific situation and what your healthcare provider suggests.
Resources for further reading and understanding
Systematic reviews and meta-analyses
“Effects of Low-Level Laser Therapy on Male and Female Pattern Hair Loss“: A systematic review and meta-analysis in Lasers in Medical Science (2014) examining the efficacy of LLLT in treating pattern hair loss. The study concluded LLLT to be an effective and safe treatment, noting significant improvements in hair density and thickness.
Clinical trials
“Treatment of Androgenetic Alopecia with LLLT“: Published in the Journal of Cosmetic and Laser Therapy (2013), this study involved individuals with androgenetic alopecia treated with LLLT and reported significant improvement in hair count and density after 26 weeks.
“LLLT for Women with Androgenetic Alopecia“: A study in Lasers in Surgery and Medicine (2014) highlighted the positive effects of LLLT in increasing hair density in women, compared to placebo groups.
Comparative studies
“Comparing LLLT with Minoxidil“: Published in The American Journal of Clinical Dermatology (2014), this study found LLLT to be as effective as a 5% minoxidil solution in promoting hair growth in men with androgenetic alopecia.
*This post is sponsored by CurrentBody but all thoughts are 100% my own. Please note that links marked with a ‘*’ are affiliate links, which means I may earn a small commission when you click through at no extra cost to you.
Overcoming mask discomfort when you can’t sleep with CPAP
Sleep apnea is a common sleep problem that affects a lot of people all over the world, and it can really mess with your health. But the good news is, there’s a treatment called Continuous Positive Airway Pressure, or CPAP for short, that works well to help handle sleep apnea.
That said, as transformative as CPAP therapy can be for those who suffer from sleep apnea, its success hinges on the comfort and compatibility of the CPAP mask. And some people find they can’t sleep with CPAP. The mask is the conduit through which pressurised air flows to maintain an open airway. However, not all masks are made equally. CPAP is not easy and there are common complaints that can become a source of discomfort for many users who can not go to sleep, potentially hindering the effective use of CPAP therapy.
In our guide, we talk about how sometimes CPAP masks can be so uncomfortable that you can’t fall asleep or stay asleep. We’ll look at the usual problems people have, like masks that don’t fit right, annoying air leaks, and skin irritation. Is your CPAP therapy keeping you awake at night? We’ll dig into why these things happen and give you some handy CPAP tips for beginners to make things better.
By figuring out what’s causing the trouble and making the right changes, you can make wearing your CPAP mask a lot more comfortable. This way, you can get a good night’s sleep and feel refreshed in the morning.
What is sleep apnea?
Sleep apnea is a pretty common problem where you stop breathing for short periods when you’re asleep. This happens because you’re airway either partly or totally gets blocked.
The most common kind is called obstructive sleep apnea (OSA). It’s where the muscles in your throat relax too much and cause a blockage. There’s also another kind called central sleep apnea (CSA), which happens when your brain doesn’t send the right signals to the muscles that control your breathing.
Good sleep is essential to good health so if you don’t get sleep apnea treated, it can lead to some serious issues. You might feel really tired all the time because of the difficulty falling asleep, have trouble thinking clearly, or even have more serious issues like heart problems.
Are you at risk of sleep apnea?
To figure out if you have sleep apnea, doctors will often need to do sleep studies. A common way to treat it is with something called Continuous Positive Airway Pressure, or CPAP therapy. This treatment helps ease the symptoms and lowers the chances of health problems that can come with sleep apnea.
Understanding CPAP therapy – How CPAP works
At its core, CPAP therapy involves using a specialised machine that delivers a continuous stream of pressurised air through a mask (like a CPAP mask from CPAP Direct) worn over the nose, mouth, or both.
The main goal of using a CPAP machine is to make sure your airway stays open while you sleep, so you don’t stop breathing like what happens with sleep apnea. By keeping a steady flow of air, CPAP therapy helps you breathe normally during sleep and cuts down the risks that come with untreated sleep apnea. These risks can be things like heart problems or feeling tired during the day.
Getting the basics of how CPAP therapy works is really important. It’s the first step to getting better sleep and feeling good overall.
Benefits of CPAP therapy
CPAP therapy is a really important treatment for people with sleep apnea, and it comes with a bunch of benefits.
What it does is send a steady flow of air into your airway when you’re sleeping. This stops the airway from getting blocked, which is what causes sleep apnea. Because of this, people who use CPAP breathe better when they’re asleep, get more oxygen, and don’t have as many sleep interruptions.
Using a CPAP machine can help you sleep better at night and feel more awake and sharp during the day. Sticking with CPAP therapy over time can help with sleep apnea symptoms and make a big difference in your overall health and happiness. It’s a treatment that can change and improve your life.
Best of all, most of the cost of CPAP treatment is covered on Medicare. So it is very affordable.
Can’t sleep with CPAP? 7 tips for sleep and avoiding common problems
Starting to use a CPAP machine to get better sleep can be a bit tough, and sometimes people find the CPAP masks uncomfortable.
This article lays out the 7 most troubleshooting issues with CPAP tolerance and provides solutions to common issues like fit problems and air leaks. By dealing with these issues, you can be more comfortable and make the most out of this helpful sleep apnea treatment.
1. CPAP machines and masks – which ones are right for you?
When shopping for CPAP, it’s really important to have a CPAP mask that fits just right. The wrong size or style of CPAP mask, i.e. if it’s too tight or too loose, can rub your skin the wrong way, cause sore spots, or let air leak out.
To prevent this, you need to pick a mask that’s the right size and shape for your face. Most masks have straps you can adjust. You want them to be tight enough to stay in place, but not so tight that they’re uncomfortable. Sometimes, you might have to try a few different types of masks to find the one that fits you the best.
Tip – Make small adjustments to your CPAP mask nightly
When you wear a CPAP mask, sometimes it doesn’t fit perfectly right off the bat. It might be a bit too tight, too loose, or just not sitting right on your face. Making small adjustments means you fiddle with the straps or the position of the mask each night, just a little, to get a better fit.
The idea is to find that ‘just right’ spot where the mask is snug but not too tight, and it doesn’t leak air or bug you while you’re trying to sleep. It’s like tuning a guitar – a little tweak here and there until it sounds perfect. In the case of your mask, you’re adjusting it bit by bit for the best comfort.
2. Air leaks
Making sure your mask fits well and doesn’t leak during your therapy is key. If air leaks out of the mask, the treatment won’t work as well, and it might bother your eyes and skin.
To stop this from happening, regularly check your mask for any cracks or damage and adjust the straps so it fits securely.
If you still have leaks, think about trying a different kind of mask, like nasal pillows or full-face masks. These might work better for your specific needs and stop the leaks.
3. Dry mouth or nose
The steady stream of air from the CPAP machine might make your mouth and nose feel dry, which can be uncomfortable. To fix this, you can use a heated humidifier with your CPAP machine. This adds moisture to the air and helps prevent dryness.
Some masks have special features that keep the air moist, which is great for avoiding dryness. Also, drinking plenty of water during the day can help keep you from feeling too dry.
4. Claustrophobia
Wearing a CPAP mask might feel weird at first, and it can even make you feel a bit trapped or uncomfortable, which might be why it’s hard to fall asleep with it on or fall asleep right away. You will have trouble getting used to wearing the CPAP mask at the beginning, but there are ways to make it easier to get used to.
One thing you can try is to wear the mask for a little while during the day, and then ease yourself into CPAP slowly, wearing it for longer periods. Practising breathing with the mask on can also help you feel more at ease with it.
If you still feel closed in after trying the mask for a few days, you might want to try a mask with a simpler design or one with nasal pillows. These kinds of masks can feel more comfortable and less in the way.
Tip – Use your CPAP mask every time you sleep
You should use your CPAP mask every single time you go to sleep, whether it’s at night or even during a short nap during the day. The idea is to make sure you’re always getting help from your CPAP machine to keep your breathing steady while you sleep. It’s like wearing your seatbelt every time you’re in a car – it’s just a good habit to keep you safe and healthy. So, whether it’s a full night’s sleep or just a quick snooze on the couch, pop on that CPAP mask to make sure your sleep is as good as it can be!
5. Skin irritation
Wearing a CPAP mask for a long time can sometimes cause skin problems like irritation, redness, or even sore spots. This happens because the mask needs to fit closely to work right, and that can rub against your skin.
To help with this, it’s a good idea to clean the mask regularly using a gentle, skin-friendly soap. This keeps any buildup off the mask that could irritate your skin. Also, using something like mask liners or barrier creams can make a big difference. They act like a cushion between your skin and the mask, cutting down on rubbing and protecting your skin.
Taking these steps can make wearing your CPAP mask a lot more comfortable and lower the chances of having skin issues.
6. Noisy mask
Some CPAP masks can be noisy, making sounds like whistling or air leaks, and this noise can bother both the person wearing the mask and their sleeping partner. It’s important to figure out where the noise is coming from so everyone can sleep better.
Start by checking the mask parts to see if anything is loose or broken. Make sure everything is connected tightly. If there’s still noise after that, talking to a healthcare provider can be helpful. They might suggest different masks that are quieter and more comfortable.
Dealing with a noisy mask right away is key. It not only makes things more comfortable for the person wearing it but also helps create a better sleep environment for everyone.
7. Congestion or nasal issues
People who already have stuffy noses or other nose problems might find it tricky to get used to some types of CPAP masks. This can make it hard to breathe comfortably and affect how well the therapy works.
If this is a problem, trying a nasal mask or nasal pillows might work better if you have a stuffy nose. Also, using a saline nasal spray before bed can help clear uhup the congestion, making sure the air flows smoothly and making the CPAP experience more comfortable.
Choosing the right kind of mask to suit nose issues can help you breathe easier and deal with stuffy nose problems while using your CPAP machine.
Tip – Use AutoRamp on your CPAP machine
AutoRamp is a cool feature on some CPAP machines. When you first put on your mask and turn on the machine at night, the AutoRamp setting starts with a lower air pressure. As you fall asleep, the machine automatically increases the pressure to the level your doctor set for you.
This is great because it makes it more comfortable to fall asleep. See if there’s a ramp setting on your CPAP machine where you don’t have to start with the full pressure right away, which can feel a bit overwhelming. AutoRamp starts gently and then gradually gets stronger as you snooze. It’s all about making it easier to drift off to sleep while using your CPAP.
How to know if CPAP is not right for you
Treating sleep apnea when CPAP masks don’t help is doable with CPAP alternatives, but it’s always good to chat with your doctor for advice on how to sleep with sleep apnea without CPAP. Is your CPAP therapy keeping you awake at night? Here are some other options you can try:
BiPAP therapy
It’s like CPAP but with two pressure levels – a stronger one when you breathe in and a gentler one when you breathe out. Some folks find this more comfy.
Oral appliances
If you can’t get to sleep with your CPAP, you can try oral appliances. Think of these as special mouthpieces that adjust your jaw and tongue position. They work well for a lot of people, especially if your sleep apnea isn’t super severe.
Lifestyle changes
Sometimes losing some weight, quitting smoking, or cutting back on booze can make a big difference.
Positional therapy
If your sleep apnea gets worse in certain sleeping positions, there are ways to train yourself not to sleep on your back.
Surgery
For some, surgery might be the answer, especially if something in your throat or nose structure is causing the problem.
Supplemental oxygen
Adding extra oxygen at night can help, sometimes along with CPAP or BiPAP.
Adaptive Servo-Ventilation (ASV)
New CPAP innovations can help like this fancy new type of air machine mainly for a specific kind of sleep apnea.
Nerve stimulation
There are several new treatment options available now, one of which is nerve stimulation where doctors zap a nerve to help keep your airway open.
Lifestyle adjustments
Not drinking before bed, keeping a regular sleep schedule, and sleeping on your side can also help with sleep apnea. You can also try to prepare your sleep space and create good sleep habits like preparing your sleep area to keep it ambient for sleep.
Alternative therapies
Yoga or acupuncture might give some relief, but they’re more like extras, not the main solution.
Conclusion
If you have sleep apnea, getting comfortable with your CPAP mask is important for the treatment to work well. But sometimes, you might run into problems like the mask not fitting right, air leaks, your nose and mouth getting dry, or skin irritation.
The good news is that these issues can be fixed to make wearing the mask more comfortable and help you stick with the treatment. Don’t let your sleep suffer. It’s all about being patient and trying different things to see what suits you best. And if you keep having trouble, it’s a good idea to talk to a healthcare professional to make sure you’re getting the most out of your treatment.
With the right mask, accurate health information from your doctor, and a few adjustments, you can benefit from this therapy and enjoy a better night’s sleep.
FAQ
I can’t tolerate CPAP. What can I do?
I get it, CPAP machines aren’t for everyone. But don’t worry, there are other ways to tackle sleep apnea. Check out the tips above for when you’re struggling with sleep and check out some troubleshooting issues with CPAP tolerance too.
Why do I sleep with my mouth open with a CPAP?
If you sleep with your mouth open while using a CPAP machine, it could be because of the following:
Habit: Sometimes, it’s just a habit to breathe through your mouth, especially if you’ve done it for a long time.
Nose issues: If your nose is stuffy or blocked, you might open your mouth to breathe easier while asleep.
CPAP pressure: The air pressure from the CPAP might feel too strong, making you open your mouth.
Mask fit: If your CPAP mask doesn’t fit just right, you might open your mouth without realising it.
To help with this, you could try a chin strap to keep your mouth closed, or a full-face mask that covers both your nose and mouth. Also, a humidifier can make breathing more comfortable.
To enhance your sleep environment alongside CPAP therapy, consider incorporating the Crane 2.0 4-in-1 Humidifier into your nightly routine. This innovative device offers more than simple humidification; it emits a soothing ultrasonic cool mist to alleviate congestion and coughs, features a built-in sound machine to drown out background noise for a calmer sleeping atmosphere, and includes an aroma diffuser for the safe use of essential oils, creating a relaxing environment conducive to sleep.
Additionally, its optional nightlight provides a gentle, comforting glow, easing the transition into sleep. By addressing common sleep disturbances, the Crane 2.0 4-in-1 Humidifier complements CPAP therapy, making it an essential tool for achieving a restful night’s sleep. For more details and purchase options, visit the Cheeky Rascals website, and discover how this device can improve your sleep quality and comfort.
How do you wear a full face mask?
Full face masks tend to be a learning curve. Here’s how to do it:
Position the mask: Hold the mask against your face, covering both your nose and mouth. The cushion should fit comfortably.
Adjust the straps: Pull the headgear over your head. There are straps you can adjust to make sure it’s snug but not too tight. You want it just right so there’s no air leaking but it doesn’t press into your skin.
Check the fit: Once the mask is on, turn on your CPAP machine. If you feel air leaking out around the edges, you might need to adjust the straps a bit more.
Get comfortable: It might feel a bit odd at first, but you’ll get used to it. Lying down with the mask on before you turn on the machine can help you get comfortable.
Remember, the key to how to stay asleep for longer is that the mask should feel secure on your face, but not too tight. It’s like finding the perfect pillow – it might take a little adjusting, but once you get it right, you’re all set for a good night’s sleep!
Can CPAP cause insomnia? I can’t get to sleep
Using a CPAP machine can sometimes lead to trouble sleeping, especially when you’re just starting with it. It’s pretty common actually. The feeling of the mask on your face, the sound of the machine, or the sensation of the air pressure – all these things can feel a bit strange and might make it harder for you to fall asleep at first. It’s like getting used to a new pillow or blanket, but a bit more challenging.
But don’t worry too much – many people adjust to it after a while. It’s like getting used to any new thing in your routine. If you continue having trouble sleeping though, it’s a good idea to chat with your doctor or a sleep specialist. They might have some tips to make it more comfortable for you or adjust the settings on your machine. Hang in there, it often gets easier with a bit of time!
What does a CPAP machine do when you stop breathing?
A CPAP machine is like a little assistant that watches over your breathing while you sleep. When you stop breathing, which can happen in a condition called sleep apnea, the CPAP machine jumps into action. It gently pushes air into your airways to keep them open, making sure that your breathing doesn’t stop. This way, you can keep breathing smoothly throughout the night.
Are there any body changes after CPAP?
Yes, using a CPAP machine can lead to some changes in your body, but mostly good ones! When you start using CPAP, you’re likely to notice:
Better sleep quality: You’ll probably sleep better because the CPAP machine helps keep your breathing steady while you sleep. This means you won’t be waking up as much during the night.
More energy during the day: Because you’re sleeping better, you’ll likely feel more energetic and less sleepy during the day.
Less snoring: CPAP can really cut down on snoring, which is a bonus for anyone who shares your bed or your home!
Improved health: Over time, using CPAP can help lower your blood pressure and reduce the risks of heart problems.
Possible side effects: Some people experience dry mouth, nasal congestion, or skin irritation from the mask. But these can often be managed with a little adjustment to the machine or the mask.
Overall, the changes are generally positive and can really improve your quality of life.
Does sleeping with a CPAP cause gas?
Yes, sleeping with a CPAP machine can sometimes cause gas. This happens because a bit of the air from the machine can get into your stomach while you’re sleeping. It’s like swallowing a little extra air, and this can make you feel a bit bloated or give you some extra burps or even a bit of gas.
It’s not too serious, but it can be a bit uncomfortable. If it bothers you a lot, it’s a good idea to talk to your doctor about it. They might have some tips to adjust the machine or change how you use it to help reduce this side effect.
What happens if you don’t sleep with your CPAP machine?
If you skip sleeping with your CPAP machine, especially if you have sleep apnea, a few things might happen:
Back to snoring: You might start snoring again. The CPAP machine helps keep your airways open, so without it, the snoring could come back.
Poor sleep quality: You might not sleep as well. The CPAP machine helps you breathe smoothly, so without it, you might wake up more often during the night.
Feeling tired during the day: Because your sleep might not be as good, you might feel more tired or sleepy during the day.
Health risks: Over time, not using your CPAP can increase your risk of health problems related to sleep apnea, like high blood pressure or heart issues.
So, it’s really important to use your CPAP machine as your doctor advised, to keep all these things in check. It helps you get better sleep and keeps you healthier!
Do you need less sleep with CPAP?
Not exactly. Using a CPAP machine doesn’t mean you need less sleep, but it can make the sleep you get more effective. Here’s the thing: if you have sleep apnea, you might not be getting good, quality sleep. You might wake up a lot during the night, even if you don’t realise it, because your breathing stops and starts.
When you start using a CPAP, it helps keep your breathing steady all night. So, you’re less likely to wake up, and the sleep you get is deeper and more restful. This means you might feel more refreshed and alert during the day, even if you sleep the same number of hours as before. It’s like the difference between having a bunch of short, interrupted naps and one good, long sleep.
Can CPAP make sleep worse?
Yes, sometimes a CPAP machine can make your sleep feel worse, especially when you first start using it. Here’s why:
Getting used to it: The mask and the sound of the machine can feel strange at first. It’s like trying to sleep with a new pillow that you’re not used to.
Air pressure adjustments: The air pressure might not feel comfortable right away. It can take some time to get the settings just right for you.
Mask fit: If the mask doesn’t fit well, it can be annoying. It might leak air, or you might feel like it’s too tight or too loose.
Side effects: Some people get side effects like a dry mouth, a stuffy nose, or irritation where the mask touches their face.
But don’t worry too much. Many people get used to their CPAP machine after a while and their sleep improves a lot. It’s a bit like breaking in a new pair of shoes – uncomfortable at first, but better over time. If you’re having trouble, it’s a good idea to talk to your doctor. They can help adjust the machine or give you tips to make it more comfortable.
Are there any long-term side effects of CPAP machine?
Using a CPAP machine for a long time can have some side effects, but keep in mind that many people use it for years without major issues. Here are a few things that can happen:
Skin irritation: Where the mask touches your face, you might get some irritation or pressure marks. This usually happens if the mask isn’t fitting quite right.
Nose and throat issues: Some folks experience dryness in their nose or throat or even nosebleeds. This is because of the air blowing in all night. Using a humidifier with the CPAP machine can help with this.
Ear problems: Rarely, the pressure from the CPAP machine can cause issues like earaches or sinus problems, especially if the pressure settings aren’t quite right for you.
Claustrophobia: For some, wearing a mask can feel a bit claustrophobic, but different types of masks can help with this feeling.
Remember, while these side effects can happen, the benefits of using a CPAP machine – like better sleep and reduced risk of serious health problems – often outweigh these issues. If you’re having any troubles with your CPAP machine, it’s always a good idea to chat with your doctor. They can help adjust things to make it more comfortable for you.
Why can’t I seem to stay asleep when using CPAP?
Other questions asked were:
Why can’t I fall back asleep with my CPAP machine?
How do I get a good night sleep with my CPAP machine?
Why can’t I sleep with my CPAP machine?
Is sleeping with a CPAP uncomfortable?
Why can’t I stay asleep with my CPAP mask?
You may have sleep apnea but what if you can’t sleep with a CPAP machine? Trouble staying asleep with your CPAP machine can be frustrating, but it’s pretty common, especially when you’re just getting used to it. Check out the tips above for how to make your CPAP mask comfortable and maintain good sleep hygiene.
It’s a good idea to talk to your doctor or a sleep specialist about these issues. They can help you figure out what’s going on and how to make CPAP work better for you. And remember, it often takes a bit of time to get used to CPAP, so don’t get discouraged!