I had the pleasure of being on a panel with Leyla and a few other mum bloggers and influencers recently as part of the BBC’s look at children returning to school. Even though some potential impact is still shrouded in mystery, we certainly had a lot to reflect on.
One of the biggest reflections was that a lot of these changes might be longer-term than first imagined. Social distancing at school, and potentially more home and online schooling. At a time where the balance for parents at home has been far from ideal, it led to an even bigger thought– what does all of this mean for the future of family routines?
In the run-up to Father’s Day, I wonder if, along with a Fathers’ Day card, for modern-day dads in particular, this is the moment to drive the sort of change that will positively affect a new routine?
Creating the right work-life balance for dads
Over the last few years, we’ve seen a generational shift for dads at home. The results of our own study, The Millennial Dad at Work, showed that 87% of us are now actively involved in the day-to-day parenting, with nearly 6 in 10 claiming to be fully equalised across all day to day parental tasks.
However, the world of work has been much slower to adapt to this change. With a lot of workplace culture still treating dads as if ‘they should just be at work’ it can feel like we’re living in a different time – which is probably not helped by more traditional beliefs, by older parents perhaps, and thinking ‘that’s just the way it has always been around here.’
If ever COVID has shown us one thing – it’s that large scale change is possible, and perhaps, even more so, is vital to reflect on what truly matters.
For dads wanting to shift the way they work for their futures, I offer 3 things to think about.
The importance of having the conversation
In our Millennial Dad at Work report, we found that 1/3 of all dads we surveyed had left their jobs since becoming a dad to find that right parental balance for them.
It’s clear that more and more dads are striving for a new type of work/life balance, but men, in general, find it tricky to be truly vulnerable at work, which stops them sometimes from even having the conversation in the first place.
It’s vital that, first, dads feel comfortable to speak with their partners – what is their vision of work/life balance success? What’s getting in the way (yes, money is always one, but what else?). After that discussion, the conversation with work should be a lot clearer too.
Measure your success
Flexible working is one area I believe will change greatly for dads, but it’s important when applying for it, that dads are measuring the success of what they’ve been able to achieve by working remotely or flexibly before.
Ultimately, those of us who work for commercially focussed organisations need to show how we can be more of an asset in any new routine.
Find your allies / key learnings
Who else do you know that’s been through what you’re trying to get? Are they in your organisation? If not, can you talk to them and found out how they did it. It’s interesting that a lot of the top dad authors of new dad books also talk about allies and community – albeit for home. Now is our time to find the same for work.
A wave of change is coming, and for modern-day dads, there has never been a better time to unite, talk to your partner, and go for the life balance that equates to real success in your world.
I wish you all the best.
How to deal with the stress of moving to a new house
Moving to a new house is stressful enough when children aren’t a factor, but when they are, it becomes an entirely different ball game. An online study conducted by Online Mortgage Advisor found parents are twice as likely to find moving home extremely stressful, with just under half stating that finding and securing the property was the most stressful part of moving home.
Companies like eXp can help with your home search, but the moving process is no longer solely about whether you and your partner like the house and the area,it’s about the impact this move could have on your children and growing family.You must consider school relocation, friends, and how adaptable your child is to these changes. That’s not all though, if you’re planning on growing your family further in the future then you need to take this into consideration too. Below are some things to think about when you’re moving to a new house with your family.
Moving with a child
If you already have children, then it’s important for them to feel involved in the whole moving process, so they felt comfortable with the change. Understandably, it’s not always going to be possible for them to attend house viewings with you, so if they can’t be there, take pictures or make a short video and tell them all about it as soon as you see them.
Show them a map to help them understand where their new house is in relation to your current one and the route you would take. It’s also a good idea to make it a positive process, by informing them of changes like what the new address would be, and what will seem like a huge advantage for them.
“It will only take 10 minutes to get to grandma’s house instead of 20!”.
Finally, when you have confirmed everything and you have a set date, have them help you with the packing and the moving. Give them the boxes they need to pack up their room and teach them how to do it in an orderly fashion. Leave them to it and check on them every few minutes. By doing this, you’re giving them the responsibility, which they’ll appreciate and associate with the move, positively reinforcing the process.
Then, involve them in the moving process or get them to help with moving their boxes to storage, so they can see where they store their belongings until you move to the new house – moreover, if you have hired a professional moving company such as Atlanta Home Movers, LLC for example, then try to encourage your little ones to ask questions about the moving process as speaking to an expert mover can help to put your child’s mind at ease.
Shurgard is a great place to store your moving boxes if there is a transition period between property A and property B because you can visit your storage area whenever you want.
Moving with a growing family
To avoid the same situation of moving house again in two years, sit down with your partner and talk through your plans. Make sure the home you are buying is fit for kids, now and in the future and whether you will want a family pet. You should consider all these things before committing to buying a house because if you think more children are on the cards, then a two-up-two-down won’t cut it when they come along.
Equally, a flat with no outside space probably isn’t the best choice for children and a dog either. By discussing your true intentions with your partner you’ll avoid having to go through the house moving stress again until you reach a point where you don’t necessarily need to move out, but you want to move.
Create a To-Do list that includes the start and finish of your move
A master to-do list you can work from will help keep your mind at ease, and it also ensures you are not missing out on any of the important components of moving house. Divide the to-do list into main sections like decluttering, packing, hiring real estate agents/conveyancing solicitors/removal vans, and where everything will go in the new house, as well as plans for home security and interior design. Then check them off each step at a time.
Subheadings can include a longer description to remind you of some lesser important jobs you need do to, to complete the main job. It keeps your family in line with your plans too, so everyone is working from the same song sheet. Google is your friend in this instance, as you can find some great template to-do lists on the internet.
Get the whole family involved
Armed with your master to-do list, become the project manager for the move and start creating jobs for members of the family and any other friends/family members who are kind enough to help. Doing everything alone will increase your stress levels and trigger anxiety. But, if everyone is tasked with a small job then, bit by bit, you’ll see progress and stress levels will decrease immensely. Plus, you’ll save time with a well-oiled plan in place and you’ll leave with a clean house ready for the next family to enjoy.
Start decluttering unwanted items in the house
In the weeks (or months) leading up to the big move, go through each room one by one and bag/box up items you don’t really need. Be brutal, the less you bring with you on the move, the cheaper your moving costs will be. Plus, you stand to earn an extra bit of money if you pop your unwanted stuff on eBay/Gumtree/Amazon, which you can then offset against your moving costs. Or, you can be super generous and drop them off at your local charity shop, so others can enjoy them instead.
“One person’s trash is another person’s treasure.”
Hire reputable estate agents and conveyancing solicitors
If you’re buying/selling a property, you will need to appoint either a solicitor or a conveyancer from the offset, to deal with the legal matters of moving. Moving house starts with conveyancing, which is the legal process you go through to buy or sell your house, and this is usually carried out by a solicitor or a licensed conveyancer. It is important to note at this stage that solicitors are qualified lawyers and have received extensive training in all aspects of the law. They can also offer full legal services, including taking someone to court.
A licensed conveyancer is specialised in property matters but has received less training. Not that they are less qualified, they are just as capable of handling your property matters, and they also may be cheaper to use. Your conveyancer/solicitor will then carry out the relevant checks on the property you’re buying and provide essential information to the buyer of your home. When everyone is happy and have agreed to all terms, all parties will sign and exchange contracts via the conveyancer/solicitor to make the moving process legally binding.
Once all the money has changed hands, you hand over your keys to the estate agent and pick up your new ones from the seller’s estate agent. You want this process to run as smoothly as possible so you can concentrate on the actual logistics of moving to a new house. And, to do this, you need to find someone reputable enough to handle the mammoth task. Important points to note are that solicitors must be members of the Law Society, and Conveyancers must be members of the Council for Licensed Conveyancers. You can find a licensed conveyancer by using their name, practice/organisation or your postcode here.
If you know someone that has recently moved to a new house, ask them which conveyancer/solicitor they used. Were they competent enough to handle the exchange properly and quickly? Did they run into any problems with the conveyancer/solicitor? Would they use them again? Not everyone will have the same experience, but sometimes recommendations and testimonials can be worth so much more than the sales blurb on the website. The same goes for estate agents. Ask around and don’t be afraid to ask difficult questions about their expertise and knowledge.
Hire a removal company to pack your stuff up for you and move them to the new house
If you can afford it, I would absolutely recommend hiring professionals to pack up your belongings into their moving truck and move them to the new house. They are so experienced in what they do, the moving company can have pretty much everything boxed and moved within hours. Don’t forget to negotiate on the price, though. Perhaps, see if the movers would spread the move over a few days for a cheaper quote. If you need a place to store your boxes, Shurgard offers competitive rates to hold your items in storage, while you’re sorting out the move to property B.
If you can’t afford to then you can carry an HGV (Heavy Goods Vehicle) or an 18-wheeler to transport your goods from property A to property B. Be careful though as 18-wheelers are dangerous. Only drive if you know how to drive one and if you get into trouble and have an accident am 18-wheeler lawyer can help you here.
Take care of your emotional self and encourage your children to do the same.
You will experience a whole heap of emotions during this move, I know I did. I had my two boys almost back-to-back (they’re 15 months apart) and the postnatal healing took place on moving day to our first ever home as a family. I had to leave behind so many memories and, without realising it, I became depressed.
Even if the reasons for your move are positive, you will still experience feelings of anxiety, sadness and stress. Don’t brush these feelings away, but instead realise that you are feeling them and address them one-by-one with someone close who can help. Mourn the move and grieve its loss before you can then finally accept that you’re moving on to bigger and better things. If you’re moving because you’ve had to make some difficult decisions, then stay focused on the task ahead and why you are moving in the first place.
Say goodbye to people and places before you leave and settle any unfinished business. If you’re leaving good friends behind, then get in touch with them, say goodbye and promise to keep in touch. Saying goodbye to my boys’ local playgroup was one of the hardest things I had to do, although I never expected that it would be. I went back and said goodbye to all the staff members and other mums whom I had met and became good friends with, in those last five years–and I still keep in touch with most of them now (thanks to Facebook!).
Your children will also experience feelings they may not understand. Encourage them to talk to you about how they’re feeling and allow them to express themselves in a way they feel comfortable. They need to know that what they are feeling is normal. My boys may have only been three and four years old at the time of the move, but they still harboured feelings of anger and sadness because it was the only home that they had ever known. I assured them I was also sad to leave, but I was looking forward to moving to a big new house and making new memories with them, and if they ever needed to share how they felt about the move they could at any time they wanted.
So, there you have it. Motherhood Diaries’ top tips on how to deal with the stress of moving to a new house. As long as you give yourself enough time to plan and operate the move, and being organised with your belongings right from the beginning, you should be able to make moving to a new house a breeze. Good luck!
*Collaborative feature post*
How to go from Idea to Income in just 5 Steps
I changed careers with a newborn in a new country.
When my husband and I discussed having children, I voted to wait because we were not financially ready. He overruled me, and soon we had a baby on the way.
I was working as a Legal Secretary at the time. Now while it was a good job, and the pay was not bad, I was still living paycheck to paycheck and I had no wiggle room in my budget. No emergency fund, no savings. So that meant no luxuries, no family vacations, etc. I already knew that even with the slight increase in salary I was sure to get, this situation was not sustainable.
So what did I do? I switched careers. I went to school in another country to become a Computer Technician just two months after my son was born. Once I gained some experience, I could bring in extra income to supplement my main salary. So, along with working at a local computer company, I saw clients in my off time and I also taught Computer Repair at a local business centre.
All of this was an improvement, but I soon pivoted again. I went to work for a large corporation and stopped teaching and serving clients on the side. I simply no longer had the time and energy and also I had no desperate need of the extra income.
So you might say that is great, and it was, but I was not satisfied. I took some business training and opened my businesses, which began the transition out of corporate life. I hired myself as CEO in my Business and Career Consultancy Agency and Dean of my Online IT Academy.
You can change your career and own your income too
Here is how I help people: There are many out there in the world that have these ideas within them but they don’t know how to develop them or if they can even make money doing so. I help people go from Idea to Income and I have put together a free 5 Step Guide on the topic, which you can find here.
Another way I serve is by helping Tech Enthusiasts become High-Earning Tech Experts as Computer Technicians, all while being completely online. I also have a 5-Step Guide on how you can break into the Tech Field, which can be found here.
STEP 1
It’s all about Mindset
So let’s talk about the very important first step to achieving financial freedom. It’s all about your Mindset. Mindset is everything. It can either stop you in your tracks or spur you on, so your mindset is something you must deal with first.
Believe in yourself
One of the first things that hit us with mindset is, Limiting Beliefs. These are negative things we hear or say to ourselves. It can come from our childhood, our environment, our loved ones or other from people around us. We hear:
“People like you don’t do things like this.”
Or you may say to yourself:
“I can’t do this. It’s too hard. I don’t know how to do this.”
Perhaps we shoot down our own ideas by saying:
“Someone else is already doing that. I can’t catch up or even compete.”
“The market is already saturated. There is no space for me.”
Falling prey to these limiting beliefs will stop you from attempting this new thing or putting forth the effort it takes to be successful.
Say this instead:
“I will try my best!”
“I do hard things!”
Then live up to your words and really put in the effort.
Internal Narrative
You need to write your own narrative.
Turn it from negative:
“I’m not good enough. People like me don’t do things like this.”
To Positive:
“I deserve this. People like me work hard and accomplish their goals. Period!”
Imposter Syndrome
If you have an idea, it’s for a reason, you Can bring it to fruition. You are capable. Instead of asking yourself if you are good enough or doubting if you belong to the table, take a page out of Michelle Obama’s book. She says:
‘I have been at every powerful table you can think of… They are not that smart.’
STEP 2
Make a list of your Hobbies and Skills
What are you really good at? What do you love doing? What is your passion? What do people ask you to help with?
STEP 3
Validate
Narrow it down
Take the best idea from your list, one you believe you can make money with.
Check out the Competition
Look at the successful businesses out there. The ones you admire. (Please note: this is not meant for you to copy them, just for inspiration.) How are they doing things? What can you do differently, better, with your unique spin on things?
Don’t be afraid of competition
Embrace it. It means that your idea is valid and there are people out there paying for this product or service. There is space for you. Have you ever looked at the bread aisle? What if your favourite bread company gave up on putting their bread out there because they believed there was no space for their spin on bread?!?
STEP 4
Market Research
Find your ideal client
The ones that will love your product or service and gladly buy from you and sing your praises to others. What problems are they having with the product or service you provide? How does your product or service solve the problem or ease their pain? Create a Market Research Form to find out all this information so you can best serve your clients.
STEP 5
Invest
Invest in yourself and your business
Successful people invest time and money in personal and professional development.
If you are interested in making money and creating income streams even while at home with the babies, download either of my two guides. You can find them below:
During these unprecedented times when the world is quiet and the houses are bustling during the COVID-19 outbreak, Easter is looming, but things are going to be different this year. Last year, the kids and I spent Easter (and my middle one’s birthday) at The Arch London hotel. Now we are in self-isolation mode, Easter for kids doesn’t involve going out on countrywide treasure hunts or enjoying the fresh spring weather in the park (unless it’s isolated). Instead, we are confined to our home quarters and forced to spend the holidays indoors. And, as schools have closed, the Easter holidays feel like any other normal day now. So, let’s spin this self-isolation on its head and create some fun Easter activities for kids at home.
Easter home décor should still include traditional Easter eggs and bunnies, but you can change it up and still keep things spring light with fresh greens and yellows. You can make your own DIY Easter decorations by creating little Easter bouquets or Easter napkin bunnies for the table. You can also make Printable Easter Cards, which you can give to each member of the family or add as decoration on the wall. (more info can be found here).
Some Easter activity ideas include a mini Easter egg hunt at home. If you have a large garden then great, you can take your Easter egg hunt outside. Otherwise, it’s fine to just hide the eggs in different rooms in the house and come up with a mini quiz to help the kids find the Easter eggs. Some egg hunt ideas can include a crystal maze type quiz and a puzzle marathon, i.e. complete the puzzle, find the clue, and find the egg. The boys were kept entertained for ages when we did this at my parent’s house last year.
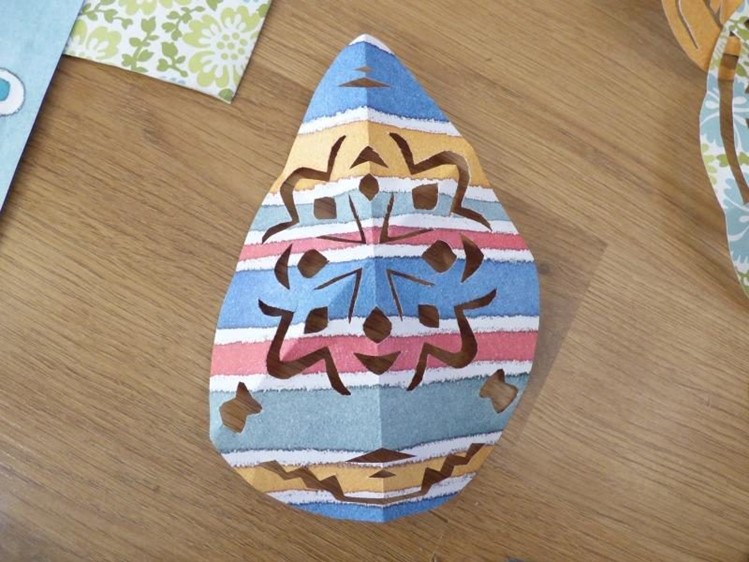
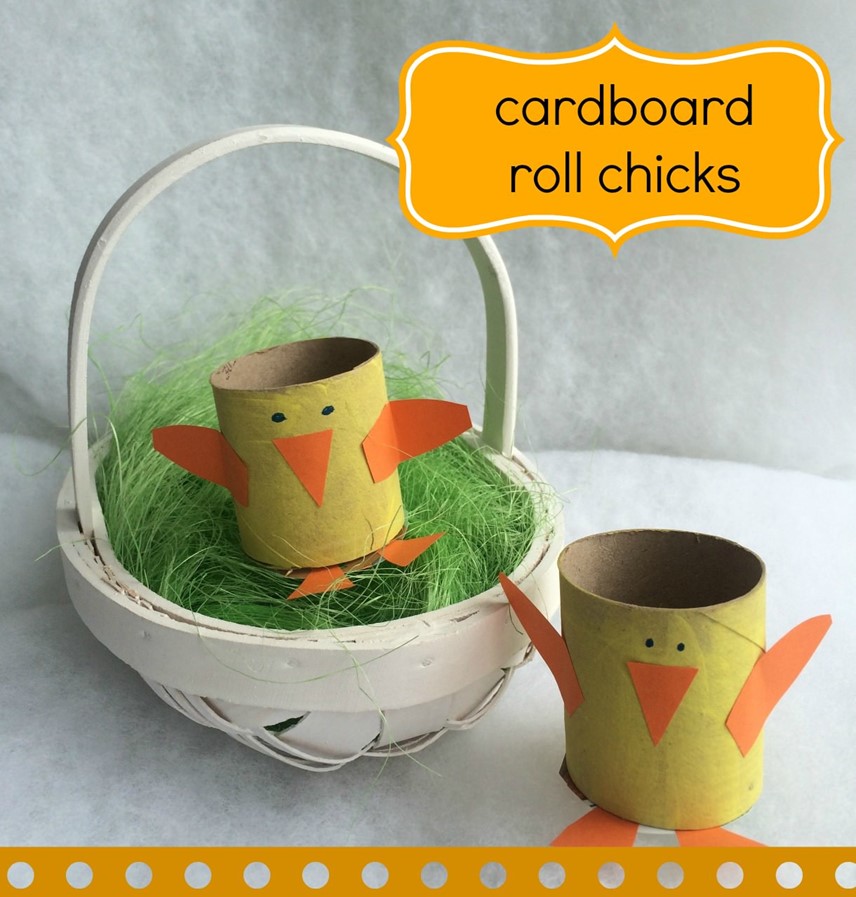
Homemade Easter gifts make the best gifts! The boys and I are planning to complete Lockdown activity number 16, which is Design and Make a Craft at Easter (for more lockdown ideas subscribe to 101noscreenways.com here). Think about Easter activities for toddlers that allow them to use their hands. Easter crafts are a great way to build on their imagination and creativity. You can get started with easy paper crafts like printing out stencils or colouring sheets and getting the kids to colour them in. You could also make a Paper Plate Chick using just a paper plate and some materials/colours you have in the house. Other Easter ideas for toddlers could be hand-printing cards, which can double up as lovely Easter cards for the family. Or you could try your hand at a Mix and Match Paper Chick Craft which can be personalised with a photo of your child’s face. Easter crafts for kids means that everyone has a hand in decorating the house for Easter and there are loads of great ways to get them involved, like making this Easy Kids Paper Cut Egg with some coloured paper and scissors. You can even get frugal and recycle cardboard to make little chick crafts too!
Other Easter crafts for toddlers could be to papier Mache Easter eggs, which are surprisingly simple to do, as you can see here, but these kinds of activities make great Easter crafts for pre-schoolers too.
You could make some Easter baskets which would fit perfectly with the mini Easter egg hunt as players can carry their eggs in their homemade Easter baskets. Add little cardboard roll chicks in the basket for decoration or this awesome Bunny in a Basket Easter Craft which looks amazing!
An Easter Sunday activity can differ from the rest of the holidays by doing something fun but educational at the same time! Print off some Easter Activity Sheets for the kids to do while you are getting the Easter meals ready or when you need some time to prepare the games.
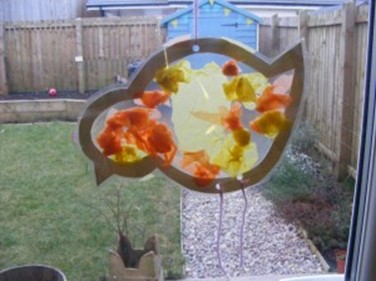
Other Easter craft ideas could involve catching the sun with an Easter Chick Suncatcher, which is surprisingly simple to make. All you have to do is rip small pieces of tissue paper and stick them inside a chick shaped stencil. Then hang up the sun catcher and watch the sun rays shine through. Perfect present for kids at Easter!
Edible Easter treats
When you can’t go out to buy your Easter eggs, you can always stay in and make your own! The boys and I made some Easter Peanut Butter & Chocolate Egg Cups, which tasted absolutely delicious, albeit very sugary! But you can always make sugar-free versions by getting creative on the ingredients. And it’s a great way to get in other fun Easter egg activities too. We painted plastic eggs to go in our little egg box with the chocolate egg cups, but you can use pretty much any egg-shaped material you like!
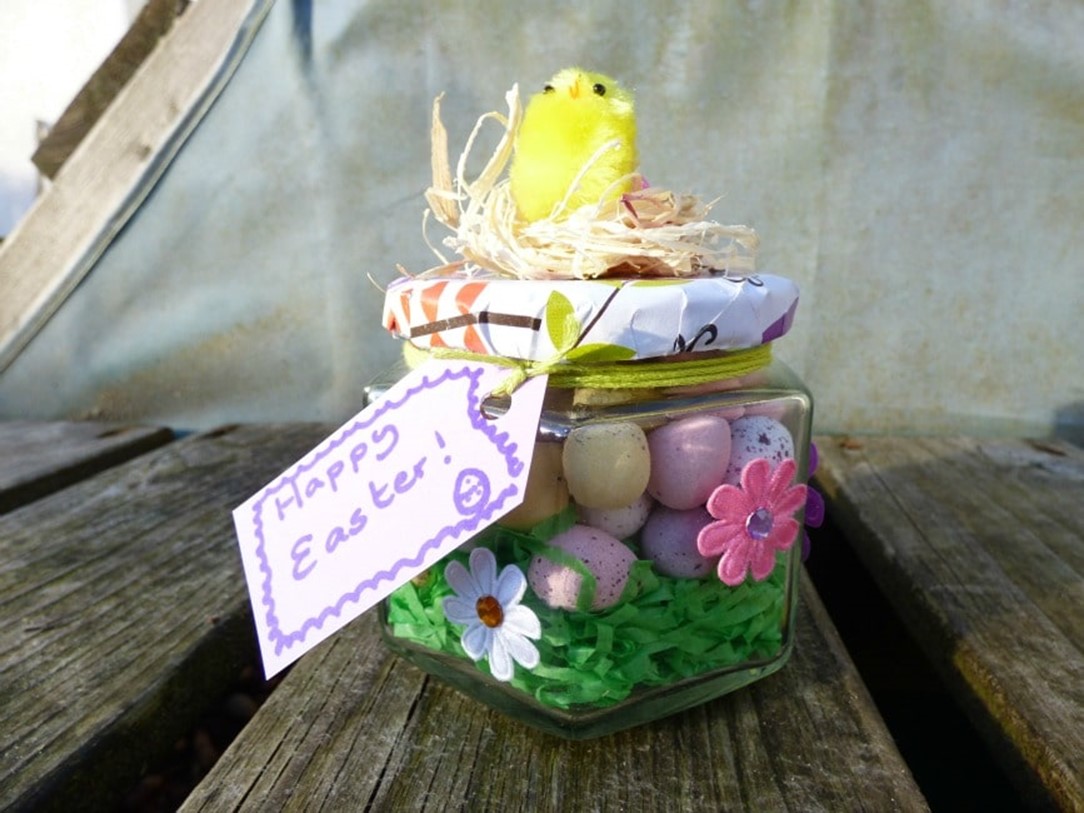
You could also use readymade Easter eggs, like the Cadbury’s mini eggs above and decorate a jar for the eggs. They make great gifts for family members, which you could drop at the door along with a note (as long as you obey the 2-metre distance rule during the coronavirus lockdown!)
Other Easter games for kids
Easter doesn’t always have to be about mini Easter egg hunts. You have time to spend with the family now, so some fun Easter activities for families can include breaking out that difficult jigsaw puzzle (lockdown activity number 18 at 101noscreenways.com) or paint faces and put on a show. And as you’re home-schooling, go for a science experiment with the kids like this Fizzy Egg Baking Soda and Vinegar Reaction which doubles up as a science lesson during Easter too! You can find more lockdown activities that don’t involve a screen when you subscribe to 101noscreenways.com here. Build in some Easter activities for adults when the kids have gone to bed like a mini Easter egg hunt but with alcohol or a difficult jigsaw. Whatever you choose, there are tons of indoor Easter games to pick from, you just have to be creative and use some of the ideas above for inspiration.
Now is the perfect time to come up with these kinds of ideas for Easter and make family bonding time fun with new things to do for the kids. Whatever you decide, quarantining with the family means you can enjoy Easter games and activities even in the confines of your home. If you need to find more Easter activities, Pinterest is a great place to look.
Happy Easter!
*Featured image by Nadine Kunath*
Elder Care: the Options
Nobody wants to think about what will happen to their parents as they become more dependent on family support. So, it’s important to think about how to make their lives as straightforward as possible as they ease into old age. Loneliness can contribute to mental health problems, so relying on a home team and in home care is important for your loved one’s wellbeing. As overwhelming as it sounds, there are ways to simplify elder care, as long as you know what options are available to you. Here are some ideas on how you can administer elder care going forward.
Establish a home team
A home team is a group of family members, friends, colleagues or a mixture of all three of whom your loved one can depend upon, both emotionally, physically and socially. They are the ones who can motivate them when they’re feeling low, advise when in a tricky situation, support them when they have experienced a tragedy, and make them laugh when they need it the most.
One way to keep everyone together is to use a caregiver mobile app, which connects the carer’s team, caregivers, clients, and families, to make personalised everyday support management easier.
Who is on the home team?
Home teams come in all shapes and sizes and can be different even for other family members. Your loved one’s (or however your kids like to call your grandparents) home team is with whom they have formed an unbreakable rapport and who they know will be there in the good and bad times.
A home team in life allows us to experience life to its fullest, to enjoy what really matters – to form relationships and experience true love. We all need a home team to make us feel complete to ensure that if we are in a conundrum, they can help us get out of it. They contribute to your life more than you’ll ever know and as you get older, you will depend on them more so when you need it the most. Therefore, the adage of ‘treat people as you want to be treated yourself’, rings so true at this point because there will come a time when you will need to depend on your home team. If you’ve pushed them away, you may find yourself in a team of ‘me, myself and I’.
As we get older, we want our family around more to stop us from feeling lonely. Sometimes children can help with a bit of DIY in the house or get the shopping in, for example. In more serious situations, your loved one’s home team can help with matters that might require legal help. If they have developed a disability and their condition happened while in the military service, then they might benefit from VA disability rates and be entitled to compensation.
Grandchildren can be around more to help. If you are lucky enough for your family to live close by, then grandchildren can become part of the home team. Grandchildren can bring life to their grandparents in ways others cannot replicate and remind them of what it felt like to be young again. They provide that much-needed boost in morale and grandparents can parent their grandchildren again with the benefit of life experience. It is such a wonderful relationship to experience if you have the fortune of being around your extended family.
How can we help and be part of our older generation’s home team?
When SunLife asked over 55s whether they would prefer to stay in their own home, rather than move, 60% said they would have preferred to stay in the comfort of their own home. Most loved ones would like to maintain their independence, so adapting their home, i.e. installing stairlifts and door entry systems, can ensure they can carry on living a high quality of life with the added benefit of their home team being available when they need it, either through live-in care, or part-time care. More on these options below.
Care at home
You could ask your elder relative to move in with you so you can offer more help with daily tasks. They may feel like they are imposing, but it’s important to note that if they need help, they know they can rely on their home team.
Care at home doesn’t have to mean 24 hours a day. For instance, a ‘meals on wheels’ service may be provided if you have trouble cooking or you might just need someone to pop in once or twice a day to help you wash or change clothes.
Hourly Care
Hourly care is domiciliary care delivered in the home, however, this care is not consistent throughout the day. A care assistant will visit your loved one’s property at specified times, helping with a range of jobs, including getting out of bed in the morning and preparing food. The time spent in their home supporting your loved one is relatively short compared to live-in care and can mean that they may spend extended periods of the day alone. For those with more complex needs, hours spent without care can be particularly problematic – increasing the risk of falls and accidents. Like care homes, your loved one may be supported by a variety of different staff week on week, giving them little opportunity to develop friendships and meaningful relationships.
Adapt their home to make them more independent
There are various home adaptations that can be made to help people stay safe in their own homes as they grow older. Depending on your relative’s needs, they might benefit from adjustments like easy access showers, motion sensor lighting, toilet frames, stairlifts (Millercare Stairlifts are an option to look at), ramps and handrails, kitchen mobility accessories, door entry systems that grant trusted people access and wider internal doors. You don’t have to live in a care home to have access to specialist products such as electric beds, riser recliner chairs and pressure mattresses either. Companies like Alpine HC supply these types of high-tech equipment to private individuals and the care industry. Talk to the person you care for about the difficulties they have around the house and help them make a plan that will allow them to stay in their own home for longer.
Live-in care
There is a real need for more resources that not only help people find live-in care services but also explain the distinctive benefits of professional support in the home. The ‘7 Benefits Unique to Live-In Care‘ infographic can help you understand how the lives of your loved ones can be transformed by choosing live-in care.
By choosing live-in services your loved one will receive undivided attention from their carer through one-to-one support. Live-in care is very flexible compared to other types of care, a super strict routine is unnecessary as there is no time limit on when their care ends – allowing for a greater level of independence, choice and fun spontaneity. Working in teams of two live-in carers are trained to provide anything from companionship to complex care for a variety of conditions including Dementia, meaning your loved one can remain in the comfort of their home even if their care needs change.
Why Consider Live-In Care
Choosing live-in care can help improve, health, happiness, and well-being in some following ways:
Consistent Care – Your loved one will receive care as and when they need it.
Tailored Assistance – They’ll be cared for by a person who understands their individual needs.
Build Trust – Live-in care allows your loved one to build a long-lasting and trusting relationship with their carers.
Immediate Care – Their carer can immediately respond to medical emergencies.
The Good Care Group is a Live-in care provider rated ‘Outstanding’ by the Care Quality Commission. They provide care, support, and companionship to help your loved one continue to live safely and comfortably within their home. Find out more about live-in care by The Good Care Group by visiting https://www.thegoodcaregroup.com/ or contact them on 020 3728 7575
Moving into a care home
When choosing a care home, your loved one will move out of their current property and into new accommodation, which is often one room within the home itself. Once living in a care home, they will receive support from the staff there. Their care team is likely to comprise of many people who rotate shifts. Where their care home is located will largely depend on availability, so this means they may not receive care in their preferred community and sometimes, they could be separated from their partner.
This is a big step, particularly if family members don’t feel they can offer the level of care needed for the best quality of life. You can be there to help them feel active and make new friends, while staff are on hand 24 hours a day for all their medical needs. If you’re serious about a care home, then do your research about what’s offered. Some just provide accommodation with some personal care, while others can offer nursing care as well if needed. There are several organisations that can help you find a suitable care home. You can get advice about every aspect of the process from the likes of Extra Care so you’re fully informed about what the best options are.
The cost of moving to a care home is a worry for many. Age UK has some excellent information about paying for residential care.
Help them stay independent outside of the home
According to a survey conducted by Independent Age in 2017, 91% of drivers aged 70 and over say that if they could not drive, it would cause a loss of independence. Although a driving license expires when a holder turns 70, this doesn’t mean that people over this age can’t get behind the wheel. Make sure your loved one knows that they can renew their license once they reach 70. They should also know that developing a health condition doesn’t mean they must stop driving. If their condition affects their ability to drive, the DVLA might conclude they need to make adaptations to their car.
Exercise
Encouraging your loved one to keep fit is also great for lengthening their life expectancy, so taking them out for walks, and new activities are great for the mind and soul. Being part of a home team that has younger children means that grandparents need to keep up with the activities and this forces them to push outside of their comfort zone, which is good for morale.
Physical activity can help people stay healthy, preserve their independence and keep doing the things they enjoy. It is recommended that adults do 150 minutes of moderate exercise every week. Why not help your relative to stay well by joining them in doing activities that get the heart racing? You don’t have to be a gym buff to help your loved one to get moving. From walking to going out dancing, to taking a yoga class, to doing some gardening, there are lots of ways you and your elderly loved one can get more exercise.
If you care for someone with reduced mobility or another health problem or if your loved one hasn’t exercised for a long time, it’s a good idea to seek advice from their healthcare professional to find out what kind of exercise might suit them.
Keep them warm in the winter
Medical advances and a better understanding of how to look after our health mean that we’re all enjoying longer lives, but while this is something to be celebrated, a growing percentage of the population is at increased risk of general and seasonal illnesses. According to Age UK, 15 million adults in Britain are now aged 60 or over. They’re the most vulnerable social group to winter conditions like colds, flu or pneumonia and at serious risk of exacerbating age-related heart and circulatory conditions, often with fatal outcomes. Statistics show that on average, 210 older adults die every day; that’s someone’s elderly friend or relative “every 7 minutes.” In most cases, their deaths, which Age UK report are attributable to inadequate insulation and heating in the home, are preventable. Fuel poverty, which now affects over 1 million adults in the UK, makes addressing some of those home heating inadequacies difficult but staying warm throughout winter can literally make the difference between life and death.
Short – term, Low-cost Solutions
Hot water bottles, electric blankets and warm clothing, as well as regular hot meals and drinks, can provide the short-term boost of warmth older individuals need to keep their core temperature up and their circulatory system healthy. However, although they offer some short-term comforts and can help to keep home heating bills down, they’re not practical or reliable alternatives to the proper heating and home insulation setup that’s necessary to see a person through weeks and months of cold weather.
Home Heating and Insulation
Ideally, living areas should be maintained at 18-21˚C and although any wood-burning stove, home gas fire or portable heater can generate that heat, they can be costly to run and their warmth is generally confined to one or two rooms. Make sure your house is properly insulated to keep the heat. You can build the insulation into the walls yourself if you know what you’re doing and you are staying safe with the right tools and equipment (you can find a selection of tools at SGS). Central heating can offer a cheaper, more reliable alternative, but old or poorly maintained systems can be ineffective and expensive to run. Ask a plumber to carry out a quick health check on your central heating system to make sure there are no airlocks in radiators, that the boiler is operating safely and that any heating pumps are running the system efficiently to generate heat and hot water and provide value for money. However, even the best central heating system will struggle to generate and regulate warmth where it’s needed if the property’s insulation is inadequate. Most interior heat will leak out through windows, doors and roofs, but insulation can trap it inside to keep homes warmer and bills down. It is estimated that loft insulation could reduce annual bills by £125 and cavity wall insulation could reduce them by £155. Private tenants or homeowners on certain income-related benefits are entitled to have loft and wall insulation fitted for free under the government’s Energy Company Obligation (ECO) scheme.
Besides adding insulation, switch any lightweight curtains to thermal or heavy-backed alternatives, lag any pipes and block any window, door or letterbox draughts with excluders. These are available from most local DIY stores for around £5 to £20. Hire a plumber to ensure that all the plumbing is installed correctly and hot water is coming through properly.
Financial help
Besides the ECO scheme, there are several other financial grants and benefits available for older adults and vulnerable people who need help to keep their homes warm throughout winter, including:
Winter Fuel Allowance
Any adult-born before 1953 is entitled to a winter fuel payment of between £100 and £300. To check your eligibility and claim any payments you haven’t yet received, visit the government’s Winter Fuel Payment service online.
Boiler Replacement Scheme
If your boiler is over 5 years old, then a free or heavily discounted replacement may also be available via the government’s ECO scheme. You can check your eligibility and apply for a new boiler at www.boilergrants.org.uk.
Switch Energy Supplier
Getting the best price for gas and electric has never been easier. To find out if you’re on the best tariff, visit Which? Switch, where you can compare deals and change suppliers in a matter of minutes.
Finally, if you’re concerned about the welfare of an elderly or vulnerable person in your area, then please contact your local Social Services department.
Will preparation and storage ideas
Although some people find the prospect of will preparation both morbid and confronting taking this step is necessary if your loved wants to bequeath their worldly possessions to their loved ones in a particular way. As a legally binding document, a will can also prevent confusion and future disputes, making things that little easier for all parties concerned. So, below are some will preparation and storage ideas that will help you ensure that the will is safe, secure, and legal.
Will preparation
Writing a will ensures that your loved one is the person who decides what happens to their possessions, property, and money after they die. A will also ensure they don’t pay more Inheritance Tax than they need to. You can make your own will but it’s not as straightforward as you think, so it is advisable to get advice from will writing solicitors who will ensure that the will can hold under law. You can purchase a Will Kit which will contain all the information you need to create a will, and which will also include information on making sure that the will is formally signed and witnessed to make it legally valid.
To update the will before their death, your loved one would require a ‘codicil’, which is an official alteration to the original will. Or they can make a new will altogether if there are several changes.
How to make your own will
If you don’t want to pay a lawyer to write a will for your loved one, then there are several things you need to include to ensure that the will is valid under the law. The will should set out:
Who you would want to benefit from your loved one’s will (their beneficiaries)
Who should look after their children under 18, if any?
Who have they appointed to manage their estate and carry their wishes after their death (the executor)
What happens if their beneficiaries die before them
When you need to get legal advice from will solicitors
If their will isn’t so straightforward, then they should get legal advice from will solicitors who will help them understand:
How to share their property with anyone other than their husband, wife or civil partner
They have several family members who will want to make a claim on their will (for example, a spouse or children from another marriage)
They want to leave money/property to a dependent unable to care for themselves.
They have a permanent home outside of the UK.
They have a business
They have property abroad
Once they have sorted out their will, they will need to make sure it is safe. There are several ways they can store their will, for example:
In a home safe deposit box
One of the most popular methods of storage for confidential items such as a will is the humble safe deposit box. Although renting a bank safe deposit box ensures a high level of security, it does not afford a great deal of convenience for access. The terms and conditions regarding when and how the box can be opened will differ from institution to institution, but the result could be a long, drawn-out legal process for friends and/or family. If your loved one chooses this option, make sure they do their research on any restrictions or opt for joint ownership if this is an available selection. Also, inform trusted individuals of the box’s location.
Storing your will documents online
For a more convenient option, they can store their will documents online. Thanks to the genesis and subsequent popularity of cloud computing, businesses and individuals can store large files and access them from multiple locations around the world.
The main concern with storing data in the virtual world is security. Is anything safe online? What if someone hacks in and manipulates or steals their will? The threat of viruses, hackers, and malfunctions is still relevant, so to combat these threats, online defence specialists are creating products such as Your Digital File, which uses a complex encryption system as a safeguard, ensuring that no unwanted visitors will access your loved one’s files.
Will Solicitors
Last, your loved one could opt to trust solicitors with their will documents. If they don’t have a personal solicitor or they don’t know where to look, they can always ask people they trust which solicitor they used. Make sure they take into account factors like, what if they change their legal representation? What if their lawyer retires or moves location? What if their office is broken into or subjected to a fire or flood? What if the paperwork is simply lost somehow? These are hypothetical situations that can become a reality in an instant, making life very tiresome. That said, if they are comfortable placing their trust in their long-term lawyer, this could be a viable option.
It is unavoidable that one day you will require the same care and support from your home team and so it is vital to keep this close-knit love and support around you whenever you can. No one wants to grow old on their own and so if you find that you need to reconnect with some members of your home team, do not hesitate. Seek them out and find out if they need a home team of their own. Unfortunately, it may not always be possible to have your close-knit family and friends around you. Birds flee the nest and settle miles away and acquaintances may fade into the distance or even pass away. As you get older, friendship groups get smaller, but the ones who have stuck around are the ones who stood the test of time and will inevitably last forever.
*Collaborative feature post*
Preparing for arrival of baby – Guide for expecting parents
This is a hefty first-year essential guide on preparing for arrival of baby which comes with a YouTube Video. So grab your favourite beverage, watch the video alongside reading the article and enjoy this extensive guide to your baby’s first year.
Whether you’re preparing for first baby or your fifth, every baby comes with baggage and a whole heap of preparation. I had my fourth baby two years ago and my lounge still looks like a baby has thrown up all over it. Yet, I still didn’t buy half as much baby gear as I did twelve years ago when I had my first.
But, there seems to be a rite of passage that everyone goes through – buy all the unnecessary stuff until you realise what really is necessary. You don’t have to go through that rite of passage anymore as I’m here to help (check out my top tools here!).
So, I present to you my first-year essential guide on how to prepare for a baby and what to expect in the first year. If I miss anything out please comment below as I plan to regularly update this guide.
Check out the full video on what to do when preparing for a baby below!
https://youtu.be/90muIYBraJc
When to start preparing for your baby’s arrival – Your third trimester!
Preparing for your new baby starts when you’re pregnant (and even before getting pregnant and the dreaded argument that comes with picking baby names) because once labour begins time is of the essence until your little miracle joins you.
And, ideally, you want to be ready for when that time comes, whenever that will be. Preparing for labour and birth can be a mammoth task on its own and there are a number of things you should have in your hospital bag before you meet your baby. Here are some of the essentials:
Preparing for arrival of baby – Get your hospital bag ready – Baby stuff you’ll want ready to go on day
Contrary to what you think (and what I end up doing), you need not pack the kitchen sink. I would suggest investing in a good changing bag and using that as your hospital bag, so you can transition from packing for birth to packing for the baby once he/she arrives.
How to prepare for arrival of baby – The changing bag
Essentially you can use any bag you want, as long as it’s big enough to carry all the items you need. Personally, I like using a bag that’s big enough to carry my laptop, as well as having lots of compartments to organise all the bits and bobs I would need for a typical day. I found the perfect changing bag during my search – one that doesn’t look like carry-on luggage or a soulless black suitcase. I present to you, the Mia Tui Berry Jennie Travel Changing Bag!*
It looks like a stylish tote bag, but with tons of cute compartments – perfect for me.
The Jennie bag in Berry contains a changing bag accessory kit and is perfect for busy mums who have many feathers in their hats and who need to carry their lives in a bag. Plus it’s totally vegan! The Mia Tui Berry Jennie Changing Bag includes:
Gem Organiser Bag
Travel Changing Mat
Clutch Bag with X-Body Strap
Clips for Keys
Clear Bag for Baby Bits
Two Insulated Bottle Holders
Buggy Clips
Waterproof Inside and Out
Large Mobile Phone Pocket
The bag also comes in a tote bag of its own which doubles up as a great bag for carrying other bits like groceries etc.
Other great hospital bags that you can buy from Amazon are:
Diaper Backpack with Changing Bed, 3 in 1 Travel Diaper Bag with Changing Station, Water Resistant Portable Baby Bag with Bassinet, Blue Foldable Diaper Crib (Bag + Crib + USB) – Buy from Amazon here
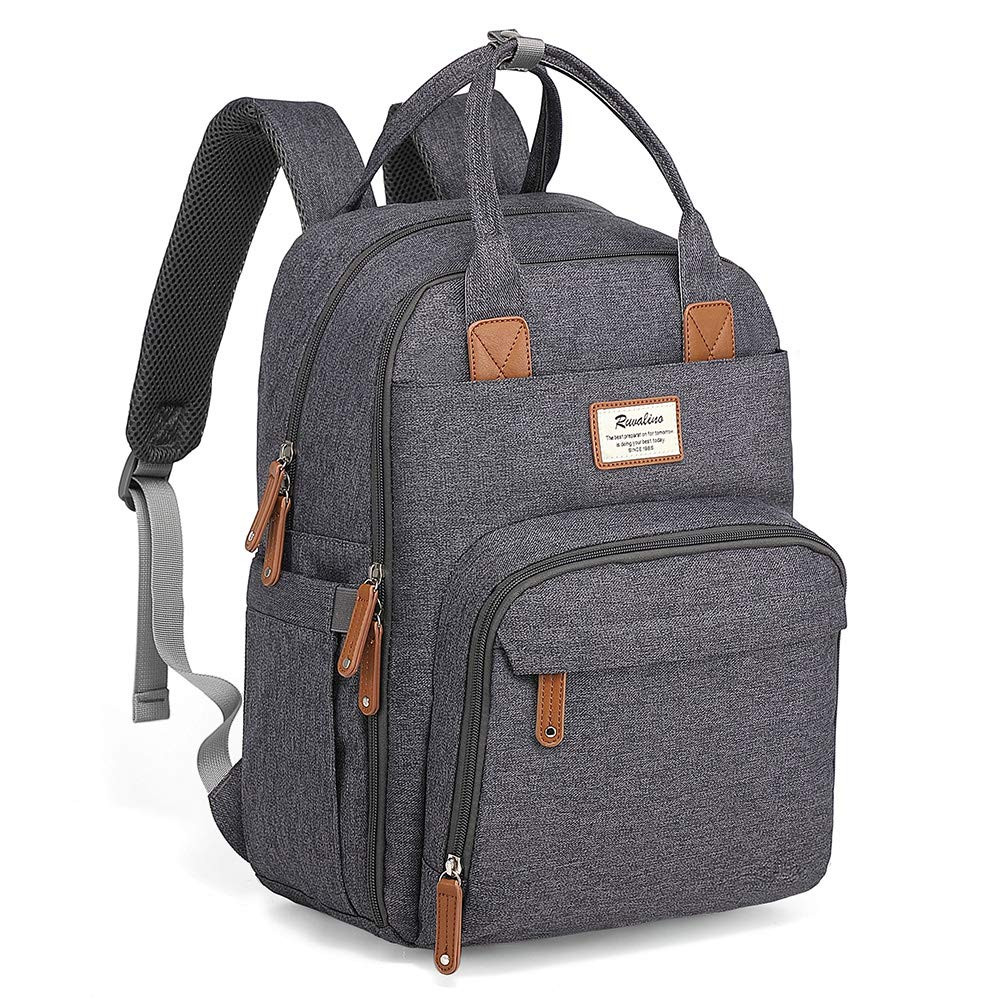
RUVALINO Diaper Bag Backpack, Multifunction Travel Back Pack Maternity Baby Changing Bags, Large Capacity, Waterproof and Stylish, Dark Gray. Prime Day deal available – check now here* for discounted price!
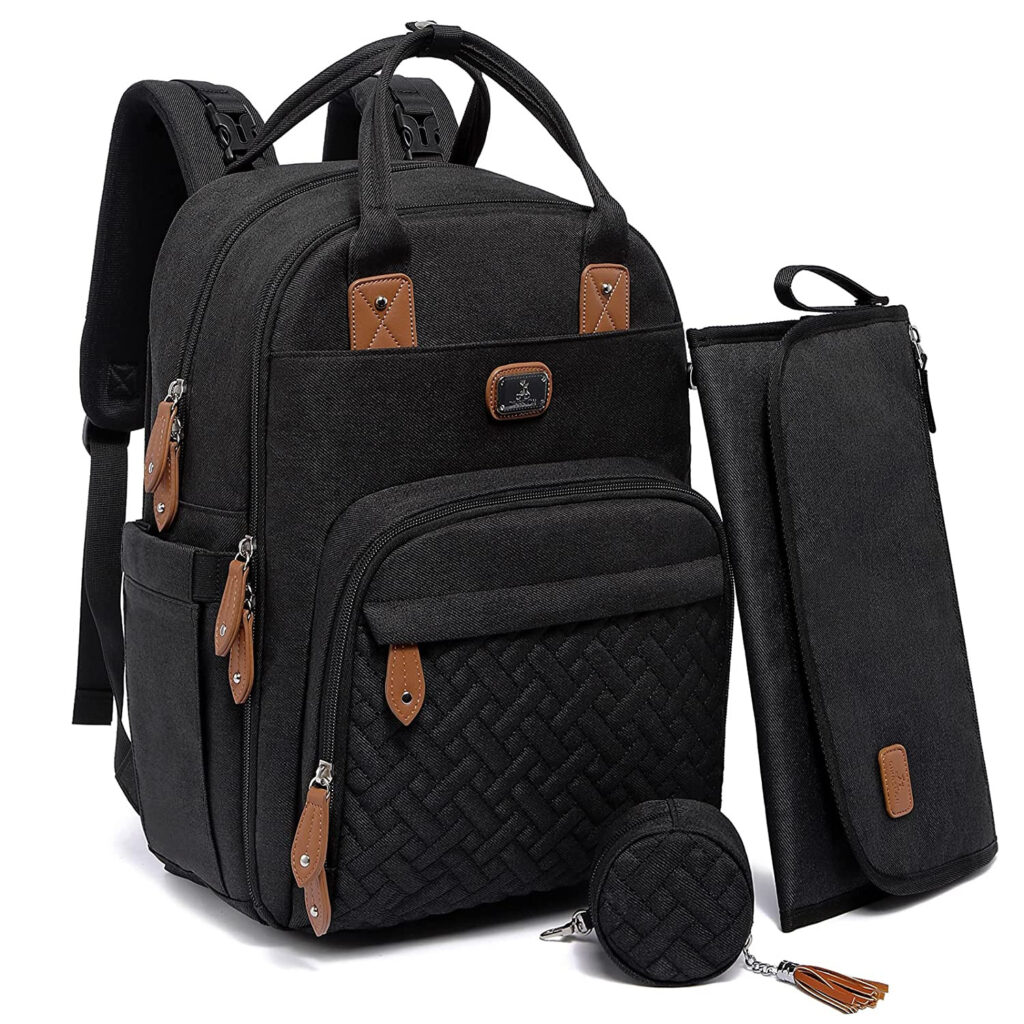
Dikaslon Diaper Bag Backpack with Portable Changing Pad, Pacifier Case and Stroller Straps, Large Unisex Baby Bags for Boys Girls. Prime Day deal available. Check here now* for the discounted price!
Baby Diaper Bag Backpack with Changing Pad, Pacifier Case – Green Diaper Bags for Girl Boy Newborn Unisex Infant Toddler – Baby Travel Bag for Mom Dad. Check out the deals on this bag now!*
So, what do you need in your hospital bag/future changing bag?
For mum
You will be in the hospital for up to three days (more if you require special attention but that’s not common), so think less is more. In fact, the less you pack, the less overwhelmed you’ll feel when the baby comes. So here is a list of things you will need to pack for yourself:
Your maternity notes
Don’t forget your maternity notes as these notes contain your medical history and pregnancy journey. Midwives and doctors who will be on hand during the birth will consult your maternity notes for special medication or equipment required during labour and birth. Your maternity notes should also contain your birth plan which you created during your pregnancy.
Births rarely go to plan, but it would be a great idea to at least write a skeleton birth plan so you know what you’d like to happen. Do you want pain medication? Would you like to be upright during birth? Is there anything you won’t do, like push or get an epidural? Write all these down in your birth plan. If you need some help or something ready-made that you can work from, I have a printable for you in my pregnancy welcome pack, which you can subscribe to here.
2 x nighties and a dressing gown
Pack two light nighties (one for birth and one for after) and a dressing gown to walk around in (if you can walk, that is!) as it will be very hot in the hospital. Newborns cannot regulate their body temperature, so hospitals crank the heat up very high, which means you won’t be wearing much else than the thinnest nightie you can find.
I didn’t even wear my nightie on the first day, I ended up covering myself in a thin blanket provided by the hospital because I was so hot most of the time, and only because I didn’t want to scare people with my wobbly post-baby body! The sweat from the heat coupled with the excessive itching from the epidural and anaesthesia meant I had never felt so uncomfortable in my whole life. I was at the hospital for two days and towards the end, I ended up wearing a very loose-fitting dress. That’s it.
Dressing gown/nightie sets you can get from Amazon:
Latuza Women’s Bamboo Viscose Nursing Nightgown and Robe Set – Buy from Amazon here
Ekouaer Women’s Nursing/Delivery/Labor/Hospital Nightdress Short Sleeve Maternity Nightgown with Button S-XXL – Buy from Amazon here
Slippers
The hospital gives you compression socks to help circulate the blood as you’ll be stuck in bed. But, once the wires are disconnected the midwives will prompt you to try walking. I had a vaginal birth but I was prepared for theatre as I had two previous caesareans. During the VBAC, I had an epidural at 7cm, which meant I wasn’t able to push and the last stage of labour was prolonged.
I ended up pushing my baby girl out but not without a second-degree tear and an episiotomy (they snipped me to allow for the baby to come through). So, walking was difficult.
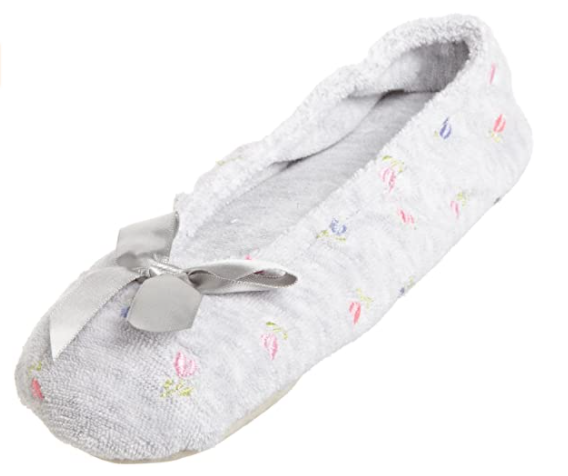
However, I wasn’t allowed to head to the postnatal ward unless I was on my feet, so I was glad I bought very soft, but breathable slippers to help me take my first few steps. I would suggest getting slippers that are airy, thin and comfortable. Don’t forget it’s hot, so fir lined ugg-style slippers won’t work here.
Here are some slippers I found on Amazon:
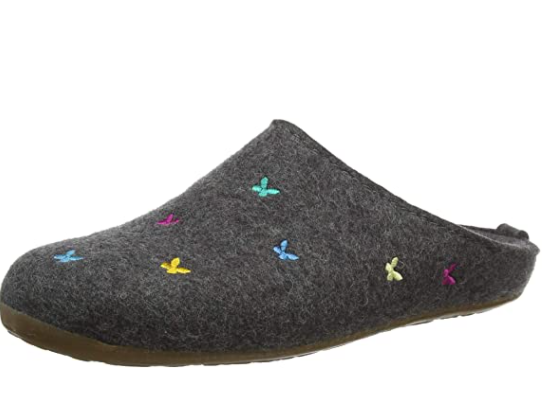
HAFLINGER Women’s Felt Slippers with Butterflies Farfalline, Anthracite – Buy from Amazon here
Whether you have a c section or vaginal birth, the outcome is the same – you will bleed a lot. And, if you’ve had a vaginal birth, even if it was a straightforward birth, then your front bottom will be sore. So when investing in maternity pads, think about comfort and size. I went with super-sized Abena Premium Maternity Pads which felt very protective, even though they looked and felt like miniature planes.
I hardly leaked for the first four weeks, but once the bleeding died down a bit, I transferred to the Always Ultra Thin Pads which worked just as well. I wasn’t a fan of Boots’ own maternity pads for the first few weeks as they didn’t have wings and I leaked when using them. I think it’s worth investing more money to protect yourself from leakage, which brings me to my next point.
I would invest in around three packs, maybe more. So, it may be worth buying in bulk, i.e. 12 packs of 14 which costs much less per pad:
Always Ultra Thin Feminine Pads for Women, Size 2, Super Absorbency, with Flexi-Wings, Unscented, 42 Count – Buy from Amazon here
Disposable knickers
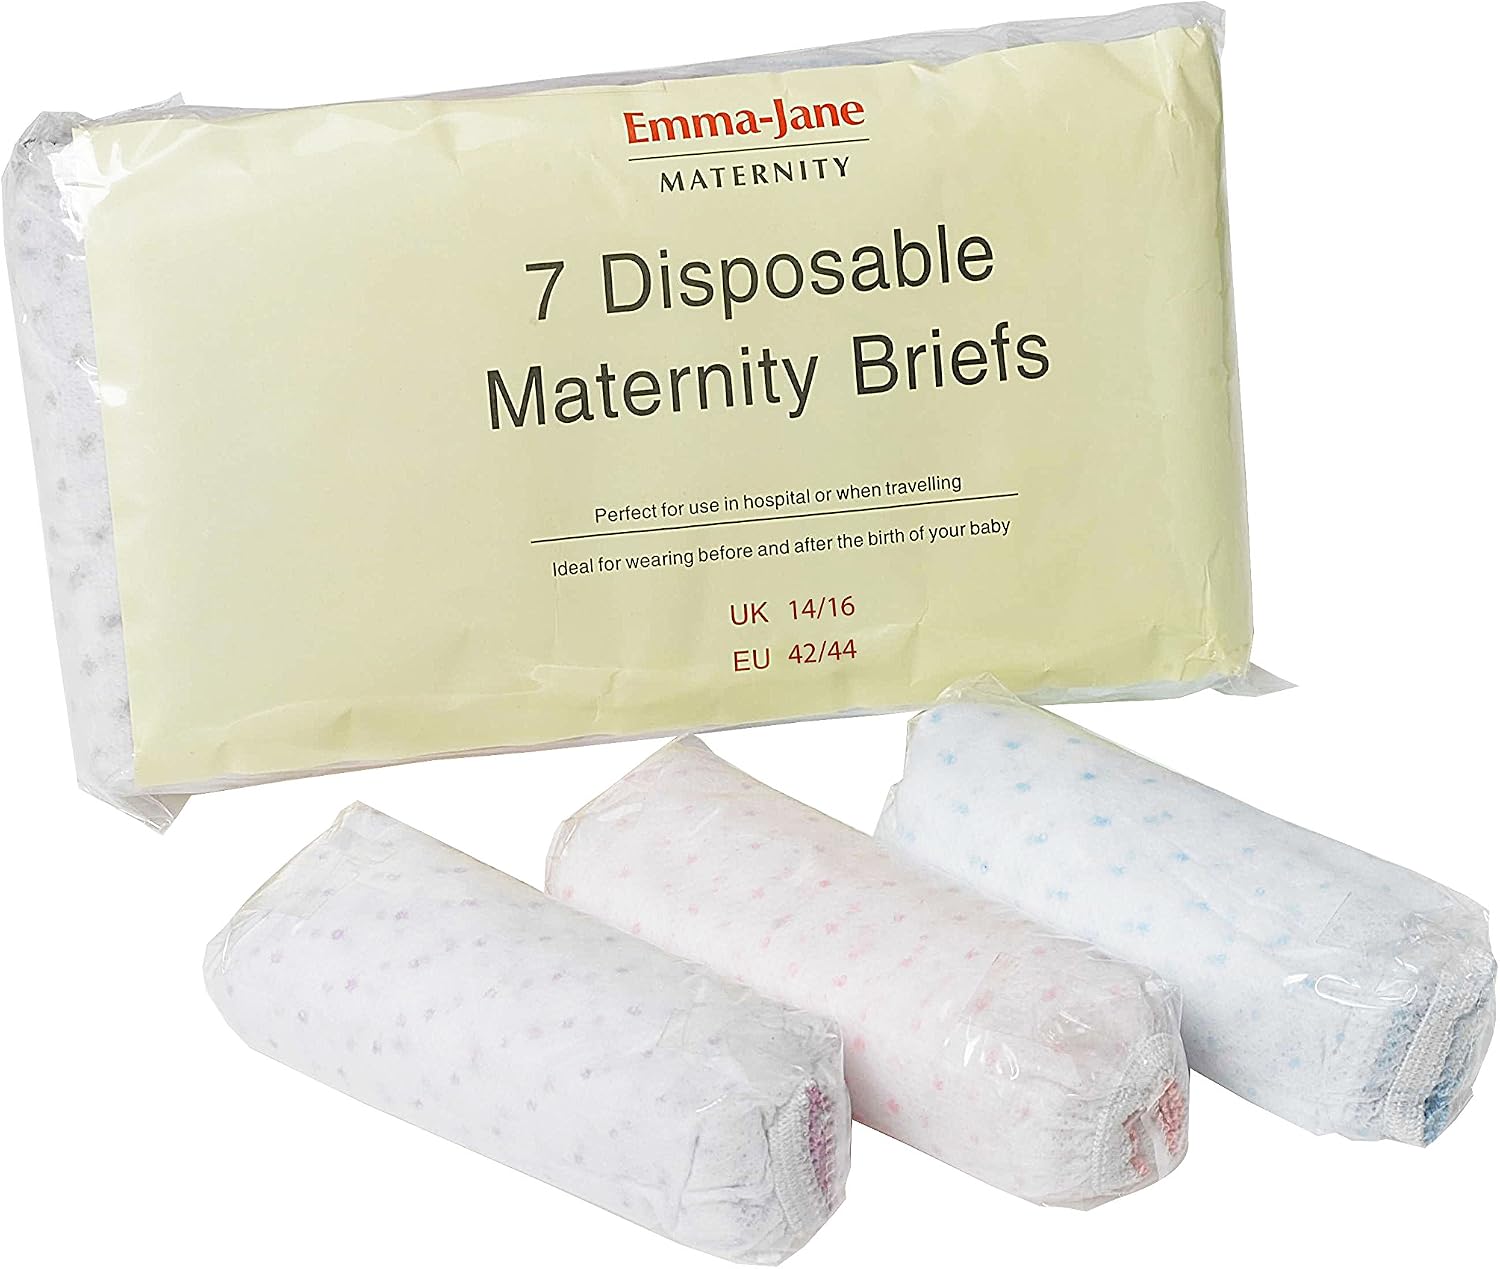
Whichever pad you choose, I would suggest wearing only disposable knickers for the first couple of weeks at least. I have used the same brand for all of my four kids (spanning twelve years), the Emma Jane disposable briefs.
You get seven different coloured and patterned disposable knickers, and I found them very comfortable to use, especially after my c section scars, as they went above the scar rather than on top of it which is what I found with other disposable briefs.
I would also recommend getting a size up to what you think you’ll need. I was around a size 12 when I gave birth to my third so I went for 14/16 and they fit perfectly. Don’t forget you still have a bump after birth and you won’t want to wear anything tight around your bottom area.
1 Emma Jane Disposable Hospital Briefs (14-16 cm, Pack of 7), White – Buy from Amazon here
Toiletries
I barely used my toiletries as I had to keep my front bottom free from chemicals and external bacteria to prevent infection. So I could only wash with water. But I would still suggest bringing your bare essentials, i.e. shampoo, conditioner and body wash. I also brought my moisturiser, coconut oil and a hairband for my thick curly hair which I wore scrunched up at the top or in a dutch braid.
When you can wash with a body wash, I would recommend the Sanex body wash, as it’s kinder to the skin and free of harsh chemicals. I even wash with baby soap because I know that it will be the most gentle on my skin. Also, don’t forget your toothbrush and toothpaste so you can feel fresh in the mouth when you don’t feel fresh elsewhere.
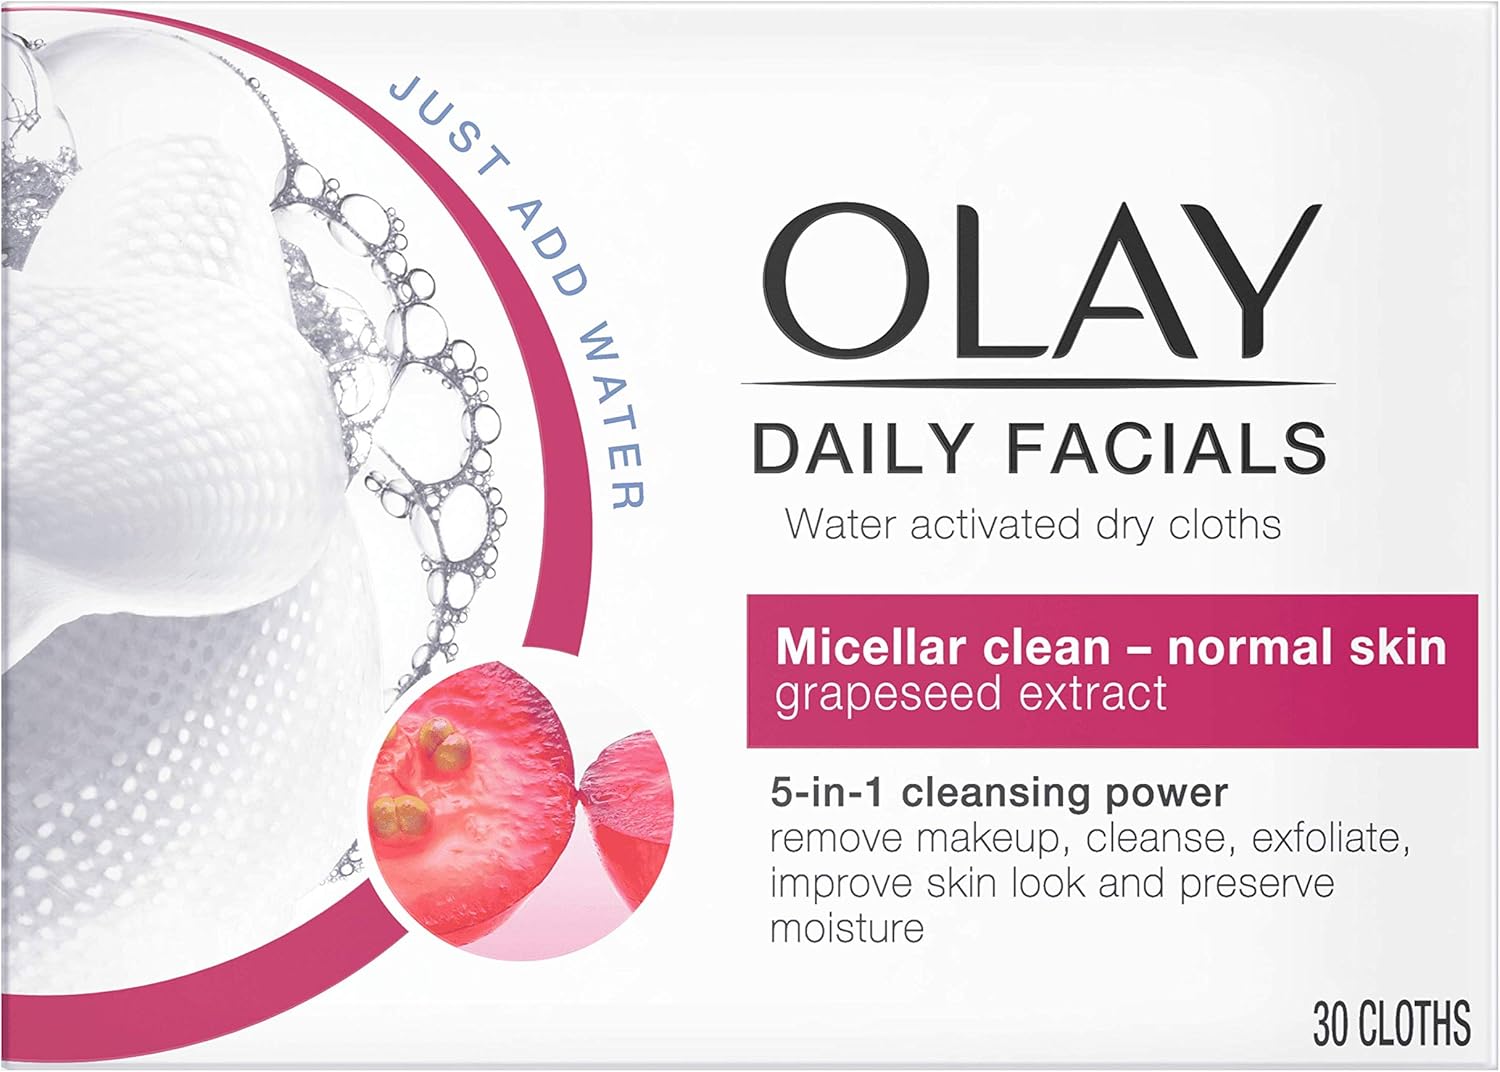
I have added face wipes, massage oil, water spray and razors in my infographic above, but I didn’t use any of those, except for my Olay facial wipes to wash my face. They’re brilliant! It’s up to you if you want to bring these. Also, don’t forget your glasses and/or contact lenses if you’re a wearer like me.
Olay Daily Facials 5-in-1 Water Activated Dry Cloths – Micellar Clean for Normal Skin with Grapeseed Extract – Buy from Amazon here
Breast pads and nursing bras
You may or may not want to breastfeed, but either way, you may experience some leakage. Breast pads are great to help with leaking, even if you are formula feeding. I didn’t use them this time around, though, because my milk didn’t come in until day three. But with my previous pregnancies, I experienced some leaking and wished I had brought some breast pads with me.
Lansinoh, Disposable Nursing Breast Pads with BlueLock core pack of x 60 pads 265, purple, Count – Buy from Amazon here
With my second I experienced a little discomfort (most likely because I had breastfed my first up to the day before I gave birth and I had probably lost all feeling in my nipples). But, with my third, I didn’t experience any pain at all. So I haven’t touched my nipple cream. But, you never know. Bring it just in case.
Lansinoh HPA Lanolin Nipple Cream 40ml for Breastfeeding New mums – Buy now from Amazon
Organic Nipple Butter Breastfeeding Cream by Earth Mama | Lanolin-free, Postpartum Essentials Safe for Nursing, Non-GMO Project Verified, 2-Fluid Ounce. Buy from Amazon here
A cold compress for downstairs
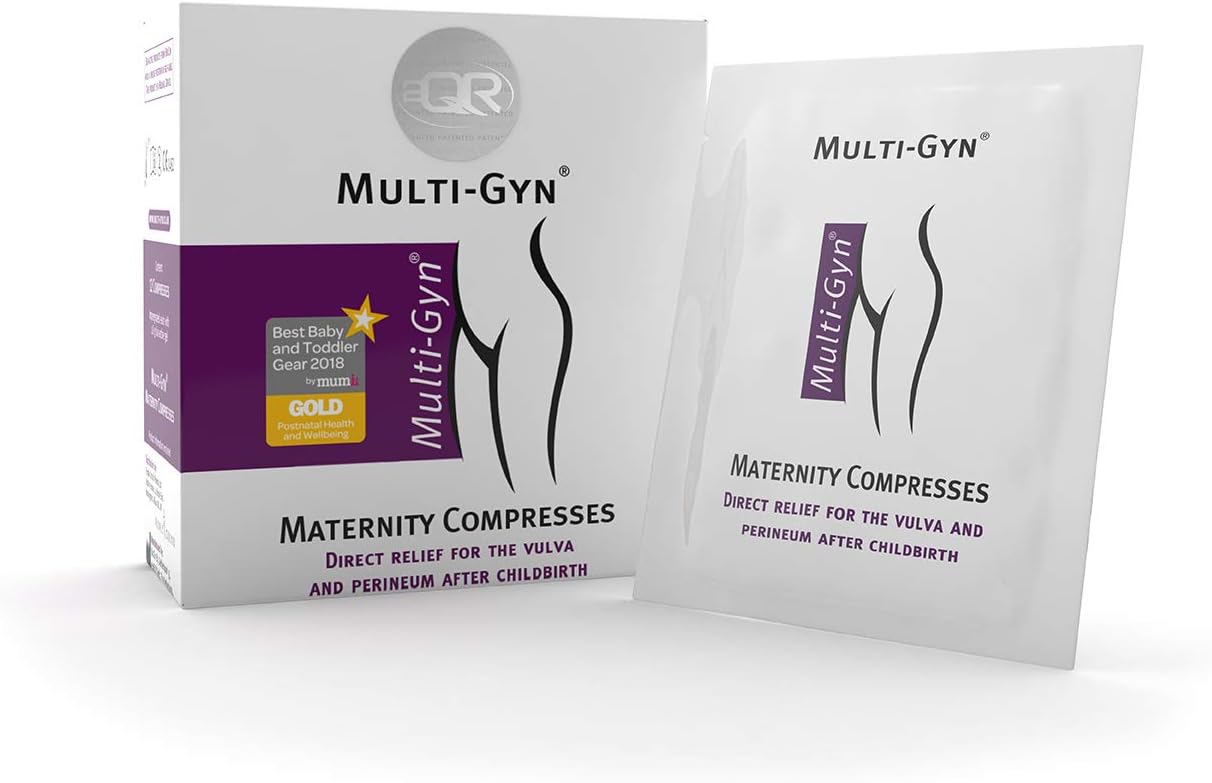
This birth experience was the first time I had a vaginal birth and I had no idea how sore my downstairs would be. I wished I had bought a cold compress for downstairs. My friend had kindly given me a Multi-Gyn Compress which I had forgotten all about until the second week at home. and, boy, was it soothing!
This particular compress has 2QR-complex gel which helps to treat the swelling and it sits comfortably on the pad. I loved the cooling effect and I think it helped me to heal. So I urge you, bring one of these packets with you – you’ll be thankful you did if you need it.
Most hospitals offer breakfast and lunch. But, I would suggest you bring some snacks in between until dinner. You might want to snack on something if you have long labour too and bring a bottle of water or two to keep you going as you don’t want to keep disturbing the midwives to refill your jug of water when you’re not able to move from the bed.
Something to do
There’s a lot of downtime and babies sleep a lot so you may find yourself unable to sleep, and not having anything to do. I brought my laptop and thought I’d blog and write notes, but I was too tired to stare into a screen. The problem was, I had brought nothing else with me. So I asked hubby to get me some magazines, puzzle books and regular books to keep me occupied.
I would recommend trying to sleep first, but if you can’t then at least you’ll have something to do. I didn’t listen to music or watch anything as I was too concerned I wouldn’t be able to hear my baby. But, you can pass the time with screen time if you think it’d help you get through the first few days.
Comfortable going-home clothes
You will be sore, you will have a wobbly belly and you will feel pretty rubbish after you come down from the high of giving birth. So you may not want to dress up in anything too fancy or wear tight clothing when you go home. Leggings are great for all-day wear and baggy jumpers cover up the belly and fat pad sticking out of your bottom. Long flowy dresses, depending on the weather work well as they loosely fit over c-section scars and leaves the bottom part free to breathe.
Depending on your baby’s size, you may require Size 0 nappies (from 1.5-2.5kg / 3.6lbs) or Size 1 nappies (2-5kg / 4-11lbs). You may even require Size 2 nappies (3-6kg / 7-14lbs), but your safe bet is only to buy a small pack first as you can’t predict what size your baby will be when he/she is she graces you with their presence. I had big babies – my first was 8lbs 9oz / 3.89kg and my second was even bigger, at 9lbs 8oz / 4.5kg). My third baby was smaller at 7lbs 7oz / 3.5kg) so I needed Size 1 and 2 nappies, to begin with!
First, decide whether you want to go disposable or reusable (i.e. you can wash and re-use your nappies). I have always gone with Pampers, which are disposable because I have enough laundry to do, but it’s worth considering going reusable for the sake of the environment.
I like Asda’s Little Angels disposable brand as they feel softer on the skin. But, so far, I’ve found Pampers soak up wet nappies quicker and keep my baby’s bottom drier, so we have fewer nappy rash incidents. The choice is up to you though, I’d try them all and find one that works for you.
Baby Diapers Newborn/Size 0 (< 10 lb), 120 Count – Pampers Swaddlers, ONE MONTH SUPPLY (Packaging May Vary) – Buy from Amazon
Cotton wool
To begin with, you will want to use cooled boiled water and cotton wool to clean your baby’s bottom, for at least the first four weeks. This gives your baby’s skin time to get used to external toxins and the environment around them.
Then you can transition to baby wipes. We waited until around four weeks, but in the meantime we found cotton wool balls to be the best for cleaning baby’s bottom. The first poo is like black tar, meconium, and that’s difficult to clean off. But, after a few days, you’ll find that your baby’s poo will turn yellow and they’ll get easier to clean after that. More on your baby’s poo later!
Baby wipes
I wouldn’t recommend using baby wipes on your baby just yet, but baby wipes are fantastic inventions, which you can use for so much more during the last trimester/labour/birth/new baby phase. Baby wipes are great for taking off makeup, refreshing your face, cleaning marks/stains, giving things a general wipe, and refreshing yourself if you can’t get to a shower.
We have tried many baby wipes, but I found Water Wipes to be the best as they are made from 99.9% water and a drop of fruit extract. So they’re the kindest on the skin and perfect for baby when s/he’s ready to have his/her bum wiped.
Baby Wipes, WaterWipes Sensitive Baby Diaper Wipes, 99.9% Water, Unscented & Hypoallergenic, for Newborn Skin, 9 Packs (540 Count) – Buy from Amazon here
Changing mat
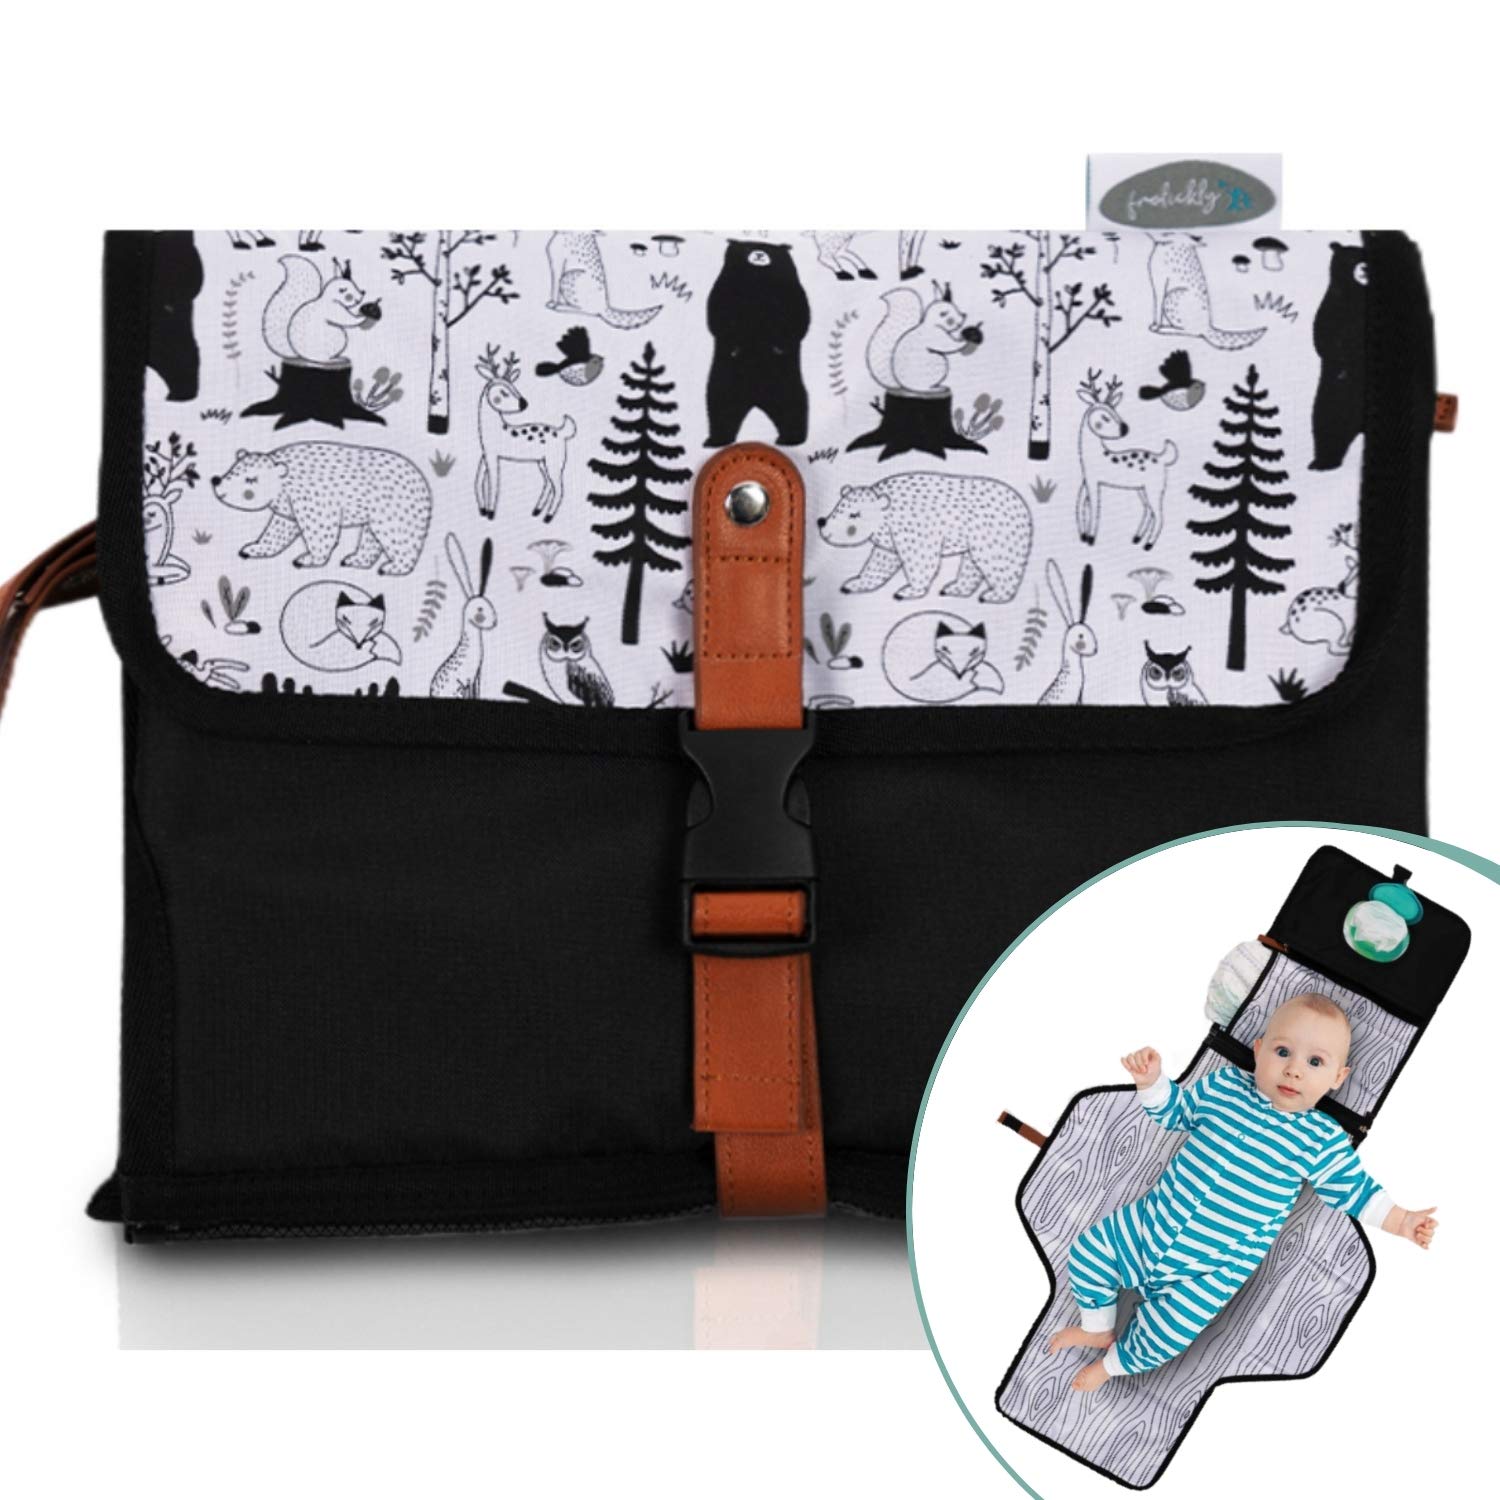
You’ll need a good changing mat to place over surfaces when you change your baby’s bottom. Most changing mats come with the changing bag, but if you don’t have any to hand, a simple towel will work as they’re large enough and they’re soft on the baby’s skin. Just remember to put them in the wash and not use them anywhere else on your baby! We have a great sturdy changing mat that came with the MoKee cot at home, which I’ll talk about later below.
Frolickly Portable Diaper Changing Pad | Extra Long 33″ Inch Changing Mat for Newborns and Toddlers | Protect Baby’s Head with Diaper Pocket Pillow | Waterproof Travel Changing Pad – Buy from Amazon here
Hats, scratch mittens, booties, socks
It is essential to pack hats, as mentioned above, babies cannot regulate their own body temperature, and a lot of body heat escapes from their heads, so make sure you pack a couple. The hospital gave us one too: this pretty pink and blue hat (below), which I thought was a very sweet gesture. We still have that hat and have kept it for sentimental value. It reminds us of our positive time in the hospital.
Here are some newborn / hospital hats I found from Amazon:
Zando Baby Cotton Beanies for Boys Toddler Knit Hats Cute Warm Infant Beanies for Baby Girls Newborn Caps – Buy from Amazon here
Gellwhu 5-Pack Newborn Baby Girl Bow Hats caps Beanies Hospital Infant hat Clothes Outfits – Buy from Amazon here
Scratch mitts are important too because they stop the baby scratching themselves (you’d be surprised at how quickly their nails grow!). Booties are not essential but very cute. And if it’s super cold outside, then booties can add extra heat protection to their feet. Generally, feet should be free for the first year until they walk assisted.
Then you can look at the baby’s first shoes, which are soft and malleable, so the baby feels protected but can still use their own weight to walk. I have these very cute pink booties from Bobux*, but Ayla has only worn them from three months old. Socks can work from birth onwards.
Baby Mittens Newborn – 100% Organic Cotton, Soft No Scratch Gloves – Hypoallergenic Infant Hand Mittens with Elastic Wrist – Cute Mitts for Boy or Girl 0-6 months – Buy now from Amazon
Nappy sacks
Nappy sacks will probably become obsolete as they’re not great for the environment. But, they’re very handy when you’re out and about and your baby does a number two in an inopportune moment. You can get fragranced nappy sacks which help to keep the smell contained. They’re very cheap and you get hundreds in a pack. I still haven’t bought another pack and it has been almost four months!
Snowsuit if cold
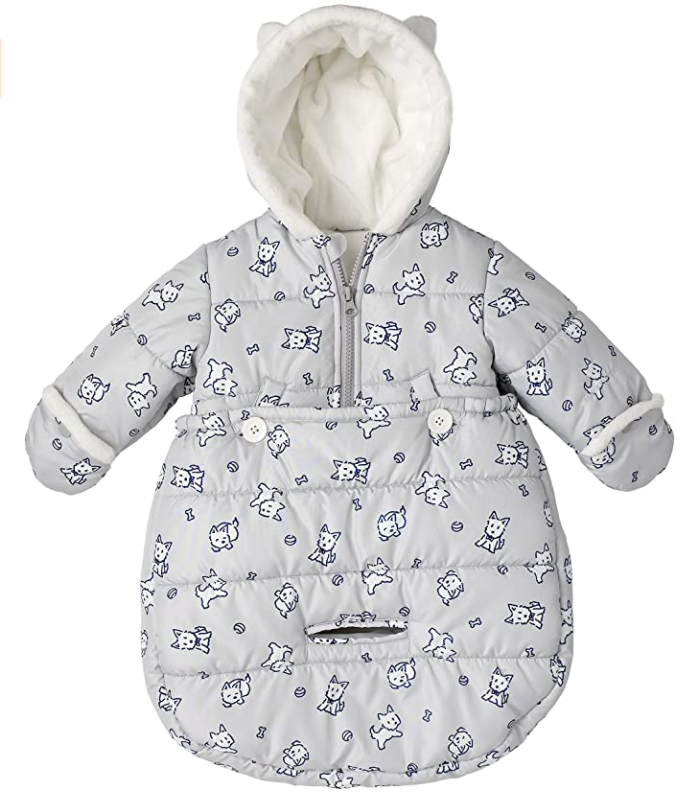
Snowsuits are great. They cover the baby from head to toe and some even come with gloves too. Ayla was born in September so she didn’t need a snowsuit until she hit around two months old. She now has four snowsuits, two pink ones (see images below), a grey snowsuit passed down from the boys and a white snowsuit that makes her look like a yeti. They are so useful because they are fleece-lined, which means you only need a baby vest and a Babygro underneath the snowsuit when you’re going out.
Here are some cute snowsuits I found from Amazon:
LONDON FOG Newborn Infant Baby Girl Boy Puffer Carbag Pram Bag Snowsuit Bunting – Buy now from Amazon
AIKSSOO Baby Winter Jumpsuit Bear Outfit Newborn Hoody Coat Infant Warm Rompers Toddler Fleece Snowsuit – Buy now from Amazon
Cellular blankets
Cellular blankets are fab because you can use them both during winter and summer and they are light enough to carry around everywhere. We have sooo many cellular blankets that some have still never been used, but our favourites are the cream and pink cellular blankets from Bloomsbury Mill because they’re super soft, 100% cotton and machine washable at 40 degrees.
So, keep around four or five in your cupboard and one in your changing bag, then you can bring them out when needed. Cellular blankets are designed with a clever ‘cell’ construction, so they trap the air to keep the baby cool in the summer and warm in the winter. Also, they’re safer to use during sleep than regular blankets because the holes can allow the baby to still breathe if they accidentally come over the baby’s face. It’s safer to use Sleepsacks though, which I will talk more about below.
Baby vests/bodysuits/sleepsuits/baby grows
You only need a couple in your hospital bag and they can be short-sleeved or long-sleeved, depending on the weather. The baby vests or bodysuits go underneath the sleepsuits or baby grows, which can also be long-sleeved or short-sleeved.
As this was our first baby girl and we knew the gender before birth, we packed some very cute pink baby vests and baby grows, but you can always go for white, yellow, pink or even leopard print – whatever floats your boat! Just make sure they’re 100% cotton and washed in suitable detergent. We use Fairy Non-Bio as that seems the gentlest on baby’s skin.
Here are some great newborn babygrows, body vests and sleepsuits I found on Amazon:
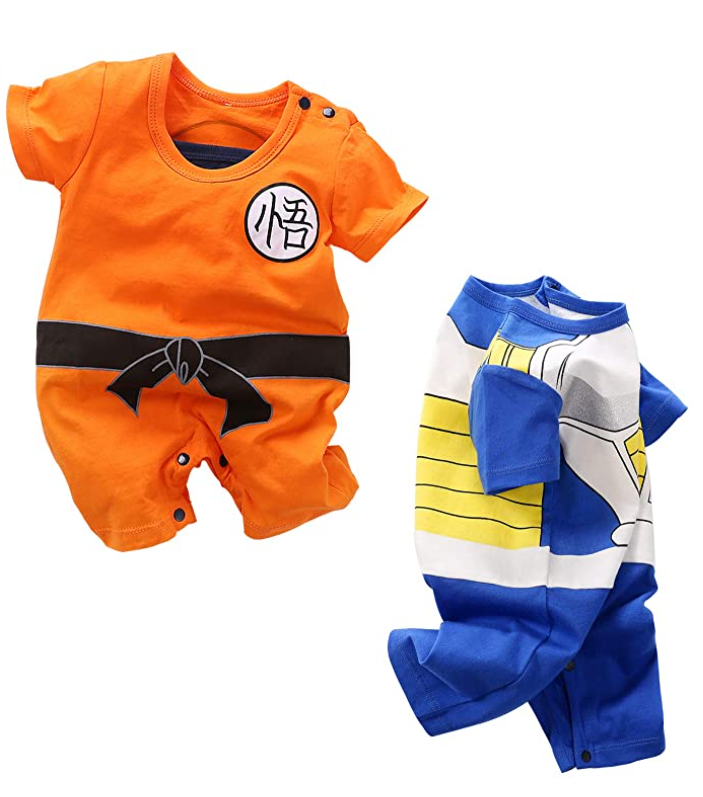
YFYBaby 2-Pack Baby Boys Girls Rompers Cute Infant Toddler Cotton Onesie Newborn Cosplay Cartoon Clothes – Buy from Amazon here
Baby Boy Clothes Newborn Infant Ontfit Long Sleeve Romper + Pants + Hat 3PCS Outfit Set – Buy now from Amazon here
Muslin squares, swaddles and blankets
Muslin squares* are small cloths that are used when you breastfeed or bottle-feed a baby. They’re great for cleaning spit-ups (when the baby throws up a bit of milk), excess milk and other bodily functions when you’re out and about. You also place these cloths over your shoulder or your hand when you’re burping your baby during winding, as that’s when babies spit up. So pack a few muslin squares in case your baby is one of those who like to ‘share their food’.
Muslin swaddles* and blankets are used for swaddling babies, i.e. wrapping babies in blankets which are believed to help them sleep. They are usually made from thin, breathable muslin fabric to help moderate temperature. They can also be used as extra protection for wiping sick and even as a nappy changing mat if you don’t have another to spare. They’re quite multi-purposeful and come in various sizes and patterns. I have some very cute muslins from Bloomsbury Mill, which you’ll be able to see in action in my video below:
https://youtu.be/90muIYBraJc
You should take care of your muslins, so they continue to be fresh and soft for your baby. Place in the wash before you use and wash with similar colours to prevent fading. Also, avoid washing with anything that could snag your muslin, like zips and Velcro and use a soft detergent like the Fairy Non-Bio I’ve talked about above.
If you have stains that can’t be removed from washing alone (make way for the bright yellow staining breastfeeding poo!), fill a basin/sink with cold water and bleach-free detergent. Then soak your muslin for at least one hour – rinse then repeat if needed. Also, keep your muslins away from fire and other sources of direct heat. Cold, not hot! Heat sets the stain and makes it almost impossible for the stain to come out.
You should have full care instructions on your muslin’s label, but it’s worth keeping them pretty and soft. You’ll take them everywhere and they’ll be the items you’ll most likely use.
A cute outfit to go home in (not essential, but cute nonetheless!)
Of course, it’s not an essential part of going home, but a cute going home outfit will perk you up once the highs of birth and having a new baby drop and you witness that postnatal crash. I didn’t actually have a cute baby outfit because the one we bought was too small ☹ But below is a picture of my firstborn’s going home outfit twelve years ago. It was freezing and we were snowed in, but I still think he looked cute in his winter hat and blanket 😊
You can also bring lots of really cute stuff that you may not need but would love to have as keepsakes because it’s a monumental time – you’re taking baby home! I love this Ultimate Luxury Hamper for Girls* which was the perfect hamper to bring with me to my birth as it contained all the lovely items you’ll need for a new baby. It comes in such a lovely box too so it makes for a perfect gift for a friend or family who is due to welcome a baby.
Preparing your home for baby’s arrival – Get the nursery ready
Where is the baby going to sleep when s/he arrives? Are they sleeping in your room for the first year or are they going to have their own room straight away? Even if you transition them from your room to their room within the first year, you will need to figure it out and ideally before the baby gets here. But, if you’re like us and move when you’re seven months pregnant then you may have to prepare a lot more than just the nursery!
Our old nursery before we moved into our home over twelve years ago
which then transitioned to this…
Our new nursery which was home to the boys for five years
Now baby sleeps with us while we look for our forever home, so we have most of the nursery stuff in the lounge.
So, first things first. Select the room which will become your nursery and then clear out the area to make way for the baby stuff. Get all those baby essentials early, so you can decorate the nursery however you choose. But there are some baby essentials and some not so essential, yet lovely to have items that should go into a nursery. These are:
The bed
If the baby is sleeping with you, then a co-sleeper or pod like a Snuzpod will work well. We had a Snuzpod next to our bed until Ayla was four months old and it helped me to breastfeed her lying down and then roll her back into her bed.
I try to avoid co-sleeping as much as possible and always put her back into her bed, but sometimes I’m so tired and find I’ve fallen asleep for a few minutes while feeding. So, at least, this way, I’m just gliding her rather than lifting her up and placing her. It makes a huge difference. Sadly she’s grown out of the Snuzpod now and transitioned to the cot, which has taken its place.
Watch this space for an extensive SnuzPod⁴ review coming soon!
All my kids had a Moses Basket and it was my favourite bed for them to use right at the very beginning as it felt like their little cocoon. Each child loved their Moses Basket too and slept very well in it, but they grew out of them very quickly. Sadly, even my fourth baby has already grown out of hers, but I’d thoroughly recommend getting one.
Both my boys used the above Moses Basket until around 2/3 months (they were big babies!)
Ayla slept in the Clair De Lune Limited Edition Cotton Bubbles Moses Basket* during the day until three months old, which isn’t available anymore. The set didn’t come with the stand, so we got that separately, but it did come with the mattress, bedding, hood and coverlet. It’s such a lovely little set and I would definitely recommend checking out Clair de Lune’s products as they’re really good quality and so, so pretty!
Plus you can move the Moses Basket around with you everywhere. I had the Moses Basket with me in the lounge next to the couch while I was recovering from birth or getting ready to go out.
Here is a great Moses Basket I found on Amazon:
Tadpoles Line Stitched Moses Basket and Bedding Set, Grey – Buy from Amazon here
Finally, once your little one is not so little anymore, you can then transition them into a proper cot, preferably one which doubles up as a bed later.
We have a MoKee Mini Cot in Ivory Plum* which is a gorgeous cot that comes complete with a MoKee Cot Changer* (more on that later). It’s a perfect size and you can remove the panels to transform the cot into a toddler bed later because even though it’s mini it is still large enough to cater up to three years old.
We also have a beautiful pink Baby Nest from Kally Sleep* which we placed in the cot to help with the transition from Snuzpod/Moses Basket to MoKee cot and it worked well for a few months. The Kally Baby Nest is a multi-functional cocoon that is designed to keep the baby safe and comfortable during supervised naps and tummy time. T
The Baby Nest comes with a pillow and pillow cover, and a lovely blanket too. Ayla slept very well in the Baby Nest during nap time and enjoyed viewing her world from the nest too. I would recommend buying a Baby Nest from Kally Sleep because it is very soft and firm while keeping the baby safe and comfortable during sleep and playtimes.
Unfortunately, Ayla grew out of the Baby Nest at four months, and transitioned to the cot.
Bumpers and protection for the cot
There has been some backlash about cot bumpers and other additional protective equipment for the cot lately, with some resources saying they are hazardous and can lead to cot death. But, like anything, as long as you ensure ties remain securely fastened to the cot and remove cot bumpers when the baby is unaided then you should be ok.
When children get older they use cot bumpers as a climbing frame which may lead to falling out of the cot. So once they get to this stage it’s better to remove them entirely. Check bumpers regularly too to ensure they are secure and stop using them when you see signs of damage.
Mamas & Papas kindly gifted us a bumper*, coverlet cot bed* and cot bar bumpers* as part of the pretty 6-piece Lilybelle bundle piece set and I felt they complimented the lovely ivory plum MoKee cot very well. They come in reusable plastic bags, which are very handy to store items in.
The Lilybelle set provides a beautiful and decorative touch to the cot with a gorgeous hand-quilted floral design. It’s so nice to have such a pretty bed after two alpha male boy beds!
Bedding
The bedding you have depends on the bed you have. We were given lovely 4-piece bedding set from Clair de Lune* in white, specifically for our Moses Basket, which included a Cotton Cellular Blanket, a very soft Fleece Blanket, Cotton Flat Sheet and a Cotton Fitted Sheet. The set creates a quality finish and Ayla seems to love the feel of the bedding on her skin.
You’ll need a bedding set for the cot and the world is your oyster when choosing a particular style. We are saving our Magic Unicorn Set from Bloomsbury Mill* for when Ayla is a little older and transitioning to using a duvet and pillow. I can’t wait, the bedsheets are so pretty!
Each boy had a favourite blanket, one which they fell asleep with very quickly. This time, Ayla has her favourite grey blanket (well it’s my favourite blanket) and she goes to sleep in it instantly. It’s a beautiful 100% Cotton Knitted Blanket in Grey from Clair de Lune* and it goes everywhere with Ayla, with a lovely breathable material that is a heavyweight knit so it provides very good insulation and natural comfort and warmth. The blanket has such a cute design and it was the Silver winner of the Mumii Best of Baby and Toddler Gear 2016 in the Blanket category. So it’s worth getting one of these – plus it makes for a great gift for winter babies!
Air purifier
An air purifier is a must-have first year baby essential in the nursery because it removes up to 99% of airborne particles as small as 0.1 microns in size. People spend most of their time indoors, yet indoor air is up to five times more polluted than outdoor air.
This is because of pollen and car exhaust fumes entering buildings, chemicals in paint, furniture, clothing and cleaning detergents, mould and dust. Breathing in fine dust or PM2.5 (also known as fine particulate matter) contributes to asthma, heart and lung problems and a host of other diseases.
We were gifted the Blueair Blue Pure 411* which is a whisper-silent, energy-efficient air purifier with one-button speed control for the nursery. The air purifier is very compact and is perfect for smaller rooms. The Blue Pure 411 is easy to assemble, and, depending on where you need it, you can move it around too. When you need to replace the filter, just twist the lid, replace the filter and then cover it back up.
Baby monitor
During the first year of birth, your baby will sleep a lot and not always at night. Sometimes you need to get on with daily tasks or other duties while you let your baby sleep, but, you want to make sure that when you put them down, they’re safe in their beds and you can monitor them from wherever you are.
We have tested some good quality baby monitors over the years, both audio and video, and I think we have found the best of the best. We have the Nanit Plus Camera* which is the most advanced baby monitor ever introduced into the nursery. Nanit combines learning algorithms with advanced smart technology to provide in-depth data about your baby’s sleep patterns, quality and more. In fact, 94% of Nanit parents say they sleep better using Nanit’s products, so we gave it a shot ourselves!
You get two different baby monitors, the Nanit and Nanit Plus Camera. The Nanit Plus does everything the Nanit does except it has extra features, including one year of Nanit insights for free, which offers video history, sleep tracking and coaching. You can buy the Nanit Plus with a Wall Mount (which needs to be drilled to the wall), or a Floor Stand, which allows you to place the Nanit Plus anywhere in the house. You can also buy a Multi-Stand travel mount that makes your baby monitor a Nanit on-the-go or a nanny cam.
We got the floor stand so we could move the Nanit between Ayla’s three beds, but we ended up keeping the Nanit upstairs where Ayla slept during the night. To use, you assemble the Nanit Plus using the instructions provided and then you pair the monitor with its app via your phone.
Your phone then connects wirelessly to the camera and the app takes you to initial settings where you configure the Nanit monitor and position the camera view on the phone. Once set up, you can view your baby and the crib both with natural lighting and infrared lighting.
The camera view is excellent and there are so many additional features that make the Nanit the best out of all the ones we’ve tried so far. When away from your baby, Nanit will continue to work in the background on your phone or Alexa Show.
The Nanit will alert you on the phone or Alexa Show if there are any movements or sounds, and if your baby wakes, you can talk to them through the two-way microphone/audio and/or play bird noises, wind noises or white noise to help settle them back to sleep. The dashboard allows you to catch up on your baby’s sleep with data showing everything from how long they slept to how many times you visited or helped them.
But, the real pièce de résistance is that the built-in Insights will help you understand your baby’s sleep patterns and offer personalised Sleep Tips related to your baby and their surroundings. You also get a Night Timelapse every night to show you what happened during the night while you’re asleep, which is available every morning and eventually, you’ll see how your baby is becoming a better sleeper as time goes on.
If you’re struggling with a certain aspect of your baby’s bedtime routine you can consult a team of parenting experts who will provide you with advice that will help you to achieve a bedtime routine that suits everyone.
The Sleeping Bags are designed to be worn over pyjamas. It comes in three sizes to fit babies aged three to 24 months, allowing you to use Breathing Wear as your little one grows.
Nanit also has a built-in night light so if you’re settling your little one to sleep when everyone else is asleep you can see what you’re doing and not startle your baby awake with harsh light.
Nanit launched a ‘Memories’ tab which captures those special moments automatically so parents never miss out, like the first time baby sleeps through the night or the first time you put the baby in their bed and they go to sleep by themselves (we’re trying to do this at the moment). It’s such a great way to record your baby’s special memories and share them with loved ones digitally, especially if the extended family can’t always get to see the baby as much as they hoped.
“Now more than ever, technology is critical in keeping people connected. Sadly many grandparents and loved ones are currently separated from new members of the family, however, with the launch of Memories, we hope to make it easier for parents and other loved ones to never miss a moment as their baby grows.”
Kasa Indoor Pan/Tilt Smart Security Camera, 1080p HD Dog Camera 2.4GHz with Night Vision, Motion Detection for Baby and Pet Monitor, Cloud & SD Card… Buy from Amazon here
Night light
If you don’t have a Nanit then you would need to purchase a separate night light. We had a Gro Light but we found it to be too dark and I ended up using my phone’s torchlight which was too strong.
We love the Lumie Bug which both of our boys use. You can fully adjust the lighting, especially for bedtime and the low blue-white light avoids stimulation during the bedtime routine, allowing your baby to wind down ready for sleep. The sunset with a realistic colour change means that the light can gradually fade off to naturally promote sleepiness and settle your baby.
You also have two light intensities and a non-alerting orange light which doesn’t trigger wakefulness. Perfect for night-time feeds, when the whole world is sleeping – except for you and your baby.
Lumie Bedbug – Low-blue Bedside Light with Sunset and Nightlight for Babies and Children – Buy from Amazon here
Somewhere to sit and feed
This is not essential but unless your baby’s bed is right next to yours, then you may need to find somewhere calm and comfortable for you to sit and feed, like a nursing chair or a couch. I used to have a lovely comfy nursing chair (which you can see in the image of our old nursery above) but now I just use my bed as my baby’s bed is right next to me.
During the nightly feeds, make sure you are sitting comfortably as feeding time could take a while. Try not to fall asleep during feeds too. I normally look at my phone on the brightest light which helps me to stay up during feeds and prevents any risk of falling asleep with the baby in my arms.
You will need a nice set of drawers and cupboards to hold your baby’s clothes and other bits and bobs. We currently have a tall set of drawers with five compartments and Ayla’s items are separated into the following:
A quick note about Sleepsacks. These are very important during the night as one rule of safe sleep is to make sure you eliminate any possibility of your baby pulling the blanket over their face and potentially suffocating. Sleepsacks are great to protect the baby and keep them warm but with the added protection of being secure so it doesn’t move around when they sleep.
They look like pillowcases but with zips on either side and you have different sized togs, one for summer and one for winter. You can also get long or short-sleeved sleepsacks, depending on the temperature.
Here are some lovely sleepsacks I found on Amazon:
La Petite Chose Baby Sleeping Sack: Soft Organic Cotton Sleep Bag, (6-24 months) – Buy from Amazon here
Nested Bean Zen Sack – Gently Weighted Sleep Sacks | Baby: 0-24 Months | Cotton 100% | Help Newborn/Infant Swaddle Transition | 2-Way Zipper | Machine Washable – Buy from Amazon here
Baby Wearable Blanket, Cotton Sleep Sacks for 6-12 Months, Unisex Sleeping Bag Sack, Medium Size, 2-Way Zipper, 0.5 Tog Breathable Cotton – Buy from Amazon here
More on baby clothes later.
Baskets and organisers for other bits and bobs
You will accumulate quite a lot of stuff during the first year, so it’s a good idea to get things organised from the get-go. Little wicker baskets are cute and very useful for small items, while shelving will help to house larger items out of the way and out of reach of wandering hands too!
Momcozy Universal Stroller Organizer with Insulated Cup Holder Detachable Phone Bag & Shoulder Strap, Fits for Stroller like Uppababy, Baby Jogger,… Buy from Amazon here
Prepare for sleeptime Fun!
If you managed to get in eight hours of sleep every night before the baby arrives then prepare for one big culture shock! “Sleeping like a baby” doesn’t actually apply to newborns, much less to babies. You may be one of the rare few and birth a baby that sleeps through the night from six weeks old but that’s rare – very rare!
Newborns should get around eight hours or three naps during the day and then around eight and a half hours of sleep at night, but, they will not get these hours in all in one go. Generally, they will sleep at two to three-hour stretches until their little tummies get bigger, then at one month, this should change to around six to seven hours or three naps during the day and then eight to nine hours during the night.
The daytime naps should drop gradually and sleep should increase at night until babies get to around twelve months when they should get around two and a half hours of sleep during the day and eleven hours sleep at night.
How to prepare for birth of baby – Prepare your changing area
Why do you need a changing area? Because your baby will poo a ridiculous number of times a day and you can’t just stick them on the loo and wipe their bum with tissue (we hope that’ll happen around two to three years old). You need wipes, nappy sacks, nappy cream if the bum gets a bit sore and of course nappies. So, a great way to save yourself some time and hassle is to create a changing area.
Our very first changing area over nine years ago – we still have those Lamaze cubes!
MoKee cot changer*
The MoKee cot changing mat sits on top of the MoKee Mini Cot and saves space in your nursery. The ergonomic design means it sits comfortably on top while the wedge shape keeps the baby on the changing mat. We use the changing mat for most of the nappy changes, and it has been a great time saver for us.
But, make sure you don’t knock the changing mat off with your arm or hand as it can come off and drop into the cot – with baby in it! It has happened to us a couple of times as the changing mat isn’t attached. This is so you can take it off and put it away when you’re done.
Apart from the nappies, baby wipes, cotton wool and nappy sacks, there are a few extras that will need to sit in your changing area for ease of access. These are:
Nappy bin
A nappy bin is not 100% essential but it is time-saving and more hygienic than throwing used nappies straight into the main bin. We have the Tommee Tippee Sangenic Nappy Bin along with the bin refills next to our changing area so we can wrap up our nappies in a fragranced nappy sack and then dispose of them in the cleverly designed nappy bin.
It’s quite simple to use, you place the nappy in the system and then you twist and click so the nappy is encased in the nappy bins’ fragrance film. Once the bin is full, you use the blade on the underside of the bin to tear open the end and then knot together before you throw it in the main disposable bin.
Tommee Tippee Twist and Click Advanced Nappy Bin, Includes 1x Refill Cassette, Locks in Odours and Germs, White – Buy from Amazon here
Nappy bin accessories
Diaper Genie Bags Refills 270 Count (Pack of 3) with Max Odor Lock | Holds Up to 810 Newborn Diapers. Buy from Amazon here.
ChoiceRefill Compatible with Diaper Genie Pails, 4-Pack, 1080 count. Buy from Amazon here
Nappy cream
If you leave a soiled nappy on for too long or your baby starts teething (more on that below) and the body produces more acidic poo then your baby may end up with a nappy rash. There are a few major brands in the market that everyone uses, these are Bepanthen, Sudocrem and Metanium.
Out of all three, I think Metanium is by far the best, as it heals the rash and protects the area. You need a microscopic amount to thinly cover the rash and within hours the nappy rash has improved. The Bepanthen and Sudocrem act more like a barrier cream to prevent nappy rash and can be used two to three times a week. But, to be honest, I leave my baby’s bum open so her skin gets used to its environment.
Aquaphor Baby Healing Ointment Advanced Therapy Skin Protectant, Dry Skin and Diaper Rash Ointment, 7 Oz Tube. Buy from Amazon here.
Aquaphor Baby Healing Ointment Advanced Therapy Skin Protectant, Dry Skin and Diaper Rash Ointment, 14 Oz Jar. Buy from Amazon here.
Be prepared for lots of poo during your first year that you’ll become obsessed with it! Are they pooing enough? Are they pooing too much? Are the breastfeeding poos too yellow? Why is poo green? What’s with the smell? Why is the poo so black? Just remember, if the baby is happy they are probably fine, but if you’re worried, never be too ashamed to consult your healthcare provider – you are not wasting their time. Better safe than sorry.
Towels or muslins
Hooded towels and extra muslins are great to have in your changing area because if there is an accident you can mop it up pretty quickly. I love the Bloomsbury Mill muslins as mentioned above, but you can find muslins from pretty much anywhere. Hooded towels are great for when it’s cold and you’re wrapping your baby up before and after bathtime. You can find hooded towels from anywhere too.
Extra set of clothes
Inevitably your baby will poo up their back, thanks to runny poo, either from teething or from digesting new foods. Keep an extra set of clothes handy for when this unpleasant surprise happens and make sure you soak the stained clothes in cold water before throwing them into the wash. I made the mistake of thinking hot water will boil the stain away but instead, it sets the stain and now I have beautiful items of clothing with bright yellow breastfeeding poo stains on them! ☹
Entertainment
It’s good to have some entertainment for baby as they get older and use their arms and legs. More on how to entertain your baby below, but from birth, you can add black and white patterns to the changing area to encourage their brain and eye development.
Going home time
You’ve had your birth, you’ve welcomed baby (or babies!) into the world and now you get to take the baby home. It can be daunting to go from the comfort of hospital care to going it alone with your partner. But you’re not alone.
So, what do you need?
Ring cushion after vaginal birth
So I had two caesareans before I had my vaginal birth and I was expecting the recovery to be easier. Boy, was I wrong! I had a forceps delivery with a second-degree tear and an episiotomy which meant I had to have stitches and I suffered a minor prolapse too. The result was that I could not sit on my bum for about four weeks and even the ring cushion for the first two.
The only way I got through it was to bring a rolled-up towel everywhere with me, which I could manipulate to help me take the pressure off my front bottom and then transition to a ring cushion afterwards. Essentially what a ring cushion does is that it allows you to sit down so there is no impact or pressure on the sore area until you can sit on it again. I would thoroughly recommend a ring cushion if you have a sore bottom.
Ergonomic Innovations Donut Cushion with Removable Cover, Black – Buy from Amazon here
Medication
And after birth, if the delivery didn’t go quite as planned you will likely end up taking home some painkillers – and added extras like I had to after this birth. This time around, I came home with Co-dydramol, Ibruprofen, iron tablets (as I lost 1.5 litres of blood during birth) Lactulose (to counteract the iron tablets) and Enoxaparin which my husband needed to inject into my belly to help prevent blood clots like thrombosis.
My haemoglobin levels were inevitably very low and I was offered a blood transfusion but I refused, opting for the iron tablets instead. I have since taken another blood test and my levels are almost back to normal but the doctor has advised I eat an iron-enriched diet, so I can bring my iron levels up even further.
Postnatal supplements
Your doctor advised you to take prenatal supplements during pregnancy to get that all-important folic acid and the A to Z of minerals and vitamins. Well, taking your supplement is just as important after birth, especially after the trauma your body went through. You can continue to take your prenatal vitamins after the baby is born but postnatal vitamins have added nutrients to support you during breastfeeding. Postnatal vitamins should include Vitamin D, Vitamin B6 and Vitamin B12 to keep mum and baby healthy.
My U.S. friends, you can find out if you are deficient in any vitamins by undertaking nutrition testing. Healthlabs is offering a 15% discount to Motherhood Diaries readers here, so please take advantage!
Hospitals will not allow you to go home after birth if you don’t have a car seat so make sure you have one sorted straight away. But picking any car seat won’t do. Find the one that is the right fit for your child’s weight, not age – this is the key factor when choosing something that is suitable and safe.
By law, all children under 135cm must have their own car seat and they should continue to be in a rear-facing car seat until they are 15 months old for maximum protection against any forceful impact. Check the table below for the right sized seat (from John Lewis’ website):
Group
Child’s weight*
Approx. age of child
Child’s height¹
0
Birth – 10kg/22lb
Birth to 6 – 9 months
40 – 85cm
0+
Birth – 13kg/29lb
Birth to 12 – 15 months
40 – 85cm
0+ and 1
Birth – 18kg/40lb
Birth to 4 years
40 – 105cm
0+, 1, 2 and 3
Birth – 36kg/79lb
Birth to 12 years
40 – 150cm
1
9 – 18kg/20 – 40lb
9 months to 4 years
85 – 105cm
1 and 2
9 – 25kg/20 – 55lb
9 months to 6 years
85 – 150cm
2
15 – 25kg/33 – 55lb
4 to 6 years
105 – 150cm
1, 2 and 3
9 – 36kg/20 – 79lb
9 months to 12 years
85 – 150cm
2 and 3
15 – 36kg/33 – 79lb
4 to 12 years
105 – 150cm
*Applies to R44.04 seats
¹Applies to iSize seats
So you’re looking to get a Group 0+ car seat because they are rear-facing and the safest way for babies to travel. I would recommend getting one with an Isofix so you need not use a seatbelt. Group 0+ car seats also have a carry handle useful for transporting baby when they’re asleep. They also have a curved base for gentle rocking. These kinds of car seats also have comfort extras like cushions, head huggers and padded straps which can be removed as the baby gets bigger.
As your child grows you will transition to the Group 1, 2 and 3 car seats accordingly. We used the Nuna Car Seat gifted by my best friend and the BeSafe car seat which came with our UppaBaby Vista 2019 Travel System. The Nuna has an Isofix but we have to use the seatbelt with the BeSafe because we don’t have the right Isofix. It makes me appreciate Isofix so much more!
Car seats can be expensive so check out Kiddies Kingdom’s child car seats for sale – every little bit helps!
KURA Organics gifted us a beautiful KURA Organic Wrap in Sorbet* which keeps baby warm when they are in the car seat and pushchair. The outer fabric is a five gauge reverse jersey knit in a two-colour striped design and has a chunky knit alongside the organic cotton yarn. The lining fabric is soft and non-toxic so it keeps the baby safe and warm. The poppers ensure quick and easy fastening without disturbing the baby when you want to keep them either warm or cool.
You can machine wash this blanket in 30-degree wash and it fits babies up to six months old. It’s very easy to use, you open up the blanket and feed the car seat straps through the blanket’s holes. Then with the blanket open, you place the baby into the car seat and then wrap them around with the blanket, fastening at the button. It’s -2 outside at the moment, so we are definitely using the KURA blanket during car and stroller trips. I also use it as a handy blanket when I’m out and about as well.
Preparing for arrival of baby – Pack your changing bag
You’ll have all of the stuff you added to your hospital bag above, but you’ll need a few extras for your daily changing bag. These are:
Emergency information just in case anything happens. This should include the phone numbers of your emergency contacts and doctor.
Nail clippers – this is great for when your little one takes a nap and you have time to trim those nails
Baby sling for carrying the baby – if you have a large enough bag you should bring a baby sling so you can shift from using your pram to being a hands-free carrier
Toys, activity/board books and crayons depending on your child’s age. This is great for entertaining your child while out.
First-aid kit which can include plasters, alcohol-free cleansing wipes, https://geni.us/iT2xSE8thermometer and painkillers like infant Calpol or Ibruprofen.
Don’t forget your wallet, keys, phone, sunglasses, a diary/notebook and pen, snacks and a bottle of water for yourself!
Preparing for arrival of baby – Prepare your outfits
If you’re one of the lucky ones you may wear your pre-pregnancy clothes sooner than you think. But, if you’re like me and the fat likes to stay around your belly and bum area then you’re likely to continue wearing your maternity clothes. I’m living in my maternity leggings at the moment and wearing breastfeeding tops under baggy tops. This way, if I forget my breastfeeding shawl, the top on top of my tops acts as a cover. 😊
I also have a different array of nursing bras and have had to change the size twice since my daughter was born. Now that breastfeeding has been established I have to change my bra size again! If you can’t get to a shop to measure your bra, I use a fantastic website called Boob or Bust which has a Boob or Bust Bra Calculator that you can use to measure at home.
They also have a very supportive Facebook group where you can ask questions if you’re struggling to work out how to measure your bra. I was always a 34D until I used the calculator and found out I was a 32G! I was shocked and didn’t think it was right, but lo and behold, the bra fitted me perfectly. It’s well worth giving it a shot if you find it difficult to get to the shops.
I love my super supportive Black High Waisted Leggings* which is designed to be comfortable when running up and down doing my daily mummy tasks, plus they’re high waisted and not see-through, so no one has to see my wobbly bits!
I have a couple of cardigans that double up as breastfeeding shawls and blankets because of the extra-long panels. These are great, especially in the winter. Also, I have long shawls which I use as scarves and they also work as breastfeeding shawls too. Think about comfort but also about how easy it will be to whip out your boob and feed your child if you’re breastfeeding. If you’re healing from a c section scar then keep that area loose and make sure the waist of the trouser goes over your scar rather than under to prevent irritation.
Preparing for arrival of baby – Figure out your feeding – and your feeding area
Breastfeeding
I breastfed all three of my babies, and I’ve had all sorts of experiences with nursing. With my first, I absolutely hated it until my baby was one month old and then all of a sudden it all clicked into place and I ended up feeding him for 15 months, the day before my second was born. Feeding the second time was slightly painful but I ended up having an oversupply and breastfed my second for 2 ½ years. I produced so much that I donated over one litre of breastmilk to Chelsea and Westminster Hospital.
The third time around I found breastfeeding the easiest even though Ayla was clicking for the first few months and ended up quite windy. I ended up stopping at 16 months because my milk dried up, but that could have been down to the pregnancy. All experiences are unique, so if you’re struggling, I would thoroughly recommend seeing a breastfeeding counsellor.
I was lucky to meet one at the local weigh-in clinic and she helped me to latch Ayla on properly. Even though this was my third time breastfeeding, it was Ayla’s first time so both of us needed to learn together. Whether you’re experienced or not it doesn’t matter, if the baby isn’t latching on properly it will bloody hurt and the baby won’t get milk. So if you want to persevere then get professional help, I can’t advocate this enough.
After two weeks with my first, I was dead set on giving up because I was in so much pain, I had panic attacks from the trauma of birth and I just felt rubbish all of the time. And then I had to stick a baby on my boob every two hours when all I wanted to do was sleep! But, if it wasn’t for my mum then I would have given up.
I wrote an article on how to ensure a proper latch when breastfeeding, which may help. For more information on breastfeeding visit my breastfeeding pages (link below). There are tons of personal stories and factual information over there so you should be able to get an idea of whether breastfeeding is for you.
I want to show you what helped me (apart from mum) to get through breastfeeding. I saw the below table on the wall at one of the hospitals and it resonated with me after suffering from bleeding nipples and wanting to throw myself off the balcony.
These are just some of the ways that breastfeeding makes a difference to both mothers and babies
Time Breastfeeding
For Baby
For Mother
First feed
Helps to stabilise baby’s blood sugars and protect baby’s gut.
A great opportunity for the first skin to skin cuddle.
1 day
The antibodies in your colostrum provide natural immunity from infection.
Helps womb to contract towards normal size.
2-3 days
Sticky black meconium is cleared more readily from the baby’s bowel.
Instant relief for hot, swollen breasts when your milk comes in.
1 week
Transition to the world outside the womb is eased.
Frequent feeds mean time to sit or lie down and for you and your baby to get to know each other.
2 weeks
Food and drink always ready at the right temperature, adapting to the baby’s needs.
Hormones help you get back to sleep after night feeds.
4 weeks
For premature babies lower risk factors for heart disease in later life.
Saves time sterilising and making up bottles.
6 weeks
Half the risk of chest infections now and up to seven years old.
Breastfeeding likely to be easier and you can go out and about without bottle-feeding equipment.
2 months
Lower risk of food allergy at three years old if breastfed only.
Reduced risk of ovarian cancer in later life for mother.
3 months
Five times less likely to get diarrhoea now and a reduced risk for the whole year.
Fewer visits to the GP as a baby is less often ill.
4 months
Half the risk of ear infections. Reduced risk of asthma now and protection continues up to six years.
Feeling of empowerment at having been solely responsible for growing your baby to four months.
5 months
Five times lower risk of urinary tract infections.
A lovely way to reconnect with your baby if you go back to work.
6 months
Lower risk of eczema now and up to six years old.
Less risk of osteoporosis in the long term for mother.
1 year
Three times less risk of becoming obese by age six and a lower risk of heart disease as an adult.
No need to buy formula milk at all, saving at least £450 this year.
2 years
Likely to have higher than average scores on intelligence tests.
Expect fewer visits to the orthodontist when your baby is a teenager. Risk of breast cancer reduced by eight per cent for mother.
Some people find breastfeeding easy, but most people don’t. Try not to compare your experience to others, and remember every baby is different and your mental health is more important. If you’ve tried everything and breastfeeding still isn’t working, then it’s important to note that FED IS BEST.
As long as you have a happy healthy baby who has a happy, healthy mother, then that’s the most important thing. I used to judge women who bottle-fed before I even had kids myself. Now I have kids of my own, I know that anything related to parenting is rarely that black and white and we’re all trying to do our best for our babies – so no judgement!
Find your way to get through it, regardless of the outcome because baby needs to eat whether that’s from your breast or from the bottle.
Pumping
If you have continued to breastfeed and your baby has an established latched, then you may want to consider introducing a bottle. I didn’t introduce a bottle with my two boys until they were way past 12 months and my first accepted a bottle straight away and naturally weaned onto cow’s milk from 15 months without any fuss whatsoever.
My second was like a vampire. For him, it was all about the breasts and for a good 18 months after that, I tried everything to get him off my boobs. It didn’t work and I had to stay overnight at a friend’s house to finally wean him. After that he was fine! But, during that time I kept giving my eldest a bottle of my breastmilk because I was donating milk to the local hospital at the time and I had tons of milk leftover. I thought I’d find it super difficult but it wasn’t at all.
Breastpumps
I’ve had my fair share of breast pumps, both manual and electric and I’ve had quite a tumultuous relationship with both styles. I was gifted the MAM 2 in 1 Breast Pump* and this is legit the breast pump I have used to date. I haven’t used the manual pump yet as the electric pump is so efficient in getting my milk out in record time. I managed to pump over 160ml (size of a newborn bottle) in less than the recommended pumping time of 15 minutes.
The pump has a two-phase expression process which begins with the stimulation mode, to stimulate the milk to flow (there are nine levels) and then once the milk is flowing you switch to expression mode, again with nine different levels, depending on the strength of the vacuum in the pump.
Research shows that pumping is more efficient at a maximum vacuum level during the expression phase, and I saw that by how quickly my milk came out and filled the bottle – and some of the storage cups too! You can find more information on how to use the pump in my video below. Watch this space for an article dedicated to breast pumping coming soon!
https://youtu.be/90muIYBraJc
Ayla was six weeks old when I introduced the bottle and she took to bottle-feeding like a duck to water! No child of mine refuses food, no matter how it is presented (well except for my middle one who is still fussy at eleven years old). 😉
The MAM Breast Pump supplied us with two Easy Start anti-colic bottles and Ayla only struggled a little bit with the slightly bigger bottle but she got the hang of it quickly afterwards. It may be worth going for a range of bottles and then finding the one that suits your baby. We were happy with the bottles MAM provided us and even though we need a bigger size now, Ayla mostly breastfed anyway so we didn’t use bottles that often. If you bottle-feed, you’ll likely need a few to hand and in the changing bag to keep up with demand.
Storing breastmilk
The MAM breast pump comes with storage pots to store milk, but some pumps offer storage bags that you can pump directly into and which come already pre-sterilised so you can just pop them in the freezer afterwards. To store breastmilk using a storage bag, lay flat on top with a sheet of kitchen roll in between to prevent sticking to the freezer or to another storage bag.
Freezing the milk flat allows breastmilk to defrost quicker too. When you need to use the milk, let the bag thaw in the fridge or at room temperature. You can also place the bag in warm water or hold it under cool running water, gradually increasing the warmth of the water to increase the temperature of the milk.
The rule of thumb is untouched breastmilk is safe for your baby if it has been sitting at room temperature for four hours or less. If you know you will not use it within four hours then stick the milk on the bottom shelf at the back of the fridge where it can stay for up to eight days, but it’s best used within four.
Breastmilk can stay in an insulated cooler with an ice pack for up to 24 hours but if you will not use it for longer than eight days then stick it in the freezer within twenty-four hours of pumping or four days from the fridge and it will be good for around nine months If you have a deep freezer or a chest freezer you should be able to freeze milk for up to one year.
Some storage bags to try
Medela Breast Milk Storage Bags, 100 Count, Ready to Use Breastmilk Bags for Breastfeeding, Self Standing Bag, Space Saving Flat Profile, Hygienically… Buy from Amazon here.
Lansinoh Breastmilk Storage Bags, 200 Count Value Pack, Easy to Use Milk Storage Bags for Breastfeeding, Presterilized, Hygienically Doubled-Sealed, for Refrigeration and Freezing, 6 Ounce. Buy from Amazon here
Compress for your breasts
I had an unfortunate experience with self-diagnosed mastitis where my left boob was warm to the touch and painful when feeding because I wasn’t emptying my boob properly. I thought I had the flu as my body temperature was out of whack and I was shivering. But I had read somewhere that the more you feed off the affected breast the better you feel, and I did start to feel better.
It turns out that mastitis that goes away on its own with no antibiotics is a mild form of mastitis, which means… what the heck does full mastitis feel like!?
Lansinoh TheraPearl Breast Therapy Pack, Breastfeeding Essentials, 2 Pack – Buy from Amazon here
Baby soothers/dummies/comforters
My babies have never taken dummies or soothers before, nor did they have comforters – they just didn’t want to know. They were much happier using my breast as a comforter until they were old enough to use bottles. Parents use dummies to help soothe and calm their babies, but sometimes it gets to a point where they aren’t able to get through the day without using a dummy. Some parents strongly disapprove of using them.
I have no judgement towards them and if my kids had used dummies I probably would have controlled the time my babies would have used them, i.e. only at night or only after feeding etc. And, in fact, my third baby sucked her thumb which I think is worse because you can take a dummy away but you can’t take their thumb away.
Sterilise your equipment
It’s important to sterilise all of your baby’s feeding equipment, including dummies, and milk bottles until they are at least 12 months old to prevent your baby from infections like diarrhoea and vomiting.
Clean your equipment with hot, soapy water first and as soon as possible after feeds before you sterilise. I used the Tommee Tippee Steriliser which is very simple to use. I placed all my feeding equipment, including my breast pump into the dishwasher and once the cycle was over, I placed the items in the steriliser, added 80ml of water and then turned it on. It will take around five minutes to sterilise. I left it to stand for one minute and then the items were ready to use.
Tommee Tippee Advanced Steam Electric Sterilizer for Baby Bottles, Kills Viruses and 99.9% of Bacteria, 5-Minute Sterilization Cycle – Buy from Amazon here
Prepare for the moving and weaning stage
Between 4 and 6 months, your baby will start to become much more active. You’ll find that they are more comfortable on their tummy and they’ll work towards doing mini push-ups, holding their head steady and strengthening their core muscles. Tummy time is important from the first few weeks, as it helps babies to build strength in the neck, back and abdomen. Rolling is an important milestone for most parents who have been wondering what to expect at 5 months. It’s common for babies to roll from their tummies to their backs first. As they become more confident, they’ll learn to roll back. At five months, they might also be able to sit briefly with your help and they’ll be more aware of sounds and noises.
Depending on your baby, you will also think about weaning them onto food. My eldest was almost seven months when he started nibbling on food for the first time and he was built like the Michelin man and my middle one was on three-course meals plus breastmilk by six months and he was built like a rake!
This is where instinct and following the baby’s lead comes into play. If they’re reaching for your food and sticking it in their mouth, they’re most likely ready. There are two ways you can start them on food, either pureeing everything and adding water or breastmilk/formula or following the Baby Led Weaning route, i.e. leaving sticks of food on their tray and allowing them to touch, feel and taste the food themselves.
I followed the baby-led weaning route with all four kids. But variety is the spice of life so I also introduced pureed foods using my super-duper Babymoov Nutribaby+ which is a steamer and blender in one. It’s the perfect size for little homemade meals.
Babymoov Nutribaby Plus 5 in 1 Nutritionist Approved Food Processor with Steam Cooker, Multi-Speed Blender, Baby Puree Maker, Warmer, Defroster, Steriliser – Buy from Amazon here
Be prepared for all the food mess though!
Using a highchair
Before you use a high chair make sure your baby is ready to sit up on their own first – usually around six months. Then finding the right highchair is paramount to having a pleasant experience during meal times.
Make sure the model you use is safe, durable and easy to clean. Get recommendations from friends and family to see if there is a running favourite or look online for reviews. Look for functionality, i.e. can you operate the tray with one hand? Does the highchair lock into place when in use? Is it space-saving and easy to fold up? And can it grow with your baby? Does it have a five-point safety harness and is it comfortable for your baby?
Preparing for arrival of baby – Prepare your bathing area
I love bath time – it’s a soothing, calming, relaxing and clean way to bond with your baby. At first, you only need to bathe them once or twice a week. After that, and when they attend playgroup or classes, then you may want to bathe them every other day or every day. It’s great to get into a routine of bathing every night before bed so the baby gets the trigger that bedtime is coming.
Baby bath
From newborn to around three months you can use a baby bath or a top and tail designed to keep the baby safe while you bath him/her. From three months onwards you can use a normal bath. Click here for more information on how to bath your baby.
Bath toys and entertainment
Bath toys are a great way to entertain your baby and distract them when you’re washing their hair and cleaning their bits. There’s not much a baby can do at the beginning than watch, so toys that are bright, flashy and colourful to begin with would work. Singing to your baby is also a great way to bond and play with them.
Then around four months, you can encourage them to pick up bath toys that float in the bath and then make noise when they’re rattled. Water operated toys are good too as they encourage your baby to follow the toy as they whizz around in the bath. When they are a bit older teach them the alphabet with floating letters and numbers.
They may not understand now, but soon they will spell out words and messages to you with the letters. There are lots of educational and interactive toys available for babies so it’s worth shopping around and having a look. Use my top tools list to help you pick the best ones – these are tried and tested with four babies!
Baby shampoo and oil
You should not use any oils or lotion until your baby is at least one month old and, to be honest, there isn’t any need to bath your baby in anything other than water for the first four weeks, as they’re not exposed to too much dirt. After four weeks you can introduce baby shampoo and sunflower oil or coconut oil during and after the bath and when you’re doing your baby massage.
Try these highly sought after baby shampoos for baby when you’re ready to transition from water to soap:
Johnson’s Head-To-Toe Gentle Baby Body Wash & Shampoo, Tear-Free, Sulfate-Free & Hypoallergenic Bath Wash & Shampoo for Baby’s Sensitive… Buy from Amazon here.
Cetaphil Baby Wash & Shampoo with Organic Calendula ,Tear Free , Paraben, Colorant and Mineral Oil Free , 13.5 Fl. Oz. Buy from amazon here.
The Honest Company 2-in-1 Cleansing Shampoo + Body Wash | Gentle for Baby | Naturally Derived, Tear-free, Hypoallergenic | Fragrance Free Sensitive, 10 fl oz. Buy from Amazon here
Aveeno Baby Daily Moisture Gentle Bath Wash & Shampoo with Natural Oat Extract, Hypoallergenic, Tear-Free & Paraben-Free Formula for Sensitive Hair… Buy from Amazon here
Baby massage
Baby massages are great after the bath to soothe your baby to sleep. Baby massages can also help to improve weight gain and aid digestion, as well as improve circulation and ease teething pain. Watch this space for an article soon on how to do an effective baby massage. I did it with all four and I could see huge benefits.
Your baby is a blank canvas, so be prepared for your little one to pick up all sorts of bugs from the outside world. There’s nothing you can do to stop this from happening but you can prepare them as much as possible and offer them the best fighting chance to protect themselves against the nasty bugs.
Keeping your baby warm when it’s cold, ensuring you are eating a good diet if you’re breastfeeding, protecting them against unnecessary germs, i.e. not allowing others to kiss them on the lips or sick people to come near them, will help to protect your baby as much as possible. Make sure their vaccinations are up to date and you and everyone around baby get their flu shots every winter, so that baby is protected against the flu virus and other deadly diseases like measles.
From three months babies can have infant Calpol, from the time they have their first jabs. And when they have teething pain, Calpol helps to soothe their gums. But, there are some ailments that you may need to prepare for regardless of how protective you are of your baby.
Colic
If you’re unfortunate enough to have a baby with colic, then you’ll likely not be sleeping at night and the sound of your baby crying will make you want to reach into your ear and pull out your eardrums. Colic is defined as when your baby cries a lot but there isn’t an obvious reason why. Of course, all babies cry but a baby with colic will cry for more than three hours a day, three times a week for at least one week.
You may find that it’s really hard to soothe them when they’re red in the face and they clench their fists. It’s a horrible sight to witness, and your health visitor or doctor will advise you to hold or cuddle your baby when they’re crying, sit or hold them upright during feeds, wind your baby afterwards and gently rock them either over your shoulder or in their bed.
Bathing your baby in a warm bath may help too and try things like white noise or TV in the background to distract them. You can get anti-colic drops or herbal supplements which may help but make sure you obtain medical advice first and consult your GP if you’re worried and nothing seems to be working. You should also seek medical advice if you’re finding it hard to cope too.
Reflux
I have never experienced colicky babies, but I have had babies with reflux – not the same I know.
There are tons of information online on how to deal with babies with reflux, i.e. food from the stomach returns back up to the food pipe which causes heartburn. In babies, you’ll find them spitting up milk or being sick shortly after feeding, and they will cough or hiccup when feeding.
They may even become unsettled and cry due to the pain. All of my four had reflux at varying levels. My eldest was the worst and had silent reflux (meaning he didn’t bring up milk or be sick). Sometimes we would have to rock him at 3 am to get him to sleep after a feed and it could take hours. The doctor prescribed us Infacol which we were convinced made no difference, but after about three months he got much better.
My second would bring up everything he ate, but he was a happy baby and the reflux didn’t seem to affect him. My third one sits somewhere in between. She spits up occasionally and as she used to click during feeding in the first couple of months, she would swallow a lot of wind and then we would spend a good ten minutes rubbing her back to burp her. She was a little burpy but she seemed to just get on with it.
Remember that it’s important that if your baby has reflux, you don’t change your diet during breastfeeding, that you do not raise the head of their cot or Moses basket and you ask your health visitor for advice and support. Hold your baby upright during feeding and for as long as possible after feeding and consult your doctor if symptoms don’t improve after trying to ease reflux, your child gets reflux for the first time after six months old, they’re older than one and still have reflux or they’re losing or not gaining weight.
Cradle cap is very common, all four of my babies had it. It is a harmless skin condition that usually clears up on its own. There are things that you can do to make it better. You can wash your baby’s hair regularly with baby shampoo and gently loosen the flakes with a soft baby brush and you can also gently rub coconut oil to soften the crusts.
My eldest had eczema too and even though we were advised to use a cream, we ended up leaving it and it cleared by itself. Sometimes it’s worth leaving cradle cap and mild eczema to clear up by themselves. But if you’re concerned or it’s getting worse, contact your GP for advice. Sometimes you will find your baby has a milk rash, especially after feeding. This could be an allergy, so it would be worth speaking to your GP about the cmpa rash too.
Items you should have to hand
Healthcare set
A healthcare set will contain all the items you need to get you through the first year at least for optimum baby care. A general healthcare set will include:
Digital oral thermometer
Nasal aspirator – to decongest your baby’s nose as they can’t clear the mucus on their own
Toothbrush
Emery board for filing nails
Nail clippers
Scissors
Brush
Comb
Baby Healthcare and Grooming Kit 19 In 1, Baby Healthcare Kit Newborn Boy Girl Gifts Baby Grooming Sets for Newborn, Grooming kit for baby Nursery Care Set Nail Clippers Trimmer Comb Brush Thermometer – Buy from Amazon here
Painkillers
Make sure you have infant Calpol to hand and then later Ibruprofen if your baby has a fever or is in pain from teething or other ailments.
Vitamin D Drops
Vitamin D drops are really important to boost your baby’s immunity and if you’re in a country that doesn’t see much sun then you and your baby may be deficient in vitamin D and there is even more reason to take vitamin D drops.
Prepare for the jabs!
The dreaded jabs! Unfortunately, we have to go through them and even though they are gruesome, first immunisations are one of the best ways to protect your baby against diseases like measles, tetanus and meningitis. Your baby will have injections at eight weeks, 12 weeks, 16 weeks and then one year and the first one is nasty (3 jabs and 1 oral!) Your baby will get the following:
Hib/MenC vaccine given as a single jab containing vaccines against meningitis C (1st dose) and Hib (4th dose)
MMR vaccine (measles, mumps and rubella), given as a single jab
PCV (pneumococcal) – 2nd dose
MenB vaccine – 3rd dose
Bring Calpol and lots of cuddles – you and your baby will need it!
Prepare for teething
Teething can be the bane of parents’ lives and it seems to go on forever when the process starts, which is generally between as young as two months and 24 months. You’ll find when teething starts the baby will become irritable and their gums will be swollen and tender. Babies will want to put objects and fingers in their mouths to reduce the discomfort and their cheeks may become red. You may even find that they will have more nappy rash because their poos become acidic and they have a slight fever and/or diarrhoea.
Help, my baby’s teething! What do to here
There’s nothing you can do but ride the process and help the baby get through it until their teeth come through. Increased drooling means they will need a bib, so make sure you have some to hand wherever you go. Calpol is great to reduce the temperature when their fever runs high and teething toys can help to soothe their gums.
All three of my kids starting teething very early so I gave them teething rattles which worked well and then Bonjela or Ashton and Parsons from six months. When they got older I used to freeze fruit and place them in protective nets for them to suck on which they enjoyed. Plus it helped soothe their gums and worked well for Baby Led Weaning too!
Accessories to help with teething
Smily Mia Penguin Buddy Never Drop Silicone Teething Toys for Babies 0-6month,Infant Hand Teether Pacifiers for 0-6Months Breastfeeding Babies, Easter Baby… Buy from Amazon here
Look after yourself
So, you’re looking after the baby, and you’re looking after the whole family but you forget to look after yourself! This is normal but needs to be rectified ASAP. Don’t forget that you’ve also gone through trauma so it’s important to take time for yourself too to nurse your mind and body back to health. Take it from me, a mother’s mental health is so vitally important otherwise your baby cannot flourish and grow. Welcoming a new baby to the family is exhausting, but there are coping strategies. Ask for help, accept offers of help if friends and family members want to muck in and try to rest while your baby sleeps.
https://www.instagram.com/p/COffqC7l3kb
Read about my mental health story with my traumatic first birth here
Start the process by taking the time to heal after birth. Don’t rush the recovery and listen to your body. Surround yourself with your support network and get help when you need it. Then when you are ready you can focus on your post-baby body.
Here are some other tips to help you be kinder to yourself:
Be kind to yourself during breastfeeding if that’s the path you take because it’s hard (see my Instagram post above). Remember you are more than a milk machine!
If you smoked before and stopped during pregnancy, please do not start again! Consider other alternatives. CBDfx is committed to using 100% organic, non-GMO, hemp plants. Meaning this is a cleaner, more discreet, alternative, that will keep you on track toward your health goals.
Stay hydrated. I’ve since bought a sports bottle which encourages me to chug because it looks so cool. You can try this customizable Yeti bottle to help you drink throughout the day.
Exercise is important
I had my baby in September, so I gave myself Christmas to enjoy and indulge in the Christmas food and then in the New Year, I would start my diet and exercise and get my life back to normal. It’s February and I’ve worked out a total of three times! You may find you won’t have time to hit the gym so home workouts are good or you can find classes where you can incorporate baby into new postnatal exercises.
There are tons to choose from on YouTube alone, but my favourite is still Shaun T Beachbody.com and the new Jericho Matthews 100 workouts which I have been working through – I am so unfit at the moment but it will come 😊 When I change the pram to a stroller I will start to run in the park which I am really excited about, as that’s a great way to exercise too plus baby gets some outside space.
You’ll naturally exercise when you’re picking your baby up and down so you may end up with a bad back if you’re not using the correct stance. Percko gifted me an innovative posture t-shirt that uses explosive elastic to remind me not to slouch and ultimately solve my lower back pain, which has grown over the years because of slouching when picking up and putting down heavy kids.
The design uses a patented ‘TENSOR technology’ to signal me when I’m hunching by applying light pressure on the lower back and shoulders when needed which naturally pulls me back into a more supportive posture. The Lyne Up* comes in black and nude and is a stylish undershirt that fits under any top.
How to be an active mum – find out here!
The right exercise outfits will help
Your bits will be wobbly so it’s important to be protected and wear the right clothing to help you exercise. The Lyne Fit* works just like the Lyne Up but offers extra protection from harmful shocks while exercising to readjust the spine.
The top also frees up the diaphragm for healthier and easier breathing and slows down muscle fatigue thanks to better blood circulation. Check out the image below of me exhausted but feeling very supported with the Lyne Fit top. You’ll have to take the whole top off to breastfeed though!
LyneFit top from Percko and Focus Full-Length Mulberry Plum Sports Leggings from Love Leggings
Fully supportive workout trousers are a must and my favourite at the moment is my Love Leggings Focus Full-Length Mulberry Plum Sports Leggings* which are flexible enough for me to stretch during yoga. They’re supportive too, so I can feel my waist is cinched in when I’m doing ab work.
They’re also breathable so I stay cool and dry when sweating through my cardio exercises. Check out my super cool leggings in thunder thighs in the image above. I plan to get back to my Size 8 figure this lifetime, although I haven’t started yet. So, I better get a move on!
It’s worth investing in proper clothing to work out as you’ll feel more supported and comfortable, which means you won’t shy away from exercise the next time.
Prepare for hair loss!
I have very thick curly hair, which was thinning just before I got pregnant with my third baby. Then when I got pregnant again, my hair became really thick and glossy again. Now Ayla is four months old, I have noticed that my hair is falling out again and I’m upset because I loved how voluminous it got. My hair is still thick, but at the rate, it’s falling out, my hair will soon become thin and straggly again.
Thankfully I was gifted a beautiful set of Pure Diamonds Line Espresso Black Clip in hair extensions from Rubin Extensions*, to cover up the shortfall! I will be publishing a video shortly on how to get your hair from curly mop to super thick straight hair using the clip-in extensions very soon so please watch this space!
Look out for signs of postpartum depression
First year with baby is the hardest. Having a baby with kids is hard. First year with baby is hard on marriage. So when you’re feeling down in the dumps and sleep-deprived soon after birth, especially when you feel you’re by yourself. it’s normal to feel overwhelmed at your impending new normality as a new parent.
But, if the ‘baby blues’ don’t seem to be fading away and you feel down in the dumps for longer than two weeks then you may need to seek further help for postnatal depression (PND). PND can be mild or severe and affect you in different ways. You may feel constantly low and/or lose interest in the world around you. You may feel tired all the time or not be able to sleep. You may even feel like you don’t want to or can’t look after your baby, and you have scary thoughts, perhaps about hurting your baby or considering suicide or self-harm.
After my eldest’s birth, I suffered from panic attacks for about six weeks afterwards and had horrible thoughts about someone stealing my son or him falling off our balcony. Unrealistic as it sounds they seemed very real to me and the thoughts would linger and result in panic attacks.
I remember unlocking and locking the balcony door and front door and going around to make sure all the windows were locked to minimise any chance of Aron falling or being stolen and then when I went to bed I would think about how he may climb out of his cot (at four weeks (!)) and fall on a knife by accident. I suffered in silence for about six weeks until I consulted a very close friend of mine and she said;
“Well, I suppose you’re probably just being a protective mother, right? You’re trying to cover all bases. But it’s unlikely that will happen you do know that?”
It was then I realised that something may have been wrong with me. However, my friend’s words also resonated with me. “A good and protective mother, but what I’m thinking is unrealistic” That was nine years ago and I never sought help for my thoughts. I somehow managed them and they faded over time.
And nine years ago, neither myself nor my friend knew anything about PND. So, very occasionally, when I’m down for the night and my head hits the pillow I will have a sudden nasty thought that takes a while to cloud over with thoughts of something more positive like work, or going out somewhere with friends and family. But, I do know that I should have sought help. Don’t make the same mistake. Go see your doctor.
Prepare for entertainment
Right! Onto more fun topics, like entertainment. Entertainment is a huge part of play and baby development and I would strongly suggest that if you’re going to spend your money on what I call unnecessary necessary things, spend it on educational toys or entertainment that will make your baby happy. Not all toys are unnecessary though. Here are some items that I think your baby shouldn’t live without:
We have a Tippy Toes Musical Mobile from Clair de Lune* which Ayla loves to follow when I’m changing her nappy. When she wakes up from her nap, she also likes to stare at the pretty pink hearts and ballerina. It plays a soft lullaby to help her drift off to sleep too.
Black and white patterns
Babies see in black and white, to begin with, and from about four to six weeks they start to see other colours. But, developing their eyes can allow them to appreciate colour sooner. The visual contrast between black and white will also encourage babies to explore different textures and patterns and provide a multi-sensory experience, as well as helps to focus their attention and enhance their levels of concentration.
Skip hop activity gym
Tummy time should start from when your baby is a newborn, even if for a few minutes at a time. Placing babies on their front encourages their muscles and neck to develop and get stronger and eventually by about four months your baby should be able to lift their chest off the floor and lean on their elbows. But tummy time can be enhanced with some visual patterns on the floor and above to encourage them to look upwards.
Activity gyms work for this reason. They improve hand-eye coordination, stimulate the baby’s senses, boost cognitive development and encourage freedom and movement. We have a lovely activity gym from Skip Hop* where Ayla regularly likes to chat to the animals, especially the fox who moves his head when he hears Ayla babble.
With this gym, you have three modes of use; babies on their back, tummy time and sitting up. You attach the arch above for overhead play, then bring it down for tummy time or to a seated floor activity centre. There are 20 developmental activities you can do to entertain your baby and you can even slip your phone behind the mirror to record the fun. The sound-activated dancing fox seems to be Ayla’s favourite though.
Other baby gyms
Fisher-Price Baby Playmat Deluxe Kick & Play Piano Gym with Musical -Toy Lights & Smart Stages Learning Content for Newborn to Toddler. Buy from Amazon here
Sensory toys and books
I always try to go for toys which are educational and sensory-based, i.e. they have lots of different shapes, textures and colours to expand the baby’s mind. Lamaze make some great toys – the boys used to enjoy playing on the Lamaze Space Symphony Activity Gym, which covered all aspects of development – the black and white patterns, the motion of the arches, the different smiley animals and lots of things to grab and pull.
The activity gym grew with the boys and eventually, we took off the items and they carried them around like toys. We also loved soft sensory books that have tags made of different materials for smashing, squashing and eating. We landed onto normal books but the kids enjoyed being interactive with their toys.
Rattles are great to start off with as they can double up as teething rings too. Things that make noise are great for introducing music and sound. Ayla loves her Lamaze caterpillar and teething rattle, as well as her array of soft playbooks which I read regularly to her. She seems to love me reading her “That’s not my unicorn” book where there is a different texture for her to feel on every page.
I read a lot to the boys and my eldest started reading from age three. My middle one started speaking very early as he learned a lot from his older brother. Stimulation, interaction and continued surrounding change all helps to develop the mind. Expose your babies to new things all the time and invoke all of their senses, then see how they grow.
Dens/Play area
To expand on enhancing their development I always wanted to provide the boys with a den because the one in their old playgroup was amazing. It was a large dark sensory tent which contained lava lamps, flashing lights and soft music. It was so soothing that I never wanted to leave that place, so, I decided to create my own 😊 I plan to do the same with Ayla too, so watch this space!
Bouncer
We have had a bouncer for all three kids as we believe that bouncers are a great way to strengthen, stretch and build a baby’s legs in preparation for crawling and walking. It also gives them a sense of balance and it’s a great exercise for them too. A bouncer seat is great to use from day one as the seat can be a great place to lay your newborn so you can free your hands.
I bring my Chicco Swing Relax&Play* into the bathroom when I shower as I know Ayla is protected by the three-point safety harness, entertained by the music and the hanging animals in the arch and soothed by the gentle rocking motion of the seat. There are five different speeds and you can choose the rhythm in which your baby rocks by how fast or slow they sway.
The Lamaze cubes have travelled everywhere with us!
Bumbo
Ayla has just started using the Bumbo at four months for a few minutes at a time, but I’m on the fence about using a Bumbo so early. The Bumbo is designed to help babies as young as four months learning how to sit, but I think that sitting upright at this time may be a bit immature and cause unnecessary strain on their pelvic area. And, in fact, I found this review from Kidspot which confirmed my concerns. Having said all of that there is no reason why you can’t use the Bumbo for a short period. At least you get some free time for three minutes!
Prepare for travel
Onto travel! Because inevitably you’re going to travel with your little one, whether that be to the shops, to baby classes, to school runs or for a walk. I find that the more alternative methods you have for travelling with your baby, the more likely you’ll stay out – and venturing outdoors is far more beneficial than being cooped up indoors all day. So, first things first. You’ll need a good travel system!
I have the Uppababy Vista 2019 travel system kindly gifted by my sister and which includes a carrycot for use with a newborn up to around four months, a stroller for use after four months, a car seat and other accessories like a rain cover and a cup holder (thanks sis!)
The Uppababy is a bit of a beast and looks like a large high-quality palace for your baby. But you may be better off getting something smaller. I absolutely loved my boys’ Phil and Teds Sports double buggy and should have gone for the single version instead as it was so nimble. I may consider getting it for my new running buggy sport, but let’s see how the Vista fares in the park when running first!
Baby carriers
I didn’t use baby carriers nearly enough with the boys and I sooo missed out. I reviewed the Lifft Baby Sling for MadeforMums from when Ayla was about two weeks old and I fell in love with it.
It was a bit of a learning curve to create the wrap but once I got the hang of it, it was pretty much wrap and go. Plus the sling looked like a t-shirt. Sadly Ayla has grown out of the baby sling now as she’s massive and I’ve gone back to my super-duper Babybjorn Baby Carrier One* which I used to use on the boys from when they were six months old.
The one I have now is a Babybjorn Baby Carrier One* and it’s awesome! It’s ergonomically designed so you don’t feel the weight of the baby when you’re walking around. In fact, I travelled to Winter Wonderland by tube with the family using the Baby Carrier One and I walked around, got back on the tube and headed back home all with the baby carrier on and Ayla asleep the whole time. The journey took around five hours and I didn’t feel any back pain or discomfort.
The clips may be a little tricky to slot into place, but other than that, it’s the best baby carrier by far. I still use it to walk Ayla in the school run and find it a lot easier to travel hands-free. And as we’re deep in the throes of winter, I have an awesome 3 in 1 maternity coat by Seraphine which has an attachment that is built entirely for going over the baby carrier, so Ayla is even more protected than when she is in the pram.
Other baby carriers
Infantino Flip Advanced 4-in-1 Carrier – Ergonomic, convertible, face-in and face-out front and back carry for newborns and older babies 8-32 lbs. Buy on Amazon here.
Other things to think about
How to prepare for a baby financially
We parents spend over £900 (£944.47 to be precise) on baby products!
I won’t go into it in too much detail here, but you need to think what to buy before your baby arrives. It may not feel you spend that much on your baby at the very beginning, but once you factor in the above equipment, the expense could hit the thousands. I have written an article on how to plan your baby budget before birth and have an archive of money topics that will help you to understand what your costs are before you spend.
Whether you like it or not, your relationship with your partner is going to change. You’ll have less time for each other and your nerves will be frayed from lack of sleep and too much going on, so you’re also going to argue more.
It’s important to understand that you are in it together and you make a team, even when you don’t feel like it. Try to spend some time with each other when the baby is asleep and get back that intimacy because your relationship shouldn’t change towards each other. Here are some things to discuss before your baby arrives:
Preparing for the arrival of a baby involves open communication and aligning your expectations with each other. Here are some things to talk about before baby arrives:
Parenting styles and values
Your parenting styles may differ so it’s important to discuss what it looks like to you when raising your baby. Talk about things like discipline, routines and the important values you want to instil in your child.
How will you divide your responsibilities?
How will you share your childcare duties? Who takes care of the household chores and who’s responsible for financial matters?
Talk about how you will support each other and work as a team during this new chapter. Think about incorporating self care too and who you will seek support from when you take that time for self care.
Parental leave and work arrangements
What do the parental leave options look like for both of you and how will you manage work and childcare responsibilities around this?
Explore any flexible work arrangements that can benefit you both during this transition period.
Plan your finances
Review your finances and discuss any expensive adjustments that come with the baby – the baby comes with baggage! Think about childcare costs, medical expenses if you’re going private, schooling and savings for the future.
When it comes to childcare, think about whether you will hire a nanny, childminder or place your child into nursery. What aligns with your finances and your parenting values?
Work on your relationship
Like I mentioned before, your relationships dynamics will change after the baby comes. You will no longer be each other’s priority so you will need to make time to send together and support each other emotionally. Think about how you will balance couple time with families time so you can nurture your relationship.
The postpartum period will be tough
Talk to each other about your expectations and concerns during the fourth trimester. How will you support each other? Factor in self-care and mental health.
Nothing is set in stone, so the important point to note is to maintain an open and honest line of communication with each other. This is a tough period so support each other and show understanding. You are on the same team, even though sometimes it may not feel like it…
Prepare your relationship with your kids
Either your baby will slot right in or you’ll receive one heck of a culture shock. I found it way harder to go from one to two rather than two to three, but that may be down to age. I had my first two almost back to back (15 months) so I had two babies to look after for a while.
I had my third when my boys were seven and eight so they had more independence and they were also at school for most of the day, so most of the time I felt like I had only one. But, there are some other unforeseen issues that you may want to prepare for, like repeating the same sentences over and over again:
But, truth be told, my boys are amazing at looking after their sisters. My eldest is very loving and my middle one is very protective. In fact, during the boys’ school fair, I had to collect some alcohol that my boys had won for me (#modelparenting) and I left my baby girl with a good friend whom I trusted. When I went to collect my daughter my friend pulled me over and said:
“Your son stared me down for a full five minutes while you were gone and when I asked why he was staring at me like that, he replied with, ‘Why do you have my sister?’ I mentioned that I was babysitting her until mummy came back and he nodded in agreement but continued to stare at me with daggers in his eyes.”
A friend
What more can a mother ask for than thoughtful protective older brothers like them?
The trick is – and you will get days when there will be fighting, especially as baby gets older and is less ‘cute’ in front of their eyes – involve them in everything you do, whether it be changing the nappies, reading a book at bedtime and/or bathing them and changing their clothes.
These everyday routines will make them feel as if they’re responsible for another human and it helps them to grow into very thoughtful and caring young people. I know my boys love their sisters more than anything so they are happy to help. Sometimes this may not always be the case in your family. If you find that there isn’t a relationship between the siblings, try and build one. Mention how amazing an older sibling they are and how their youngest sibling will grow up idolising them. They need to feel needed to respond accordingly.
Prepare for the noise
Having said all of that, prepare for a whole heap of noise coming your way! My boys play the piano, violin and guitar and they like to sing at the top of their lungs, even when their sister is sleeping. They also like to play loudly through roleplay and fight loudly too. Nothing you can do about it.
I keep shushing them and they keep apologising but the truth is, they’re kids and hopefully their sister will eventually be able to sleep through the chaos. In fact, I don’t think she can sleep if there isn’t any noise at all! Hmm… this may be where I’m going wrong at night… Maybe I just need one of the boys to shout repeatedly in her ear during the night to help her sleep… Or maybe I should just get a white noise machine, that might be better for my mental health – and hers.
Prepare for the lack of time to yourself
Do you watch your second cup of undrunk coffee get cold? Did you forget to eat or shower… or go to the toilet? Yep, as a mother of four, I’ve experienced all of this, including forgetting to sleep! It’s normal because babies are demanding. Life is demanding. My husband is demanding. Be prepared to hold everyone’s hands but find that your hands are empty. Be prepared to drop everything at the drop of a hat, but mould your timetable towards your family’s.
Just roll with the punches, kids get older and they become more independent. And believe me, at eleven and twelve my boys need fewer cuddles and less mummy time and it hurts my heart sometimes. I’m thankful that I have a toddler and a baby who takes the love I want to give because once they get older you’ll wish you could hold their hand instead of drinking your hot cup of coffee. Kids grow up too fast. ☹
What my dad meant is that new babies, especially your first baby comes with all heaps of new experiences and rewards.
You probably won’t foresee this but you’ll end up learning a lot about yourself and revisiting memories from your own childhood. The first time I went to visit Santa with my eldest, it reminded me of the time when I went to see Santa and how much I loved Christmas when I was young.
It’s going to be one of the times in your life when your inner child will take over. I love going to soft play with my boys and crashing into the soft mats and singing at the top of my lungs to Disney songs and playing with rattles and musical toys. Utilise this time with your kids to be a kid yourself. It feels amazing!
Also if you’re the first one in your friendship group to have kids, then you’ll find that your priorities have changed. Make some friends with mums of kids of similar ages and use this as an opportunity to broaden your social circle. But, remember who you were before you had kids. Having a child should only enhance your character, not change it – or define it.
Preparing for baby – things to do before giving birth – Prepare your camera for lots and lots of pictures and videos!
A picture is a thousand words but a video is worth a million. I used to take a lot of pictures of my boys and frequently ordered editing newborn photos services until someone said to me that taking a video will capture their character forever, so now I take millions and millions of pictures and videos!
Make sure you back them up safely. I use Dropbox as it is safely stored in a cloud and then I back up the pictures in Google Photos and then my own PC harddrive. So if I lose a file from one place, I have it in another place. I constantly look back over when my boys were young and it’s so nice to reflect on not only how much they’ve grown but how much you’ve grown as a parent too.
Also, it’d be a nice addition to get a baby’s first year scrapbook or a journal to record a baby’s first year milestones. They make for such nice keepsakes and you can show them to baby’s first boyfriend or girlfriend, when they get older as leverage 🙂
Twelve years ago – very first image of us as a family
Four years ago at Christmas – the boy in blue was the boy in the image above taken twelve years ago!
Family of six!
Preparing for your baby’s arrival – It will be the most adventurous time in your life
I haven’t talked about baby-proofing the apartment, the dreaded mum guilt if you’re going back to work or deciding to stay at home, or the opinions you’ll get from everyone and their mum on how to raise your own baby! I also haven’t talked about all the presents you’ll get for your baby, but not always necessary for you – in fact, you may hardly receive any presents for yourself as people will think a present for a baby is a present for you! Yup. You no longer exist.
The cuddles you will get from your baby during the first year is indescribable and incomparable to anything else you will have experienced in your life. It makes the uncomfortable pregnancy, the painful birth, the cabin fever, the sleep deprivation, the nappy changing and the feeling of uselessness all disappear when your baby first smiles at you, laughs at your jokes and gives you the biggest cuddles. Then you’ll know why you did all of this in the first place. You are a parent now and it’s the best job in the world! Go enjoy it 😊
So that was my very extensive guide on how to prepare for your baby arrival. I hoped this guide on how to survive first year with baby was useful. Well done if you made it all the way through all the milestones! Please share it around with new parents and write in the comments below if I’ve missed something. I’d like to make this guide interactive and comprehensive so please share your thoughts on what to expect for the first year.
Congratulations and I hope the first year goes well for you. Coffee helps 😊
Check out the full video below!
https://youtu.be/90muIYBraJc
FAQ
What is the best thing you ever did when preparing for your newborn’s arrival?
Preparation is key! Try to set up your support network and your newborn station, i.e. changing station, portable bed like a moses basket and lots of snacks and water so you can get relaxed in one station while you feed and change the baby and, of course, while you recover.
What were some of the unnecessary items you’ve bought while preparing for your baby’s arrival?
We have bought too many unnecessary items over the years. Some of which are toys that your baby can’t use until they’re at least 6 months. Leave those purchases for when they are ready to use them.
Are there any unique concerns that first time fathers should be aware of when preparing for the arrival of their child?
Fathers are unsung heroes during this time and can provide the most amazing support for mum and baby. Check out the article below from a dad of four on how he managed a baby and work at the same time.
Before your baby is born in the UK, there are several legal matters and administrative tasks you should consider. Here are some important legal things to do before arrival of a baby:
Registering the birth
Registering the birth actually happens after your baby is born, where you must register their birth within 42 days at the local register office.
To register, you’ll need to pick up a birth registration form from the register office and provide necessary information, such as the date and place of birth.
Arranging parental leave and pay
You should get your entitlement to parental leave sorted through your employer or government schemes while you’re pregnant, to make sure entitlement starts as soon as baby is born.
Familiarise yourself with the eligibility criteria, notice requirements, and any necessary documentation.
Applying for child benefits
Consider applying for child benefits, such as Child Benefit and Child Tax Credit. You can apply online through the government’s official website or request an application form from the Child Benefit Office.
Understanding parental rights and responsibilities
Make sure you know what your legal rights and responsibilities are as a parent in the UK. This includes custody, guardianship, child maintenance and financial obligations.
Investigating childcare options
Think about potential childcare providers, such as nurseries or childminders, you’d like to use if you need to go back to work. Learn about the regulations and requirements they have in your area.
Considering life insurance and protection policies
Review existing life insurance policies and consider increasing coverage or obtaining additional protection for your growing family. Consult with insurance providers or financial advisors for guidance.
Understanding employment rights
Familiarise yourself with employment rights and entitlements related to maternity or paternity leave, flexible working arrangements, and parental rights in the workplace. Contact Citizens Advice for more information.
How can parents prepare themselves physically and emotionally for their baby’s arrival during pregnancy and before childbirth begins?
Other questions asked were:
How do I prepare for my first baby?
My partner and I are pregnant with our first child What are some things we should do to prepare for the baby’s arrival?
Preparing both physically and emotionally for your baby’s arrival is crucial during pregnancy. Here are some suggestions to help you prepare yourself for your beautiful bundle of joy:
Physically:
Attend regular prenatal check-ups with your midwife/doctor to monitor your health and the baby’s development. You can discuss any concerns or questions you may have too.
Eat a healthy diet and focus on nutritious foods to support your own health and the development of your baby. Include a variety of fruits, vegetables, whole grains, lean proteins, and dairy products. Stay hydrated and discuss any dietary restrictions or specific needs with your midwife.
Exercise regularly and safely, but make sure you consult with your midwife/doctor about suitable exercises, such as walking, swimming, prenatal yoga, or gentle stretching. Exercise can help maintain strength, flexibility, and overall well-being during pregnancy.
Get enough rest because pregnancy can be physically demanding. So make sure you prioritise rest and sleep. Listen to your body and rest whenever you can.
Attend antenatal classes that cover topics such as labour, delivery, and newborn care. These classes provide valuable information and techniques to help you feel more prepared for childbirth and parenting.
Maintain open and honest communication with your partner throughout the pregnancy. Share your feelings, concerns, and expectations, and work together to create a support system for each other.
Reach out to friends, family, or support groups for emotional support. Connect with other parents-to-be who can relate to your experiences. Consider joining prenatal yoga classes or support groups to meet others going through similar journeys.
Identify the people who will be your support system during and after childbirth. Discuss your birth plan with them, and make sure they are aware of what you’re planning
Practice self-care to help you relax and recharge. This may include taking warm baths, practicing meditation or deep breathing exercises, engaging in hobbies, or receiving prenatal massages. Self-care is essential for emotional wellbeing during pregnancy.
Recognise that the postpartum period can bring a range of emotions. Prepare for this transition by arranging postpartum support, such as help with household jobs, meal preparation, or childcare. Knowing you have support in place can reduce stress and allow you to focus on bonding with your baby.
What to do a month before baby arrives?
Other questions asked were:
When to start preparing for baby arrival?
when should you start preparing for baby arrival?
When to start preparing for baby arrival?
How do you prepare for a newborn’s arrival into the world?
My wife and I are expecting to have our first baby in 6 months. How do I plan and prepare for it?
When should you start to prepare for a baby?
In the month leading up to your baby’s arrival, there are several things you can do. Here’s a preparing for birth checklist:
Get the nursery ready
Set up the baby’s cot, changing table, and other furniture.
Wash and organise baby clothes, bedding, and blankets.
Stock up on nappies, wipes, and other essential baby supplies.
Include items such as comfortable clothing, toiletries, nursing bras, and baby clothes.
Don’t forget your maternity notes!
Think about your birth plan
Finalise your birth plan and make sure your healthcare provider knows about it
Review and make any necessary adjustments
Attend antenatal classes
If you haven’t done so yet, it’s a good idea to attend antenatal classes as they teach you all about labour, pain management and newborn care
Get your support network and childcare ready
Make sure your chosen birth partner or support person is aware of their role and responsibilities.
Arrange for childcare for older children if necessary, both during labour and for subsequent hospital stays.
Install and check the car seat works
Ensure you know how to fix and take out your car seat as you’ll need it when the hospital discharges baby from hospital
Practice taking it out and putting it back in. Use IsoFix fastening where possible as they offer more security.
Set up postnatal support
Make sure you are available for all health visitor checks ups after birth
Attend local groups for new parents to make friends and get back out there
Lean on your support network for help when things get too much – it takes a village!
Prepare frozen meals in advance or stock up on easy-to-prepare dishes – cooking may become a challenge after the baby arrives. If people ask how they can help, request food!
Plan for the fourth trimester
Gather necessary supplies like maternity pads, nipple cream and comfortable clothing
Consider breastfeeding essentials too like breast pumps or nursing pillows
If formula feeding, stock up on formula and newborn bottles
Practice self-care and relaxation techniques
Take time to practice self-care like resting and recharging before baby arrives
Try meditation, deep breathing or prenatal yoga to help manage stress and anxiety
How much should I save before my baby arrives?
The amount of money you save depends on your financial situation, location and personal preferences as as well as any support systems you have available like the bank of mum and dad.
Some things to think about are:
The cost of basic necessities like nappies, wipes, clothing, feeding supplies, cot, car seat and stroller
Childcare costs like a childminder or a nursery if you need to go back to work.
Parental leave, so calculate how much income you may lose during this period and plan accordingly
Childcare costs: If you plan to use a nursery or hire a nanny, research the costs in your area. Childcare expenses can vary significantly, so factor them into your savings plan.
Parental leave: Determine if you or your partner will take time off work after the baby’s arrival. Calculate how much income you may lose during this period and plan accordingly to cover your expenses during that time.
Emergency fund: It’s always wise to have an emergency fund to cover unexpected expenses that may arise during your baby’s first few months. Aim to have at least three to six months’ worth of living expenses saved in case of unforeseen circumstances, if this is possible! We are living in a crisis at the moment so that can be super tough.
Future planning: Consider long-term financial planning, such as saving for your child’s education or setting up trust fund. While this may not be an immediate concern, having a plan in place can help you save gradually over time.
Fun things I do with husband before baby arrives?
Other questions asked were:
What is the most effective way for a couple to prepare for the arrival of a baby?
Before your baby arrives, take this time to spend it with your husband and strengthen your bond. Here are some fun things to do before the baby arrives:
Take a babymoon holiday!
If you can, try and take a babymoon holiday, even if it’s a short weekend, to relax and enjoy each other’s company before the baby comes and you are never alone again!
Choose non-baby activities, like sight seeing, beach relaxation or spa treatments, because heaven knows when you’ll be able to do those things again! I’m still waiting and my youngest is two…
Enjoy date night!
Make the most of your time as a couple and go on regular date nights. Explore new restaurants, watch movies, attend concerts and just have fun!
Or you can plan a special dinner at home. Cook a romantic meal together at home or surprise each other with your favourite dishes.
Take walks or go hiking
Enjoy the great outdoors by going on leisurely walks or hikes in nature because you have to lug a baby carrier or a buggy with you! Try to use this time to get some exercise and have meaningful conversations.
Attend antenatal classes together
This is a great way gain knowledge bond through this new chapter and prepare for your baby.
Consider a maternity photoshoot
A great way to capture the time together before baby arrives is during a maternity photoshoot. It’s your special time together before you share it with baby.
Things to buy before giving birth?
Other questions asked were:
Things to buy for baby arrival?
Things to have for baby arrival?
Things to prepare for baby before delivery?
What should I do to prepare for my baby’s arrival?
Things to decide before baby is born?
How can I prepare for my baby’s arrival when I have no money?
Preparing for arrival of baby is challenging when you’re short of money. But there are still ways you can look after your baby when you have limited financial resources:
Create a budget: Take the time to create a budget that outlines your income, expenses, and savings. Prioritise essential items for your baby and allocate funds accordingly. This will help you make informed decisions and ensure you’re using your available resources effectively.
Seek help from programs: Research and explore local government or community assistance programs that provide support for low-income families. These programs may offer assistance with baby essentials such as nappies, formula, clothing, and even furniture. Contact social service organisations or community centres in your area for information and resources.
Borrow or accept hand-me-downs: Reach out to friends, family, or local parenting groups to see if they have any baby items they no longer need. Many people are willing to donate or lend items such as cobs, prams, clothing, and toys. This can significantly reduce your expenses.
Focus on essential items: Identify the essential items your baby will need, such as a safe place to sleep (cot or bassinet), clothing, nappies, and feeding supplies. Prioritise these items and try to find affordable options or alternatives. Remember that babies grow quickly, so you may not need to invest in a large wardrobe right away.
DIY and repurpose: Get creative and consider do-it-yourself (DIY) projects or repurposing items you already have. For example, you can create simple decorations for the nursery or repurpose furniture for storage. Look for DIY tutorials online or seek inspiration from parenting blogs or forums.
Attend parenting classes: Many communities offer free or low-cost parenting classes that provide valuable information on baby care, safety, and budgeting. These classes can help you prepare for your baby’s arrival and connect you with other parents who may share resources or tips.
Build a support network: Reach out to family, friends, or local support groups to build a network of people who can provide emotional support and guidance during this time. They may also offer practical help or assistance with acquiring baby essentials.
Focus on the essentials: Remember that your baby’s well-being and love are more important than material possessions. Create a nurturing and loving environment by providing your baby with attention, care, and affection. Focus on creating a strong bond and meeting their basic needs.
Plan for the future: While it may be challenging to think about long-term financial planning when you’re already limited, consider setting small savings goals for your baby’s future. Every little bit counts, and having a long-term perspective can help you prioritise your spending and make informed financial decisions.
How do I prepare my toddler 3 years for the arrival of a new baby?
Other questions asked were:
What should you do to prepare a young toddler 15-18 months for the arrival of a new baby?
How do you prepare for another baby when you have a toddler?
Preparing your toddler for the arrival of a new baby is essential to help them adjust to the changes and promote a positive sibling relationship. Here are some tips to help you prepare your 3-year-old toddler:
Talk about the baby with your toddler well in advance. Talk about how babies are small, need extra care, and will be a part of the family. Use age-appropriate books or videos about new siblings to help them understand.
Involve your toddler and encourage them to talk to the baby, sing songs, or help choose items for the nursery. You can also let them feel the baby’s movements in your belly, if possible.
Show pictures and videos of when they were a baby. Talk about how you took care of them and how they have grown. This can help them understand that they were once a baby too and that the new baby will need similar care. Use simple and positive language to describe babies, such as “tiny,” “gentle,” or “needing lots of love”.
Role-play where your toddler can take on the role of a big brother or sister. Use dolls or stuffed animals to practice gentle and loving interactions with a baby. This can help them develop a positive attitude towards the baby’s arrival.
Read books about siblings and discuss the stories with your toddler. This can help them understand what to expect and learn about the joys of being a big brother or sister.
Visit friends with babies. This can give your toddler a chance to observe how babies are cared for and get familiar with their needs.
Establish routines and gradually introduce any new routines or adjustments well in advance to help them adapt more smoothly.
Reinforce their role as a helper and encourage them to help with age-appropriate tasks related to the baby. It can be simple things like fetching nappies or choosing a toy for the baby. This involvement will make them feel valued and responsible.
Spend quality time with them and engage in activities they enjoy, read books together, or have special outings. This dedicated time can reassure them of your love and attention, even after the baby arrives.
Set up a baby doll station and create a pretend play area with baby dolls, a small cot or bassinet, and age-appropriate baby accessories. Encourage your toddler to care for their baby doll, imitating behaviours they will see with the new baby, such as feeding, nappy changes, and comforting.
Demonstrate gentle behaviour and teach your toddler how to be gentle and kind to babies. Use dolls or stuffed animals to demonstrate gentle touches, hugging, or rocking motions. Praise and encourage their gentle behaviour to reinforce positive interactions with the baby.
Be patient and understanding that your toddler may experience a range of emotions, including jealousy or regression, after the baby’s arrival. Offer reassurance and extra affection during this transition period. Acknowledge their feelings and help them express themselves in a positive way.
How can I prepare my dog for the arrival of my baby?
Other questions asked were:
What can be done to prepare 4 inside dogs for the arrival of a new baby in the home?
My baby is due in two months and we have a rambunctious golden retriever How can we prepare our dog for the new arrival?
Preparing your dog for the arrival of your baby is important to make sure there’s a smooth transition and a safe and harmonious environment for everyone. Here are some tips to help you prepare your dog:
Gradual Exposure: Introduce your dog to baby-related sights, sounds, and smells gradually before the baby’s arrival. Play recordings of baby sounds, use baby products such as lotions or powders, and allow your dog to explore baby items like cots and strollers.
Obedience Training: Make sure your dog understands and responds to basic commands such as sit, stay, and leave it. Training your dog helps establish boundaries and reinforces their behaviour around the baby.
Establish New Rules: Determine the new rules and boundaries that will be in place once the baby arrives. For example, decide if your dog will be allowed in the nursery or certain areas of the house. Start implementing these changes gradually to avoid sudden adjustments.
Desensitisation: If your dog has never been around infants, gradually expose them to babies or young children. Arrange controlled interactions with friends or family who have infants, ensuring the safety and comfort of both the dog and the baby.
Changes in Routine: Gradually adjust your dog’s routine to reflect the upcoming changes once the baby arrives. For example, if your dog’s exercise or feeding times will be modified, start making those changes in advance.
Positive Reinforcement: Reward your dog with praise, treats, and affection when they show calm and appropriate behaviour around baby-related items. This positive reinforcement helps them associate positive experiences with the baby’s presence.
Baby Smells: Introduce your dog to the scent of the baby before bringing them home. Bring home a blanket or an article of clothing that carries the baby’s scent and allow your dog to sniff and become familiar with it.
Controlled Introductions: When the baby arrives, make controlled and supervised introductions. Keep your dog on a leash during the initial meetings and reward them for calm and gentle behaviour. Gradually increase the duration and proximity of the interactions based on your dog’s comfort level.
Attention and Exercise: Ensure your dog continues to receive attention, exercise, and mental stimulation. Set aside specific time for quality interaction and playtime with your dog, even with the demands of a newborn.
Seek Professional Help if Needed: If you have concerns about your dog’s behaviour or if your dog shows signs of anxiety or aggression towards the baby, consult with a professional dog trainer or animal behaviourist for guidance and support.
What are some good ideas for preparing a baby nursery for a newborn baby’s arrival?
Preparing a baby nursery for a newborn’s arrival is an exciting and creative process. Here are some ideas to consider when setting up a baby nursery:
Choose a Theme or Colour Scheme that reflects your style and preferences. Common themes include nature, animals, space, princesses, or a simple and elegant design. Use the chosen theme or colour scheme as a guide for selecting furniture, decor, and accessories.
Start with essential furniture items such as a cot, changing table, and storage options like a dresser or shelves. Look for furniture that meets safety standards and is durable. Consider the size of the nursery and choose furniture that fits comfortably without overcrowding the space.
Select a safe and comfortable cot that meets safety standards. Choose a mattress that is firm and fits properly within the cot. Decorate the cot with fitted sheets, a soft blanket, and a cot skirt that match your chosen theme or colour scheme. Avoid using bumpers, as they can pose a safety risk.
Install soft and adjustable lighting options in the nursery. Consider using a combination of overhead lights, dimmers, and task lighting. A nightlight can be helpful for nighttime feedings and diaper changes.
Install curtains or blinds to control the amount of natural light entering the nursery. Choose window treatments that provide both privacy and the ability to darken the room for nap times.
Utilise storage options such as shelves, baskets, or bins to keep baby essentials organised. Have designated spaces for nappies, clothing, toys, and other baby items. This will help keep the nursery clutter-free and make it easier to find things when needed.
Add personal touches to the nursery with wall decals, artwork, or framed pictures. Consider using removable wall decals to create a themed or customized look. Hang a mobile above the cot to provide visual stimulation for the baby. Place a comfortable chair or rocking chair in the nursery to create a cosy space for feeding and bonding.
Include soft furnishings like a rug or carpet to create a warm and comfortable environment. Opt for baby-friendly materials that are easy to clean and maintain.
Make sure the nursery is safe for the baby by securing furniture to the walls, covering electrical outlets, and removing any potential hazards. Install safety gates if necessary.
seek advice when needed, and enjoy the journey of welcoming your baby boy into the world.
When to pack hospital bag and install car seat?
Other questions asked were:
How do you prepare a hospital bag for baby delivery?
It’s a good idea to have your hospital bag packed and your car seat installed well in advance of your due date. Here are some general guidelines:
Hospital bag
Have you hospital bag ready by 37 weeks to allow you to be prepared in case your baby decides to arrive earlier than expected. Packing your bag in advance gives you peace of mind and ensures you have everything you need for your hospital stay. Scroll up for essential items you need in your hospital bag.
Car seat
Installing the car seat before your due date is important to ensure your baby’s safety and to be ready for the journey home from the hospital. Here are a few points to consider:
Select a car seat appropriate for your baby’s age, weight, and height. Make sure it meets safety standards and is installed correctly according to the manufacturer’s instructions.
Familiarise yourself with the car seat’s installation process. Read the manual, watch instructional videos, or seek help from a certified car seat technician if needed. Proper installation is crucial for your baby’s safety.
Install it in advance: Aim to have the car seat installed in your vehicle around the 35th to 37th week of pregnancy, so you have ample time to make adjustments, seek help if required, and become comfortable with using the car seat.
Consider having your car seat installation inspected by a certified technician. They can verify that the seat is properly installed and provide guidance if adjustments are needed.
How to prepare for birth of big baby?
Preparing for the birth of a big baby involves taking certain precautions and making necessary arrangements to ensure a safe and comfortable delivery. Here are some steps you can consider:
Regular prenatal care: Attend all scheduled prenatal check-ups to monitor the baby’s growth and overall health. Your healthcare provider will be able to assess the baby’s size and provide guidance accordingly.
Discuss with your healthcare provider: Talk to your doctor or midwife about your concerns regarding the baby’s size. They can offer insights and advice based on your specific situation.
Blood sugar management: If you have gestational diabetes or a history of it, it’s crucial to closely manage your blood sugar levels during pregnancy. High blood sugar can contribute to excessive foetal growth.
Stay active: Engage in regular physical activity unless advised otherwise by your healthcare provider. Exercise can help maintain a healthy weight gain and promote overall well-being.
Healthy diet: Focus on a balanced diet with nutrient-rich foods. Consult with a healthcare professional or a registered dietitian for personalised dietary recommendations.
Birth plan discussion: Discuss your concerns about having a big baby with your healthcare provider and develop a birth plan that addresses any potential complications or interventions that may arise.
Consider a specialist consultation: In some cases, healthcare providers may recommend consulting with a maternal-foetal medicine specialist or an obstetrician experienced in managing high-risk pregnancies to ensure appropriate care.
Support during labour: Ensure that you have a support person or a doula present during labour who can provide physical and emotional support. They can assist with various techniques to help manage pain and discomfort, but they can’t provide medical advice.
Be prepared for interventions: In the case of a suspected big baby, your healthcare provider may recommend an induction or a scheduled caesarean section. Understand the potential risks and benefits associated with these interventions and discuss them with your provider.
Do you have a preparing for labour and delivery checklist?
I will create an infographic, but for now, you can use the following basic checklist when preparing for arrival of baby:
Antenatal care
Make sure to attend all scheduled antenatal appointments and follow your healthcare provider’s advice
Discuss your birth plan, any concerns, and preferences with your midwife.
Maternity notes
Keep your maternity notes up to date and easily accessible.
Familiarise yourself with the information contained in your notes.
Birth plan
Create a birth plan that outlines your preferences for pain relief, labour positions, and any specific requests.
Discuss your birth plan with your midwife and include it in your maternity notes.
Hospital bag
Prepare a hospital bag in advance with essential items such as comfortable clothing, toiletries, and personal items for yourself and your baby.
Include items like nursing bras, maternity pads, and comfortable nightwear.
Birth partner/support person
Choose and inform your birth partner or support person who will accompany you during labour and delivery.
Discuss their role and responsibilities, and ensure they are aware of your preferences.
Childcare arrangements
If you have older children, make childcare arrangements for when you go into labour and during your hospital stay.
Transport to the hospital
Plan how you will get to the hospital or birthing centre.
Have a backup plan in case your chosen mode of transport is unavailable.
Pain relief options
Familiarise yourself with the pain relief options available to you during labour, such as gas and air, epidural, or TENS machine.
Discuss these options with your midwife and consider your preferences.
Education and preparation
Attend antenatal classes or workshops to learn about labour, pain management techniques, and newborn care.
Read books or access online resources about labour and childbirth.
NHS resources
Read up on the resources provided by the (NHS) regarding labour and childbirth.
Visit the NHS website or speak with your midwife for information on local maternity services.
Birth registration
Understand the process of birth registration in the UK and gather the necessary documents required for registration.
Postnatal care
Learn about the postnatal care services available in your area, including breastfeeding support and community midwife visits.
Some links are affiliate links which means I may earn a commission at no cost to you if you click through. Items marked with a ‘*’ are gifted by the respective brand in return for a 100% honest review.
Vegan Bean Lasagne
*This recipe is sponsored by Ocado in partnership with Ciao Gusto*
I have made so many lasagnes in the last nine years (about the time my boys started eating) and no one lasagne has ever been the same. So I’ve teamed up with Ocado to let you know about the new offers from Ciao Gusto coming soon! Ciao Gusto is host to some amazing brands including Valsoia who stock a vast range of dairy-free milk (almond, oat, coconut/almond, and walnut) and their chocolate spread and/or gelato. As I am a keen lasagne fiend, I found that Valsoia actually sells readymade bechamel sauces. So I present to you my (very first) Vegan Bean Lasagne!
Course: Mains, Vegan, One pot dishes, School night dinnersCuisine: British, ItalianDifficulty: Medium
Servings
4-6
servings
Prep time
20
minutes
Cooking time
40
minutes
Calories
600
kcal
Total time
1
hour
10
minutes
A completely meat and dairy-free lasagne that contains all your essential food groups for a
Ingredients
For the Lasagne sauce
400g meat-free mince, thawed
2 tins of chopped tomatoes
2 cans of frozen mixed veg
Lasagne sheets from a 500g packet
2 tbsps. tomato puree
2 red onions, finely chopped
3-5 stalks of celery, finely chopped
2 pinches of brown sugar
1 tbsp. Sunflower oil
For the White sauce
2 x 200ml Valsoia Bechamel sauce
200g of grated Violife cheese
For the seasoning
2 tbsps. Soy sauce
1 tbsps maple syrup
1 tbsp. vegetable Bouillon
1 tsp. smoked Paprika
Dash of cumin
Directions
Preheat your oven to 175C/350F/GM 3 and grab a casserole dish/baking tray and a large pan
Chop onions and celery finely and add 1 tbsps. sunflower oil to the large pan. Saute the onions and celery for a few minutes until translucent. Add 2 pinches of brown sugar to caramelise them a bit too.
Add the minced meat and cook on medium heat for around 8 to 10 minutes until lightly browned
Add 2 tbsps. of tomato puree to the sauce and mix well
Now add the 2 tins of chopped tomatoes and mix well – don’t throw away the tins or rinse them out yet!
Rinse the beans and add to the pan
Add the frozen mixed veg and mix well – the water from the melted ice will help to soften the sauce
Turn the heat down low and prepare your seasoning. Keep mixing the sauce while you’re doing this step
Mix the seasoning ingredients together: 2 tbsps. Soy sauce, 1 tbsp. Maple syrup, 1 tbsp. vegetable Bouillon, 1 tsp. smoked paprika and a dash of cumin. Add to the sauce and mix well
Now take your emptied tomato sauce and add hot water. Then pour into the seasoning mug. Mix the remnants and then add to the sauce,
Season with salt and pepper to taste
With the heat down low, leave the sauce to simmer while you make your bechamel sauce
Grab your Valsoia readymade bechamel sauce and place in a pan on warm heat – you don’t want to boil the sauce, just warm it up
Add the Violife grated cheese and mix well
Now grab your tray and your lasagne sheets because we’re going to layer up!
First up, start your lasagne with a thin layer of meat sauce, then cover the sauce with a thin layer of white sauce. Now cover your mix with a pasta sheets
Repeat step 16, but on the last layer, add pasta sheets to your meat sauce and then layer the lasagne sheets with the rest of the white sauce. Add the rest of the grated cheese on top
Place your tray in the middle shelf of the oven for 40 – 45 minutes, until the top has been browned and the pasta has cooked through
Recipe Video
Notes
You can add or remove any ingredient you want to the lasagne – the world is your oyster!
Looking after your money after Christmas
With Christmas over for another year, we’re all feeling the pinch somewhat after a month of over indulging and lavishing our loved ones with gifts. Indeed, there’s a reason why they call them the ‘January Blues,’ and budgeting can be more difficult than ever in the first month of the year.
New Year’s resolutions in particular can bring about some very ambitious and costly projects, for example, learning a new skill or re-decorating your home. However, you can still achieve these dreams and enjoy January without having to re-mortgage your property. Here are a few tips on looking after your money after Christmas.
Put your budgets onto pen and paper
If you’ve slightly over-indulged this year, it may be time to have a look at where you’re going wrong. Sit down and categorize all your outgoings accordingly – for individuals, this may be better to do so by splitting areas into travel, leisure, utilities etc., whereas for families it may be better to budget by person. You should be able to find a simple monthly budget template fairly easily by going online. A lot of them are free! This is by no means a way of singling out a particular person, but rather ensuring fairness across the board – for example, if one child has had a huge investment one month on a new Xbox, then the next month it could be time to focus on another child or mum and dad.
Budget those home improvements
Whether it’s a new kitchen re-fit or a complete bedroom overhaul, there’s no way of getting away from the cost of making home improvements. However, if you do a little bit of homework, for example, shopping for headboards online, you can keep an eye on some of the best discounts out there. More often than not, you will find a better deal online, particularly when it comes to furniture shopping. Keep an eye out for those ‘end of season sales’ in high street retailers – very often, the big discounts they promise are in actual fact figures which have been tweaked. You may find yourself better off shopping mid-season.
Spread your costs throughout the year
A lot of looking after your money can simply be timing. If you’re looking back at last year and thinking that all your spending came out in December, consider trying to spread the cost. You could try re-arranging your bills to come out on pay day, or start Christmas shopping early on, for example, in October, to spread the cost. Take what would traditionally be expensive in a certain month, such as holiday shopping, and re-distribute the cost to another. You’ll be amazed at how much you can save by simply shuffling things around.
Ayla’s VBAC Birth Story
On Thursday 12th September at around 12.30 am, at 39+4 weeks pregnant, I waddled upstairs to try to get some sleep. As I laid down, I heard a very loud pop.
That’s weird I thought.
At first, I thought something had burst in my belly, but when I went to the toilet, I experienced trickling that didn’t stop.
I went downstairs to tell my husband I thought my water just broke. Hubby, who was still absent-mindedly watching TV, had heard my self-diagnosis three times already in the pregnancy, so he double-checked I hadn’t just peed myself again. But, as soon as he finished that sentence, more liquid trickled down my leg.
It took hubby about 30 seconds to grab a towel, but by the time he had returned, I had a puddle on the floor and my knickers were soaked through. I called my parents to ask if one of them could look after our older two boys, as they were asleep and they had school the next day.
My dad came over and asked me if I was in any pain. I wasn’t but I was experiencing quite a bit of cramping, which I had put down to Braxton Hicks. We called the triage first and they confirmed that it sounded like my water broke.
“Have you got any pain?”
“No.”
“Are you experiencing contractions?”
“I don’t think so. Tightenings possibly but nothing that’s painful to write home about.”
“You better come in.”
As I was considered high-risk due to my miscarriage previously, I had to come in as soon as my water broke.
Off to the hospital
I grabbed my hospital bag and we headed to triage and the midwife asked me to keep a pad on, so she could check whether it was amniotic fluid and not just pee.
I laid on the bed as the midwives tested the liquid with a speculum, and they confirmed my waters had broken. A CTG was strapped to my belly to monitor the contractions, which I was experiencing regularly at this point. I thought this was strange because I wasn’t feeling any pain. After about half an hour to 40 minutes of checking, I was famished so I asked hubby to get me a sandwich.
I had to have an IV drip put in for Group B Strep antibiotics to be administered because I was tested positive for Group B Strep in 2017 when I had my miscarriage. The cannula put in was quite painful, apparently because my veins are really juicy and I had holes or waves in the veins. The midwife found air I think and so she had to take it out and put it on the other hand, which hurt a lot!
The two midwives in the room advised they were going to take me upstairs to the delivery suite soon. I was still fine and not experiencing that much pain until I was told to lie down. I told the midwife that I wasn’t comfortable with lying down on the bed and asked whether I could still be active. The midwife responded that when they took me to the delivery suite a bit later I would be able to move around then, but they had to continuously monitor me right now to check if the baby was ok.
It took a while for all the checks to be done and I felt so uncomfortable. The pain of some contractions was seeping in too, but I got the go-ahead to be moved to the delivery suite.
Off to the delivery suite
When I got to the delivery suite, a midwife examined me and she said I was 2 cm. The contractions were nothing to write home about; I could still talk, and I had some time in between them but they were starting to get a bit painful.
The midwives found me a birthing ball, but I still had a CTG strapped to my belly because they wanted to monitor my contractions and the baby’s heart rate, which was still high up on the 130/140 range.
We sat around and walked around a bit and I was advised not to eat in case I had to go to the theatre. I had a previous emergency c section and a planned c section, but I had made it very clear from the offset that I wanted to have a vaginal birth this time. I wanted to go as far as I could before the option of theatre had to come in. So I stuck my earphones in and listened to my hypnobirthing tracks. I kept concentrating on two chants I learned during my hypnobirthing course;
“Contractions are not that painful.”
“Your body can do this.”
I got into a rhythm of breathing in and out through the labour track while repeating the two chants in my head and I felt the process calmed me down.
Labour started and the pain increased steadily. The midwife asked me if I would consider having an epidural during this birth. I honestly didn’t know, but I said I would like the option. So the midwife brought the machine in.
The contractions were escalating now but I realised the pain was all in my back. I got really annoyed because I thought this baby was in an optimal position. I actually think she was in an optimal position until I got to the delivery suite because the contractions had changed drastically. I wasn’t feeling any contractions before 2cm. But, once I got to about 4 or 5cm, all of a sudden it felt like someone had stamped on my back and the pain was ongoing.
The midwife said she was going to try to turn the baby. So she got me to lie on the bed, which I didn’t think I could do because I was in so much pain. She assured me that lying on my side would take the tension off my back. She gave me some gas and air and told me to breathe in and out.
The midwife bent my inside leg and placed my foot on the floor and then she pushed against my back. She said we had to do this for three contractions and then we would turn to the other side.
It did feel like the pressure was off for a bit. The contractions were obviously still painful but they weren’t as painful as they were when I was walking around. When the midwife kept telling me to get on the bed, to rest a bit, I couldn’t. I couldn’t sit down, I couldn’t lie down. The only way I could lie on my side was when the midwife was pushing against my back.
We did that for three times each go, but when I had the next contraction, the pain was worse. She apologised for the manoeuvre not working. Well what can we do, I thought. It’s just the way it is. So I carried on trying to find a way to be one with the pain.
Then there was a shift change. A lovely very experienced midwife called Jo asked me whether it was ok to have a student midwife join and observe and I said yes, that’s absolutely fine – four eyes are always better than two in my opinion!
Contractions are real pain!
I was starting to struggle a lot. I thought this can’t be right, why am I not feeling anything in the front of my belly? Weren’t contractions at the front of my belly?
Jo said: “It’s because you’re having back labour. And, unfortunately, with back labour, things tend to take a bit longer.”
I thought, ok well I’m not going to let that cloud me. I had 3 days of back labour with Aron which was really intense and it ended in a crash caesarean, but Jo and Alicia were very positive that I was going to have my natural birth if I found a way to calm down.
“We’re still going to have our normal birth, don’t worry. Keep going, keep trying, keep breathing. Relax, stay positive, and breathe.”
I was examined at this point and I was 7cm. The last contraction felt like it had lasted five minutes, although it was probably only about 30 to 45 seconds. I tried to breathe through the pain and I had this system where I was shaking my hands as hard as I could to try and displace the pain. It worked until 7cm but then it stopped working.
From that point, I found it very difficult to keep the momentum of breathing through the pain and found myself holding my breath and tensing up. My husband kept reminding me about the chants, so I tried to focus back to the breathing and it worked for a couple of tries.
Epidural? Yes! A thousand times yes!
They asked me again if I wanted an epidural and I kept putting it off. I kept thinking, no I’m not going to do it. But when it got to about 7cm or 8cm, the pain had doubled, and they were getting stronger and longer. I found it too difficult to listen to the track, and couldn’t breathe through the pain anymore. It was getting to about 10.30 am at this point and hubby helped me by pushing and pressing on my back, as well as squeezing on my hips, which is what the midwife showed him to do. When the midwife asked again, “Do you want to try the epidural?” I said:
“Yes, 100% yes, I want to have the epidural NOW!”
The anaesthetist was running late; he had been called to theatre due to an emergency c section. The midwife apologised and I said no, no this is a blessing in disguise in some way. I had to deal with this on my own and I needed to find my way. So in a way, I was kind of glad it wasn’t there. But, at the same time, I was also thinking my gosh this is real pain.
So I must have got to about 8 cm, I wasn’t checked, but the contractions were coming hard and fast now and they were so painful. Then all of a sudden the anaesthetist turned up. The two midwives kept telling me:
“Come on, you can do it. Breathe! Breathe!”
They were really positive; they were breathing with me and rubbing my back. They were doing everything they could to try to get me to relax. And it worked for a while; I got into the zone a little bit. The anaesthetist again asked if I wanted the epidural and I didn’t hesitate. I screamed:
“Yes, I want the epidural! I can’t take this, it’s too much pain!”
I was given a button and advised that the epidural would need to be topped up every 25 minutes, although the pain wouldn’t necessarily come back in 25 minutes. So I was told to only press the button if I was in pain. So, from that point, I tried to challenge myself to not press the button as long as I could.
And sometimes I could feel the edge of the contractions coming back and then I’d wait for the next contraction before I pressed the button, or I’d wait until two contractions before I pressed. It was like my own private challenge to help me get through it. Plus, it was taking my mind away from how long everything was taking.
Every contraction gets you one step closer to your baby
I remember in the hypnobirthing course, Dani Diosi the course creator, said every contraction is getting you one step closer to your baby. So all you’ve got to think about is that you’ve done one, you’ll do another one and it’ll be one less than you’ll need to do. So I kept trying to think that way.
Every time the button came on I tried not to look at the green light. Jo advised me to be careful when I got to the pushing stage because I’d needed to stop topping up so I could feel the pressure to push.
I thought because I was still feeling the pressure of the contractions, I didn’t think it would make any difference.
Jo examined me and said I was at 9cm now.
Wow, that’s brilliant! I’d never got to 9cm before! I only got to 6cm with my first and my second was a planned c section, so I was in unchartered waters now.
I was so happy. I managed to get a little nap in as well and the midwives kept my mood up by joking around. At one point my husband said he was getting cramp from waving the fan to cool me down and Jo asked if it was ok to evict him from the birthing room or throw him out of the window.
I laughed and said:
“No he can keep fanning me, cramp and all!”
We joked briefly about how men think labour pain is like a toothache or adult colic and it relaxed me a lot.
We’re ready to push!
Jo reckoned in an hour’s time I would be at full dilation and once I got to 10cm, I was asked to rest a bit. When I got my contraction, Jo would ask me to push when I felt the pressure. Ok, I thought, sounds straightforward enough! So I topped up one last time, and we waited for about an hour. Jo checked me and said:
“Right, you’re ready to push. Let’s go! Wait for a contraction and then push down on your bottom.”
It was then I realised oh my gosh, it is really difficult to push without the pain or pressure because there wasn’t as much pressure as I thought there would be. I didn’t realise what Jo meant when she said it would be harder with the epidural.
Jo said, “Well 50% of women who have the epidural can’t push and 50% of women who can push end up with having an instrumental delivery because they can’t feel it.”
And I thought that was a silly mistake to accept the epidural in hindsight. If I had thought about what she had said and how difficult it was to push because of how desperately I wanted to have my baby naturally, I would have refused the epidural.
That was the first time I had kicked myself because I found pushing really difficult. I kept looking at the machine to check when I was having a contraction just in case because Jo said there was no point in pushing without a contraction because the baby wouldn’t come through.
So I pushed for about an hour. I didn’t know if I was making any progress, and I’m pretty sure I pooed at that point, but they didn’t tell me.
“Don’t worry, doesn’t matter, not thinking about it,” they said.
But I’m pretty sure I did.
Jo said, “Well baby is coming slowly but she’s coming.”
It got to just about before the hour, around 40 – 45 minutes when the doctor came in and said:
“Listen, at this point baby is doing absolutely fine, there is no distress on the heartbeat, contractions seem regular, and there doesn’t seem to be a problem.”
There was an issue at one point during the pushing stage when the contractions had faded a little bit and so Alicia brought a gauze with clary sage to trigger the contractions. I couldn’t have syntocin (to be induced) because of the previous births and risk of uterine rupture. So instead of syntocin, we went for something natural. The clary sage was so strong, but the smell was lovely. And it worked! The contractions came back really hard and fast, so I kept using the contractions to push as hard as I could and Jo kept saying, that baby’s making progress – just slowly.
The doctor continued, “We have to limit your pushing to an hour before we have to prep you for theatre in case the pushing doesn’t work.”
So the next part of the pushing had to happen in theatre and not in the delivery suite because the doctors had to make sure that if anything happened they could perform the c-section as soon as possible. The doctor examined the baby and he said that baby seemed fine. So they said to keep going with the pushing, but in about five minutes they were going to take me up to the theatre.
Off to the theatre
We got to the theatre and there were so many people there – so many staff and I didn’t know who they were. People kept coming and talking to me and they explained they were going to administer an epidural with a local anaesthetic so I couldn’t feel anything.
I had the checks done to see if the epidural was working and it hadn’t gone up to the chest – it’s a freezing cold test where they sprayed freezing cold water on my legs. The water felt warm until they sprayed on my chest which felt freezing cold. That meant the epidural was working fine. There was a situation earlier where on one part of my body, I could still feel the pain of the contractions so I was still taking in gas and air even though the epidural had kicked in. So Jo advised that the next time I topped up, I moved to the right-hand side of my hip so that the epidural drug filtered through.
In theatre, I was administered a local anaesthetic. The doctor advised that we were going to try pushing for a while, even though it wasn’t looking likely and we may end up with a c-section.
It was at that point I lost it. I just, I couldn’t hold back the tears. I was so upset that people kept asking me if I was ok. I said I really wanted to have a normal birth and at this point, this is where the two midwives really shone.
They really championed for me. I didn’t know about this but after the birth, my husband told me that the surgeon had been tugging with forceps to get the baby out. I tell you, it was even worse trying to push under a local anaesthetic. You have to try to remember the feeling of what it’s like to push, but you can’t push. I mean you cannot push!
But, apparently, it was working. Coupled with the local anaesthetic which made me shiver and feel weak, (I felt sick every time I pushed), I did everything I could to push my baby out. I had to push past the feeling of being sick, the feeling of shivering and the cold, which I later realised was down to low blood pressure.
She’s out! My baby is out!
So I thought I’m going to have to get through it, I have to push. So I did everything I could to push and finally, she was out. The relief I felt when they told me that she was out was just – it was euphoric. It’s something that I can’t explain:
“Wow, I did it! I pushed my baby out after two c sections!”
The baby wasn’t crying and she looked a little bit blue. The doctors took baby over to the examining table, straight away, and I could see they were moving her around. A few minutes later she started crying and my husband and I sobbed with relief that she’d made it. She made it through all the tugging and all this time she’d had a consistent heartbeat.
I had never felt so happy. The thought of managing a vaginal birth after two c sections was insurmountable, but I did it. I know loads of women have VBACS every day but I don’t care. For me, it was just the most immense feeling in the world.
I cried my eyes out thanking everyone in the theatre, especially the midwives.
“Thank you so much; you did it, you did it! Thank you, thank you!”
The surgeon congratulated me but mentioned it had been really tough. They had to do a forceps delivery, and I ended up with a second-degree tear and an episiotomy on each side. The midwife championed for skin on skin straight away, so while he was stitching me up I got to enjoy some really beautiful cuddles with my baby. I was so happy.
I noticed the bruises on her face from the forceps, but the doctor said not to worry as they will fade eventually. I was exhausted but I was immensely proud of myself, my body, my baby and the staff. Hubby was amazing at keeping me calm and focused too because there was one point where I thought I was going to lose it. But hubby stayed calm for me and talked me through everything. He was my absolute rock.
When they stitched me up, I got to enjoy skin on skin with my princess and they waited until the cord had stopped pulsing before they clamped and cut the cord.
They didn’t do any of the checks or weigh-ins until I had spent precious time with my baby and I thought that was amazing. It was in my birth plan, but I didn’t have to tell them that’s what I wanted.
“We don’t need to do the weigh-in checks, we don’t need to clean her now. Just put her on your skin and enjoy her.”
Baby was weighed at 7lbs, 7 ounces / 3.487 kg and born 39+5 weeks on Friday 13th September at 20.09. And, it was a fantastic experience!
I was wheeled into the labour ward as I was still under local anaesthetic, so I couldn’t feel anything in my legs. They put a catheter in me and I just relaxed with my baby. I was so happy she was there.
When the local anaesthetic wore off, however, oh my goodness! I was not aware of how painful birth really was! There was a swelling in my back passage, which the surgeon said I should take a look at because it could have been a prolapse. And, the afterpains, the pressure and the swelling was agonising. I couldn’t sit on my bum, I couldn’t do anything. They told me they had been giving me oramorph which was liquid morphine, but it wasn’t cutting the pain. It was getting rid of the vaginal pain but the back passage was just intense.
So, after many, many talks, the doctor decided to up the dosage. They gave me one small dose of epidural, which they tied to my back, and I scratched my back half to death because the epidural has a side effect, which is very itchy skin. I itched everywhere. It was so hot in the theatre as well, so I was sweating and so, so uncomfortable. I had also forgotten all about the bleeding aftermath.
I ate loads of food constantly. I didn’t know whether it was because of the drugs or breastfeeding, but I couldn’t stop eating. One of the midwives said I needed to let her know when I did my first poo. And I was like how the hell am I going to do my first poo, I can’t even feel that area!? She mentioned it was going to be tough because I’d had a bit of trauma down there.
I was convinced that I had over pushed and certain things had come out from the inside to the outside because of how swollen my back passage was. But apparently, you can’t overpush. The midwife assured me that the bottom will eventually heal. I asked her how long she thought it would take and she said maybe about 3 weeks; up to 3 weeks, depending on how quickly I healed. 3 weeks!? C section is 6 weeks!
She praised me again:
“Honestly, what you did was amazing, You would have not experienced the same if you had a c-section.”
She was right. It was all worth it. I had a beautiful baby out of it. So I told myself to take the pain. I’ll deal with it, just keep topping me up with painkillers!
The midwives kept asking about when I was ready to go to the toilet and and hubby desperately wanted to go home because the ward was so loud. I told him I didn’t want to go home until I hit the poo milestone, just in case I broke something else down there.
So I drank loads and loads of water, and thought about how I was going to pass this milestone with minimal disruption. The midwives advised just trying to pee first and then I thought, OMG how am I even going to pee!? The midwives took the catheter out and I thought just break the bullet; they won’t take the cannula out unless I pee.
It really wasn’t as bad as I thought it would be in terms of stinging but I was shocked at the lack of bladder control I had. As soon as I pulled my pants down it was free-flowing. I now needed to have a shower. But I thought, how am I going to have a shower!? I’ve got loads of stitches down there. The midwife told me not to use any shampoo or conditioner, I didn’t need it. I just needed to rinse off because I had been sweating buckets.
The epidural was taken off my back and it was such a relief to get all that tape off because it was so itchy. I was so sweaty, I’d actually scratched my back half to death! I had a really cold shower, which felt amazing. I felt so much better, apart from the pain downstairs.
As a result, I found it very difficult to sleep. But, the baby was amazing and she was so relaxed. We had a few problems with her latching on to the breast. She was a bit diva-like and couldn’t wait for me to show her where the nipple was – she had to have it now!
But while she was on she fed for ages and in her first night, she slept for six hours! The midwife asked me if I wanted to wake her up and I was like, do you know what? No. I think I’m just going to let her sleep, she seems fine. When she woke up, she was obviously very hungry, so I fed her again and she fell back to sleep. The poos took a while to come in but once they did she was pooing like a champion as well.
Off to the postnatal ward
The next day, I was wheeled into the postnatal ward. During the birth, I had lost 1.7 litres of blood, which is a ridiculous amount of blood to lose. I lost 900ml with my first, and 700ml with my second. I felt quite weak and lethargic – I really wasn’t feeling all too strong.
When I moved to the postnatal ward, I was prescribed iron tablets, lactulose so I could go to the toilet, co dydramol, and ibuprofen.
The consultants were worried that the oramorph was only working in the vaginal area and not in the back passage. How can liquid morphine not hit the pain in the back passage?
A consultant examined me to test whether something had happened with the epidural. They later deduced that the legs being on the stirrups may have caused some muscle tension or breakage near the hips, around the back passage and that could have been what was causing the pain. But whatever the reason was, it did not allow me to sit on my bum or lie on it.
So, I just had to lie on my the left side and very rarely on the right-hand side – it was so difficult. I couldn’t do anything. I couldn’t wait to get the next dose because the pain kept coming back.
That night my husband wasn’t around either, so I found that night really difficult. I was in a ward with two other hungry crying babies and I had to figure out how to get up off the bed, feed the baby, put her back in the cot, and then get back on the bed. So I was doing loads of ninja moves, by using my feet to control the height of the bed, the pillow area, the head area, and the headrest, and by pulling the headrest up to 90 degrees, to 45 degrees, or lying it down flat. But nothing worked. I was in constant pain.
The aftercare was amazing, though. The midwives regularly checked my obs. They also kept telling me my bloods were very low, so they might need to offer a blood transfusion. However, I said I preferred iron tablets instead, which was what I had been taking anyway.
The second night I told the midwives that my baby wanted to feed constantly and she struggled to sleep because of the other babies crying. I also found it quite hard because I couldn’t lie down with her, and I couldn’t sit up to breastfeed her. I had to do the advanced, lying-down-on-the-side breastfeeding move because I didn’t really have much of a choice.
I also found out that I couldn’t have any painkillers at night so I had to handle the pain until the ibuprofen came at 6am – I couldn’t have eaten it fast enough! Ibuprofen was the only thing that worked because it was anti inflammatory. So when I had ibuprofen, I felt relief. Actual relief.
I ate lots of food but I couldn’t go. I thought ok it’s not working so I am just going to just leave it and this really lovely midwife said to me that she’d experienced the same thing.
“Don’t push it; have Weetabix, prunes, and milk the next day and you’ll go.”
I ended up going the next day – and it didn’t hurt at all. We had lots of obs, and so did Ayla, which she passed with flying colours!
Our next-door neighbour’s husband constantly chatted on the phone in the middle of the night to his mum or family member and his baby was crying constantly. Then, when the husband went to sleep, he snored so loudly. I thought it was so selfish of him. We’ve got babies trying to sleep here and he’s chatting away throughout the night! Luckily Ayla like a champion slept really well.
I still found it difficult to sit down on my bottom, so I slept much less. The boys came to visit me in hospital and we got a lovely photo in together. They also ate all my hospital food!
Off home – with a new addition!
We took a long time to be discharged and hubby was getting restless. But, the meds had to be signed off before we were finally able to leave for home. I looked like a state when I got into the car, wearing my husband’s clothes, no makeup, and hair scrunched up on my head. I also didn’t realise that I couldn’t sit on the seat, so I had to crouch. I asked hubby to get a towel from the back, which I turned into a ring cushion and that made it much better to sit down, although the pressure was still horrible.
The first three weeks were tough but I lived on the couch with my laptop. Hubby took time off from work and he and my parents did the school run for me. It was amazing to just sit and be with my baby and I have my support network to thank for that!
I realised how important it is to have a support network around you because it can turn an otherwise positive experience into a very negative one. Hubby had to inject me for 10 days with Enoxaparin to prevent any blood clots after birth and I had to continue my meds – there were so many I had to keep to a rigorous plan, so I wouldn’t forget. I used a cooling gel for downstairs which I placed on top of my really protective pads and that really helped with the soothing and healing.
And slowly but surely, I started to heal. I was told that you will know when you’re on the road to recovery when your stitches feel really tight. I felt that around 3/4 weeks. I hadn’t used any shampoo or conditioner until that point and it felt really good to use a mild detergent like Sanex to have a proper wash. I didn’t have a bath, though, just a standing shower to ensure downstairs was free from any chemicals. I was actually very strict with my aftercare and I think that helped.
The health visitor came to check me over and asked how my mental health was. I said that I was on top of the moon! I had a really positive birth and that was a lot down to the hospital being so positive too.
I since learned that the pain of vaginal birth was probably worse than the c-section and that it didn’t matter whether you had a vaginal or a c section delivery as long as it was made to be as positive as possible. Having had both now, it didn’t matter how our babies are born. What matters are that they’re happy and healthy!
Thank you to Watford General Hospital for helping us achieve a really positive birth. We brought in some chocolates and a card to Jo and Alicia for being such amazing midwives throughout labour and birth.
A big thank you to Dani Diosi for the wonderful and very informative hypnobirthing course which helped me to think positive throughout my birth delivery and get me the positive birth I wanted and to Dr Verma for giving me hope in getting my girl. We did abandon the conception plan towards the end so it’s hard to know whether it was luck or whether Urobiologics helped me get my girl. Again looking back, it doesn’t matter to me anymore whether it’s a boy or or a girl. Being happy and healthy trumps all of it.
If you want more information on Dani Diosi’s hypnobirthing course, head here: mamaserene.co.uk
Don’t forget to read Part 1 and Part 2 of my Hypnobirthing series on how hypnobirthing works to achieve a positive birth.
If you want to learn more about how you can get the baby of your desired gender through non-invasive methods, head here: urobiologics.com
Click here for more birth stories (including VBAC stories)
After a very successful VBAC birth story, I welcome Ayla Christina Preston who was born on 13 September 2019 at 20.09, two days before my due date! Ayla is now 16 months old and a very active baby!
*Some links contain affiliate links where I may earn a small commission at no extra cost to you. As an Amazon Associate, I earn from qualifying purchases.*