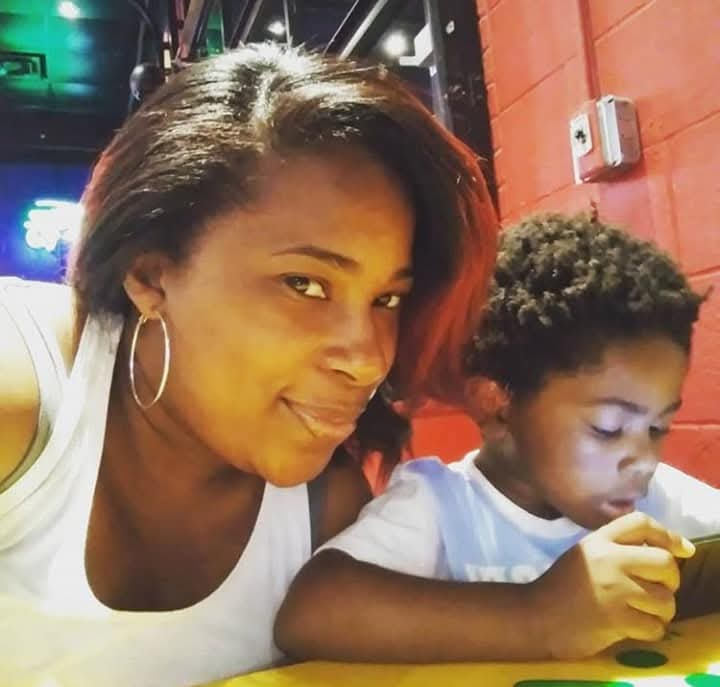
In Greek mythology, Leto was a pregnant mother turned away by every land and left to give birth alone. Randy has her tattooed on his arm, and her story runs through his.
This is a personal story from a father about his partner’s postnatal depression. It mentions hospital visits and drinking. If you’re struggling, there’s UK support listed at the end.
Being a mother is perhaps one of the most selfless responsibilities a person can undertake. It requires endurance, unwavering love, discipline and sometimes a temporary disconnection from the self. Many of these qualities were precisely the ones I lacked when my first child was born. While I was still trying to make sense of my own immaturity, his mother was being forced to make sense of an entirely new life, one in which another human being depended on her for practically everything.
Thankfully, my son had a mother whose instinct to nurture came before everything else. But this isn’t about celebrating her sacrifices. It is about the uneven dynamic that can develop between two partners after childbirth, and how easily one parent can mistake the other’s ability to endure suffering for evidence that no suffering exists.
Parenthood forced my then-partner to mature at an accelerated rate. Somebody had to raise our child, and she understood that responsibility could not be postponed. It certainly wasn’t going to be me. Rather than becoming the person she could depend on, I became another burden she had to navigate. I was too busy getting drunk, too concerned with my own desires and too immature to recognise the wedge I was creating between myself, my partner and my child. I loved my son, or at least I believed I did. But what I understood about love at the time was terribly incomplete.
A different kind of love
To be a father requires more than simply loving your child. I believe there must also be a particular kind of love between the mother and father of that child, whether or not their romantic relationship survives. The ancient Greeks had a word for it: agape, a love that considers another person’s wellbeing without calculating what we might receive in return. Two people may fall out of romantic love. But the responsibility to treat one another with compassion does not disappear with the relationship, and children learn more from seeing that compassion than from the appearance of a perfect household.
What I chose not to see
The mother of my children experienced postpartum depression. According to the US Centers for Disease Control and Prevention, around one in eight women who have recently given birth report symptoms of it. Yet we still romanticise motherhood in ways that can make suffering almost invisible. We celebrate the sacrifice, praise the endurance and admire the woman who manages to hold everything together. Rarely do we stop to ask what holding everything together is costing her.
During her depression, I chose to ignore her. I opted out of my duties as a partner and neglected responsibilities I should have embraced as a father. I could leave the house, drink, distract myself and temporarily escape the consequences of becoming a parent. She was never afforded that luxury. She couldn’t simply decide she was no longer going to be a mother for the afternoon. Our child still needed to eat. His nappies still needed changing. He still needed to be held, comforted, bathed and settled for a nap. Somewhere between those responsibilities, she had to find enough room to experience her own sadness.
I sometimes wonder how often I interpreted her silence as contentment, when perhaps it was simply exhaustion. I cannot answer those questions on her behalf. But I can acknowledge that I never cared enough to ask them when the answers might have mattered.
My son was being fed, clothed, loved and cared for. From my perspective, he was receiving everything he needed. I made the terrible mistake of believing that because his mother was capable of providing those things, she must have been doing reasonably well herself. Her competence became my excuse for remaining absent. Even after emergency room visits related to her depression, I continued looking the other way. What makes this harder to admit is that I had first-hand experience of depression. I simply failed to extend that understanding to the woman raising my child.
Postnatal depression is not merely a long spell of sadness, nor a reflection of a mother’s love for her baby. It can bring hopelessness, constant anxiety, trouble sleeping even when rest is possible, withdrawal and difficulty bonding with the baby. These are not character flaws. They are signs of a medical condition that deserves attention, treatment and compassion. Yet many fathers, myself included at the time, are so focused on whether the baby is doing well that we neglect to notice the person who brought that baby into the world. A mother should not have to reach breaking point before the people around her take her suffering seriously.
The tattoo on my arm
On my right arm, I have a tattoo of Leto, the figure from Greek mythology associated with motherhood and the mother of Apollo and Artemis. It reminds me that motherhood can be one of the most difficult and thankless responsibilities in the world. But I also recognise the contradiction in having admired motherhood symbolically while failing to appreciate the actual mother standing in front of me. It is easy to praise the strength of women in abstract terms. It is much harder to accept that strength should never be used as a reason to ask them to endure everything alone.
I took her success in raising our child as proof that her life was fine. I did not create an environment in which she could rest without guilt, express her sadness without being dismissed, or trust that her partner would take responsibility without being told. I confused the absence of complaints with the absence of needs.
What I know now
Today, I understand that fathers must be as attentive to their partners as they are to their newborn children. That means noticing changes in behaviour, making room for honest conversations, encouraging professional support when it is needed, and sharing the work of parenting without expecting praise for doing so. It means understanding that the words “How can I help?” sometimes place yet another responsibility on the mother: the responsibility of managing us. A father shouldn’t need instructions to see that the washing is piling up, that his partner hasn’t slept, or that she hasn’t had a moment to herself.
I cannot rewrite the beginning of my journey into fatherhood. What I can do is acknowledge the harm my absence caused and refuse to disguise it as youthful confusion. Becoming a parent can straighten us out, or it can expose the shortcomings we have spent years avoiding. For me, it did the latter. And perhaps the greatest lesson I have taken from it is that loving our children also means caring for the people who love them.
Motherhood should not require a woman to disappear so that her children can thrive. And fatherhood should never be reduced to enjoying the beautiful moments while somebody else carries everything in between. If agape is a love that places another person’s wellbeing alongside our own, then perhaps one of its greatest expressions is recognising suffering before somebody has to beg us to see it.
I thought my children had everything they needed because they had an extraordinary mother. What I failed to understand was that their mother needed somebody, too.
Postnatal depression: what partners need to know
A note from the Motherhood Diaries team to go with Randy’s story.
Postnatal depression is common. The NHS says it affects more than 1 in 10 women within a year of giving birth, and that fathers and partners can also have depression after having a baby. Many people feel low, tearful or anxious in the first week or so, often called the “baby blues”, but this usually passes within two weeks. If the feelings last longer, start later or get worse, it could be postnatal depression.
Signs your partner might be struggling include:
a low mood or sadness that doesn’t lift (low mood can start in pregnancy too)
losing interest in things she used to enjoy
feeling exhausted all the time, or not sleeping even when the baby does
withdrawing from friends and family
finding it hard to bond with the baby
frightening or unwanted thoughts
As Randy found, someone with postnatal depression can still look after their baby brilliantly. Coping on the outside doesn’t mean someone is OK.
How partners can help
Notice, don’t wait to be told. Take on night feeds, meals, washing and appointments without being asked.
Ask and listen. “How are you, really?” and then listen without trying to fix it. If things feel strained between you, our guide to reconnecting after a baby may help.
Encourage help early. Offer to book a GP or health visitor appointment and go with her.
Protect her rest. Give her time alone that isn’t spent on chores.
Look after yourself too. New dads and partners can become depressed as well, so talk to your GP if you’re struggling. A parent support group can help too.
Where to get help in the UK
Speak to your GP, midwife or health visitor. Postnatal depression is treatable, and the sooner you ask, the sooner things can start to feel better.
NHS 111 for urgent advice, day or night.
PANDAS Foundation supports parents and their partners and families: free helpline 0808 1961 776.
Samaritans are there any time, day or night: call 116 123 for free.
If you or someone else is in immediate danger, call 999 or go to A&E.
Randy Duran is a father of two, mental health coach, and founder of Mental Mastery Consultancy, based in the United States.
Letting children join a story in their own way
Jonathan Hewston is a disabled children’s author who writes inclusive picture books. Here he shares what writing for children has taught him about bedtime stories, and why the best bit is often the one your child finds for themselves.
You’re halfway through a bedtime story when your child points to a dog in the corner of the page. It’s got a sock in its mouth. You were just getting to the good bit, but as far as your child is concerned, you’re already there.
I’d stop and look at the dog.
As an author, I spend a lot of time deciding what happens on each page. I like the idea that a child might have their own favourite bit, even if it’s something I barely gave a second thought. They’ve spotted a detail and decided it’s worth sharing with you. That’s a lovely thing to happen halfway through a book.
Photo: Stephen Andrews on Unsplash
See what happens if you wait
If your child points to the dog, you could say, “Oh, he’s got a sock,” and give them a moment. They might turn back a page to see where he got it. They might laugh. They might be ready for you to carry on.
I find it tempting to fill that little silence. “Whose sock is it? Where’s he taking it?” Before long, I’ve asked three questions when all they wanted was for me to look at the dog. Sometimes looking together is enough.
The same goes for doing something after the story. If your child wants to draw the dog, get the pencils out. If they want you to do the dog’s voice one more time, do the voice. They’ll soon tell you if you’ve got it wrong.
Give them someone to root for
When I write a character with a learning difference, I think about what a child might spot in them. Maybe they ask a friend to write down a clue because there’s too much going on to hold it all in their head. Maybe a page later they’re the one who notices the clue everyone else has walked straight past. I want a reader to have room to think, “I do that,” and then, “Go on, you’ve nearly got it.”
Some nights you’ll get to the last page. Some nights you’ll spend five minutes working out whether the dog stole the sock or found it. If you’ve ever been asked to read the same book three nights running, you’ll know there’s always another chance to find out what happens next.
Why sharing a story together matters
Jonathan’s point, that looking together is sometimes enough, is backed up by research. The children’s reading charity BookTrust says sharing stories with babies and toddlers creates moments of closeness and shared attention that support bonding and wellbeing, and that children who hear books and stories regularly benefit in their language skills, social and emotional growth and creativity.
BookTrust’s research also found that daily reading with children tends to peak between the ages of two and four, then drops off sharply after the age of four. If your child is starting school and reading to themselves, it’s still worth keeping a shared story in the bedtime routine. The pointing, the questions and the silly voices are part of how they learn to love books. For more ideas, try our language and literacy activities for toddlers.
Try it tonight: let your child lead the story
A few ideas from the Motherhood Diaries team to go with Jonathan’s piece.
Let them choose the book, even if it’s the same one for the tenth night running. Familiar stories give children the confidence to spot things, join in with favourite lines and, in time, “read” bits back to you.
Follow their finger. When they point, look where they’re pointing first and say what you see. You can always find your place again.
Count to five before you speak. It feels like a long time, but a pause gives children the chance to get their thought out, especially if they need longer to find their words.
Offer, don’t insist. Pencils, a puppet, a silly voice or acting out a page are invitations, not tasks. If they’d rather just listen, that counts too.
Stop while it’s still fun. A few pages with your full attention are worth more than a whole book with a tired, wriggly child.
If sitting still for a story is hard
Not every child wants to sit quietly on a lap for a bedtime story, and that’s fine. Some children listen best while they move, fidget or hold something in their hands. Some love books with flaps, textures or very few words, and some like to hear the same page again and again before they’re ready to turn over.
keep story time short and at the same point in the bedtime routine each night, so it feels calm and predictable
use the pictures as much as the words, and talk about whatever your child is looking at
try books with textures, sounds or lift-the-flaps for children who learn through touch (our guide to learning through sensory play has more ideas)
use signs, gestures or picture cards alongside the words, if that’s how your child communicates (see our tips on supporting an autistic child at home)
let your child hold the book or turn the pages, so they’re part of the story rather than an audience
Your child’s nursery, school, health visitor or speech and language therapist can suggest books and ideas that suit your child, and your local library is a free way to try lots of different books before you find the ones they love.
Whether you finish the book or spend the whole time on one page, what your child will remember is you, sitting close and looking at the same thing they are.
Bedtime story questions parents ask
When should I start reading to my child?
It’s never too early. The NHS Start for Life programme suggests looking at simple picture books together and describing the pictures to your baby, and fabric or touch-and-feel books are perfect for little hands. Your baby won’t follow the story yet, but they’ll love your voice and being close to you.
What if my child keeps interrupting the story?
Interruptions usually mean your child is joining in. As Jonathan says, if they point at something, stop and look at it with them. You can always find your place again, and some nights the detour is the best part.
Is it OK to read the same book every night?
Yes. Repetition helps children feel confident with a story, so they start spotting details, joining in with favourite lines and eventually “reading” parts back to you. Try to enjoy it, even on the tenth night running.
How long should a bedtime story last?
There’s no right length. A few pages with your full attention can be worth more than a whole book with a tired child, so follow their lead and stop while it’s still fun. If the whole bedtime routine feels like a battle, our guide to when children are ready to sleep in their own bed may help.
Jonathan Hewston is a disabled children’s author and founder of Hewston Higgins Books & Learning, an independent children’s publisher in Coventry. He writes stories and creates resources for children with special educational needs and disabilities.
I became a mother twice before 20. My story didn’t end there
I became a mother at 18. By 19, I was a mother of two.
Before I had fully figured out who I was as a young woman, I was responsible for helping two little boys discover who they would become.
While many people my age were thinking about college experiences, friendships, relationships and what their futures might look like, I was learning how to balance motherhood, education, responsibility and the uncertainty of adulthood.
I was still growing up myself.
Domonique with Jamar (2) and Jairus (3) in 2007.
And although I didn’t know it then, becoming a mother so young would become one of the most defining experiences of my life.
Today, at 41, I am a mother of three, an author, a non-profit chief executive and a community leader. I have earned multiple degrees, pursued leadership opportunities and dedicated much of my professional life to serving others.
But none of those accomplishments tells the full story.
Because long before the titles, recognition or professional achievements, a teenage girl was learning how to be a mother while still learning how to believe in herself.
The weight of becoming a young mother
Teenage motherhood comes with responsibilities that are difficult to fully understand until you experience them.
The pressure to make the right decisions. The fear of making mistakes. The constant awareness that another human being depends on you. And sometimes, the uncomfortable feeling that people have already decided what your future will look like because of the age at which you became a mother.
Being a teenage mother can make you feel as though you must prove yourself before anyone will take you seriously.
I had to learn that my circumstances did not have to become the limitations of my life.
Those truths became the foundation of how I approached motherhood and, eventually, leadership.
Growing alongside my children
One of the most remarkable things about becoming a mother young is that, in many ways, you grow up alongside your children.
My first two sons were born just one year apart, sharing the same birthday. Our lives became intertwined in ways I could never have imagined.
Domonique with Jamar and Jairus, aged 4 and 5.
There were undoubtedly things I had to learn earlier than I expected. There were responsibilities I could not postpone and decisions that required me to think beyond myself.
Motherhood gave me a front-row seat to two young lives unfolding. It taught me patience, accountability, compassion and the importance of showing up, even when life felt overwhelming.
Years later, I welcomed my third son at 28.
Meeting Jabari, one hour old.
By then, I had grown and changed. I approached motherhood with different experiences, greater perspective and a deeper understanding of myself.
Yet one thing remained constant: my commitment to being present for my children while continuing to grow as a person.
Motherhood was never meant to require me to stop becoming.
Education, ambition and the decision to keep going
One of the lessons I hope other young mothers take from my story is that education and personal development do not have expiry dates.
I earned my bachelor’s degree in 2007, when my first two sons were still very young.
A decade later, I completed my master’s degree in Human Services. I later pursued additional education in leadership through Harvard Graduate School of Education.
Each milestone represented more than an academic accomplishment.
It represented a decision to keep going.
Domonique Cooper and her son Jabari, aged 3
I wanted my children to understand the importance of perseverance, but I also needed to demonstrate it.
I wanted them to know that life may require us to adjust our timelines, reconsider our plans or take a different route, but those changes do not automatically eliminate our possibilities.
I did not need my life to follow a traditional timeline for it to be valuable.
Motherhood helped shape my leadership
Today, I serve as chief executive of a non-profit organisation dedicated to advocating for children experiencing foster care.
My professional responsibilities involve leadership, decision-making, collaboration and working to ensure that vulnerable children have the support and advocacy they deserve.
Although my professional development has involved years of education and experience, I recognise that some of my earliest leadership lessons came from motherhood.
Perhaps most importantly, it taught me that leadership is not simply about having authority.
It is about responsibility.
Domonique and Jabari, aged 4.
As a young mother, I learned that my decisions affected more than just me. Today, as a leader, I carry that same awareness into the work I do with colleagues, communities and the children we serve.
I am also an author, and storytelling has become another way for me to encourage others to recognise their own possibilities.
The experiences that once made my journey feel different have become part of the perspective I bring to the world.
What I would tell my 18-year-old self
If I could sit across from the young woman I was at 18, I would tell her something I hope every young mother eventually comes to understand:
Your life is not over.
You are not defined solely by the age at which you became a mother.
You will make mistakes. You will encounter challenges. You will experience moments when you question your decisions, your abilities and perhaps even your worth.
But you are still allowed to dream.
And you do not have to choose between loving your children and believing in yourself.
I would also remind her that motherhood is not a competition.
There is no single perfect timeline, no universal definition of success and no requirement that every mother follow the same path.
My story is still being written
At 41, I can look back at my journey with a perspective I simply did not have at 18.
And I see three sons who remain among the greatest parts of my life.
Domonique with her three sons, Jairus, Jamar and Jabari.
I am proud of my accomplishments, but I am equally proud of the journey that brought me here.
Becoming a mother twice before 20 changed my life.
It changed my priorities, challenged my expectations and shaped the woman I would become.
But it did not end my story.
In many ways, it was only the beginning.
And if there is one message I hope another young mother takes from my experience, it is this:
Your beginning does not have to determine your ending. You are allowed to keep writing your story.
Domonique Cooper is a mother of three, an author and a non-profit chief executive based in Georgia, USA. She became a mum at 18 and again at 19, and went on to earn her degree while raising her two young sons.
Emergency Dentist Appointment: How It Can Save Your Smile
This is a collaborative feature. Need an emergency dentist appointment fast? Here’s the quick answer.
Book an emergency dentist appointment straight away for a knocked-out adult tooth, severe toothache, swelling, or a broken tooth or crown.
Ring your own dentist first. If they’re closed, or you don’t have one, use NHS 111 online or call 111 for an urgent NHS appointment.
Go to A&E or call 999 if swelling makes it hard to breathe, swallow or speak, or if bleeding won’t stop.
A dental emergency can strike without warning, such as a sudden toothache, a knocked-out tooth, a broken crown, or an unexpected injury. In these critical moments, professional care in the initial hours is essential and can make a difference in saving your smile. In any dental emergency, immediate assistance from an emergency dentist in London can protect your oral health, restore your confidence, and even support long-term treatments.
1. Immediate Intervention to Prevent Permanent Damage
Dental emergencies often involve issues that worsen rapidly without professional care. For example:
Knocked-Out Teeth: Time is crucial in managing a knocked-out tooth. Seeing a London emergency dentist within 30–60 minutes significantly increases the chances of successfully re-implanting the tooth.
Severe Toothaches: Severe tooth pain that can lead to sleepless nights often signals infection or decay that could lead to an abscess, which can spread to the deep tissues of the oral cavity and cause tooth loss if untreated. Emergency care provides pain relief and prevents the spread of infection.
Cracked or Broken Teeth: Due to chewing harder substances, teeth can develop cracks or fractures, which may cause severe sensitivity and pain. Quick treatment, such as tooth crowning, can protect the tooth from further damage or extraction.
By acting swiftly, you’re not just addressing pain, but you’re preserving the structural integrity of your smile.
If your child knocks out a tooth
Baby tooth: never put it back in, as it can damage the adult tooth growing underneath. Take your child to a dentist straight away.
Adult tooth (usually from around age six): hold it by the white crown, not the root. If it’s dirty, rinse it briefly and gently push it back into the socket, then have your child bite on a clean cloth to hold it. If you can’t, keep it in milk or your child’s spit.
Not sure which it is? Keep it in milk and let the dentist decide.
For a knocked-out adult tooth, the NHS says you should be offered emergency care within an hour. See the NHS guide to a knocked-out tooth.
2. Access to Specialised Expertise and Technology
An emergency dentist in Camden, London is equipped with advanced tools and trained to handle complex cases efficiently. On-site facilities for procedures like root canals, extractions, or temporary repairs, such as digital imaging for accurate diagnosis or same-day restorations like crowns or fillings, ensure you receive precise, effective care. Additionally, if you’re undergoing treatments like Invisalign to align your teeth, an emergency dentist can address issues like broken aligners or discomfort without delaying your treatment progress.
3. Pain Management and Infection Control
Dental emergencies often come with significant pain or swelling, which can impact your overall health. A London emergency dentist provides immediate pain relief through safe, tailored treatments, like immediate tooth access to drain infection that could relieve pain. They also address infections with antibiotics or drainage procedures, preventing complications that could affect your heart, lungs, or other systemic health.
4. Seamless Coordination with Your Dental Team
A trusted emergency dentist in London works with your dentist and hygienist to ensure continuity of care. For instance:
After emergency treatment, good oral hygiene accelerates the healing process. Your hygienist can guide you on gentle cleaning techniques to aid healing for long-term smile protection.
If you’re mid-treatment with Invisalign in London, your emergency dentist can collaborate with your orthodontist to adjust your treatment plan as needed.
Follow-up care with your dentist in London ensures long-term stability and monitors recovery.
This integrated approach means your smile receives comprehensive support from prevention to restoration.
5. Protecting Long-Term Investments in Your Smile
If you’ve invested in cosmetic or orthodontic treatments like Invisalign in London, a dental emergency could set back your teeth alignment results. Prompt care from a professional dentist helps:
Repair damaged aligners or braces.
Address trauma that could shift teeth out of alignment.
Ensure your treatment stays on track, saving you time and money.
6. Preventive Guidance for Future Emergencies
Beyond immediate treatment, an emergency dentist offers practical advice to help prevent future incidents. This might include:
Custom mouthguards for sports.
Guidance on avoiding hard foods or habits that risk dental injury.
Referrals to your hygienist in London for ongoing oral health maintenance to strengthen teeth and gums.
7. Emotional Reassurance and Confidence
A dental emergency can be stressful and unsettling. Knowing you have access to a reliable emergency dentist in London offers peace of mind. Quick, compassionate care not only restores your oral health but also rebuilds your confidence in your smile.
Why is Choosing an Emergency Dentist Critical in Dental Emergencies?
When a dental emergency occurs, such as a knocked-out tooth, severe infection, or traumatic injury, time and expertise are the two most critical factors determining whether your smile can be saved.
Immediate Access to Specialised Care
Emergency dentists in London are specifically trained and equipped to handle acute dental trauma and severe pain. Emergency dental practices prioritise urgent cases, often offering:
Same-day or walk-in appointments.
Extended hours, including evenings and weekends.
Dedicated emergency contact lines.
This immediate access can mean the difference between saving and losing a tooth, especially in cases like avulsion (knocked-out tooth), where the first 60 minutes are golden.
Prevention of Long-Term Complications
What may seem like a minor chip or toothache can develop into a serious problem. An emergency dentist can:
Prevent a cracked tooth from splitting.
Stop decay from reaching the tooth’s nerve.
Address gum or jaw injuries before they affect function or aesthetics.
Early intervention reduces the need for more complex, costly procedures later.
Clear, calm instructions for immediate at-home care (e.g. how to store a knocked-out tooth).
Emotional reassurance and a structured recovery plan.
Referrals to specialists (e.g. endodontists, oral surgeons) if needed.
Preservation of Cosmetic and Restorative Work
If you have dental implants, crowns, veneers, or orthodontic appliances like braces or Invisalign, an emergency dentist can:
Repair or temporarily stabilise damaged restorations.
Prevent disruption to long-term treatment plans.
Collaborate with your regular dentist or orthodontist for seamless follow-up.
Getting an Emergency Dentist Appointment: NHS 111 or A&E?
Your own dentist first: many practices keep emergency slots, and out of hours their answerphone will often tell you what to do.
No dentist, or they’re closed: use NHS 111 online or call 111. You don’t need to be registered with a dentist, and you should be offered urgent treatment within 24 hours or 7 days, depending on your symptoms.
Free for many families: NHS dental treatment is free for children under 18, and if you’re pregnant or have had a baby in the last 12 months.
Go to A&E or call 999 if there’s swelling around the eye or neck, swelling that makes it hard to breathe, swallow or speak, heavy bleeding that won’t stop, or a serious injury to the face or jaw.
Choosing an emergency dentist in London ensures you receive prompt, specialised, and comprehensive care designed to resolve acute dental issues, alleviate pain, and preserve your oral health long-term. In a dental emergency, minutes matter, and having a trusted professional available can save your smile, your comfort, and your wellbeing. Delaying care can turn a manageable problem into a permanent one.
Always remember, your oral health is a lifelong journey, and having a trusted team, from your dentist in London to your hygienist in London, ensures you’re supported every step of the way.
This article is for general information and isn’t a substitute for advice from your own dentist. If you’re worried about your teeth or your child’s, call your dentist or NHS 111.
Natural skin-safe solutions for kids: NatPat Review
This post is sponsored by NatPat * who have gifted us some products to review during our trip to North Cyprus. All thoughts and opinions are 100% our own.
Quick verdict
Buy this: MagicPatch Itch Relief – genuinely works, stays on and stopped my kids and I scratching immediately. Now a permanent part of our first aid kit.
Accidentally tested and impressed: ZenPatch Mood Calming Patches – our youngest was patched with these by mistake at a funfair/festival and was noticeably calmer than everyone else all evening. Now intentionally part of our toolkit for big emotions and bedtime battles.
Mixed results: Mosquito Patches for Kids – it didn’t prevent bites for us in the Mediterranean, but might work better in less intense mosquito environments or add more to your clothes.
Couldn’t test: SunnyPatch UV Stickers – went clear immediately on the skin so couldn’t use as intended.
Whether you’re jetting off for some winter sun, planning ahead for the summer holidays, or simply want natural solutions in your family first aid kit (like mosquito repellent that doesn’t contain DEET, or chemicals you can’t pronounce or spell), then look no further as NatPat* reached out to Motherhood Diaries about their range of natural, patch-based products for children and we were more than eager to try them.
As a mum of four, with kids ranging from 4 to 15, I had a ready-made testing squad ready to enjoy a sun, sea and sand holiday in July/August. So when we headed to Cyprus on our family holiday (it was super hot!), I packed a selection of their patches and was determined to put them through their paces in real-world conditions.
Here’s my completely honest verdict on each product, i.e. what worked brilliantly, what disappointed, and what I’d recommend to fellow parents no matter the season.
What is NatPat?
NatPat creates sticker and patch-based products designed to help families tackle everyday challenges naturally. Their range includes mosquito repellent patches, UV-detecting stickers, itch relief patches, and allergy relief stickers, as well as magic mood-calming patches, all made with natural ingredients and free from harsh chemicals like DEET.
The great thing about these patches is there are no messy sprays, no direct skin contact (great for children with sensitive skin), and all include fun designs that kids actually want to wear – and kids really do love stickers!
But do they actually work? Let’s get into it.
When will you actually use these products?
One thing I love about NatPat products is they’re not just for summer. Here’s when each product comes in handy:
MagicPatch (Itch Relief): This is a year-round essential. Bug bites from autumn spiders, midges in Scotland, mystery bites that appear overnight; these happen in every season. And you do feel instant relief. This is one product we’d never travel without now.
BuzzPatch (Mosquito Repellent): February half-term in the Canaries, Easter in the Med, summer holidays anywhere warm, autumn half-term in Dubai. If you’re escaping the UK grey for somewhere sunny, mosquitoes will likely be there to greet you.
SunnyPatch (UV Detection): Any sunny destination plus UK summers. Sun damage happens on ski trips too — the UV reflection off snow is brutal. Useful from March onwards when UV levels start rising.
AllergyPatch (Allergy Relief): Tree pollen starts as early as late February, grass pollen peaks in summer, and indoor allergens (dust mites, pet dander) are year-round. If your little one suffers from seasonal sniffles or year-round sensitivities, these could be worth having on hand.
ZenPatch (Mood Calming): School mornings when emotions are running high, long car journeys, visits to the grandparents, homework battles, bedtime wind-down, or any situation where you need to take the edge off big feelings. We accidentally discovered how well these work (more on that below!).
So what did we think?
MagicPatch Itch Relief
Verdict: 5/5 – Genuinely impressed — the clear winner
Of all the products we tested, MagicPatch itch relief stickers were the standout success. These little patches work by using a grid pattern that gently lifts the skin to help reduce itching from bug bites — and honestly, they delivered.
The key takeaway: When my younger two inevitably got bitten on our trip, these patches provided noticeable relief almost immediately. My four-year-old, who would normally scratch a bite until it bled, stopped fussing within minutes of application. The patches stayed on and lasted for days on the top – exactly as promised.
If you’re looking for the best itch relief for children that’s mess-free and chemical-free, MagicPatch genuinely delivers. These are now a permanent addition to our travel first aid kit and I keep a pack at home too for random bites that pop up throughout the year.
Verdict: 3/5 – Didn’t work for our family in Mediterranean conditions
I really wanted to love these. The BuzzPatch stickers use citronella and other essential oils to create a scent barrier that’s supposed to deter mosquitoes for up to 12 hours. They have a pleasant, natural citrus scent that my kids didn’t mind at all and the application couldn’t be easier: just stick them on clothing or nearby surfaces.
The honest truth: They didn’t prevent bites for us. We were in Cyprus during peak mosquito season, and despite applying multiple patches per child (we tried different placements and quantities), everyone still got bitten. All of us, adults and kids alike, came back with multiple bites.
Now, to be fair, mosquito repellent effectiveness can vary hugely depending on location, species of mosquito, and individual body chemistry. Mediterranean mosquitoes are notoriously aggressive, and what works in milder environments might not cut it against the Cyprus varieties. Other families may have better results, particularly in the UK or destinations with less intense mosquito populations.
Bottom line: If you’re looking for the best mosquito repellent for children and prefer a natural, DEET-free option, these might still be worth trying, especially for UK garden evenings, camping trips, or destinations without aggressive mosquito species. But for tropical holidays, the Canaries in winter, or areas known for biting insects, you might want a backup plan.
Verdict: 2/5 – Great concept, couldn’t test properly
The SunnyPatch concept is genuinely clever: UV-detecting stickers that change colour when it’s time to reapply suncream. As someone who’s forever paranoid about UV protection for children, whether we’re on a beach holiday or a ski trip, I was excited about these.
What happened: We couldn’t get them to work as intended. When we applied them to skin, they went clear almost immediately before we’d even gone outside. This made it impossible to use them as a UV indicator since we couldn’t tell when they were changing versus their baseline state.
I suspect there may be specific application requirements I missed, perhaps compatibility issues with certain suncream types, required drying times, or placement considerations. The concept of UV protection indicators for children is fantastic, and I’d love to try these again with clearer usage guidance.
Verdict: Not yet tested — update coming for hay fever season
We also received AllergyPatch stickers, which are designed to provide natural relief from allergy symptoms using essential oils like eucalyptus and peppermint. While we didn’t have a chance to test these during our trip (thankfully no allergy flare-ups!), the concept of having a natural, child-friendly option for seasonal allergy relief is appealing.
For parents seeking the best allergy relief for children without drowsy antihistamines, these could be worth exploring. With tree pollen season starting as early as late February and grass pollen peaking through summer, I’ll be testing these properly and updating this post with my findings.
Verdict: 4/5 – Accidentally tested — and genuinely impressed
Here’s a funny story: one evening at a festival, we were frantically patching everyone up with mosquito repellent before heading out. In the chaos, our youngest ended up covered in the wrong patches, the ZenPatch mood-calming stickers instead of BuzzPatches. We only realised later when we noticed she was by far the calmest person on that entire trip. No meltdowns, no overstimulation, just zen.
The ZenPatch uses a blend of essential oils including Mandarin, Sweet Orange, Atlas Cedarwood, and Lavender, all designed to help calm the nervous system and regulate emotions. According to NatPat, they work by triggering receptors in the nose that send messages to the limbic system (the part of the brain that controls behaviour and emotions), and the effects can last up to 8 hours.
The key takeaway: While our “testing” was completely accidental, the results were noticeable enough that we’ve since used them intentionally. They’re now part of our toolkit for long journeys, overwhelming situations, and those evenings when bedtime feels like a battleground.
Who these are perfect for: If you have a child who struggles with big emotions, gets overwhelmed easily, or just needs help winding down, these could be worth trying. They’re also marketed for children with anxiety, ADHD traits, or autism, though obviously, every child is different and these aren’t a replacement for professional support.
Bottom line: I wouldn’t have believed a sticker could make a noticeable difference to mood, but our accidental experiment suggests otherwise. The fact that they’re 100% natural essential oils (no synthetic ingredients or drowsy side effects) makes them worth having on hand for those moments when everyone, including you, needs to take a breath.
The MagicPatch itch relief stickers are genuinely excellent and something I’ll repurchase again and again. They work, they’re convenient, and they’re gentle enough for even my sensitive-skinned toddler. Whether you’re heading abroad this February half-term, planning your summer holiday, or just want something effective in your medicine cabinet, if you buy nothing else from the range, get these.
The other products didn’t work as well for us in the conditions we tested them in, but that doesn’t mean they won’t work for your family. Natural products can be highly individual, and what failed against aggressive Mediterranean mosquitoes might work perfectly well in the UK or at less tropical destinations.
What I genuinely appreciate about NatPat is their commitment to natural, chemical-free solutions that are safe for children’s sensitive skin. In a market full of harsh synthetic options, having natural alternatives is valuable, even if they require some trial and error to find what works best for your family.
Have you tried NatPat products? I’d love to hear about your experience in the comments below, especially if you’ve had different results with the BuzzPatch or SunnyPatch. Every family is different, and your insights could help other parents make informed decisions!
Disclosure: Products were gifted for review purposes. All opinions are my own honest assessment. This post contains affiliate links (marked with a ‘*’). If you purchase through my links, I may earn a small commission at no extra cost to you.
About Leyla Preston
Leyla is a UK mum of four, a writer and the founder of Motherhood Diaries, which she has edited since 2010. She has written about pregnancy, birth and family life for more than 15 years, edited NCT Harrow’s Special Delivery magazine, and is the author of several children’s and family books. She is also co-founder of Poppy, a new app helping UK parents find trusted local support, and presents Tech Talks Zone, a YouTube channel reviewing tech and AI tools for busy parents. Read Leyla’s story
Our health articles follow NHS guidance and aren’t a substitute for advice from your midwife, health visitor or GP.
Affordable snowboard gear for growing kids: What’s worth buying vs. renting
Ad · This is a paid collaborative post. Links to the partner are sponsored.
If your child has recently fallen in love with snowboarding, you already know how quickly the costs can add up. Growing feet, sudden size jumps, new interests every season, and gear that feels more complicated than school supply lists. It is completely normal to wonder what you should actually buy and what you can safely rent.
The good news is that with a smart approach, you can build a snowboard setup that keeps your child warm, safe and comfortable without overspending. We are bonafide experts at stretching budgets, and snow gear is no different. Below is a clear, mum-friendly guide to knowing when to rent, when to buy, and how to save along the way.
1. Snowboards: Start by renting
For beginners or younger kids, renting a snowboard usually makes the most sense. Children grow quickly and their ability level can change dramatically between seasons, so renting lets your child try the sport without committing to a board that may be the wrong size in a few months.
When sizing a children’s snowboard, it should reach somewhere between their chest and chin when stood upright beside them. For smaller or newer riders, slightly shorter is fine. Shorter boards are easier to manoeuvre and help build confidence.
Resorts and local shops often offer multi-day or season-long rental packages that cost far less than purchasing a new board. The boards are typically well maintained and chosen to suit beginners, which helps your child learn safely. Some packages even include a mid-season size swap if your child has a growth spurt. It’s worth asking about when you book.
When your child becomes more skilled or starts showing long-term interest, buying can become worthwhile. At that point, you can look for lighter boards sized specifically for kids. Buying secondhand is another smart option as long as the board is still in good condition.
2. Boots: One of the best things to buy
If you are going to invest in one major piece of gear, make it the boots. They affect comfort and control more than anything else your child wears on the mountain. Rental boots are convenient but are often stretched, worn down, or simply not very warm.
A pair of properly fitting boots helps your child stay balanced, reduces fatigue, and prevents those mid-mountain meltdowns caused by uncomfortable feet. Look for boots with supportive cuffs, reliable lacing systems, and a warm liner. Boots should fit snugly but not pinch. Your child’s toes should just brush the end when standing straight, then pull back slightly when they bend their knees into a riding position.
Choose boots with simple closure systems like BOA dials or Velcro straps that children can manage on their own. This makes a real difference when you’re not having to do up laces repeatedly in the cold.
Buying boots also gives you flexibility with fit. Many models have removable liners or adjustable panels that help extend their lifespan as your child grows. Some brands, like Burton’s Grom range, feature “Room-to-Grow” technology that extends the boot by a full size, giving you an extra season’s wear.
3. Bindings: Rent early, buy later
Bindings can easily be rented in the early days. Most rental shops include them with boards and they tend to work perfectly well for beginners.
Once your child starts riding steeper terrain or wants more control, buying becomes more worthwhile. When that time comes, choose bindings that are lightweight and easy for kids to operate on their own. Focus on comfort and simplicity rather than advanced features.
4. Jackets and trousers: Buy these
Snowboarding requires clothing that keeps kids warm, dry and able to move freely. Jackets and trousers designed specifically for winter sports are worth purchasing because they provide the right balance of insulation and waterproofing.
Choose pieces that have room for layers without feeling bulky. Many kids-specific jackets come with extendable sleeves or trouser hems that add an extra season of life as your child grows. These features help stretch your budget and reduce yearly replacements.
Look for a waterproof rating of at least 5,000mm (10,000mm is even better for frequent riders) and reinforced knees and seat. Snowboard-specific trousers usually have extra protection in these areas since snowboarding involves a lot of sitting in snow.
Renting clothing can work in a pinch, but kids usually prefer the comfort and cleanliness of wearing their own. For outerwear like jackets and salopettes, secondhand is a great option. Vinted, Facebook Marketplace, and local secondhand ski groups are brilliant for picking up barely-worn gear at half the price.
5. Base layers and mid layers: Budget-friendly must-haves
Base layers make the biggest difference in warmth. A moisture-wicking top and leggings keep kids comfortable even on long days outside. Cotton is not a good choice because it traps moisture, so look for synthetic or wool blends instead.
A lightweight fleece or thin insulated sweater works well as a mid layer. These pieces are affordable and get used all winter long, not just during snow trips.
Base layers don’t need to be expensive. Shops like Decathlon and even supermarket ranges do perfectly good children’s thermals for around £15-25 a set.
6. Helmets and goggles: Always buy
A helmet is one of the most important pieces of gear your child will wear. Renting might seem easy, but buying provides a far better fit. A properly fitted helmet is safer, warmer and more comfortable, especially for kids who might wear one several days in a row.
Look for helmets with an adjustable fit system. Most have a dial at the back that tightens or loosens the inner harness, allowing for growth. The helmet should sit level on your child’s head, covering the forehead without tilting back. When they shake their head, it shouldn’t wobble.
Goggles are also worth owning. They protect eyes from wind, cold and sun glare. Choose a pair that sits comfortably on your child’s face and fits well with their helmet. Many brands sell helmet-and-goggle sets designed to work together, eliminating the exposed forehead gap that gets painfully cold.
7. Gloves, socks and neck warmers: Small items that matter
These items seem simple but make a big difference in how long your child lasts on the mountain. Waterproof gloves, warm wool socks and a soft neck warmer help keep your child protected against cold weather.
For gloves, make sure they are fully waterproof (not just water-resistant) and well insulated. Snowboarders spend a lot of time with hands in snow. Socks should be merino wool or synthetic blend, calf-length, and not too thick. One proper pair is better than two thin pairs.
They are inexpensive, easy to pack and worth buying new so your child has a reliable set that stays warm and dry.
8. Wrist guards: Worth considering for beginners
Wrist injuries are one of the most common snowboarding accidents. When we fall, our instinct is to put our hands out, and on hard snow, that can mean sprains or fractures.
Wrist guards worn under gloves provide support and protection while your child is learning. Some snowboard gloves come with built-in wrist protection, or you can buy guards separately. They are not essential for everyone, but for beginners or children who tend to fall hard, they are worth considering.
9. What you can skip
Not everything sold in the snowboarding section is necessary. Kids do not need high-end backpacks, avalanche equipment, advanced tuning kits, or racing-specific accessories. Many of these items are designed for advanced riders or backcountry terrain.
Focus on the basics. Warm clothing, a good helmet, comfortable boots and a functional board setup are all most kids need.
10. Saving money through smart shopping
Online shopping can be one of the easiest ways to save money on snow gear. Many retailers mark down last season’s equipment and clothing significantly, especially in late winter and early spring. Past season colours and styles work just as well as current ones for a fraction of the price.
Look for online clearance sections, bundle deals, or end-of-season promotions. Buying jackets or trousers in slightly roomier fits or extendable models can also help them last longer.
The summer months are particularly good for bargains. Snowboard gear is ridiculously cheap off-season as shops want it gone to make room for warm-weather stock.
Secondhand groups, local gear swaps and parent community boards are other great places to find lightly used items for growing kids. Ski swaps, which are events where families buy and sell used equipment, are brilliant for picking up quality gear cheaply.
Some retailers also offer junior trade-in programmes where you return outgrown gear and receive credit towards the next size. Ask at your local shops what’s available.
11. Build a gear strategy, not a collection
The best approach to affordable snowboarding is balance. Renting the high-cost items at first and buying the pieces that affect warmth and comfort helps keep the sport accessible. Once your child commits to snowboarding, you can gradually transition into owning more of the gear.
Kids grow quickly, but smart choices help you stay one step ahead of the next size change. With the right mix of rentals, budget-friendly purchases and a bit of online deal hunting, your child can enjoy every snowy adventure without stretching the family budget.
Quick gear checklist
Rent (at first):
Snowboard
Bindings
Possibly boots (if only going once or twice)
Buy:
Boots (if snowboarding regularly)
Helmet
Goggles
Jacket and snow trousers
Base layers (thermal top and leggings)
Mid layer (fleece)
Waterproof gloves or mittens
Snowboard socks
Neck warmer
Consider:
Wrist guards (especially for beginners)
Frequently asked questions
What age can children start snowboarding?
Most ski schools accept children from around age 4-5 for snowboarding lessons, though some will take younger children if they are physically ready and enthusiastic. The key factors are balance, coordination and willingness to try.
How much does it cost to kit out a child for snowboarding?
With strategic shopping, you can kit out a beginner child for around £150-250, including secondhand outerwear, new boots, helmet and goggles, plus rental board and bindings.
Should I buy snowboard gear a size bigger so it lasts longer?
This is tempting but generally not recommended for key items. Oversized boots affect control and can cause injury. Boards that are too long are harder to manoeuvre and frustrating for learners. Clothing can be slightly roomier, especially with extendable features, but avoid going too big.
Is it worth buying gear if we only snowboard once a year?
For once-a-year holidays, renting the board, boots and bindings usually makes more sense. However, buying outerwear, helmet, goggles and base layers is still worthwhile as these items ensure your child stays comfortable and can be used for other winter activities.
How do I know if rental boots fit properly?
Your child’s toes should just brush the end of the boot when standing straight, then pull back slightly when they bend their knees. There should be no painful pressure points, but the boot should not feel loose. If your child complains about boots within the first hour, take them back and ask to try a different size.
Have questions about getting your family started with snowboarding? Drop them in the comments below. We’d love to help.
*Collaborative feature post*
About Leyla Preston
Leyla is a UK mum of four, a writer and the founder of Motherhood Diaries, which she has edited since 2010. She has written about pregnancy, birth and family life for more than 15 years, edited NCT Harrow’s Special Delivery magazine, and is the author of several children’s and family books. She is also co-founder of Poppy, a new app helping UK parents find trusted local support, and presents Tech Talks Zone, a YouTube channel reviewing tech and AI tools for busy parents. Read Leyla’s story
Our health articles follow NHS guidance and aren’t a substitute for advice from your midwife, health visitor or GP.
How to achieve happiness in your family home
Ad · This is a paid collaborative post. Links to the partner are sponsored.
According to the EPA, parents spend approximately 90% of their time indoors, much of it at home with their families.
Your home should make you smile, not stress you out. Designing for joy isn’t about following trends or copying glossy magazine spreads; it’s about creating a space that lifts your mood, makes life easier, and feels like you.
From the moment your feet touch the floor in the morning (often earlier than you’d like, thanks to little ones) to the soft glow of a lamp in the evening, every detail has the power to shape how you feel. And the secret is to design with happiness in mind, not just to make the place look pleasing.
What it really means to design for joy
Designing for joy is about emotion, not perfection. It’s that little sigh of relief when you walk through the door after a long day. It’s the cosy warmth of the living room on a rainy Sunday or the light that dances across the kitchen tiles while making breakfast.
When we design with joy in mind, we stop chasing flawless interiors and start building homes that make us feel good. It’s about surrounding yourself with colours that make you smile, materials that feel right in your hands, and spaces that work for real life —i.e., kids, pets, muddy boots, and all.
Creating zones that work for homework, play, and relaxation
Choosing furniture that can handle real family life
A joyful home tells your story. It’s filled with familiar textures, comforting scents, and small details that quietly say, “this is our home”. Research from the Journal of Environmental Psychology confirms that personalised spaces significantly reduce family stress levels.
Why happiness deserves a place in every design plan
We often talk about function and style in interiors, but happiness rarely gets a mention, which is a real shame because our surroundings can have a bigger impact on our mood than we realise.
Bright spaces tend to lift energy levels, while softer, natural tones help calm a busy mind. A clutter-free room can make mornings run more smoothly, and a cosy corner can become your daily reset spot, even if it’s just five minutes with a cuppa before the chaos begins.
The science behind happy homes:
Natural light exposure increases serotonin production by 30%
Organised spaces reduce morning stress for 73% of families
Good design can’t fix everything, but it can make daily life more enjoyable. It’s the kind of quiet happiness that builds up over time, like stepping onto warm wooden flooring on a chilly morning or catching the smell of baked goods in the kitchen.
The role of flooring in a joyful home
Flooring might not be the first thing you think about when it comes to happiness, but it has a surprisingly big influence on how a home feels. It sets the foundation for everything else… literally.
Think about it: flooring is the first thing you feel when you wake up and the last thing you touch before bed. Whether you’re padding barefoot through the kitchen or hosting friends in the living room, it’s always part of the moment.
Key benefits for family homes:
Warmth and comfort: A soft, warm surface underfoot makes every step feel better. Engineered wood and luxury vinyl are both great for maintaining a homely feel without the maintenance. Perfect for those midnight baby checks or early morning school runs.
A sense of calm: Natural wood grains and gentle tones bring a grounding energy into a space. They help rooms feel balanced and peaceful, even when life feels anything but.
Light and brightness: Pale flooring reflects light beautifully, making smaller spaces feel airy and open. If you prefer a snug, cocoon-like feel, darker floors create warmth and depth instead.
Ease of living: True joy comes when things just work. Durable, easy-to-clean flooring means fewer worries about muddy paws or spilt tea, and more time spent actually enjoying your home. For families, consider waterproof laminate or luxury vinyl planks that can handle spills, toys, and heavy traffic.
Flooring quietly supports the whole mood of your home. It can add texture, warmth, and personality in ways that go far beyond what’s underfoot.
Simple ways to design for joy
You don’t need to start from scratch to make your home more joyful. A few thoughtful changes can make a big difference.
Quick wins for busy families:
Play with light: Use mirrors and warm lighting to create brightness and a sense of space. Try battery-operated LED strips for instant under-cabinet lighting, no electrician needed!
Add nature: Plants, wood textures, and natural materials help soften a room’s look and boost wellbeing. Choose low-maintenance options like snake plants or pothos that survive busy family life.
Bring in personal touches: Family photos, handmade crafts, or travel keepsakes make your space truly yours. Create a rotating gallery wall for children’s artwork – it’s a confidence booster for kids and adds personality to your home.
Choose comfort first: From your flooring to your seating, prioritise pieces that feel good to use every day. Invest in washable slipcovers and memory foam rug pads for family-friendly comfort.
Keep it calm: Joy often grows in simple, uncluttered spaces. Clear surfaces and clever storage can instantly lift the mood. Implement a nightly 15-minute family reset where everyone tidies their zone.
At the end of the day, the best homes are the ones that make you smile when you walk through the door. Designing for joy means thinking about the everyday moments that make life feel good; whether that’s the feel of your kitchen floor as you make your morning brew or the glow of sunlight bouncing across your living room.
Remember: Perfect homes don’t exist, but happy homes do. Start with one small change – perhaps better lighting in your most-used room or a cosy reading corner for bedtime stories. Small steps lead to big transformations in how your family experiences home.
FAQs about creating a happy family home
Q: How can I maintain a joyful home with young children? A: Focus on durable materials, smart storage, and designated play zones. Remember that “lived-in” is beautiful when it reflects a happy family life.
Q: How do I handle different family members‘ style preferences? A: Keep shared spaces neutral while allowing personal expression in bedrooms. Let children have input in their own spaces while maintaining overall home cohesion.
Q: Can I achieve this on a budget? A: Absolutely! Paint, reorganisation, and thrift store finds can work wonders. Focus on one area at a time rather than overwhelming yourself (and your budget).
Q: How do I know if my design choices are working? A: Watch your family’s behaviour. Do they gravitate to certain spaces? Do mornings feel calmer? Are bedtimes smoother? Your family’s happiness is the best measure of success.
About this guide
This guide was developed in collaboration with interior designers who specialise in family homes and reviewed by child development experts to ensure all recommendations support family wellbeing.
*Collaborative feature post*
About Leyla Preston
Leyla is a UK mum of four, a writer and the founder of Motherhood Diaries, which she has edited since 2010. She has written about pregnancy, birth and family life for more than 15 years, edited NCT Harrow’s Special Delivery magazine, and is the author of several children’s and family books. She is also co-founder of Poppy, a new app helping UK parents find trusted local support, and presents Tech Talks Zone, a YouTube channel reviewing tech and AI tools for busy parents. Read Leyla’s story
Our health articles follow NHS guidance and aren’t a substitute for advice from your midwife, health visitor or GP.
Helping your teen to manage their first paycheck responsibly
Ad · This is a paid collaborative post. Links to the partner are sponsored.
Your teenager has just landed their first job, and you’re probably feeling super proud and maybe a bit nervous, too. They’re becoming independent, and how they handle their first earnings could shape their money habits forever.
As parents, we witness this pivotal moment with mixed emotions. That part-time job at the local cafe, weekend shifts at the retail store, or summer position at the leisure centre represents more than just pocket money. It’s the beginning of their financial journey. Research from the Money and Pensions Service shows that money habits formed between ages 16-18 typically persist into adulthood1, making this period crucial for kids learning how to manage their money.
Building essential life skills early
That first paycheck represents so much more than cash in hand. It’s freedom, responsibility, and a chance to mess up or get things brilliantly right. This is where you come in.
Teaching money management now isn’t about being the fun police. It’s about giving your teen tools they’ll actually use. Parents and carers working with Foster Care Associates both face this challenge, though foster children might need extra support since they often transition to independence more abruptly than their peers. Either way, your guidance matters enormously.
The gap in financial education
Money skills aren’t taught properly in schools, so your teen needs to learn through real experience. Their weekend job provides the perfect training ground since it’s low stakes but has real consequences.
Despite financial literacy being added to the national curriculum, a 2024 study by the London Institute of Banking & Finance found that 82% of young people want to learn more about money and finance in school2. 69% of young people now say they have access to financial education in school, compared to 29% in 20153
This is great, but there’s still an education gap that parents, particularly mothers who often handle day-to-day household budgeting, fill when they become the primary financial educators. So, your teenager’s first job offers an unparalleled opportunity to bridge this gap with practical, hands-on learning that sticks.
Understanding your teen’s financial psychology
Teenagers process money differently from adults. Their prefrontal cortex, responsible for long-term planning and impulse control, won’t fully develop until their mid-twenties. This biological reality means they’re naturally inclined toward immediate gratification rather than future planning, so understanding this helps us approach financial education with patience and realistic expectations.
When your teenager receives that first paycheck, their brain releases dopamine, the same reward chemical triggered by social media likes or video game achievements. This creates a powerful emotional connection to earning money, which we can harness for positive financial learning. We can guide them through this experience thoughtfully, to help them wire their brains for better financial decision-making.
The unique position of parents as financial mentors
Working parents bring their own unique perspectives to teaching financial literacy. We understand the juggling act of managing household finances, the reality of making every pound stretch, and the importance of financial independence. Statistics show that 55% of women living with a partner say they have the most responsibility for day-to-day budgeting4, making us naturally positioned to pass on practical money wisdom.
It is important to share your own experiences, as the financial mistakes you made at their age are lessons you learned the hard way, and the strategies you developed have served you well. The transparency with your child also builds trust and makes financial conversations feel less like lectures and more like valuable life advice from someone who’s been there.
Creating smart spending habits
Of course, your teenager may want to blow their entire paycheck on clothes or games – who wouldn’t! The trick isn’t stopping them completely but helping them think it through first.
Try suggesting they split their money into thirds: some for immediate wants, some for bigger goals, and some for saving. Try not to be too rigid with percentages; flexibility keeps them engaged. Let them choose what matters to them.
Watch what happens when they really want something expensive. Do they wait and save, or do they impulse buy and regret it later? These moments teach far more than any lecture ever could.
The three-jar method modernised
While the traditional three-jar method (spending, saving, giving) remains valuable, today’s teens need a digital-age approach. Consider introducing a modified system that reflects modern financial realities:
Jar 1: Immediate enjoyment (40-50%)
This isn’t just frivolous spending–it’s learning to enjoy the fruits of their labour responsibly. Whether it’s grabbing coffee with friends, downloading music, or buying that trendy jumper, this spending teaches them to value their work and make conscious choices about immediate pleasures.
Jar 2: Short-term goals (25-30%)
This might include saving for festival tickets, a new phone, driving lessons, or university freshers’ week. These goals, typically achievable within 3-6 months, teach the satisfaction of delayed gratification without the frustration of endless waiting.
Jar 3: Future fund (20-30%)
This is their long-term savings – university expenses, a gap year, or simply an emergency fund. Even small amounts accumulate significantly over time, and seeing this growth builds confidence in their ability to prepare for the future.
Teaching value vs price
One crucial lesson often overlooked is helping teenagers understand the difference between value and price. That £60 branded hoodie might seem essential to them, but discussing cost-per-wear can shift perspectives. If they’ll wear it twice, that’s £30 per wear. Compare that to a £30 hoodie worn 30 times–just £1 per wear.
Introduce them to concepts like:
Quality over quantity: Sometimes paying more upfront saves money long-term
The 24-hour rule: Wait a day before non-essential purchases
Opportunity cost: What else could that money buy or achieve?
Social pressure spending: Recognising when they’re buying to fit in rather than from genuine desire
Navigating peer pressure and social spending
Teenagers face immense pressure to keep up with their peers financially. Social media amplifies this with constant exposure to others’ highlight reels. Address this directly by discussing:
The reality behind social media posts (not everyone is being truthful about affording things)
The confidence that comes from financial security vs. temporary satisfaction from purchases
Ways of socialising that don’t require significant spending
The respect earned from being financially responsible
Research shows that teenagers who understand their spending triggers make better financial decisions. Help your teen identify their vulnerable moments–is it scrolling through social media, shopping with certain friends, or feeling stressed about school?
The power of saving
Saving money as a teenager feels pointless until you see it actually working. Even putting away ten pounds from each paycheck creates momentum. Your teen starts noticing their balance growing. That’s when saving stops feeling like punishment and starts feeling like power.
Help them open their own bank account. Let them speak to the bank staff, ask questions, and make decisions. This ownership makes everything feel more real and less like something adults control.
Many teenagers save for driving lessons or university. Others want festival tickets or designer trainers. The goal matters less than developing the habit of consistently setting aside money.
Whether it’s a savings thermometer on their bedroom wall or a digital tracker app, a visual representation makes progress real. Seeing that the driving lessons fund grows from £0 to £500 to £1,000 provides continuous motivation.
Establishing milestone rewards
Celebrate savings milestones without undermining the lesson. When they save their first £100, perhaps contribute an extra £10. This reinforces positive behaviour without removing their responsibility.
Introducing the compound effect
Show them how money grows over time. If they save £50 monthly from age 16, they’ll have £2,400 by 20 without interest. Add compound interest, and it’s even more. Use online calculators to demonstrate how starting early magnifies results.
Different savings strategies for different personalities
Not every teenager responds to the same savings approach. Identify your teen’s money personality:
The Competitive Saver – Challenge them to savings competitions with siblings or friends
The Goal-Oriented Saver – Help them set specific, measurable targets with deadlines
The Spontaneous Saver – Suggest automatic transfers so saving happens without thinking
The Visual Saver – Provide charts, graphs, and apps that show progress clearly
Building emergency fund awareness
While “emergency fund” sounds boring to teenagers, reframe it as their “freedom fund” or “opportunity fund.” This money means they can:
Handle unexpected costs without asking parents
Take advantage of sudden opportunities (last-minute concert tickets when a friend can’t go)
Feel secure knowing they’re prepared for surprises
Experience the adult satisfaction of solving their own problems
Start small. Even £50 set aside provides a cushion and builds the emergency fund habit.
Teaching real-world money management
Your teen’s payslip may confuse them at first. Why is their take-home pay less than their hourly rate multiplied by hours worked? This is a perfect opportunity for a reality check about taxes and National Insurance.
Don’t just explain deductions. Show them where that money goes. Talk about NHS funding, road maintenance, and benefit systems. Suddenly, taxes feel less like theft and more like membership fees for living in society.
Share some household costs too. When your teenager discovers how much the weekly shop costs or what you pay for electricity, they gain perspective on the financial pressures of adulthood. Foster carers might find this particularly important since foster children often face these realities sooner than expected.
Decoding the payslip together
That first payslip provides numerous teaching opportunities. Sit down together and examine:
Gross pay vs net pay
Explain how their £10/hour for 10 hours doesn’t equal £100 in their pocket. Break down each deduction:
Income tax (if applicable)
National Insurance contributions
Pension contributions (if offered)
Student loan repayments (for older teens)
Understanding tax codes and allowances
Teach them about personal allowances (£12,570 for 2024/25) and how tax codes work. Many teenagers don’t realise they might be entitled to tax refunds if they work only part of the year.
The importance of keeping records
Encourage them to photograph or file their payslips. This habit serves them throughout their working life and teaches organisational skills that extend beyond finances.
Real household economics
Create teaching moments by involving your teenager in household financial decisions:
The weekly shop challenge
Give them the actual grocery budget and list. Let them plan meals, compare prices, and experience the reality of feeding a family within constraints. They’ll quickly understand why you say no to certain requests.
This reality check helps them understand that their £200 monthly earnings, while exciting, wouldn’t cover even basic living expenses.
Introducing credit and debt concepts
While they can’t access credit cards yet, teenagers need to understand credit before they’re offered it.
The Cost of Borrowing Use relatable examples: “If you borrowed £1,000 for that gaming computer at 20% APR and paid minimum payments, you’d pay £1,200 total and take two years to clear it.”
Building credit history
Explain how their mobile phone contract (if they have one) affects their credit score. Discuss how future landlords, employers, and lenders might check their credit history.
Good debt vs bad debt
Introduce the concept that some debt (student loans, mortgages) can be investments in their future, while other debt (payday loans, excessive credit cards) can trap them financially.
Setting up for success
These early money lessons stick. Your teenager who learns to budget their Saturday job wages finds university finances less overwhelming. They understand debt, interest rates, and delayed gratification because they’ve practised with smaller amounts.
Confidence grows through experience. Each successful saving goal or wise spending decision builds their self-trust. They start believing they can handle bigger financial challenges because they’ve already proven they can handle smaller ones.
Mistakes happen too, and that’s valuable. Better to learn from overspending £20 at 16 than £2000 at 26.
Creating financial milestones and celebrations
Acknowledge your teenager’s financial achievements to reinforce positive behaviours:
First month success
When they successfully manage their first full month’s pay, celebrate this achievement. Perhaps have a special dinner where they contribute by buying dessert – letting them experience the joy of treating others.
Six-month review
After six months of working, conduct a friendly “financial review.” Discuss:
This significant milestone deserves recognition. Consider creating a “financial achievement certificate” or letting them make a larger purchase they’ve saved for. Reflect on how much they’ve learned and grown.
Preparing for university and beyond
Your teenager’s part-time job experience provides perfect preparation for university financial challenges:
Student loan literacy
Explain how student loans work differently from other debt. Discuss:
Repayment thresholds
Interest rates
The reality of graduate starting salaries
Budgeting for university life
The part-time work balance
Share strategies for balancing work and studies. Many successful students work 10-15 hours weekly during term time, using earnings for socialising and extras while loans cover essentials.
Post-university planning
Help them understand the financial transition from student to graduate:
Typical graduate salaries in their field of interest
The reality of London living costs vs other cities
How to budget on an entry-level salary
The importance of continued saving habits
Technology and financial management
Today’s teenagers have powerful financial tools at their fingertips. Guide them toward helpful resources:
Recommended apps for teen financial management
Monzo/Starling: User-friendly banking with spending insights
Emma/Money Dashboard: Expense tracking and budgeting
Chip: Automatic saving based on spending patterns
Plum: AI-assisted saving and investing basics
Online learning resources
Money Saving Expert’s Teen Cash Class
The Money Charity’s workshops for young people
Young Money’s financial education resources
National Numeracy’s online courses
Setting up digital safeguards
Teach them about:
Strong, unique passwords for financial accounts
Two-factor authentication
Recognising financial scams targeting young people
Safe online shopping practices
The conversation continues
Financial education isn’t a one-time discussion but an ongoing conversation. Keep communication open by:
Regular check-ins
Schedule monthly “money chats” that feel casual rather than formal. Perhaps during car rides or while cooking together – moments when conversation flows naturally.
Sharing your own journey
Continue being transparent about family financial decisions. When you’re saving for something, share your progress. When you make a financial mistake, discuss it appropriately.
Encouraging questions
Create an environment where no financial question feels stupid. Their curiosity about mortgages, investments, or taxes shows engagement with their financial future.
Building long-term financial resilience
The ultimate goal extends beyond managing a teenage paycheck. You’re building financial resilience that will serve them throughout life:
Emotional money management
Help them recognise emotional spending triggers and develop healthy coping mechanisms that don’t involve shopping.
Financial goal setting
Teach them to set SMART financial goals (Specific, Measurable, Achievable, Relevant, Time-bound) that they can work toward independently.
The value of financial independence
Emphasise that financial independence means choices – career decisions based on passion rather than desperation, the ability to leave unhealthy situations, and the freedom to pursue opportunities.
Conclusion: your lasting impact
Teaching responsible money management isn’t about restricting your teenager’s choices. It’s about expanding them. Give them skills now and watch them build financial confidence that lasts a lifetime.
Remember, every conversation about money, every shared decision, and every supported mistake contributes to raising a financially capable adult. Your teenager’s first job is just the beginning of their financial journey, and with your guidance, it’s a journey toward security, confidence, and success.
The lessons you teach now through patient guidance, practical examples, and continued support become the foundation of their adult financial life. You’re not just teaching them to manage a paycheck, you’re empowering them to build the life they want, make informed decisions, and approach their financial future with confidence rather than fear.
Start today. Have that first conversation. Open that first savings account together. Celebrate that first successfully managed paycheck. Your investment in their financial education pays dividends that last a lifetime.
Leyla is a UK mum of four, a writer and the founder of Motherhood Diaries, which she has edited since 2010. She has written about pregnancy, birth and family life for more than 15 years, edited NCT Harrow’s Special Delivery magazine, and is the author of several children’s and family books. She is also co-founder of Poppy, a new app helping UK parents find trusted local support, and presents Tech Talks Zone, a YouTube channel reviewing tech and AI tools for busy parents. Read Leyla’s story
Our health articles follow NHS guidance and aren’t a substitute for advice from your midwife, health visitor or GP.
Start-Rite school shoes review – real-life wear test
#AD – Paid partnership with Start-Rite. Products gifted. Opinions are my own.
With four kids in school, our shoe-shopping trips come around roughly every two to four months because children’s feet seem to grow faster than it rains in a single British season. And if they’re not sizing up, it’s usually because the shoes didn’t survive the brutal quality control of one average school day: torrential rain, muddy puddles, uneven playground gravel, and at least one child who refuses to lift their feet when they walk.
So yes, school shoes have to work hard. They need to be high-quality, durable, and built to outlast both the weather and the wearer.
When Start-Rite offered to partner with Motherhood Diaries and gift four pairs of their beautifully made school shoes, we jumped at the chance. Fast forward to October half-term, and I’m happy to report that not only are all four pairs still very much in one piece, but the kids are actually excited to wear them. (A small miracle in itself.)
And because good news deserves to be shared, we’re taking you along for the ride. In this article, we’ll walk you through the full Start-Rite unboxing, chat about why these shoes stand out, and explore why getting the right fit matters so much for growing feet.
Why we chose Start-Rite (and why fit matters for children’s feet)
When you stop and do the math, children spend over 1,200 hours a year in their school shoes running, climbing, kicking footballs, and racing to class. So, finding the right pair isn’t just about ticking off a uniform list. The right fit is absolutely essential for healthy growth, posture, and comfort all day long.
That’s where Start-Rite* comes in. Their collection is one of the most extensive in the UK, designed to suit every child’s foot shape, whether wide, narrow, or somewhere in between. Each pair is built with the understanding that kids’ feet aren’t just smaller versions of adult feet; they’re developing structures of bones, muscles, and ligaments that need protection as they strengthen and grow through the school years.
During the school years, all ligaments begin to form and bones become stronger. Trunk, leg, and foot muscles are learning to work synchronously, although they are not fully developed until mid-to-late teens.
As children wear school shoes for 195 days a year for at least six hours a day, it is super important that the shoes fit properly. Poorly fitting footwear can cause immediate discomfort and can also affect the way children move and walk for the rest of their lives. If uncomfortable shoes disrupt a child’s walking pattern, the brain will compensate, potentially leading to long-term issues such as knee and spine problems. Given that a child’s gait (the pattern of how they walk) continues to develop until around the age of 16, shoes must be worn correctly and be comfortable to support healthy development.
Start-Rite’s quality control for shoes is based on a number of factors that go into making the perfect shoe for a growing child and we will go through each of these briefly.
Comfort that keeps up with busy feet
Start-Rite designs its shoes to feel good all day long with soft cushioning where it counts and breathable leather linings that help prevent overheating. Even the insoles are engineered for comfort. Some insoles can be removed and some are extra padded, so little feet stay supported whether they’re sitting in class or sprinting across the playground.
The fit – no two feet are the same
Each Start-Rite shoe is available in whole and half sizes and multiple widths, giving every child a near-custom fit – perfect for parents who’ve ever had to choose between a shoe that’s a bit snug and one that’s slightly roomy. You’ll also find different fastening options like rip-tape, buckles, and laces, to suit different ages and levels of independence. Every design aims to make mornings smoother for parents and help kids feel confident doing things on their own.
Start-Rite recommends measuring your child’s feet every 3–4 months, since children’s growth spurts can creep up faster than we expect. Their Start-Rite measuring gauge makes it simple to check at home before buying the next pair.
Durability and everyday protection
Kids don’t hold back and neither should their shoes. Start-Rite’s supple leather uppers (and smart patent finishes) are dyed through to keep them looking newer for longer. Scuffs and scratches are easy to hide with a quick polish, and reinforced toes and heels add an extra layer of durability. Some styles even include reflective panels with enhanced 360-degree protection around the tow, heel and side of some shoes, for better visibility on darker winter mornings.
Flexibility that follows natural movement
A big part of what sets Start-Rite apart is its biomechanically engineered sole. Designed to flex exactly where the foot naturally bends around the metatarsal joints, it allows kids’ feet to move freely and safely through every hop, skip, and sprint. This flexibility helps the foot muscles develop strength and coordination, supporting healthy movement patterns that will last long after the school day ends.
Start-Rite shoes are built for real life and the non-stop motion of childhood. They’re shoes that don’t just fit; they understand what growing feet need.
Unboxing video — a first look at four pairs
We got the chance to review four pairs of Start-Rite shoes for a wide spectrum of ages; our 4 and 6-year-old girls and our 13 and 14-year-old boys. All kids were extremely happy with the shoes and despite some camera shyness with the teenagers, we managed to catch the girls in action with their new shoes! You can check out our unboxing video on YouTube and Instagram:
Between four kids, we’ve somehow managed to cover every possible foot shape known to humankind – narrow, wide, flat, you name it. So when Start-Rite offered to send us four pairs to put through their paces, it felt like the ultimate real-life test.
We went for a full family line-up: two pairs for the girls and two for the boys. The girls wanted something that looked “pretty but not babyish,” while the boys just needed shoes that could survive them and football. Fair.
From shiny patent T-bars to sturdy lace-ups built for muddy football breaks and endless playground laps, each pair brings something a little different. Whether it’s your child’s first school shoe or their last before secondary, this line-up covers all bases – comfort, durability, and that all-important “Mum, they actually fit!” moment.
The line-up we tested
Here’s what we tested, what each Start-Rite shoe is best for, and how they shaped up straight out of the box:
Star Jump (Girls T-bar Rip-Tape)
If there was ever a first school shoe made to handle every emotion of the Reception years, it’s the Star Jump. Smart in the classroom and protective on the playground, this girls T-bar design genuinely covers all grounds.
The perfectly placed ankle cushioning keeps little feet comfy all day long, while the biomechanically engineered sole flexes exactly where it should, supporting natural, healthy movement. And because four-year-olds rarely stay still, Start-Rite’s clever Air-Rite technology lets air flow through to keep sweaty feet at bay (thank you, science).
The easy rip-tape fastening and removable footbed make it simple for kids to adjust the fit themselves, building confidence and independence from day one. Add in subtle patent details, star accents, and a sparkly insole, and you’ve got a school shoe that feels every bit as magical as it looks.
Sizes: Small 9 – Large 2 Best for: Reception to early primary – active girls who want to do it all.
How they fit
These were an instant hit. My youngest was able to pop them on all by herself (and hasn’t stopped reminding me of that since). The rip-tape fastening allowed her to adjust them for her own comfort, and the ankle padding hugged without rubbing.
Fit-wise, the size 9F felt spot-on — no heel slip, plenty of wiggle room for the toes (a good toe count of about a thumb’s width), and zero “Muuum, my foot hurts!” within the first hour. The wide option would suit chunkier feet, but the standard fit already offered generous space.
Verdict: a perfect first school shoe — soft, flexible, and built to support independent little girls finding their stride.
Hope (black patent girls rip-tape T-bar school shoes)
If your little one needs a stylish new pair of school shoes, the Hope* design is the perfect choice! With a sleek patent finish and fresh star punch detailing, these shoes offer all-day comfort with cushioned ankles, breathable leather and textile linings, and a removable footbed. The specially designed rubber sole provides superior flexibility and support. The T-bar rip-tape fastening ensures a quick, adjustable fit, keeping the shoes secure and making mornings easy and hassle-free.
Features:
Dyed- through leather for scuff-resistant colour
Padded ankles for added comfort and support
Leather linings to absorb moisture and help keep little feet dry and comfy
Riptape fastening for easy adjustment by little fingers
Sizes: Small 9 – Large 2 Best for: Kids who want all-day comfort with a touch of polish and shine.
How did they fit?
Our 6-year-old tester has slightly wide feet, so I was curious to see how Hope handled that. We went with a size 12F, and it fitted beautifully right out of the box. The adjustable rip-tape strap gave a snug, secure fit without pinching.
The patent finish earned top marks for hiding playground scuffs (and doubling as a mirror, apparently). Comfort-wise, the padded collar made a noticeable difference — no red marks, no complaints, just happy feet that looked effortlessly smart all day.
Verdict: a confident, comfortable fit for kids who love that polished “grown-up” look.
Rhino Sherman (Boys Lace-Up)
The Rhino Sherman is the definition of tough love — made for boys who treat their school shoes like sports equipment. Built with a scuff-resistant toe and reinforced heel protection, these lace-ups are designed to look smart for longer (even after football at lunch).
The lightweight, flexible sole supports natural movement and healthy development, while a padded ankle gives comfort and support where it counts. Breathable linings and removable insoles help keep growing feet fresh — and for older kids who’ve mastered tying their own laces, it’s a little badge of independence.
Sizes: 1 – 9 Large Best for: Older boys who need durability, support, and a shoe that’ll actually survive the term.
How did they fit?
My 13-year-old is in that tricky in-between phase where his shoe size seems to change weekly. We went with a Large 5.5 wide, and it was bang-on. He said they felt “solid but light,” which, coming from a teenage boy, is basically poetry.
The heel fit was excellent — no lift, even when walking briskly. Inside, the removable insole made it easy to check the growing room (about one finger’s width at the toes — ideal for longevity). The lace-up design gave a snug, supported feel without being restrictive, and the scuff-resistant toe passed its first test during a very unnecessary post-school kickabout.
Verdict: sturdy, breathable, and surprisingly stylish for a “school shoe” — a winner for active older kids.
Glitch (Boys Lace-Up)
For style-conscious kids who also need comfort, the Glitch hits the sweet spot between “cool” and “practical.” Designed for confidence in the classroom and freedom on the playground, these black leather lace-ups are part of Start-Rite’s RHINO range, meaning they’re built to last.
They come with padded collars for long-lasting comfort and a flexible sole that moves naturally with every step. Inside, leather linings help absorb moisture and the removable footbed gives a personalised fit (ideal when you’re between sizes). It’s the kind of shoe that works hard quietly — no fuss, just comfort and durability all day long.
Sizes: 2 – 12 Large Best for: Senior school boys who want classic style without compromising on comfort.
How did they fit?
Our eldest (14) has officially reached “man feet” territory, so we tested the size 11 standard fit. Straight out of the box, he commented on how light they felt — not what you expect from a traditional lace-up. The padded collar added comfort around the ankle, and the flexible sole meant no awkward breaking-in period (a rarity in school shoes).
Even after a full day, his verdict was simple: “They don’t rub.” Which, if you know teenage boys, is possibly the highest praise they’re capable of giving.
Verdict: sleek, durable, and flexible enough to handle long walks and long days — proof that Start-Rite can do “smart” without sacrificing comfort.
So, which pair came out on top?
Honestly? They all earned their gold stars, just for different reasons. The Star Jump stole hearts straight out of the box (mainly because of its sparkly insole and easy rip-tape strap), while the Hope felt like the “grown-up” choice — polished, practical, and built for comfort that lasts past lunchtime.
On the boys’ side, the Rhino Sherman was basically indestructible. If school shoes had a superhero version, this would be it. And the Glitch felt effortlessly cool. The teenagers actually said, “Yeah, these are fine,” which roughly translates to ‘glowing review’.
In short, all four pairs passed the test with flying colours. No blisters, no complaints, no emergency shoe swaps in the playground. Each shoe fits its child’s size and shape like it was made for them — and if we can get through a full school day with zero grumbles, that’s a big parenting win in my book.
How to choose the right size
If there’s one lesson every parent learns the hard way, it’s that kids’ feet do not follow the normal laws of growth. One minute, they’re a perfect size 12; the next, they’ve somehow jumped to a 1.5 overnight. So how do you keep up without living in the shoe shop?
Start-Rite makes it surprisingly easy. Their Measuring Gauge* lets you check your child’s shoe size at home, whether you prefer the digital SizeWise app or the classic plastic gauge. You simply measure length and width, then use the chart on their website to find your perfect match.
Here are a few quick tips I swear by:
Always measure both feet.
Most kids have one slightly larger foot (usually the right). Always fit the shoe to the bigger foot.
Check the wiggle room.
There should be about a thumb’s width of space between the longest toe and the end of the shoe. That’s the sweet spot for comfort and growth.
Don’t assume “wide” means loose.
Start-Rite’s wide fits are designed for natural toe width, not floppy sides. If your child’s foot looks squeezed or the strap barely closes, it’s worth going up a width, not necessarily a size.
Recheck every few months.
Children’s feet can grow up to two sizes a year (especially after summer), so a quick measure every 3–4 months helps avoid mid-term meltdowns.
When in doubt, size up — slightly.
It’s better to have a little growing room than to cram tiny toes. Start-Rite’s half sizes make it easy to find that in-between fit without the clown-shoe look.
Pro Tip: Always do a mini walk test once your child’s shoes arrive. Watch how the heel sits, how the toes move, and whether they look comfortable. The best shoe is the one they forget they’re wearing — that’s when you know you’ve nailed the fit.
After a full term’s worth of testing (and one or two inevitable “Mum, I stepped in something” incidents), I can confidently say that Start-Rite has more than earned its reputation for quality kids’ shoes.
From the first unboxing to the school-gate dash, every pair passed the ultimate ‘real life’ test. The patent finishes stayed shiny, the leather softened beautifully, and not one child complained about rubbing, slipping, or “weird bits” inside their shoes, which, in this house, is practically a five-star review.
The attention to fit, comfort, and durability really does show. Whether your child needs their first pair of T-bars or a smart lace-up for senior school, Start-Rite has thought about every detail, right down to those scuff-proof toes and flexible soles that let them move the way children are meant to.
In the meantime, if you’re on the search for school shoes that genuinely last (and look good doing it), Start-Rite might just be the brand your kids’ feet have been waiting for.
FAQ — Real parent questions answered
Are Start-Rite shoes barefoot? Not quite. Start-Rite shoes aren’t sold as a barefoot concept — they’re designed with biomechanically engineered soles specific to the age and stage of the child, and they flex with natural movement. They still offer cushioning and structure that is vital for supporting developing feet. Think of them as the perfect solution between sturdy and free-moving.
Are Start-Rite shoes good? Yes! Start-Rite is one of the UK’s most trusted children’s footwear brands, known for fit, comfort, and durability. Their shoes are tested for flexibility, breathability, and everyday performance, and they’re designed specifically for growing children, not just smaller versions of adult shoes.
Are Start-Rite shoes bigger than other brands? Different brands can size differently, so it’s important to get your feet measured specifically for the brand you are buying from. With Start-Rite you can double-check sizing using the brand’s measuring gauge before buying.
Are Start-Rite shoes true to size? Yes, most styles fit true to size when measured correctly. Start-Rite even provides a Measuring Gauge* and SizeWise app so parents can get accurate readings at home.
Are Start-Rite shoes narrow? No, and that’s one of their biggest strengths. They offer narrow, medium, wide, and extra-wide fittings, ensuring a perfect match for almost every child’s foot.
Are Start-Rite shoes wider than other brands? They can be, depending on the fit. Start-Rite’s width range is very comprehensive, so while their standard fit might feel similar to other brands, the “wide” and “extra wide” options often provide more space around the toe box.
Are Start-Rite shoes good for toddlers? Absolutely. Start-Rite’s First Steps range is specifically designed for early walkers. The flexible soles, cushioned collars, and soft materials help toddlers develop balance and coordination safely.
Are Start-Rite shoes better than other brands? Both are excellent British brands. The key difference is that Start-Rite focuses solely on children’s shoes, while other brands’ designs for all ages. Many parents prefer Start-Rite for its child-specific design research and superior range of widths.
When was Start-Rite shoes founded? Start-Rite was founded in 1792 in Norwich, England, making the brand over 230 years old.
Are Start-Rite shoe sizes the same as those of other well-known children’s brands? No. Always double-check a brand’s sizing before buying. You can use Start-Rite’s measuring guide to check the fit.
Where are Start-Rite shoes made? Start-Rite designs all its shoes in Norwich, UK, and works with carefully selected, ethical manufacturing partners worldwide to ensure high quality and fair working conditions.
Are Start-Rite shoes good for kids? Yes, that’s their entire purpose. Start-Rite’s designs are built for healthy foot development, using research-backed construction, flexible soles, and breathable materials that adapt to how children move.
Do Start-Rite shoes come up big or small? Most parents find they’re true to size, though some lace-up styles may feel slightly snug at first as they mould to the foot. The removable insoles make it easy to check for growth room.
How do Start-Rite shoes fit? They’re designed to fit snugly at the heel and provide enough toe room for growth. The adjustable straps and half-size increments make it easy to fine-tune the fit for every child.
What size do Start-Rite shoes go up to? Depending on the style, Start-Rite shoes go up to a large size 12 for older children and teens.
Who stocks Start-Rite shoes? You can find them on the Start-Rite website*, as well as through independent shoe shops and major children’s footwear retailers across the UK.
What shops sell Start-Rite shoes? / Where do they sell Start-Rite shoes? / Where sells Start-Rite shoes? Start-Rite shoes are sold online and in-store across the UK. You can shop directly from the official website, or through trusted retailers like John Lewis and independent shoe fitters.
Shop the shoes
Ready to find your child’s perfect pair? You can shop the full Start-Rite range directly via the product pages below:
Glitch – Boys’ Lace-Up* Stylish, breathable, and flexible — designed for senior school comfort.
Each Start-Rite product page includes a detailed fit guide, size chart, and easy checkout links, so you can shop confidently knowing you’ve picked the right fit for your child’s feet.
Final thoughts
After a full term of sprints, scuffs, and soggy school runs, every pair of our Start-Rite shoes is still going strong and, more importantly, still being worn without complaint. The fit, comfort, and durability genuinely held up, and each style felt thoughtfully designed for real kids doing real kid things. So if you’re on the hunt for school shoes that actually last (and look good doing it), Start-Rite* is absolutely worth a spot in your shopping basket.
#ad – This post contains affiliate links. Products were gifted for review, but all opinions are my own.
About Leyla Preston
Leyla is a UK mum of four, a writer and the founder of Motherhood Diaries, which she has edited since 2010. She has written about pregnancy, birth and family life for more than 15 years, edited NCT Harrow’s Special Delivery magazine, and is the author of several children’s and family books. She is also co-founder of Poppy, a new app helping UK parents find trusted local support, and presents Tech Talks Zone, a YouTube channel reviewing tech and AI tools for busy parents. Read Leyla’s story